|
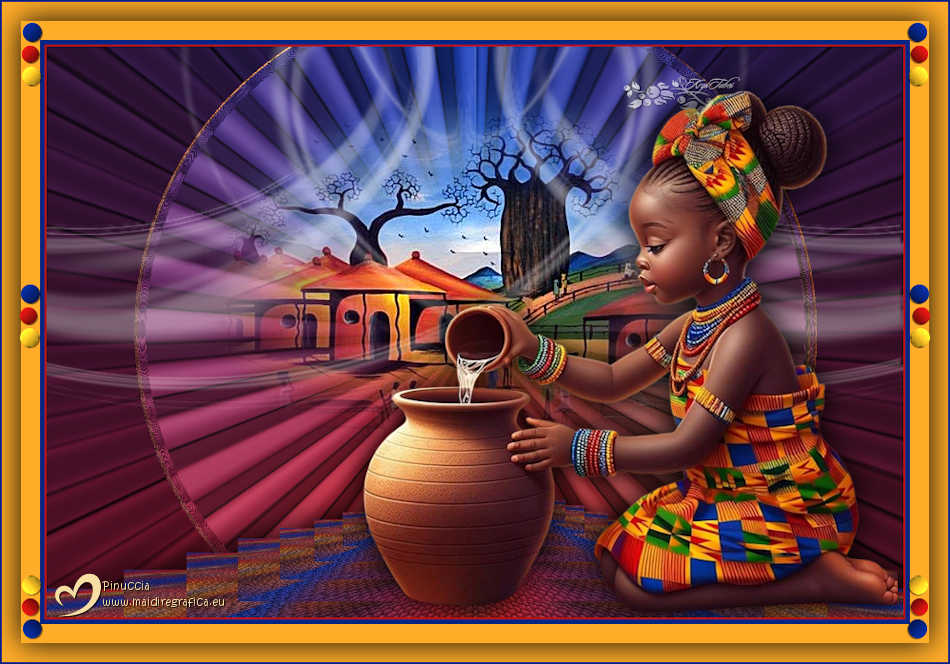
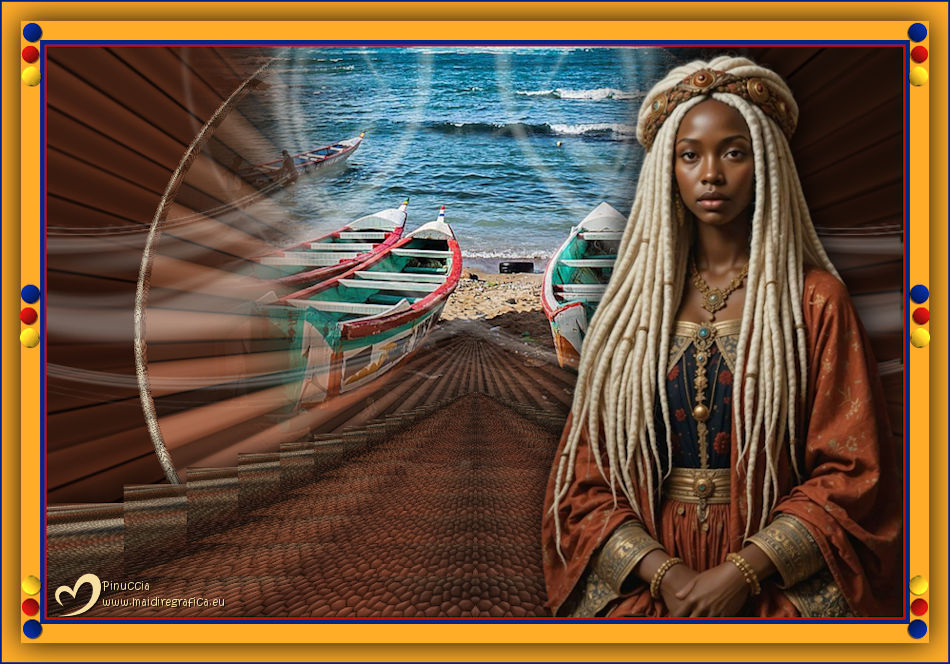
TAG SENEGAL


This tutorial was translated with PSPX9 and PSP2020, but it can also be made using other versions of PSP.
Since version PSP X4, Image>Mirror was replaced with Image>Flip Horizontal,
and Image>Flip with Image>Flip Vertical, there are some variables.
In versions X5 and X6, the functions have been improved by making available the Objects menu.
In the latest version X7 command Image>Mirror and Image>Flip returned, but with new differences.
See my schedule here
 French translation here French translation here
 Your versions here Your versions here
For this tutorial, you will need:

For the tubes and the mask thanks Renée, Krys and Narah.
The rest of the material is by Nines.
(you find here the links to the material authors' sites)

consult, if necessary, my filter section here
Mura's Meister - Pole Transform, Perspective Tiling here

You can change Blend Modes according to your colors.
In the newest versions of PSP, you don't find the foreground/background gradient (Corel_06_029).
You can use the gradients of the older versions.
The Gradient of CorelX here

Open the mask in PSP and minimize it with the rest of the material.
1. Open a new transparent image 900 x 600 pixels.
2. Set your foreground color to #b7130f,
and your background color to #062582.

Set your foreground color to a Foreground/Background Gradient, style Linear.
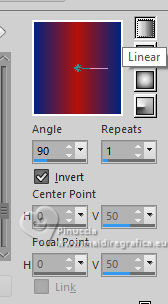
Flood Fill  the transparent image with your Gradient. the transparent image with your Gradient.
3. Selections>Select All.
Open the tube Renee-TUBES-Juin-2024-5 
Edit>Copy.
Go back to your work and go to Edit>Paste into Selection.
Selections>Select None.
4. Adjust>Blur>Gaussian Blur - radius 20.

5. Effects>Texture Effects>Tiles - color #ffffff.
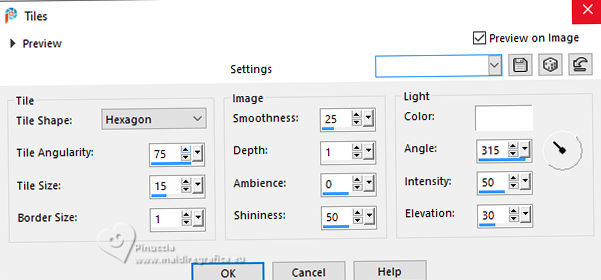
6. Layers>Duplicate.
Effects>Plugins>Mura's Meister - Pole Transform.
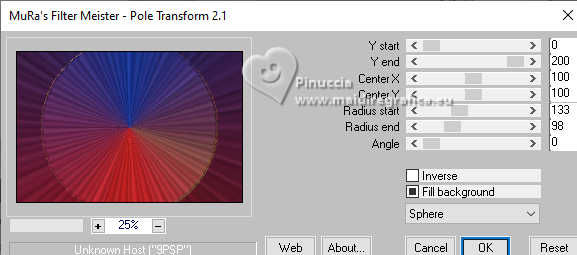
7. Layers>New Raster Layer.
Set your foreground color to white #ffffff.
Reduce the opacity of your Flood Fill Tool to 50%.
Flood Fill  the layer with your white foreground color. the layer with your white foreground color.
don't forget to set again the opacity of your Flood Fill Tool to 100
8. Layers>New Mask layer>From image
Open the menu under the source window and you'll see all the files open.
Select the mask Narah_mask_Abstract289.
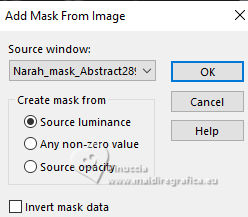
Layers>Merge>Merge Group.
9. Activate the layer Raster 1.
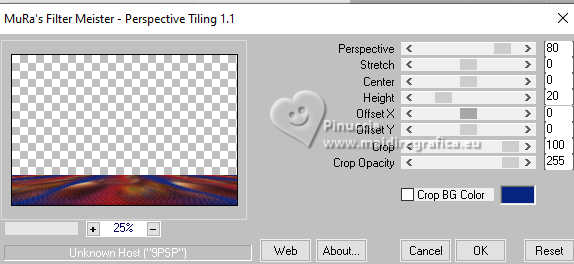
Effects>Plugins>Mura's Meister - Perspective Tiling.
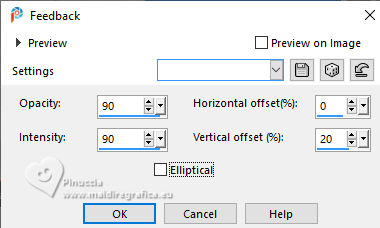
10. Effects>Reflection Effects>Feedback.
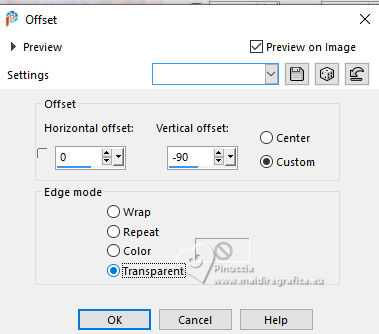
11. Effects>Image Effects>Offset.
12. Effests>Reflection Effects>Rotating Mirror.

13. Effects>3D Effects>Drop Shadow, color #000000.
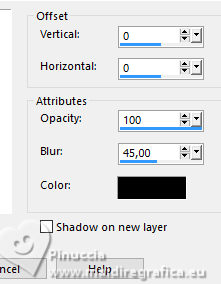
Layers>Arrange>Move up.
14. Open the tube krysmistafrique2017-009 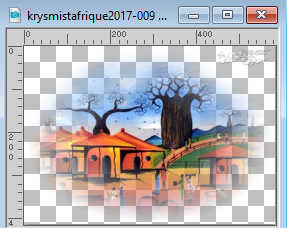
Edit>Copy.
Go back to your work and go to Edit>Paste as new layer.
15. Effects>Image Effects>Offset.
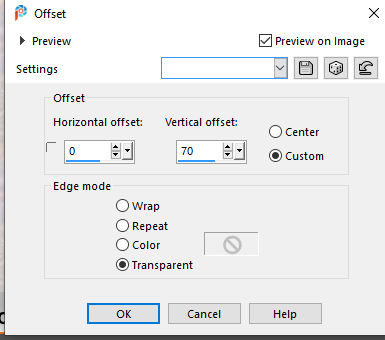
Adjust>Sharpness>Sharpen More.
16. Activate again the tube Renee-TUBES-Juin-2024-5 and go to Edit>Copy.
Go back to your work and go to Edit>Paste as new layer.
Image>Resize, to 80%, resize all layers not checked.
Move  the tube to the right side. the tube to the right side.
17. Effects>3D Effects>Drop Shadow, same settings.

18. Sign your work.
Add the author and the translator's watermarks.
Layers>Merge>Merge All.
19. Image>Add Borders, 2 pixels, symmetric, color #b7130f.
Image>Add Borders, 5 pixels, symmetric, color #062582.
Image>Add Borders, 40 pixels, symmetric, color #ffac29.
20. Selections>Select All.
Selections>Modify>Contract - 20 pixels.
21. Effects>3D Effects>Drop Shadow, same settings.

Selections>Select None.
22. Open Adorno-bolitas-nines 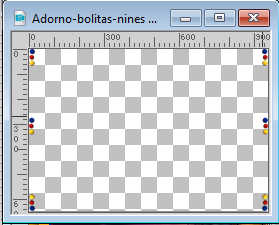
Edit>Copy.
Go back to your work and go to Edit>Paste as new layer.
23. Layers>Merge>Merge All.
24. Image>Add Borders, 2 pixels, symmetric, color #062582.
25. Save as jpg.
Version with images de Pinterest
 Your versions here Your versions here

If you have problems or doubts, or you find a not worked link, or only for tell me that you enjoyed this tutorial, write to me.
18 August 2025

|

