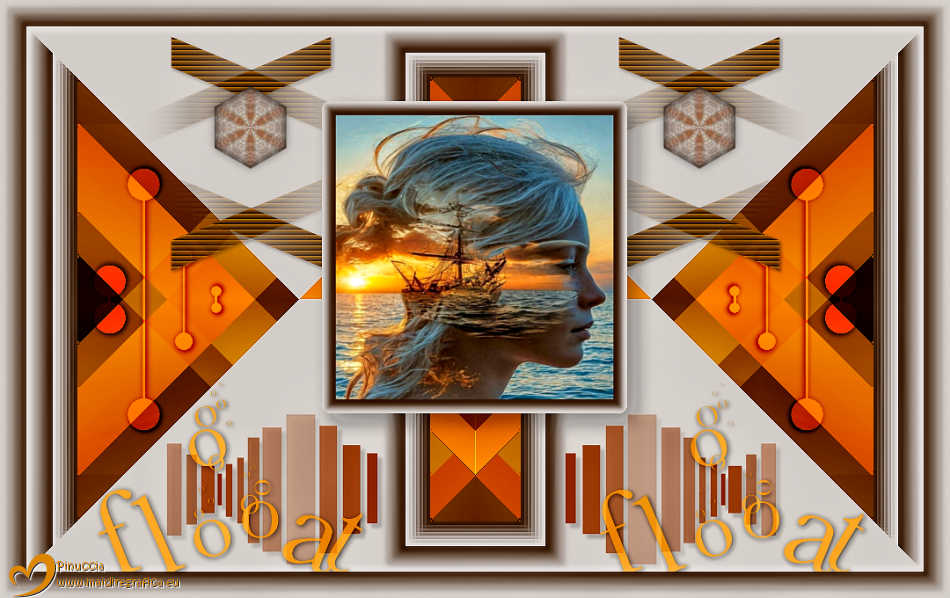
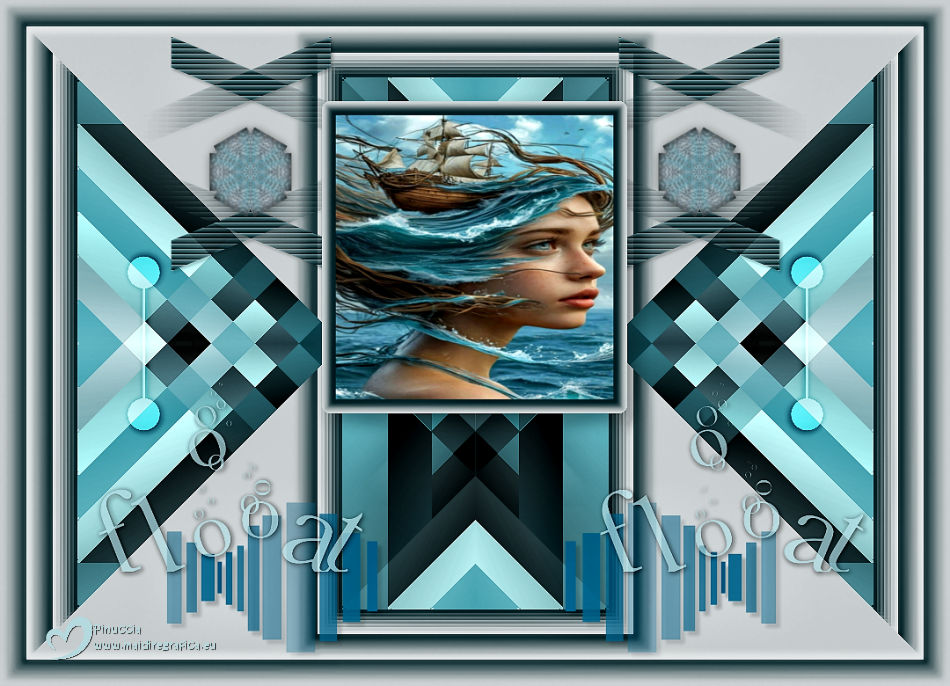
FLOAT


Thanks Brigitte for your invitation to translate

Clic and move the brush to follow the tutorial.

To print


|
This tutorial was translated with PSPX9 and PSP2020, but it can also be made using other versions of PSP.
Since version PSP X4, Image>Mirror was replaced with Image>Flip Horizontal,
and Image>Flip with Image>Flip Vertical, there are some variables.
In versions X5 and X6, the functions have been improved by making available the Objects menu.
In the latest version X7 command Image>Mirror and Image>Flip returned, but with new differences.
See my schedule here
 italian translation here italian translation here
 your versions here your versions here

Necessary

(The links of the tubemakers here).

consult, if necessary, my filter section here
Filters Unlimited 2.0 here
Tramages - Heightline here
Nik Software - Color Efex Pro here
Simple - Pizza Slice Mirror here
Alien Skin Eye Candy 5 Impact here
Alien Skin Eye Candy 5 Nature here
Filters Tramages can be used alone or imported into Filters Unlimited.
(How do, you see here)
If a plugin supplied appears with this icon  it must necessarily be imported into Unlimited it must necessarily be imported into Unlimited

You can change Blend Modes according to your colors.
In the newest versions of PSP, you don't find the foreground/background gradient (Corel_06_029).
You can use the gradients of the older versions.
The Gradient of CorelX here

Copy the selections in the Selections Folder.
Set your foreground color to the light color #c5fcff,
and your background color to the dark color #534b7a.
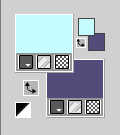
Set your foreground color to a Foreground/Background Gradient, style Rectangular.
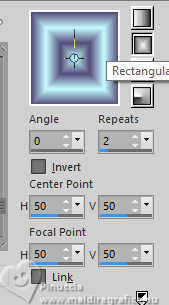
1. Open a new transparent image 900 x 500 pixels.
Flood Fill  the transparent image with your Gradient. the transparent image with your Gradient.
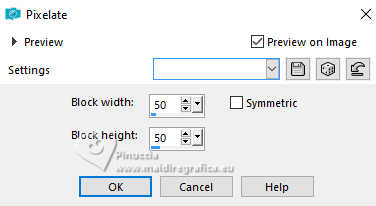
2. Effects>Distortion Effects>Pixelate.
3. Layers>Duplicate.
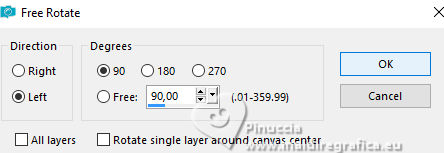
Image>Free Rotate - 90 degrees to left.
Layers>Merge>Merge visible.
4. Effects>Geometric Effects>Skew.
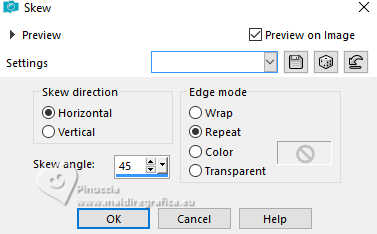
5. Layers>Duplicate.
Image>Mirror>Mirror horizontal.
Change the Blend Mode of this layer to Soft Light.
Layers>Merge>>Merge visible.
6. Layers>Duplicate.
Effects>Plugins>Tramages - Heightline, default settings.
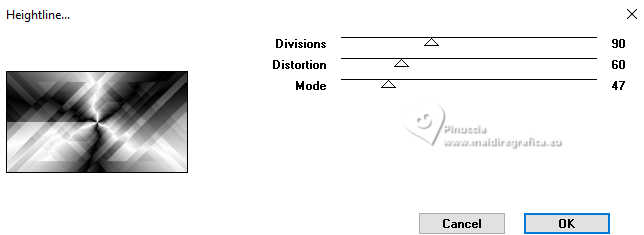
Change the Blend Mode of this layer to Overlay, or according to your colors.
7. Layers>New Raster Layer.
Selections>Load/Save Selection>Load Selection from Disk.
Look for and load the selection Sel-1-les 117
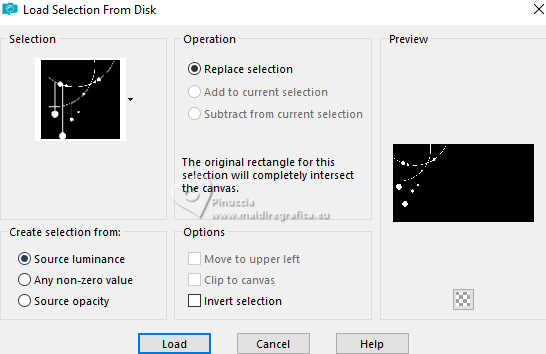
Set your foreground color to Color.
Flood Fill  the selection with your foreground color. the selection with your foreground color.
Selections>Select None.
Effects>Plugins>Alien Skin Eye Candy 5 Impact - Perspective Shadow.
Select the preset Drop Shadow Lowest, with these settings.
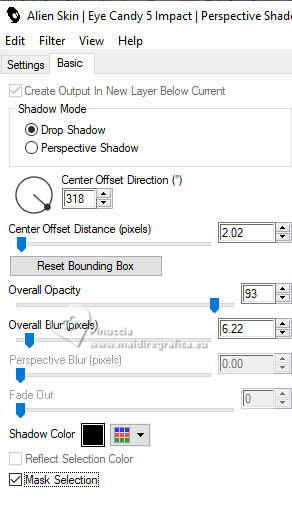
Change the Blend Mode of this layer to Overlay, or according to your colors.
8. Selections>Select All.
Image>Add Borders, 30 pixels, symmetric, background color.
Selections>Invert.
Effcts>Plugins>Nik Software - Color Efex Pro - Vignette
Shape 3 - Adapt Edge 20 - Transition 10 - Size 5 - opacity 81
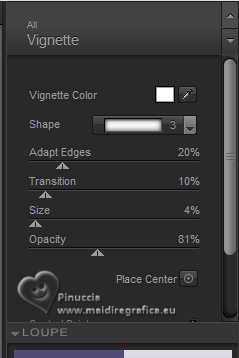
if you are problem to set the numbers, you can you the keyboard's arrows.
9. Effects>Plugins>Filters unlimited 2.0 - Lens Effects - Refractor 1.
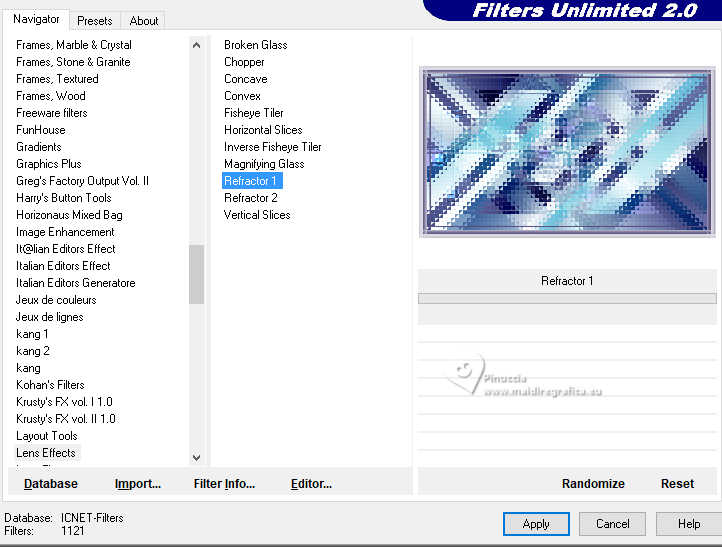
Selections>Select None.
10. Image>Add borders, 30 pixels, symmetric, background color.
Effects>Plugins>Nik Software - Color Efex Pro, last settings.
11. Effects>Plugins>Simple - Pizza Slice Mirror.
Effects>Reflection Effects>Rotating Mirror.

12. Layers>New Raster Layer.
Selections>Load/Save Selection>Load Selection from Disk.
Look for and load the selection Sel-2-les 117
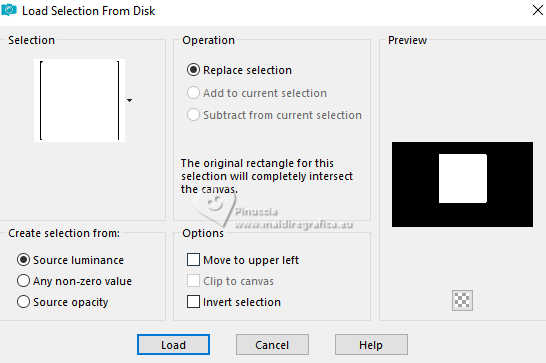
Open your background image.
attention, please,
if you use a background of yours, resize it about 615 pixels,
if you want that the border have the same sizes.
Stay on this image.
Image>Add Borders, 30 pixels, symmetric, background color.
Effects>Plugins>Nik Software - Color Efex Pro, last settings.
Edit>Copy.
Go back to your work and go to Edit>Paste into Selection.
Selections>Select None.
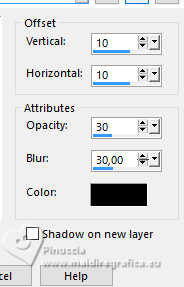
Effects>3D Effects>Drop Shadow, color black.
13. Open Decoratie les 117 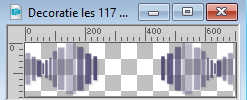
Edit>Copy.
Go back to your work and go to Edit>Paste as new layer.
Objects>Align>Bottom.
colorize, if you use other colors
14. Layers>New Raster Layer.
Selections>Load/Save Selection>Load Selection from Disk.
Look for and load the selection Sel-3-les 117
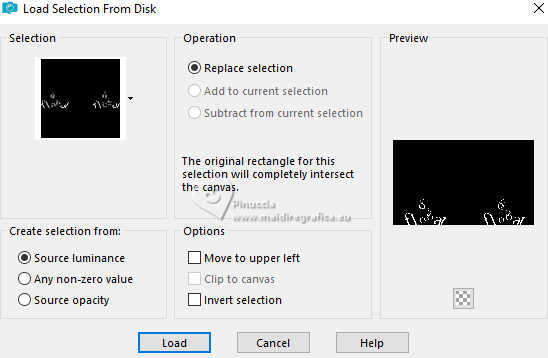
Flood Fill  the selection with your foreground color. the selection with your foreground color.
Selections>Select None.
Effects>Plugins>Alien Skin Eye Candy 5 Impact - Perspective Shadow, last settings.
Reduce the opacity of this layer to 75%.
15. Activate your background layer.
Layers>New Raster Layer.
Selections>Load/Save Selection>Load Selection from Disk.
Look for and load the selection Sel-4-les 117
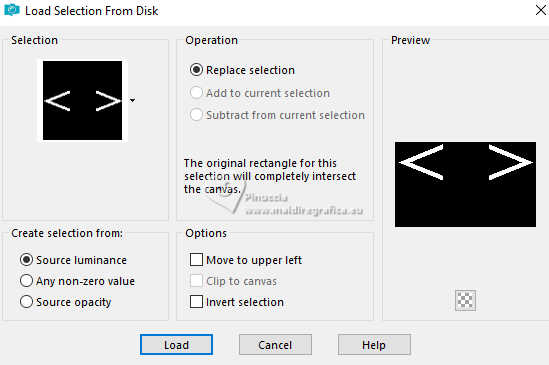
Flood Fill  the selection with your background color. the selection with your background color.
Selections>Select None.
16. Effects>Texture Effects>Blinds - foreground color.
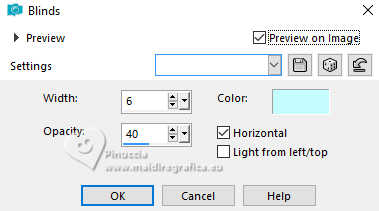
17. Effects>Image Effects>Seamless Tiling.

18. Adjust>Sharpness>Sharpen More.
Effects>3D Effects>Drop Shadow, color black.
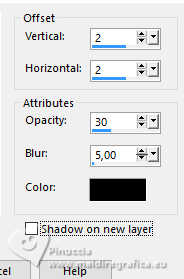
19. Image>Add Borders, 30 pixels, symmetric, background color.
Effects>Plugins>Nik Software - Color Efex Pro - Vignette, last settings.
Effects>Plugins>Nik Software - Color Efex Pro - Tonal Contrast, default settings.
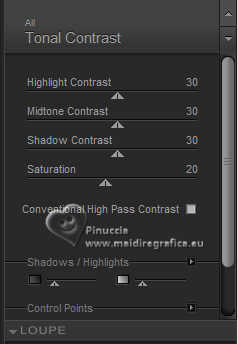
20. Layers>Duplicate.
Adjust>Blur>Radial Blur.
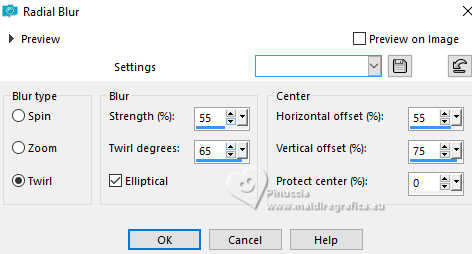
21. Effects>Plugins>Alien Skin Eye Candy 5 Nature - Ripples.
Raindrops in Slosing Water with these settings.
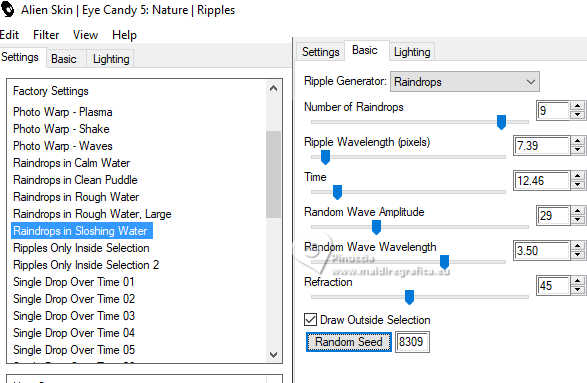
22. Image>Resize, to 12%, resize all layers not checked.
Image>Free Rotate, last settings.

Effects>Reflection Effects>Kaleidoscope.
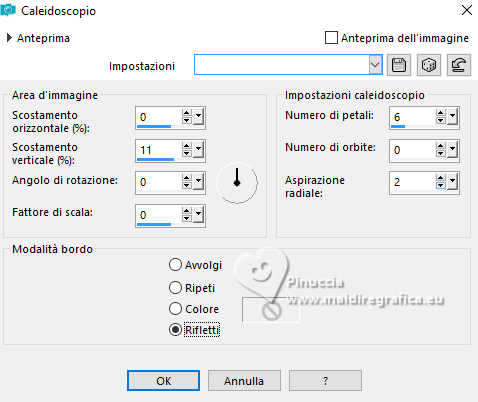
(with other PSP's versions or different colors, the result can looks like different,
adapt the settings to your liking).
23. Effects>Image Effects>Offset.
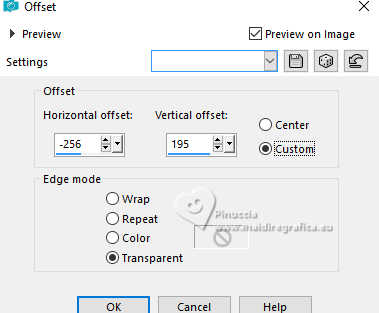
Layers>Duplicate.
Effects>3D Effects>Cutout.
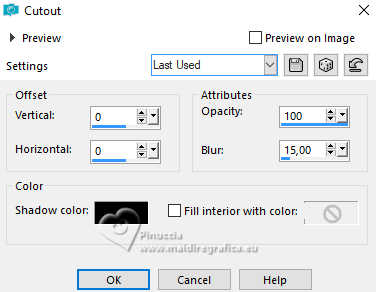
Layers>Merge>Merge Down.
24. Effects>3D Effects>Drop Shadow, color black.
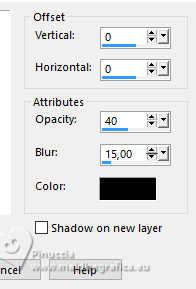
Layers>Duplicate.
Image>Mirror>Mirror horizontal.
25. Sign your work on a new layer.
Layers>Merge>Merge All and save as jpg.

If you have problems or doubts, or you find a not worked link, or only for tell me that you enjoyed this tutorial, write to me.
27 Avril 2025

|

