|
UNIÃO, ARTE, AMIZADE  
 There are balloons in the sky of the PSP and confetti on the layers!
We are in a celebratory mood, because Sim PSP has just blown out 6 candles full of creativity! To mark this special date, we created a special tutorial made by three  friends passionate about art. friends passionate about art.The choice of the title for this work was inspired by the strength of our group (union), then by the essence of the work (art), and ends with our feeling (friendship), conveying well our collaborative and caring spirit for this project that began 6 years ago. Happy 6 Years SIM PSP!
This tutorial. written with PSP2020 and Psp2022. was translated with PspX9, but it can also be made using other versions of PSP.
For this tutorial, you will need:  (The links of the tubemakers here). Plugins consult, if necessary, my filter section here Filters Unlimited 2.0 here &<Bkg Designer sf10I> - Cruncher here Carolaine and Sensibility - CS_Texture here Mura's Seamless - Duplicate, Shift at Zigzag here Toadies - What are you, Sucking Toad Bevel III here VanDerLee - Unplugged-X here FM Tile Tools - Saturation Emboss here [AFS IMPORT] - edgefade here Filters Mura's Seamless, [AFS IMPORT] and Toadies can be used alone or imported into Filters Unlimited. (How do, you see here) If a plugin supplied appears with this icon  it must necessarily be imported into Unlimited it must necessarily be imported into Unlimited You can change Blend Modes according to your colors. In the newest versions of PSP, you don't find the foreground/background gradient (Corel_06_029). You can use the gradients of the older versions. The Gradient of CorelX here 
Copy the preset Emboss 7 in the Presets Folder. Copy Preset_BallAndBubbles_BB_6Niver in the Presets Folder. Copy the selections 6Niver_1 and 6Niver_2 in the Selections Folder. 1. Choose 3 colors to work. Set your foreground color to #ddceb9, and your background color to #61360c.  Color 3: #a98345 Set your foreground color to a Foreground/Background Gradient, style Sunburst.  2. Open a new transparent image 800 x 550 pixels. Flood Fill  the transparent image with your Gradient. the transparent image with your Gradient.3. Effects>Plugins>Mura's Seamless - Shift at Zigzag 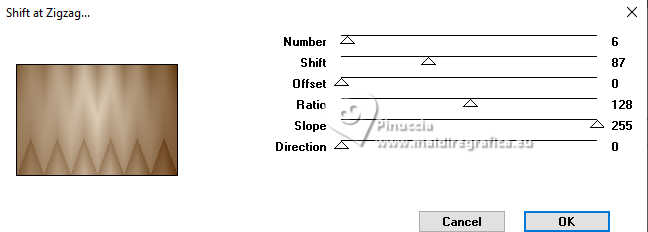 4. Effects>Plugins>Filters Unlimited 2.0 - &<Bkg Designer sf10I> - Cruncher.  5. Effects>Edge Effects>Enhance. Effects>Reflection Effects>Rotating Mirror. 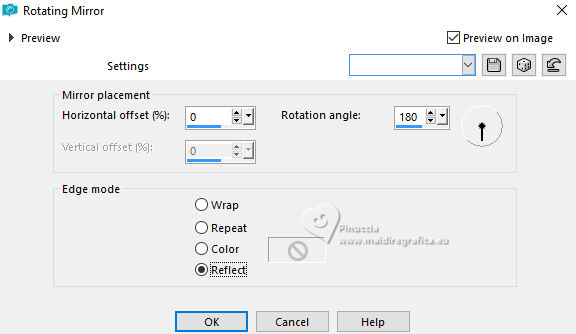 6. Effects>User Defined Filter - preset Emboss 7  7. Effects>Plugins>Mura's Seamless - Duplicate.  8. Layers>Duplicate. Image>Mirror>Mirror Vertical (Image>Flip) Layers>Properties>General>Blend Mode: Overlay - Opacity: 100% 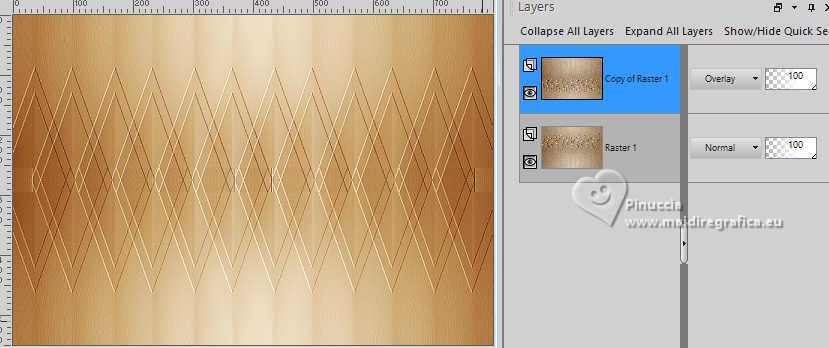 Layers>Merge>Merge Down. 9- Selections>Load/Save Selections>Load Selection From Disk. Look for and load the selection 6Niver_1 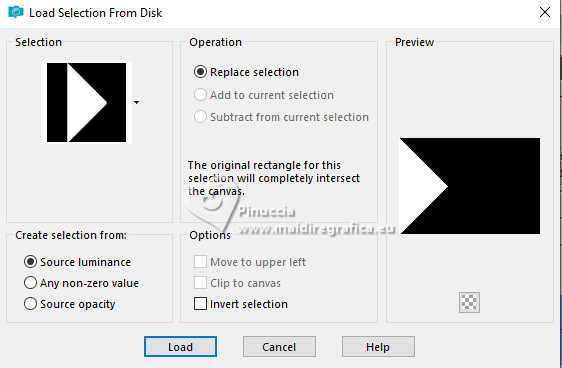 Selections>Promote Selection to Layer. Adjust>Blur>Gaussian Blur - radius 30. 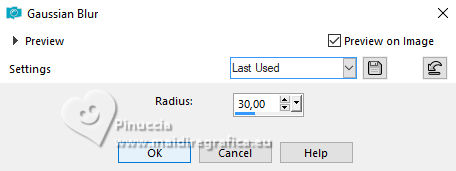 Keep selected. 10. Effects>Plugins>Carolaine and Sensibility - Cs_Texture 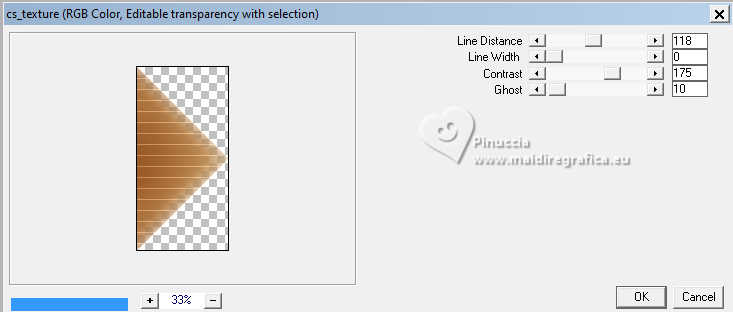 11. Effects>User Defined Filter - preset Emboss 7 12. Selections>Select None. Effects>Plugins>VanDerLee - UnPlugged-X  13. Layers>Duplicate. Effects>Plugins>Toadies - Sucking Toad Bevel III  14. Effects>Plugins>Toadies - What are you 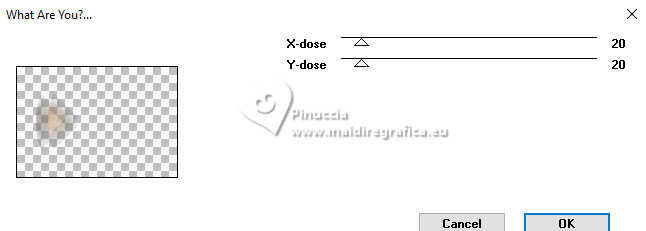
15. Activate the layer Raster 1. Layers>Duplicate. Adjust>Add/Remove Noise>Add Noise 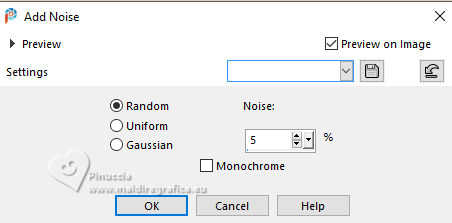 16. Effects>Plugins>FM Tile Tools - Saturation Emboss, default settings. 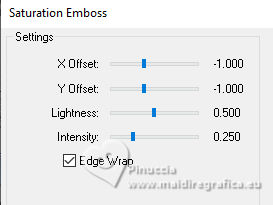 Layers>Properties>General>Blend Mode: Multiply> Opacity: 100%.  Layers>New Raster Layer. 17. Effects>Artistic Effects>Balls and Bubbles - preset BB_6Niver Surface - Material set your Gradient 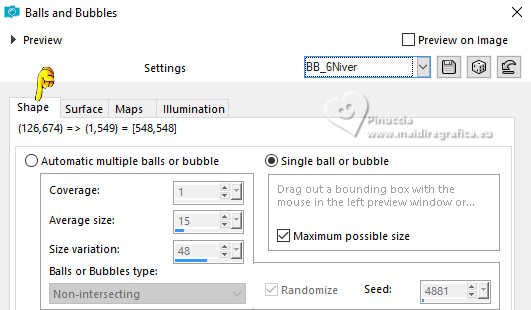   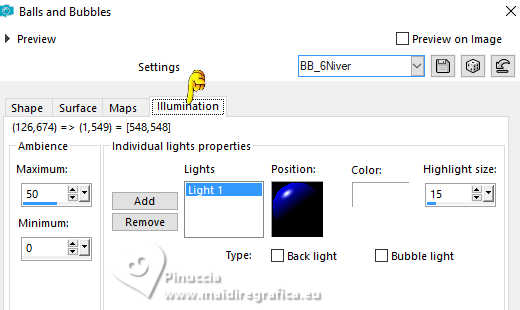 We have this result  18. The layer Raster 2 is actif. Image>Resize, to 70%, resize all layers not checked. Selections>Select All. Selections>Float. Selections>Defloat. 19. Open your tube IN_160_Mulheres 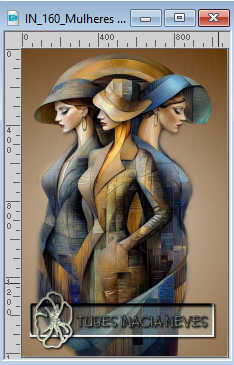 Edit>Copy. Go back to your work and go to Edit>Paste as New Layer. Image>Resize, if necessary, for the supplied tube to 50%, resize all layers not checked. Place  the tube to your liking in the selection. the tube to your liking in the selection.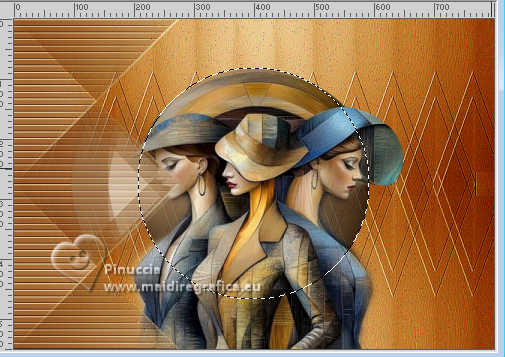 Selections>Invert. Press CANC on the keyboard  Selections>Select None. 20. Adjust>Sharpness>Sharpen. Layers>Duplicate. Layers>Merge>Merge Down. Layers>Arrange>Move Down. 21. Activate the layer Raster 2. Layers>Properties>General>Blend Mode: Hard Light> Opacity: 100%. Layers>Merge>Merge Down. Effects>Plugins>FM Tile Tools - Saturation Emboss, default settings. 22. Effects>Plugins>Mura's Meister - Copies.  23. Pick Tool  Position X: 301,00 - Position Y: 65,00.  Effects>3D Effects>Drop Shadow, Shadow on new layer checked.  Layers>Properties>General>Blend Mode: Overlay> Opacity: 100%. Your tag and the layers 
24. Activate the layer Promoted Selection. Selections>Load/Save Selections>Load Selection From Disk. Look for and load the selection 6Niver_2  Selections>Promote Selection to Layer. 25. Layers>Arrange>Bring to Top. Effects>3D Effects>Drop Shadow, background color.  Selections>Select None. 26. Activate titulo01_6Niver  Edit>Copy. Go back to your work and go to Edit>Paste as New Layer. 26. Pick Tool Position X: 273,00 - Position Y: 24,00. 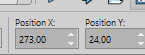 Effects>3D Effects>Drop Shadow, foreground color.  Adjust>Sharpness>Sharpen. 28. Open titulo02_6Niver 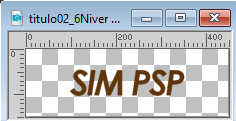 Edit>Copy. Go back to your work and go to Edit>Paste as New Layer. 29. Pick Tool Position X: 271,00 - Position Y: 488,00.  Layers>Properties>General>Blend Mode: Screen> Opacity: 100%. Layers>Duplicate. 30. Image>Add Borders, 2 piels, symmetric, background color. image>Add Borders, 4 pixels, symmetric, foreground color. Image>Add Borders, 2 pixels, symmetric, background color. Edit>Copy. Selections>Select All. 31. Image>Add Borders, 30 pixels, symmetric, whatever color. Selections>Invert. Edit>Paste Into Selection. Effects>Reflection Effects>Rotating Mirror. 32. Adjust>Blur>Gaussian Blur - radius 5 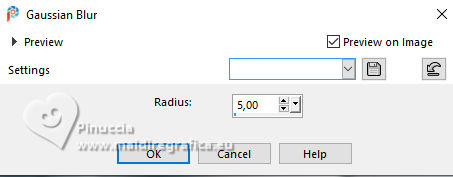 Effects>Plugins>Filters Unlimited 2.0 - AFS IMPORT - edgefade  33. Selections>Promote Selection to layer. Effects>Edge effects>Enhance. Layers>Properties>General>Blend Mode: Multiply> Opacity: 100%. in their second version Blend Mode to Overlay Selections>Select None. 34. Image>Add Borders, 1 pixel, symmetric, color 3 #a98345. Image>Add Borders, 1 pixel, symmetric, background color. 35. Resize, if you want. Sign your work and save as jpg. Version avec image by Pinterest    Your versions. Thanks Your versions. Thanks Kika  Louise   If you have problems or doubts, or you find a not worked link, or only for tell me that you enjoyed this tutorial, write to me. 25 June 2025 |


 of soft selections, of good surprises and, of course,
  of infinite inspirations, of magical moments and, of course,
  of enchanted blends, of movement in the layers and, of course, of "Wonderful, let's finish in style!"