|
A NEW CHAPTER UNFOLDS  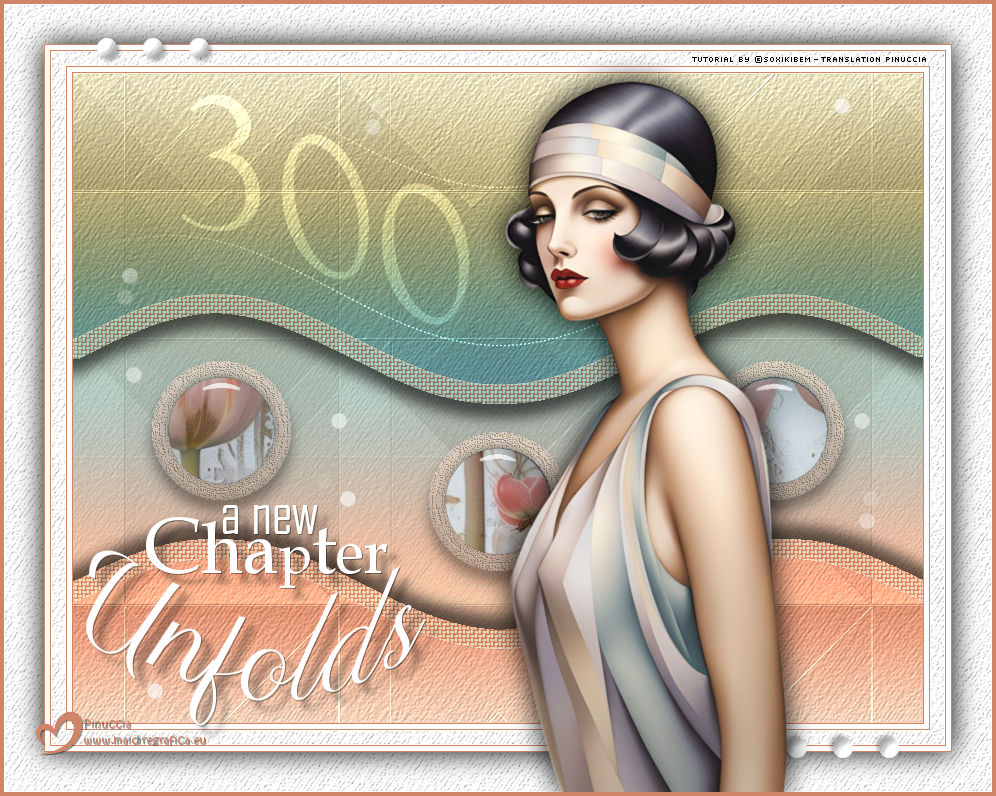
 Three hundred steps, three hundred moments of creation. Each tutorial was a spark, a discovery, a brushstroke on this ever-growing artistic journey. I’m deeply grateful to everyone who has accompanied me along the way - your support and encouragement have made this journey even more special. The journey goes on full of colors, dreams, and endless creativity.
This tutorial was written with Psp2022 and translated with PspX2020, but it can also be made using other versions of PSP.
For this tutorial, you will need:  (The links of the tubemakers here).  consult, if necessary, my filter section here Filters Unlimited 2.0 here Sandflower Special - Color Silver liquid (to import in Unlimited) here Filter Factory Gallery A - Triangular Mosaic Filter here Alien Skin Eye Candy 5 Impact - Glass here FM Tile Tools - Blend Emboss here Mura's Meister - Pole Transform here Mehdi - Wavy Lab 1.1. here Filters Factory Gallery can be used alone or imported into Filters Unlimited. (How do, you see here) If a Effects>Plugins>supplied appears with this icon  it must necessarily be imported into Unlimited it must necessarily be imported into UnlimitedYou can also follow the video tutorial created by Soxikibem   You can change Blend Modes according to your colors. In the newest versions of PSP, you don't find the foreground/background gradient (Corel_06_029). You can use the gradients of the older versions. The Gradient of CorelX here  Copy the texture Striation in the Textures Folder. 1. Choose 4 colors to work. 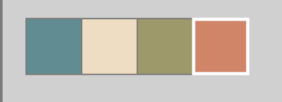 Foreground: #608c92 Background: #edddc3 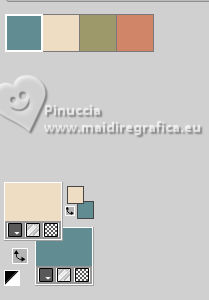 color 3 #9e996b color 4 #d08568. 2. Open a new transparent image 850 x 650 pixels. Effects>Plugins>Mehdi - Wavy Lab 1.1. Color Sequence: Foreground, Background, 3 and 4. 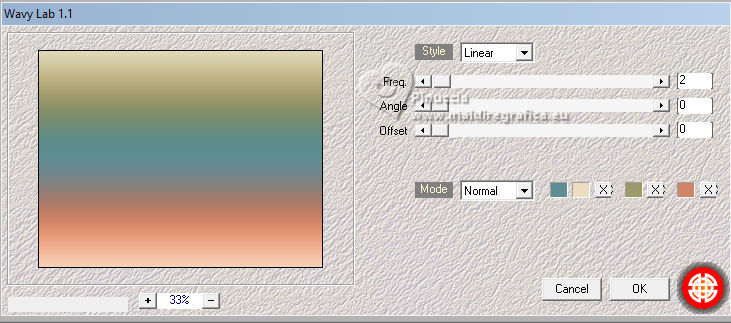 3. Layers>Duplicate. Effects>Plugins>Filter Factory Gallery A - Triangular Mosaic Filter. 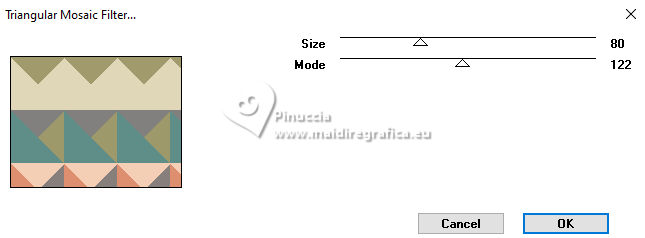 4. Effects>Plugins>Filters Unlimited 2.0 - Sandflower Specials "v" - Color Silver Liquid. 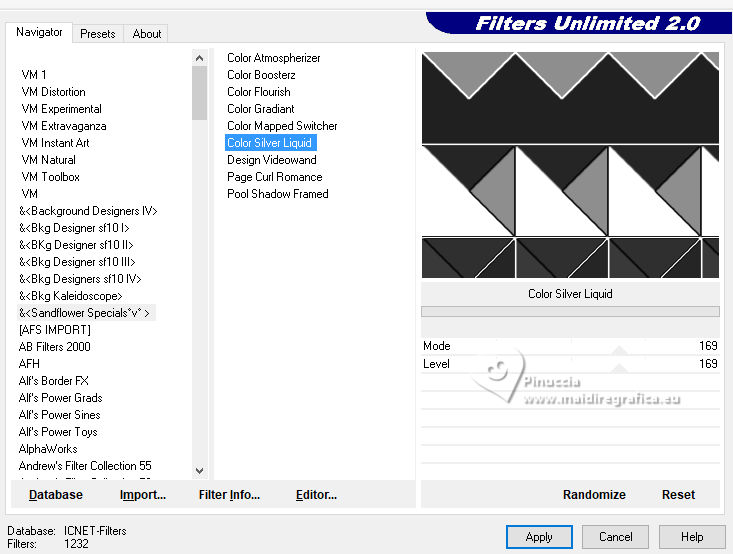 Layers>Properties>General>Blend Mode: Dodge - Opacity: 30%. 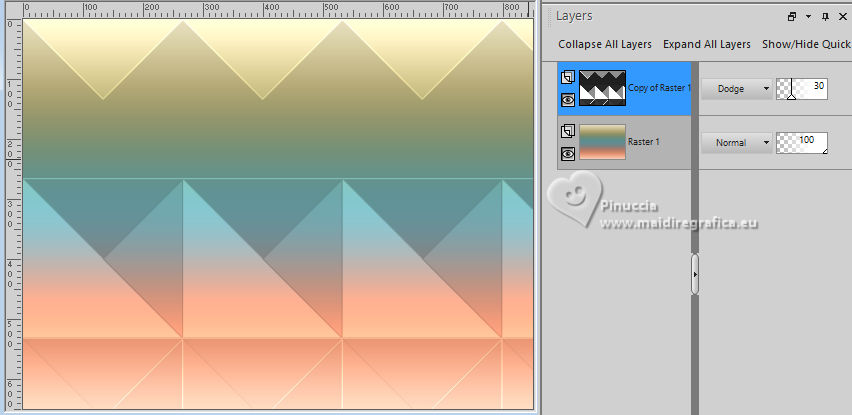 5. Effects>Image Effects>Seamles Tiling. 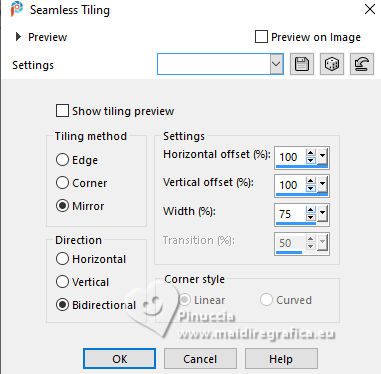 6. Effects>Reflection Effects>Rotating Mirror 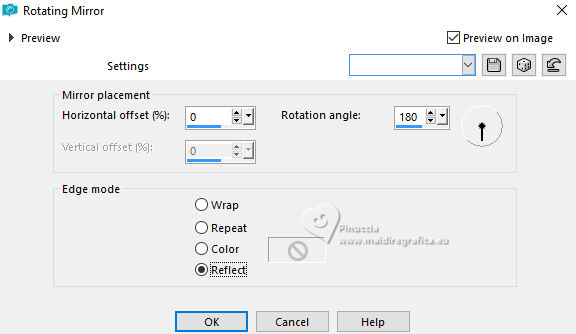 Effects>Plugins>FM Tile Tools - Blend Emboss, default settings. 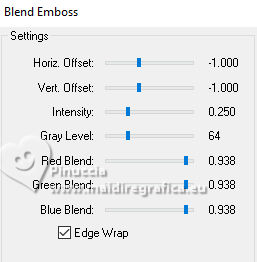 Edit>Repeat Blend Emboss. 7. Activate the layer Raster 1. Effects>Texture Effects>Texture - texture Striation  Effects>Plugins>FM Tile Tools>Blend Emboss, default settings. 8. Activate the layer Copy of Raster 1. Layers>New Raster Layer. Activate your Selection Tool  (no matter the type of selection, because with the custom selection your always get a rectangle) clic on the Custom Selection 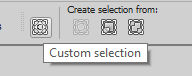 and set the following settings.  9. Reduce the opacity of your Flood Fill Tool to 50%. Flood Fill  the selection with your background color. the selection with your background color.Set again the opacity of your Flood Fill Tool to 100. Selections>Select None. Layers>Duplicate. 10. Activate the layer Raster 2. Effects>Distortion Effects>Wave. 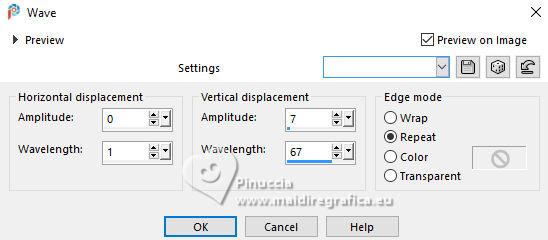 11. Activate the layer Copy of Raster 2 Effects>Plugins>Mura's Meister - Pole Trasnform. 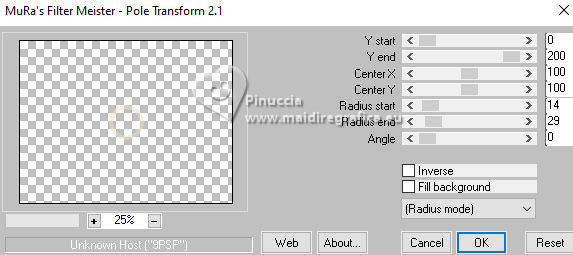 Pick Tool  Position X: 79,00 - Position Y: 288,00. 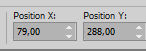 12. Layers>Duplicate. Image>Mirror>Mirror Horizontal. Layers>Duplicate. Pick Tool Position X: 356,00 - Position Y: 359,00. 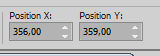 Layers>Merge>Merge Down - 2 times. 13. Activate your Magic Wand Tool  , tolerance and feather 0 , tolerance and feather 0and click in the circles to select them 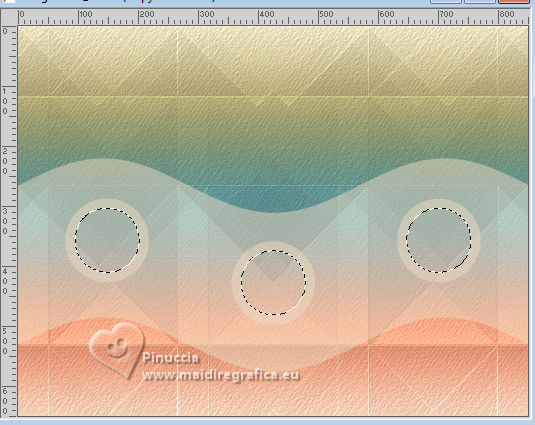 Activate the layer Raster 2 Press CANC on the keyboard  Activate the layer Copy of Raster 1 Press again CANC on the keyboard. Keep selected 14. Activate the layer Copy of Raster 2 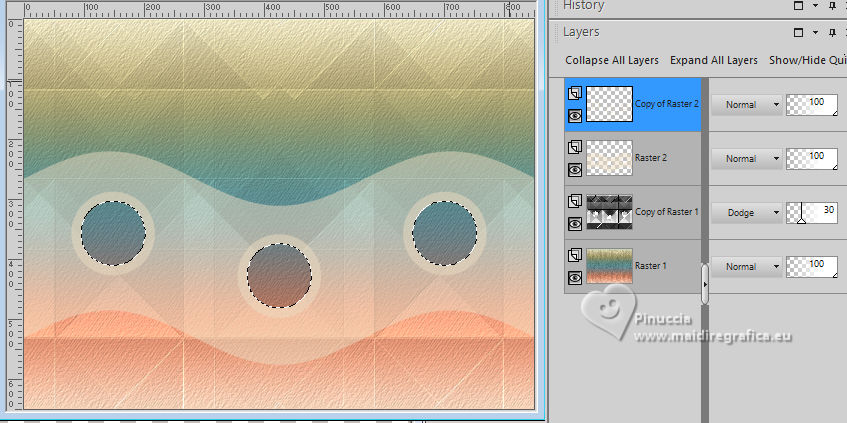 Layers>New Raster Layer. Activate your Clone Brush tool 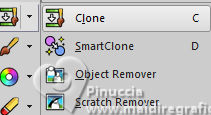 with these settings with these settings  Right-click on the Misted Floral, 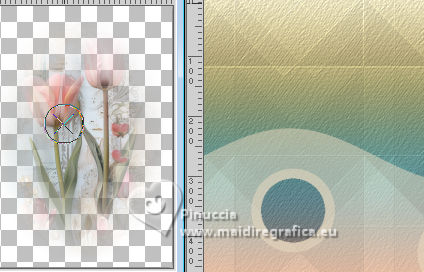 return to our work and left-click inside the selection of one of the circles. 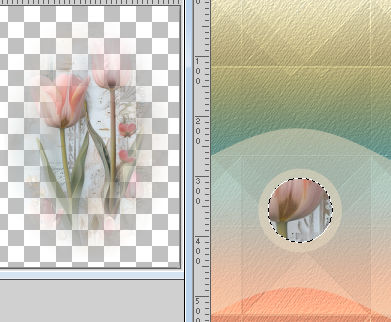 Repeat this process for all three circles. 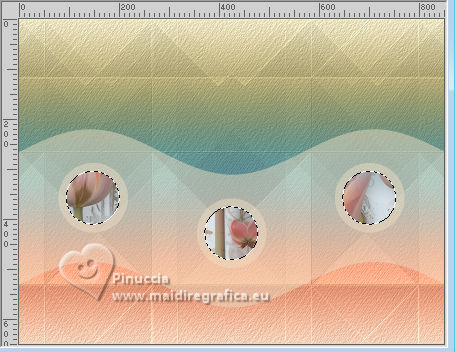 If you have any questions about how to use this tool, watch our video on YouTube. 15. Effects>Plugins>Alien Skin Eye Candy 5 Impact - Glass. 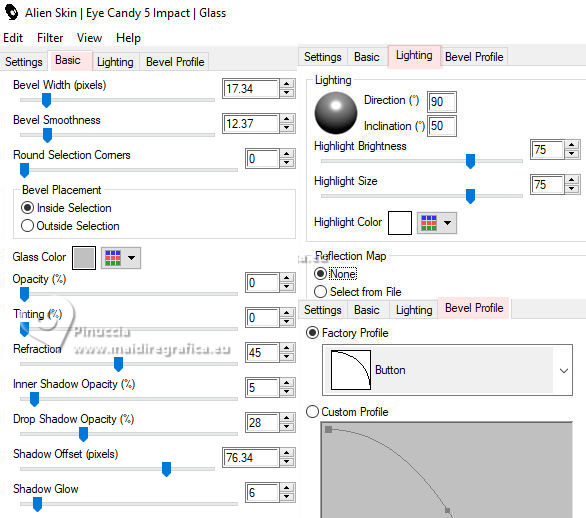 Selections>Select None. 16. Activate the layer Copy of Raster 2 Selections>Select All. Selections>Float. Selections>Defloat. Effects>Artistic Effects>Enamel 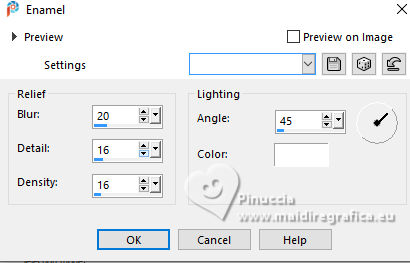 Selections>Select None. 17. Effects>3D Effects>Drop Shadow - color: #000000 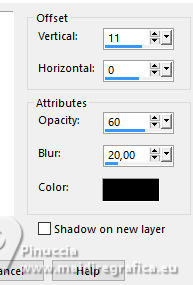 18. Activate the layer Raster 2 Activate your Magic Wand Tool , tolerance and feather 0and click in the top and bottom transparent zones to select them 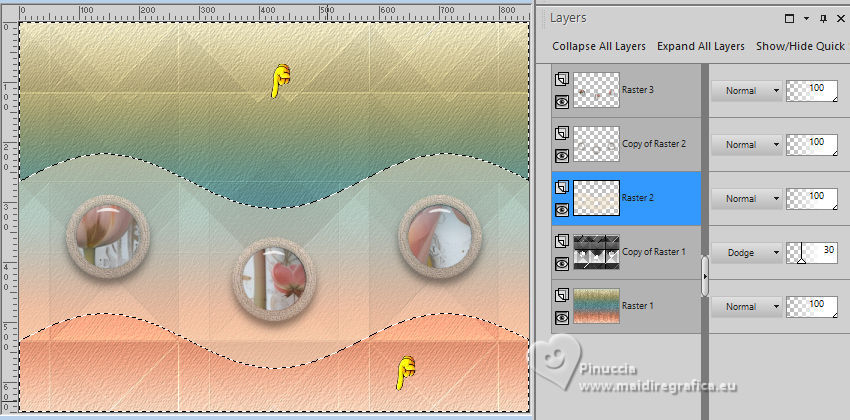 Selections>Modify>Expand - 20 pixels. 19. Effects>Texture Effects>Weave wave color: color 3 - gap color: color 4 you can change if you prefer 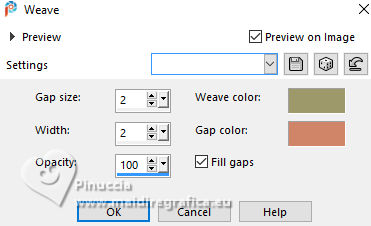 Adjust>Sharpness>Sharpen More. 20. Effects>3D Effects>Drop Shadow - color: #000000 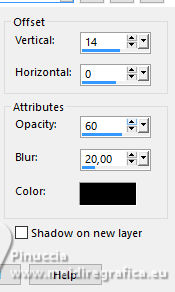 Repeat Drop Shadow, vertical -14 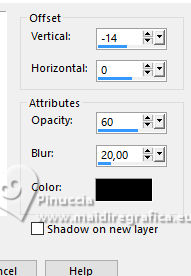 Selections>Select None. 21. Crop Tool  , Merged Opaque and click Apply , Merged Opaque and click Apply  22. For the borders, set your foreground color to color 4 #d08568 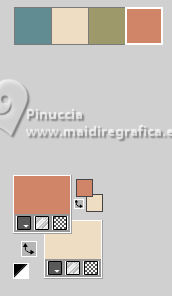 Image>Add Borders - 1 pixels, symmetric, color 4 Image>Add Borders - 5 pixels, symmetric, color #ffffff. Image>Add Borders - 1 pixels, symmetric, color 4 Selections>Select All. Image>Add Borders, 15 pixels, symmetric, color #ffffff. Selections>Invert 23. Effects>Texture Effects>Texture - Striation, same settings Effects>Edge Effects>Enhance. Selections>Select None. 24. Image>Add Borders - 1 pixels, symmetric, color 4 Image>Add Borders - 5 pixels, symmetric, color #ffffff. Image>Add Borders - 1 pixels, symmetric, color 4 Selections>Select All. Image>Add Borders, 40 pixels, symmetric, color #ffffff. 25. Selections>Invert Effects>Texture Effects>Texture - Striation, same settings Effects>Edge Effects>Enhance. Selections>Invert. Effects>3D Effects>Drop Shadow, color #000000. 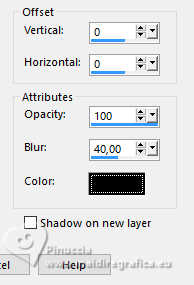 Selections>Select None. 26. Open Decor300_Xiki2  Erase the watermark and go to Edit>Copy. Go back to your work and go to Edit>Paste as new layer. Layers>Properties>General>Blend Mode: Luminance (L). Pick Tool Position X: 113,00 - Position Y: 75,00.  27. Open Decor300_Xiki  Erase the watermark and go to Edit>Copy. Go back to your work and go to Edit>Paste as new layer. Layers>Properties>General>Blend Mode: Dodge, Opacity: 50%. Pick Tool Position X: 68,00 - Position Y: 75,00.  28. Open Titulo300_Xiki  Erase the watermark and go to Edit>Copy. Go back to your work and go to Edit>Paste as new layer. Pick Tool Position X: 82,00 - Position Y: 501,00.  29. Open Decor300_Xiki3  Erase the watermark and go to Edit>Copy. Go back to your work and go to Edit>Paste as new layer. Pick Tool Position X: 92,00 - Position Y: 33,00.  30. Open the tube 1354MulherByPqnaAlice  Erase the watermark and go to Edit>Copy. Go back to your work and go to Edit>Paste as new layer. Image>Resize, if necessary, for the supplied tube to 60%. Place and apply the effect to your liking. 31. Image>Add Borders, 1 pixel, symmetric, color 4. 32. Sign your work on a new layer. Layers>Merge>Merge All and save as jpg. Version with my tubes from Pinterest images 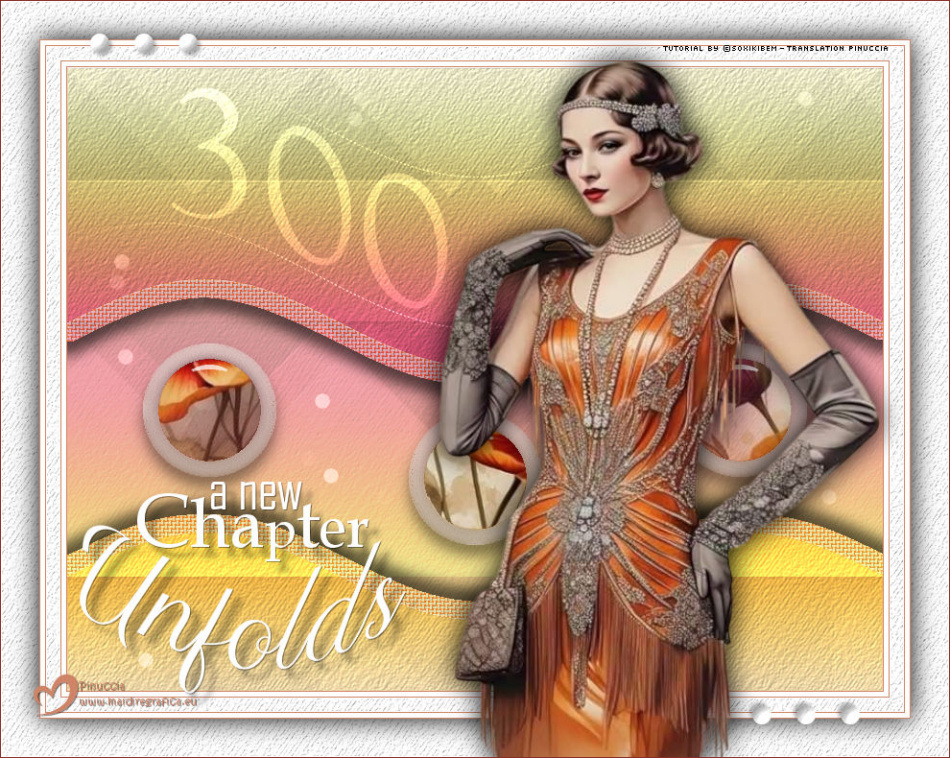  Your versions. Thanks 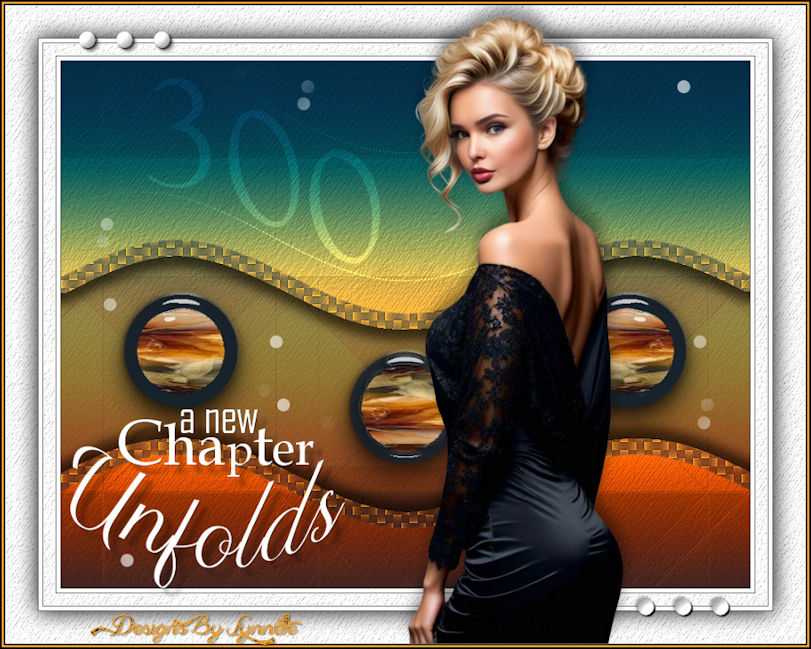 Lynnette  Aria 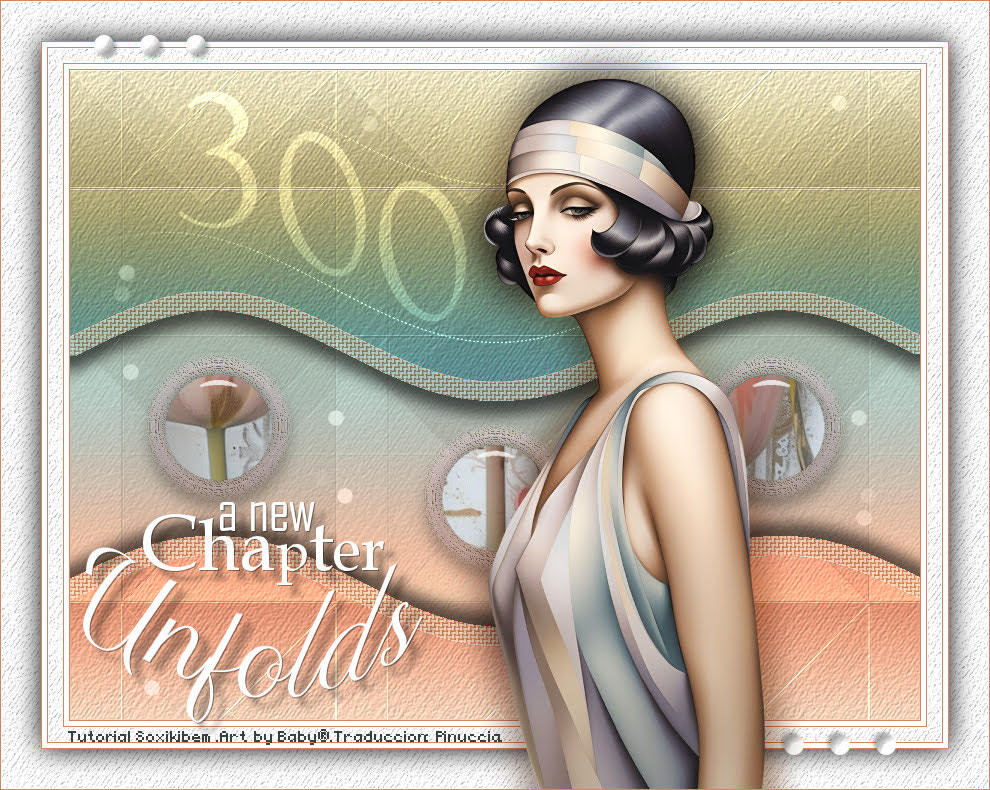 Baby 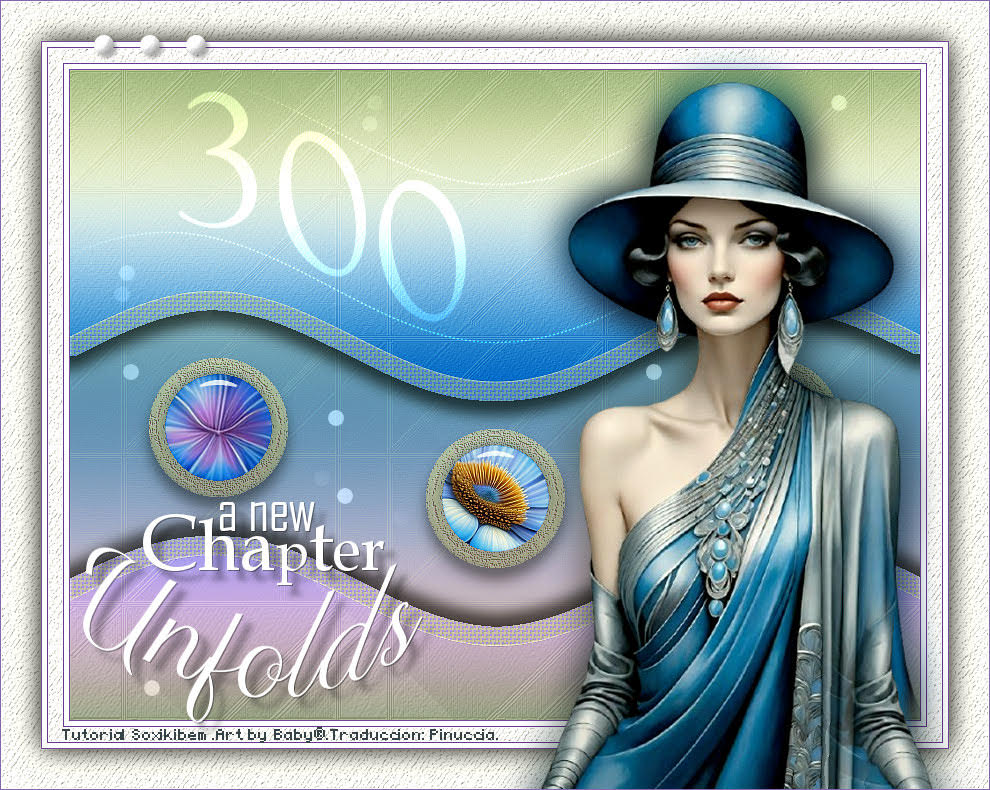 Baby  Kika  If you have problems or doubts, or you find a not worked link, or only for tell me that you enjoyed this tutorial, write to me. 20 January 2026. |