|
BARBARA CARTLAND  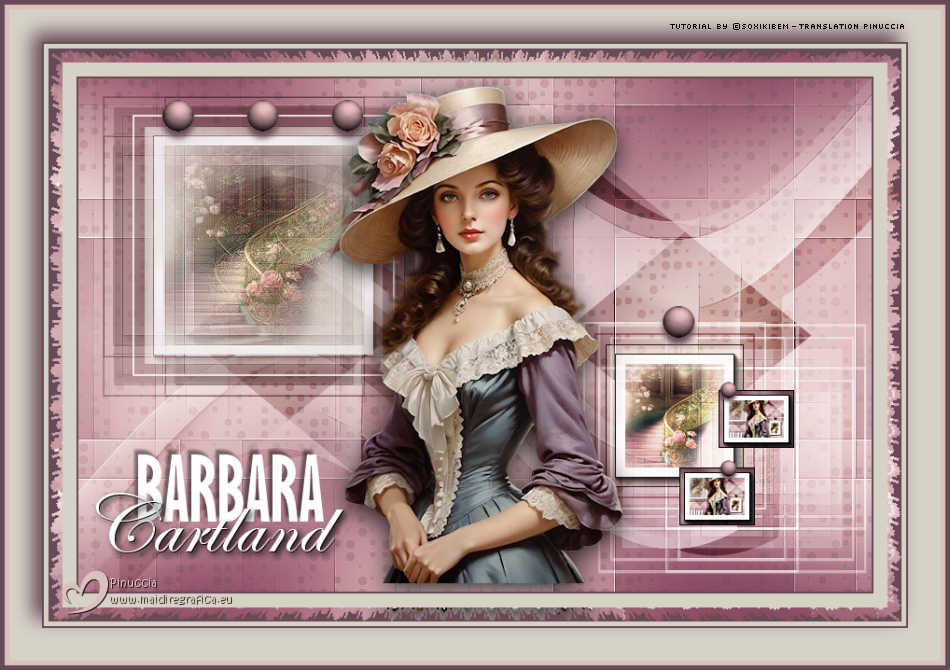
 There are romances that don't just live on the pages; they inhabit the gaze, the color, the detail. This art is a tribute to the sweetness and intensity of Barbara Cartland's books, where love blossoms amidst castles, stolen silences, and promises made under the moonlight. If you haven't yet lost yourself in one of her stories, perhaps this is the invitation. And if you already know them... then you know that the heart never forgets. 
This tutorial was written with Psp2022 and translated with PspX2020, but it can also be made using other versions of PSP.
For this tutorial, you will need:  A tube at your choice The rest of the material is by Soxikibem. (The links of the tubemakers here).  consult, if necessary, my filter section here Filters Unlimited 2.0 here &<Bkg Designer sf10III> - SpyroZag (to import in Unlimited) here AAA Frames - Foto Frame here VM Natural - Acid Rain here Filters VM Natural can be used alone or imported into Filters Unlimited. (How do, you see here) If a plugin supplied appears with this icon  it must necessarily be imported into Unlimited it must necessarily be imported into Unlimited You can change Blend Modes according to your colors. In the newest versions of PSP, you don't find the foreground/background gradient (Corel_06_029). You can use the gradients of the older versions. The Gradient of CorelX here Copy the selections in the Selections Folder. 1. Choose 3 colors to work. 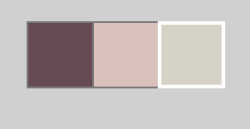 Foreground: #664a56 Background: #dac1bb 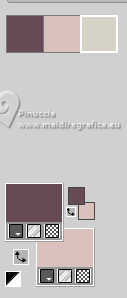 color 3: #d6d2c6 Set your foreground color to a Foreground/Backgroung Gradient, style Sunburst 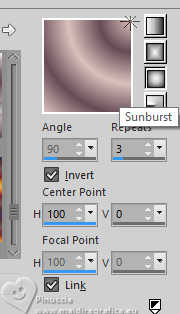 2. Open a new transparent image 850 x 550 pixels. Flood Fill  the transparent image with your Gradient. the transparent image with your Gradient.3. Effects>Reflection Effects>Kaleidoscope. 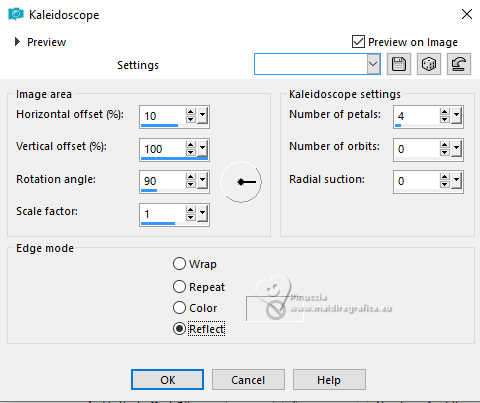 4. Layers>Duplicate. Effects>Plugins>VM Natural - Acid Rain. 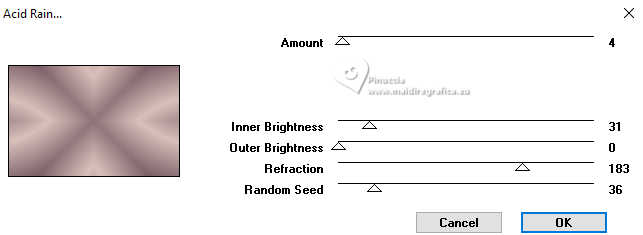 Layers>Properties>General>Blend Mode: Overlay, Opacity 35%. 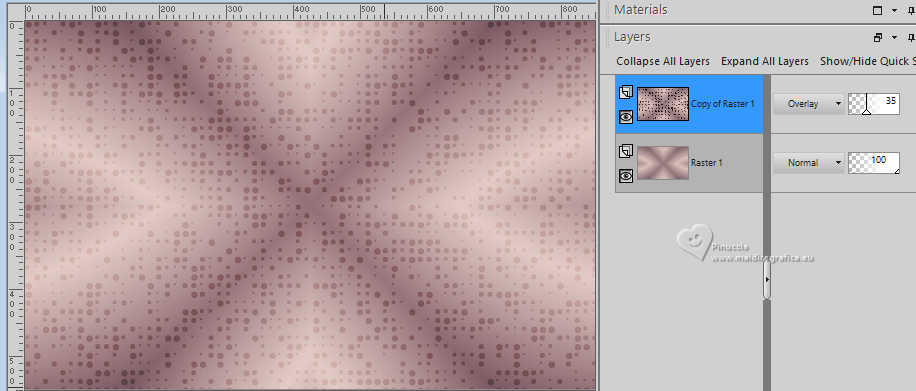 5. Activate the layer Raster 1. Effects>Texture Effects>Weave weave color: foreground color 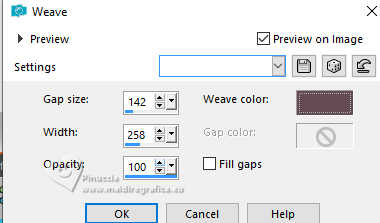 6. Effects>Plugins>Toadies - What are you  Effects>Edge Effects>Enhance More. 7. Layers>Duplicate. Image>Mirror>Mirror Horizontal. Layers>Properties>General>Blend Mode: Burn, Opacity 55%. 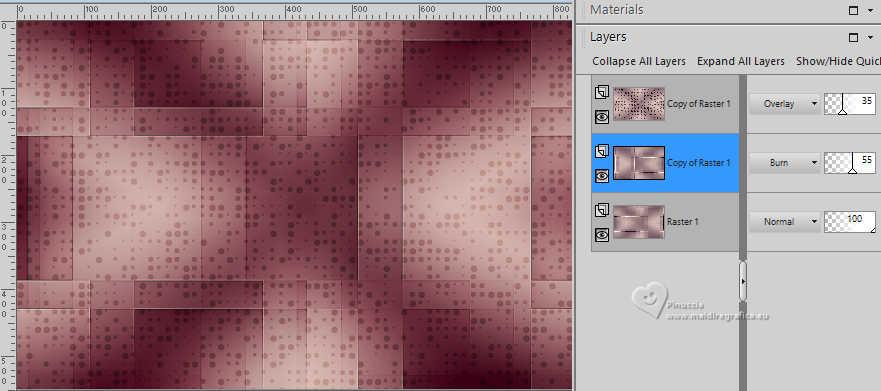 8. Activate your top layer, Copy of Raster 1. Layers>New Raster Layer. Selectons>Load/Save Selections>Load Selectoin from Disk. Look for and load the selection 305_Xiki6 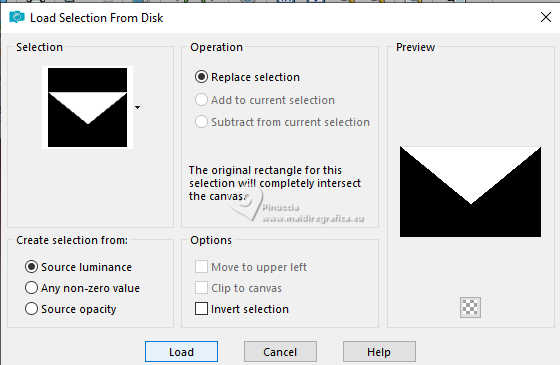 Change the settings of your Gradient, style Linear 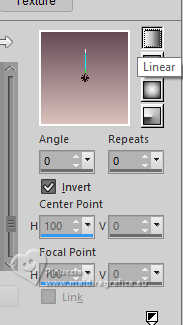 Flood Fill the selection with your Gradient.9. Selections>Select None. Effects>Image Effects>Seamless Tiling, Side by Side. 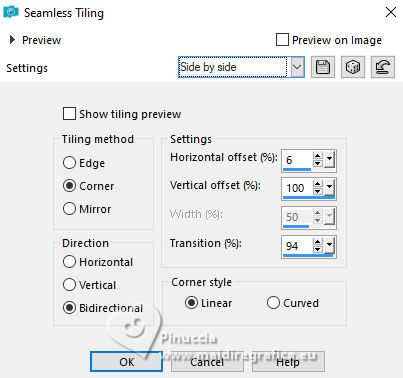 10. Effects>Reflection Effects>Rotating Mirror. 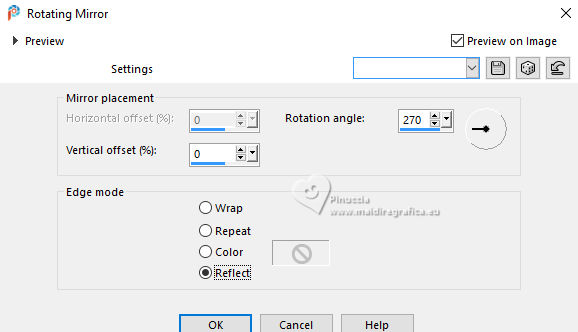 Layers>Properties>General>Blend Mode: Screen.  11. Layers>New Raster Layer. Selectons>Load/Save Selections>Load Selectoin from Disk. Look for and load the selection 305_Xiki1  Set your foreground color to the color 3: #d6d2c6 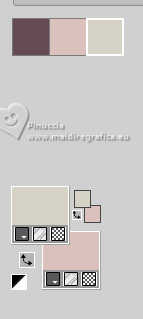 Flood Fill the selection with color 3 #d6d2c6.Selections>Modify>Contract - 2 pixels. Press CANC on the keyboard  12. Selections>Modify>Contract - 10 pixels. Reduce the opacity of your Flood Fill Tool to 60%, Flood Fill the selection with color 3 #d6d2c6.Open the misted 195PaisagemByPqnaAlice 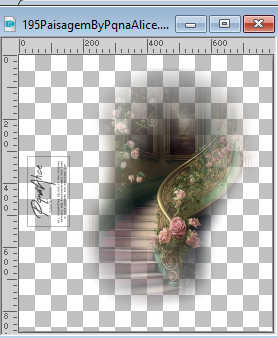 Erase the watermark and go to Edit>Copy. Go back to your work and go to Edit>Paste Into Selection. Adjust>Sharpness>Sharpen. 13. Effects>Plugins>AAA Frames - Foto Frame. 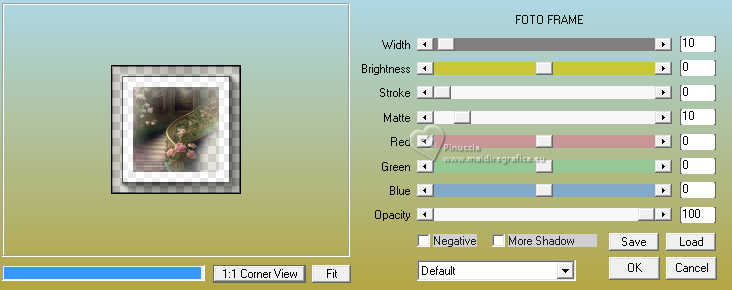 Selections>Select None. 14. Layers>Duplicate. Activate the layer below, Raster 3. Effects>Plugins>Toadies - What Are You 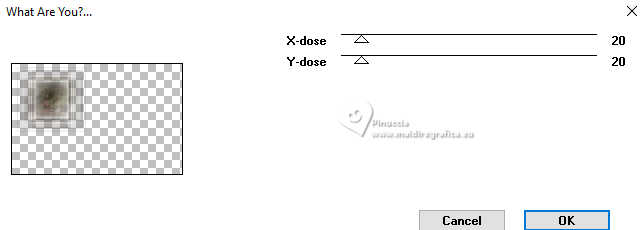 Effects>Edge Effects>Enhance. 15. Effects>3D Effects>Drop Shadow, foreground color #664a56 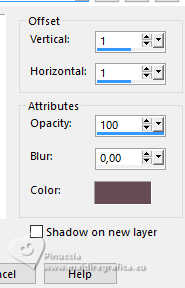 Layers>Properties>General>Blend Mode: Multiply. Activate the layer Copy of Raster 3. Layers>Properties>General>Blend Mode: Screen. 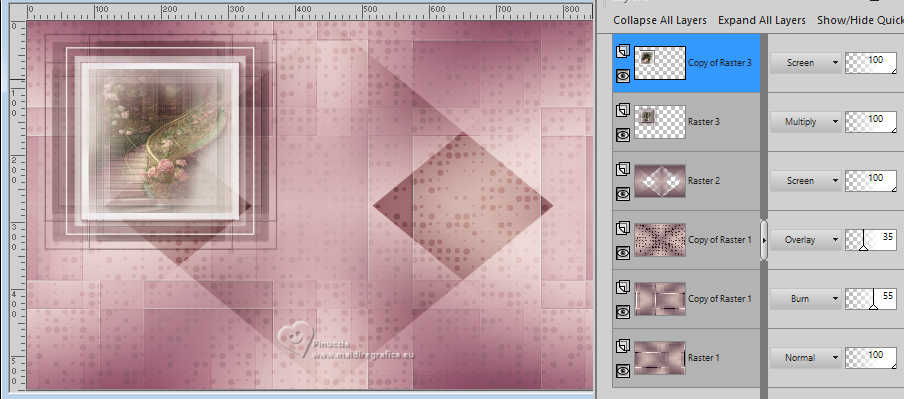 16. Layers>New Raster Layer. Selectons>Load/Save Selections>Load Selectoin from Disk. Look for and load the selection 305_Xiki4 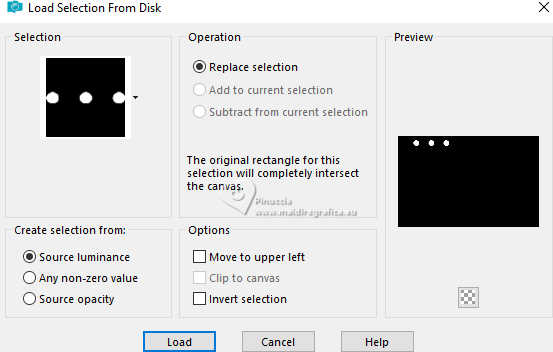 Set again the opacity of your Flood Fill to 100, Flood Fill the selection with your foreground color.17. Effects>3D Effects>Inner Bevel, background color 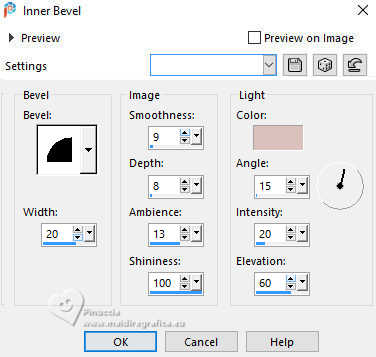 Selections>Select None. Effects>3D Effects>Drop Shadow, foreground color #664a56 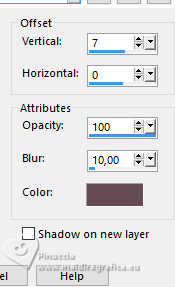 18. Layers>New Raster Layer. Selectons>Load/Save Selections>Load Selectoin from Disk. Look for and load the selection 305_Xiki2 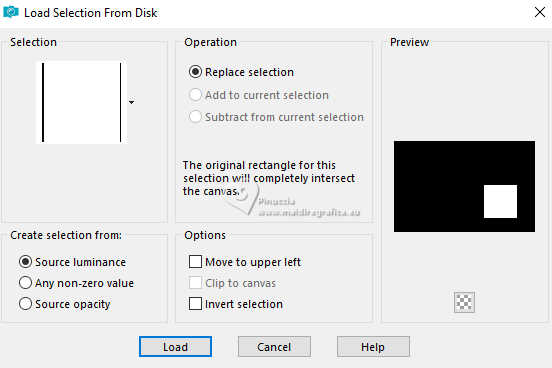 Set again your foreground color to color 3. Flood Fill>Opacity 100% Flood Fill the selection with color 3.Selections>Modify>Contract - 2 pixels. Press CANC on the keyboard. 19. Selections>Modify>Contract - 10 pixels. Se again your foreground color to the first color #664a56. Flood Fill the selection with your foreground color.Selections>Modify>Contract - 2 pixels. Press CANC on the keyboard. 20. Selections>Modify>Contract - 10 pixels. Again set your foreground color to color 3. Flood Fill>Opacity 60% Flood Fill the selection with color 3.Edit>Paste Into Selection - your landscape misted is still in memory. Adjust>Sharpness>Sharpen. 21. Effects>Plugins>AAA Frames - Foto Frame. 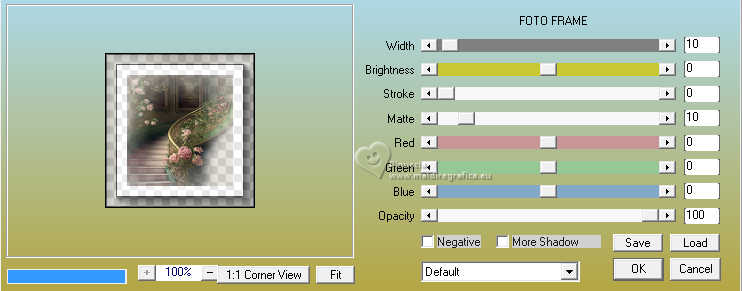 Selections>Select None. 22. Layers>Duplicate. Activate the layer below, Raster 5. Effects>Plugins>Toadies - What Are You 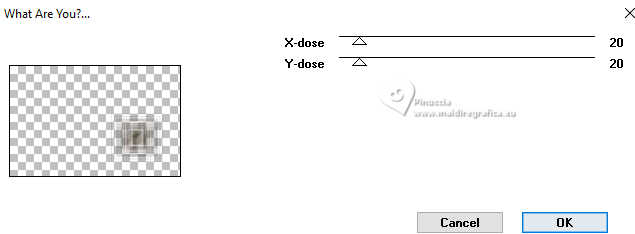 Effects>Edge Effects>Enhance. 23. Effects>3D Effects>Drop Shadow, foreground color Effects>Image Effects>Seamless Tiling. 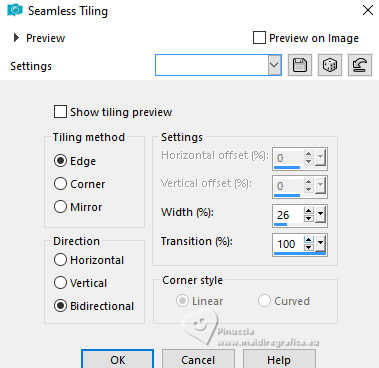 Layers>Properties>General>Blend Mode: Screen. 24. Activate the top layer Copy of Raster 5. Layers>Properties>General>Blend Mode: Hard Light. 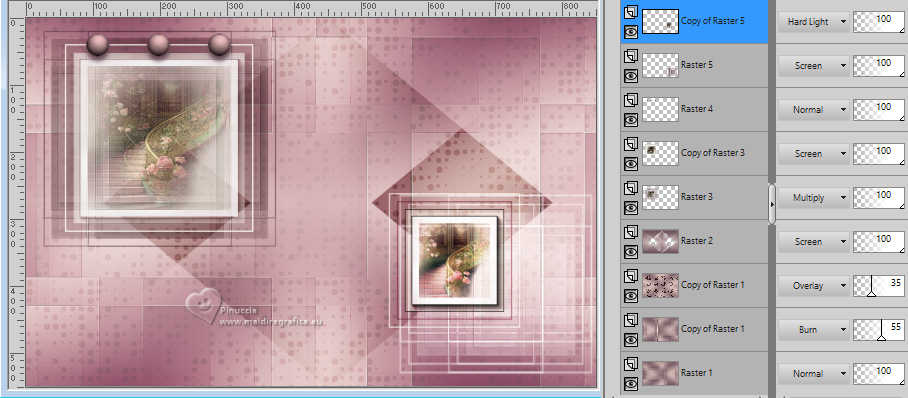 25. Layers>New Raster Layer. Selectons>Load/Save Selections>Load Selectoin from Disk. Look for and load the selection 305_Xiki5 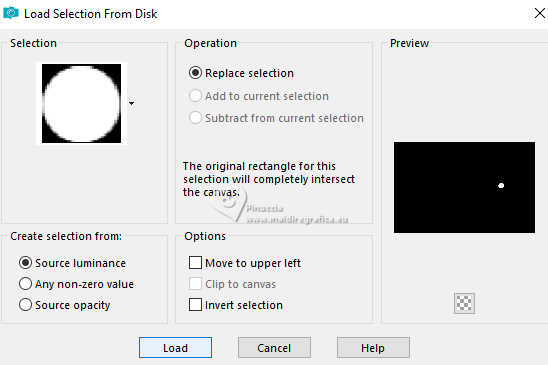 Flood Fill>Opacity 100% Foreground color #664a56. Flood Fill the selection with your foreground color.26. Effects>3D Effects>Inner Bevel, background color. Selections>Select None. Effects>3D Effects>Drop Shadow, foreground color. 27. Activate the layer Raster 2. Open Decor305_Xiki1  Edit>Copy. Go back to your work and go to Edit>Paste as New Layer. It is at its place. 28. Activate your top layer, Raster 6. Open the tube 1387MulherByPqnaAlice  Erase the watermark and go to Edit>Copy. Go back to your work and go to Edit>Paste as new layer. Place  correctly the tube, see my example. correctly the tube, see my example.Apply Effects at your choice. 29. Open TituloCartland_Xiki  Erase the watermark and go to Edit>Copy. Go back to your work and go to Edit>Paste as new layer. Pick Tool  Position X: 14,00 - Position Y: 395,00.  30. Edit>Copy Special>Copy Merged. Layers>New Raster Layer. Selectons>Load/Save Selections>Load Selectoin from Disk. Look for and load the selection 305_Xiki3 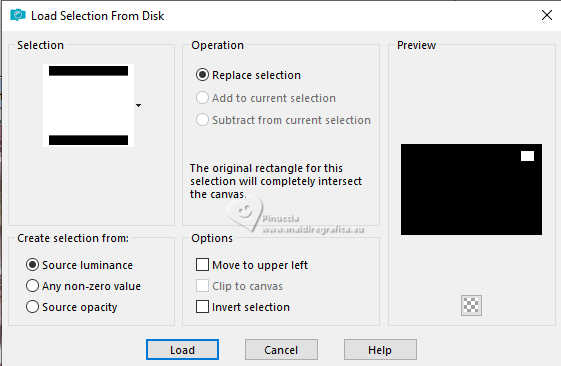 Edit>Paste Into Selection. Adjust>Sharpness>Sharpen More. 31. Effects>Plugins>AAA Frames - Foto Frame. 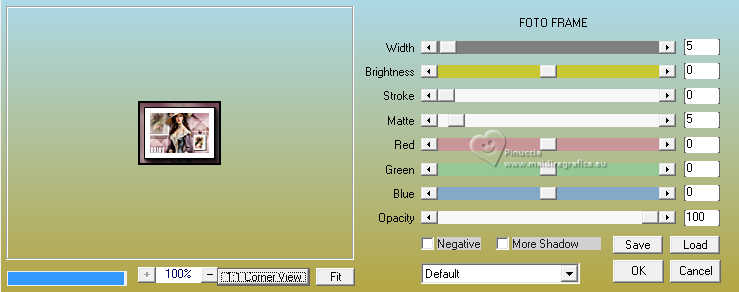 Selections>Select None. 32. Pick Tool Position X: 644,00 - Position Y: 417,00.  Layers>Duplicate. Position X: 686,00 - Position Y: 334,00.  33. Activate the layer Raster 6. Layers>Duplicate. Layers>Arrange>Bring to Top. Image>Resize, to 50%, resize all layers not checked. Adjust>Sharpness>Sharpen. Pick Tool Position X: 684,00 - Position Y: 325,00.  Layers>Duplicate. Position X: 684,00 - Position Y: 409,00.  34. Image>Add Borders, 2 pixels, symmetric, foreground color. Edit>Copy Image>Add Borders, 15 pixels, symmetric, color 3: #d6d2c6. Selections>Select All. 35. Image>Add Borders, 15 pixels, symmetric, whatever color. Selections>Invert. Edit>Paste Into Selection Effects>Plugins>Filters Unlimited 2.0 - &<Bkg Designer sf10III> - Spyrozag - Amplitude  Selections>Select None. 36. Image>Add Borders, 5 pixels, symmetric, color 3: #d6d2c6. Image>Add Borders, 2 pixels, symmetric, foreground color. Selections>Select All Image>Add Borders, 35 pixels, symmetric, color 3: #d6d2c6. Effects>3D Effects>Drop Shadow, foreground color 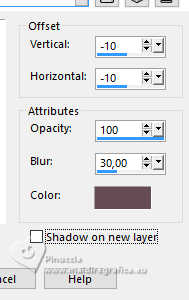 Selections>Select None. Image>Add Borders, 5 pixels, symmetric, background color. Image>Add Borders, 5 pixels, symmetric, foreground color. 37. If you want, resize your work. Sign your work on a new layer and save as jpg. Version with my tube from Pinterest image; for the misted thanks PqnaAlice 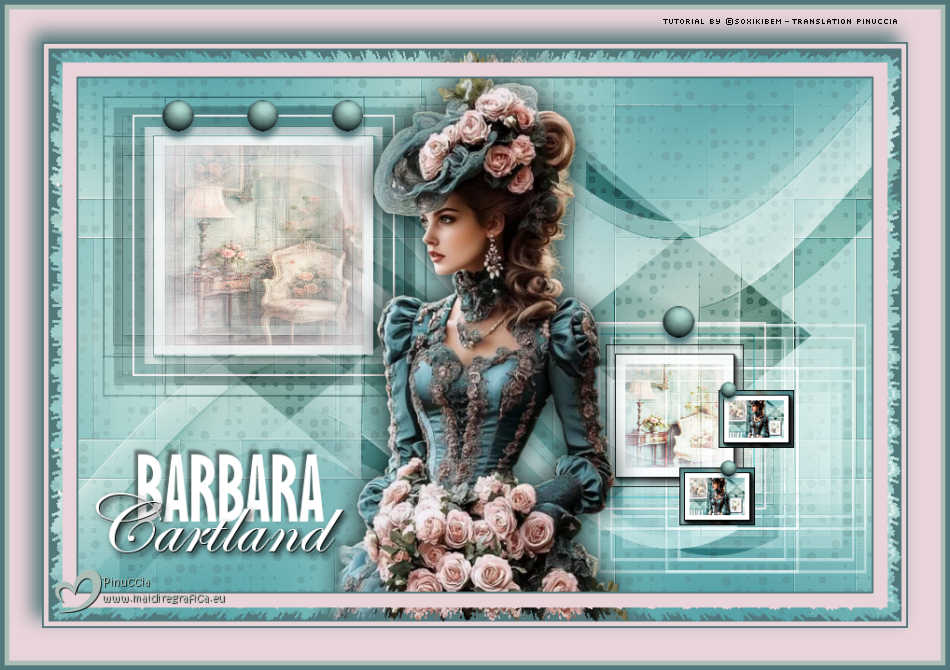  Your versions. Thanks  Irene  Kika  Melodi  If you have problems or doubts, or you find a not worked link, or only for tell me that you enjoyed this tutorial, write to me. 30 March 2026 |


