|
BOHO SOUL  
 Boho, or Boho-Chic, is a fashion and lifestyle style that combines bohemian, ethnic, and hippie elements. It is characterized by clothing and accessories that are usually relaxed, colorful, with ethnic prints, fringes, embroidery, and accessories like bracelets, necklaces, and scarves that reflect a free-spirited and effortless aesthetic. This style often evokes a sense of freedom, creativity, and connection with nature.
This tutorial was written with Psp2022 and translated with PspX2020, but it can also be made using other versions of PSP.
For this tutorial, you will need:  Thanks for the misted PqnaAlice. The rest of the material is by Soxikibem. (The links of the tubemakers here).  consult, if necessary, my filter section here Filters Unlimited 2.0 here &<Bkg Designer sf10III> - Splash (to import in Unlimited) here Mehdi - Sorting Tiles here Mura's Meister - Perspective Tiling here RCS Filter Pack 1.0 - RCSSequins here Scribe - 4way mirror here Filters RCS Filter Pack and Scribe can be used alone or imported into Filters Unlimited. (How do, you see here) If a plugin supplied appears with this icon  it must necessarily be imported into Unlimited it must necessarily be imported into UnlimitedVIDEO LESSON If you prefer to watch the video on YouTube, click the link below here  You can change Blend Modes according to your colors.  Copy the preset Bords de verre in the Presets Folder. 1. Choose 2 colors to work. Foreground color #4e4f53, Background color #785e79 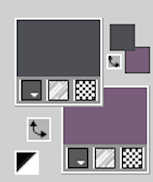 2. Open a new transparent image 800 x 550 pixels. Selections>Select All. Open the image Grafico 1 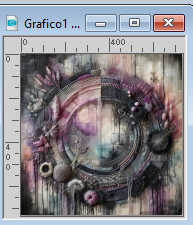 Edit>Copy. Go back to your work and go to Edit>Paste Into Selection. Selections>Select None. 3. Effects>Image Effects>Seamless Tiling. 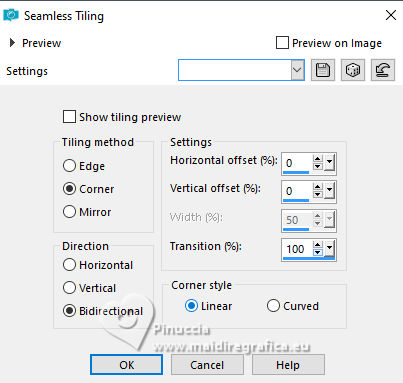 4. Effects>Plugins>Filters Unlimited 2.0 - &<Bkg Designer sf10III> - Splash. 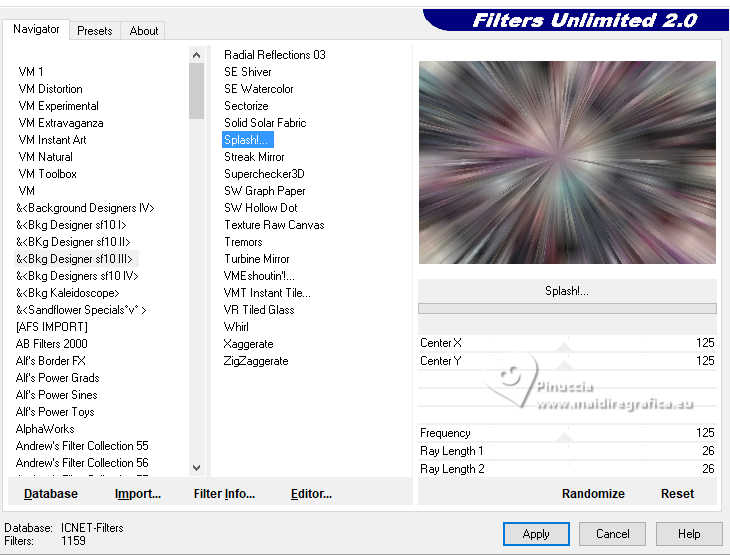 5. Effects>Plugins>Mehdi - Sorting Tiles. 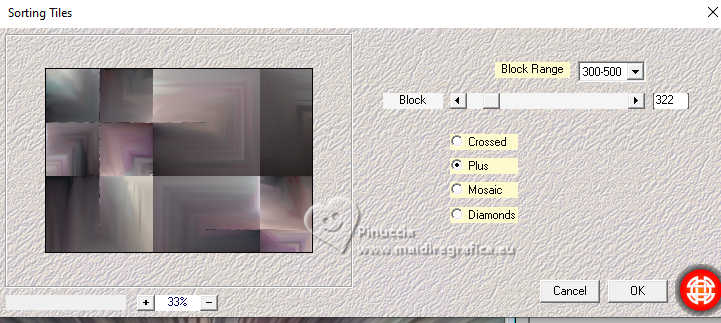 6. Effects>Plugins>Filters Unlimited 2.0 - Scribe - 4way mirror. 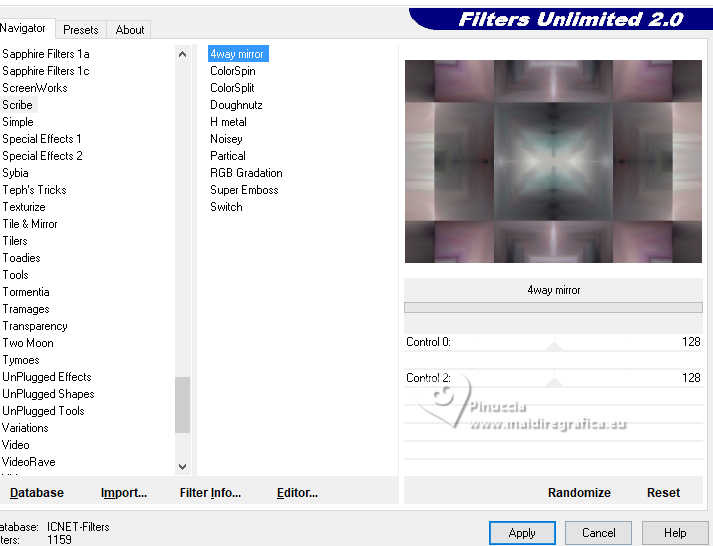 7. Effects>Plugins>Filters Unlimited 2.0 - RCS Filter Pack 1.0 - RCSSequins  Effects>User Defined Filter - Bords de verre 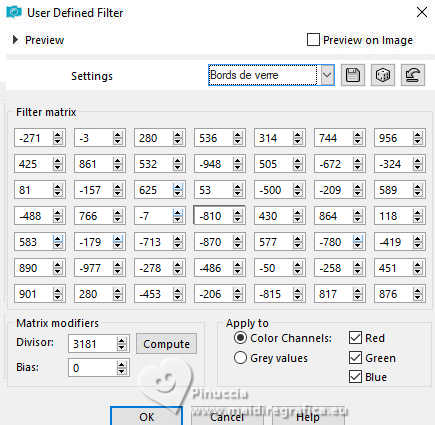 8. Adjust>Sharpness>Sharpen More. Layers>Duplicate. Effects>Plugins>Mura's Meister - Perspective Tiling. 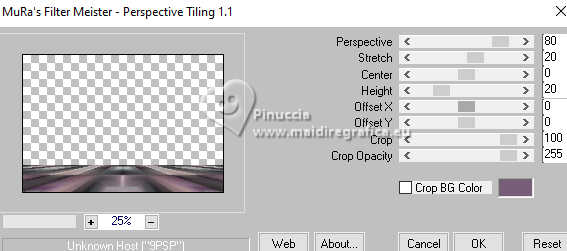 9. Activate your Magic Wand Tool  , tolerance 0, feather 50, , tolerance 0, feather 50,and click in the transparent part to select it. Press 4 times CANC on the keyboard  Selections>Select None. don't forget to set again the feather to 0 Layers>Duplicate. Image>Mirror>Mirror Vertical. Layers>Merge>Merge Down. Layers>Properties>General>Blend Mode: Overlay.  10. Open the misted 097DiversosByPqnaAlice 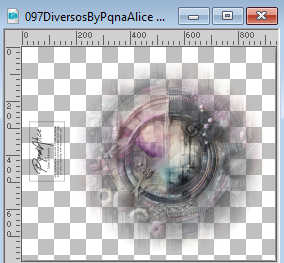 Erase the watermark and go to Edit>Copy. Go back to your work and go to Edit>Paste as New Layer. Image>Resize, if necessary - for the supplied tube to 50%, resize all layers not checked. Adjust>Sharpness>Sharpen. 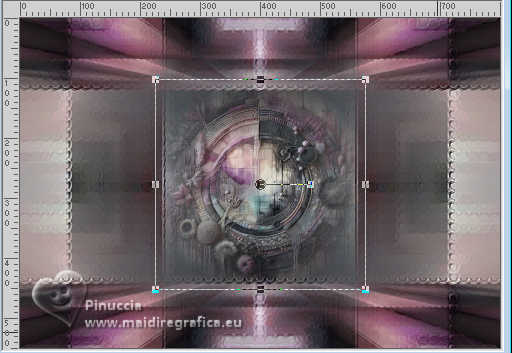 11. Layers>Duplicate. Effects>Image Effects>Seamless Tiling. 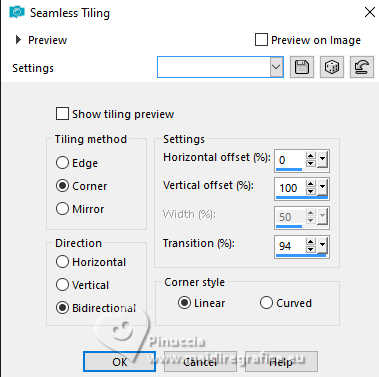 Layers>Properties>General>Blend Mode: Burn - Opacity: 60%. note de Soxikibem: in my second version I used Blend Mode: Overlay 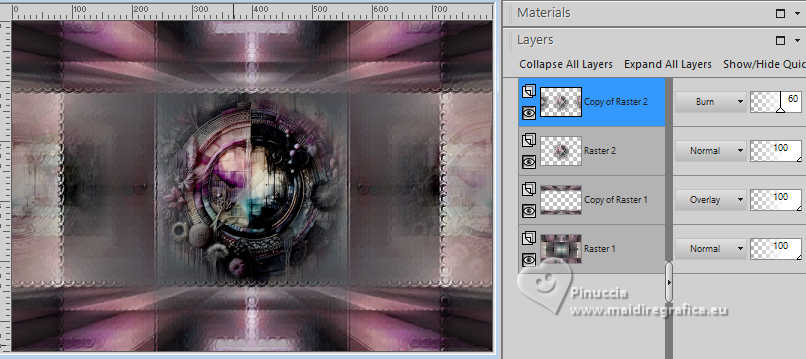 12. Open DecorBS_Xiki 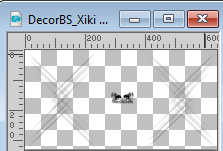 Erase the watermark and go to Edit>Copy. Go back to your work and go to Edit>Paste as New Layer. Pick Tool  Position X: 80,00 - Position Y: 114,00.  Layers>Properties>General>Blend Mode: Luminance. in her second version, Soxikibem used Blend Mode: Screen  13. Image>Add Borders, 2 pixels, symmetric, foreground color. Image>Add Borders, 1 pixel, symmetric, background color. Image>Add Borders, 2 pixels, symmetric, foreground color. Image>Add Borders, 10 pixels, symmetric, color white #ffffff. Image>Add Borders, 2 pixels, symmetric, foreground color. Image>Add Borders, 1 pixel, symmetric, background color. Image>Add Borders, 2 pixels, symmetric, foreground color. Image>Add Borders, 50 pixels, symmetric, color white #ffffff. 14. Open TituloBS_Xiki 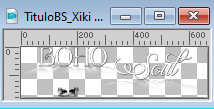 Erase the watermark and go to Edit>Copy. Go back to your work and go to Edit>Paste as New Layer. Pick Tool Position X: 135,00 - Position Y: 450.00.  15. Open DecorBS_Xiki2 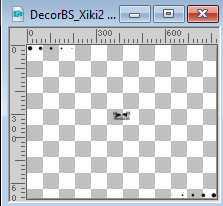 Edit>Copy. Go back to your work and go to Edit>Paste as New Layer. Pick Tool Position X: 57,00 - Position Y: 11,00. 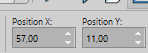 16. Image>Add Borders, 2 pixels, symmetric, foreground color. Image>Add Borders, 1 pixel, symmetric, background color. Image>Add Borders, 2 pixels, symmetric, foreground color. 17. Sign your work and save as jpg. 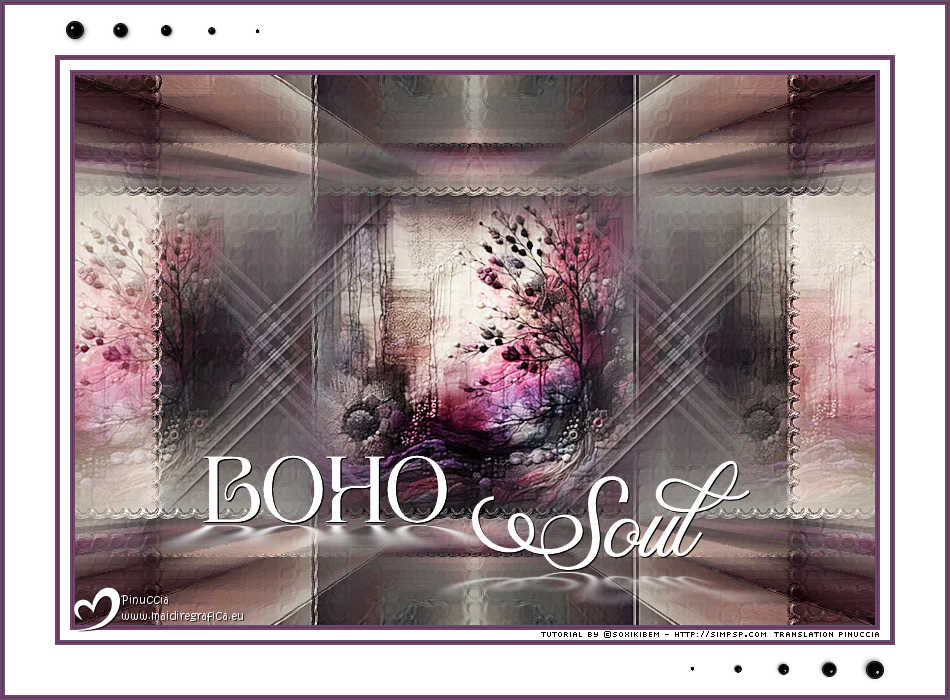  Your versions. Thanks  Marion 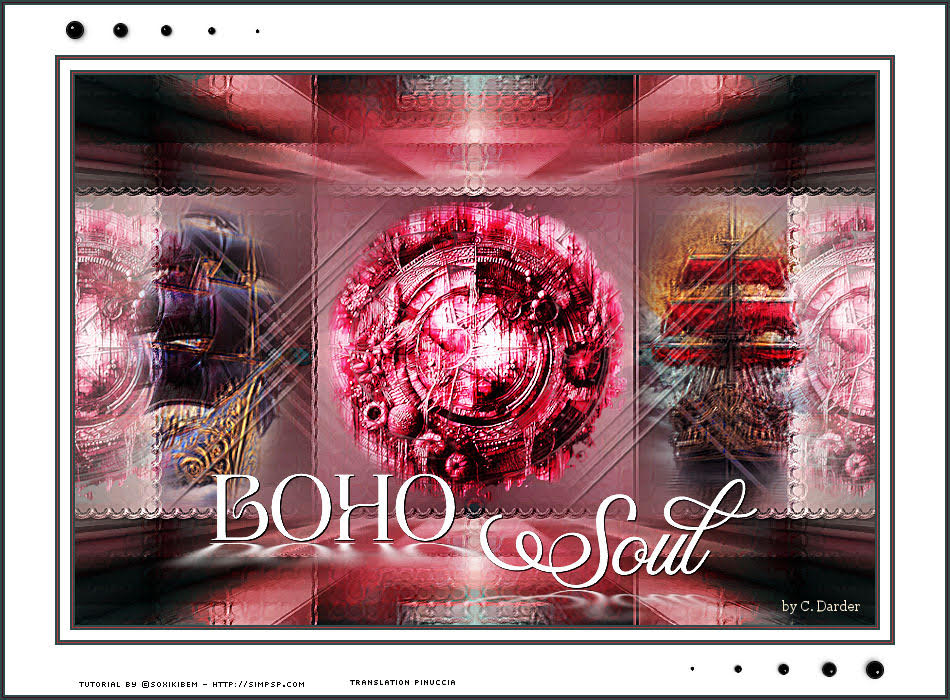 Carmen Darder  If you have problems or doubts, or you find a not worked link, or only for tell me that you enjoyed this tutorial, write to me. 18 August 2025 |


