|
CITRICA  
 Do you know those days when creativity calls for something different, full of color and with a fun touch? Then this is the perfect tutorial! In "Citric", the star is the orange — but not just any orange: it becomes art, a hat, and an attitude! Let's play with geometric shapes, textures, and a super modern look, the kind that makes you want to have an ice-cold juice while you create. I hope you have fun! 
This tutorial was written with Psp2022 and translated with PspX2020,
For this tutorial, you will need:  A tube at your choice The rest of the material is by Soxikibem. (The links of the tubemakers here).  consult, if necessary, my filter section here Filters Unlimited 2.0 here &<Bkg Designer sf10IV> - @BlueBerry Pie (to import in Unlimited) here AP 01 [Innovations] - Lines SilverLining here Flaming Pear - Flexify 2 here Penta.com - Jeans here Simple - Diamonds here °v° Kiwi's Oelfilter - Zig-Zag here Filters Penta.com, Simple and Kiwi Oelfilter can be used alone or imported into Filters Unlimited. (How do, you see here) If a plugin supplied appears with this icon  it must necessarily be imported into Unlimited it must necessarily be imported into Unlimited You can change Blend Modes according to your colors. In the newest versions of PSP, you don't find the foreground/background gradient (Corel_06_029). You can use the gradients of the older versions. The Gradient of CorelX here  Copy the selections in the Selections Folder. 1. Choose 3 colors to work. 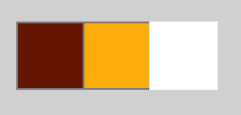 Foreground: #651701 Background: #fcae0f  color 3: #ffffff Set your foreground color to a Foreground/Backgroung Gradient, style Linear 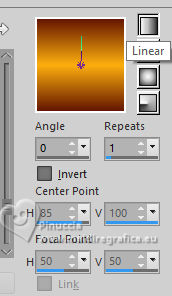 2. Open a new transparent image 800 x 500 pixels. Flood Fill  the transparent image with your Gradient. the transparent image with your Gradient.3. Effects>Plugins>Simple - Diamonds This effect works without window; result 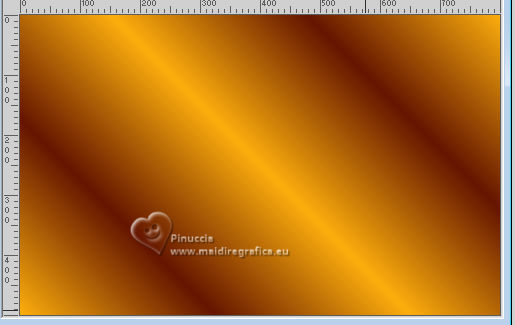 Layers>Duplicate. Image>Mirror>Mirror Horizontal. Layers>Properties>General>Blend Mode: Soft Light. 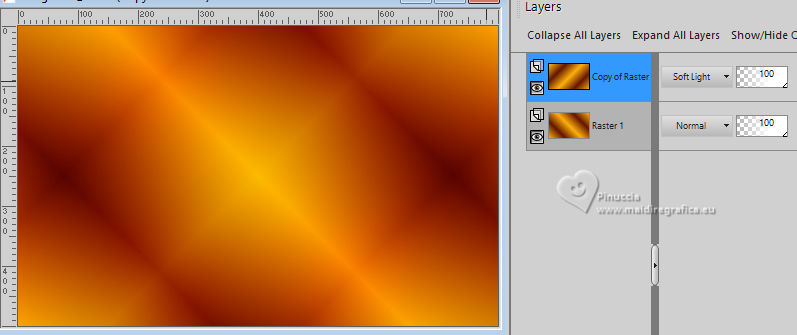 Layers>Merge>Merge Down. 4. Layers>Duplicate. Close the layer Copy of Raster 1. Activate the layer below of the original, Raster 1. 5. Effects>Plugins>°v° Kiwi's Oelfilter - Zig-Zag. 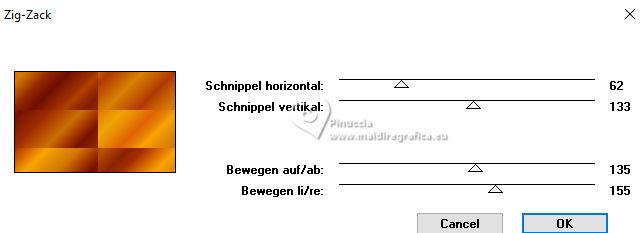 6. Effects>Reflection Effects>Rotating>Mirror, default settings. 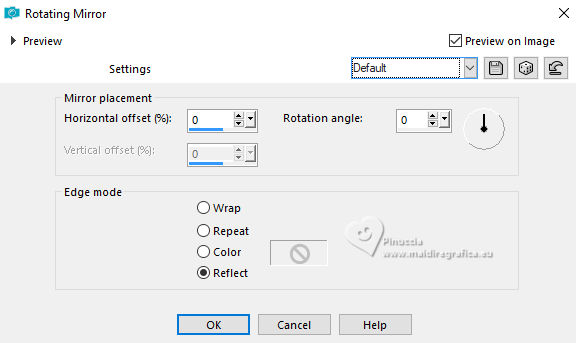 7. Effects>Plugins>Filters Unlimited 2.0 - &<Bkg Designers sf10IV> - @BlueBerry Pie. 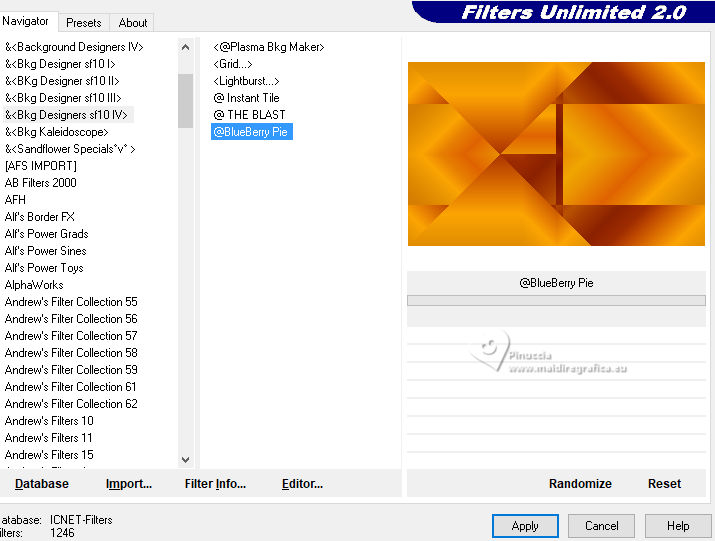 Effects>Image Effects>Seamless Tiling, default settings  8. Selections>Load/Save Selections>Load Selection From Disk. Look for and load the selection 309_Xiki1 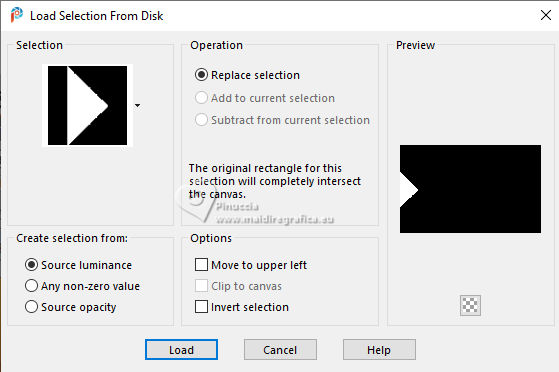 Selections>Promote Selection to Layer. Effects>Plugin>AP 01 [Innovations] - Lines SilverLining 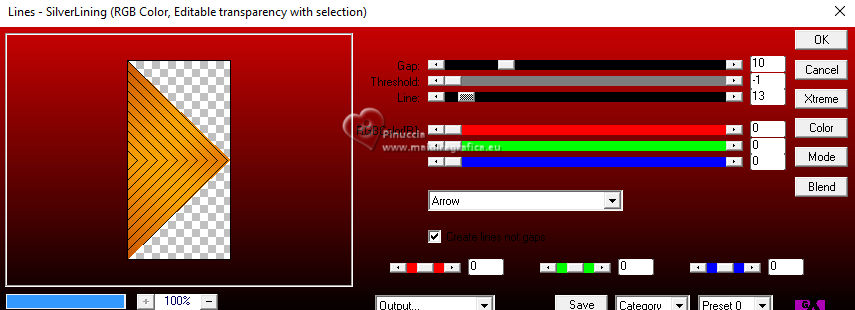 9. Layers>Duplicate. Effects>Reflection Effects>Rotating Mirror, default settings Selections>Select None. 10. Layers>Duplicate. Close the layer Copy (2) of Promoted Selection. Activate the layer below Copy of Promoted Selection. 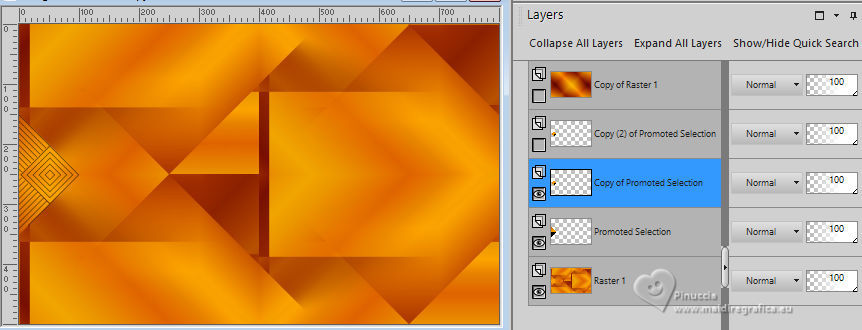 Layers>Merge>Merge Down. Effects>3D Effects>Drop Shadow, foreground color 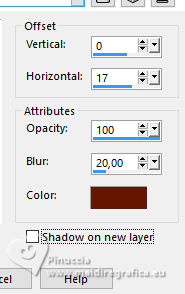 11. Activate the layer Raster 1. Selections>Load/Save Selections>Load Selection From Disk. Look for and load the selection 309_Xiki2 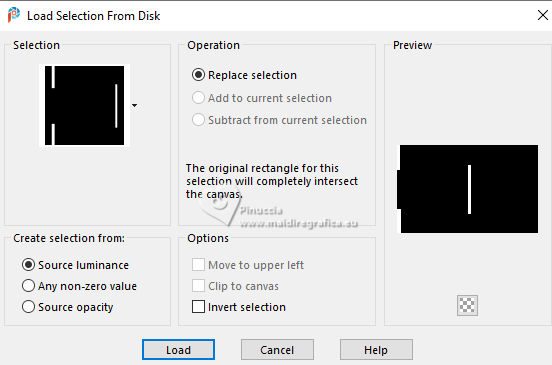 Selections>Promote Selection to Layer. Effects>Texture Effects>Blinds, background color. 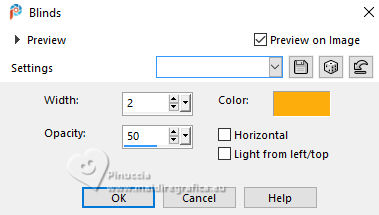 Adjust>Sharpness>Sharpen. Selections>Select None. 12. Effects>Distortion Effects>Wave. 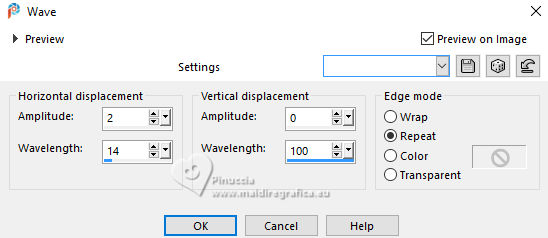 Effects>3D Effects>Drop Shadow, foreground color. 13. Activate again the layer Raster 1. 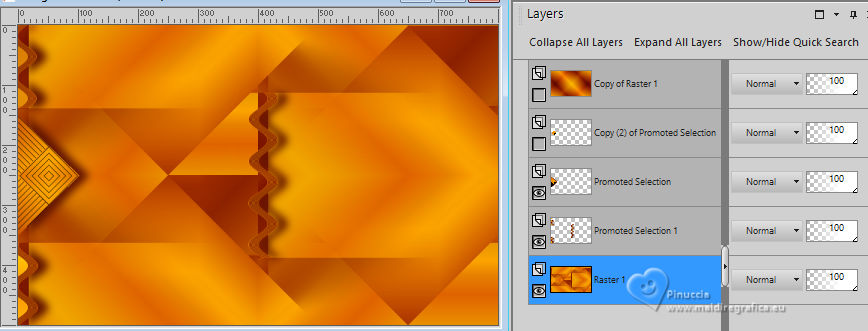 Selections>Load/Save Selections>Load Selection From Disk. Look for and load the selection 309_Xiki3 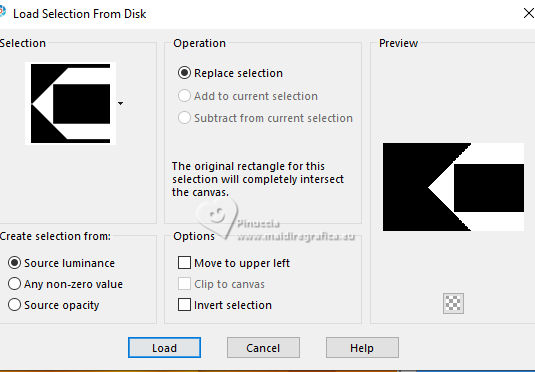 Selections>Promote Selection to Layer Effects>Plugins>Penta.com - Jeans 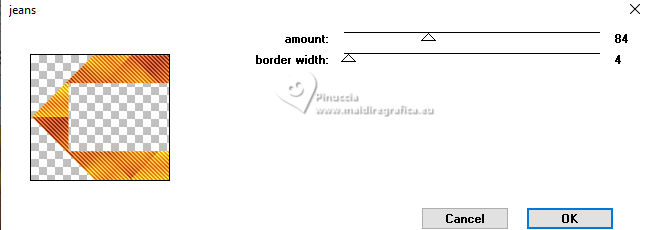 14. Effects>3D Effects>Drop Shadow, foreground color. Effects>3D Effects>Drop Shadow, foreground color. 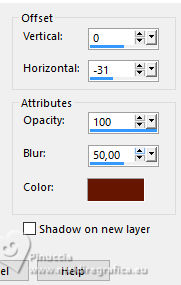 Selections>Select None. 15. One more time, activate the layer Raster 1. Effects>Texture Effects>Mosaic-Antique. 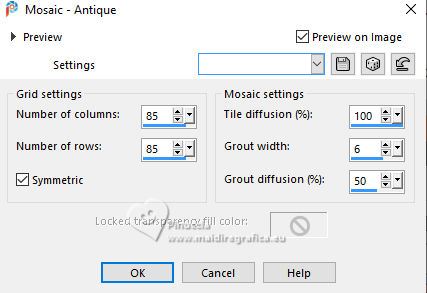 16. Open and activate the layer Copy of Raster 1. 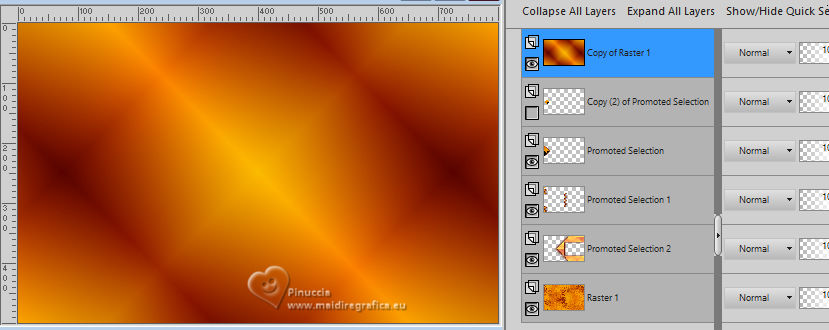 Effects>Geometric Effects>Perspective Horizontal.  Repeat Effects>Geometric Effects>Perspective Horizontal -100 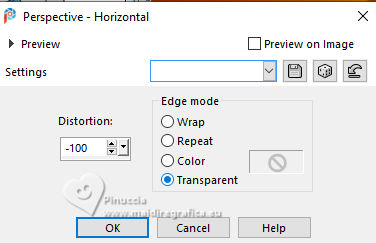 You have this 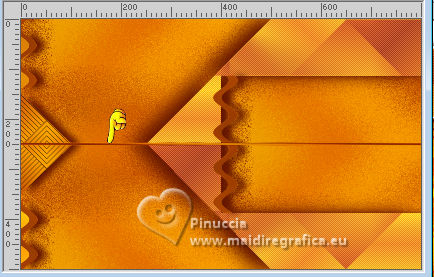 17. Effects>Distortion Effects>Wave. 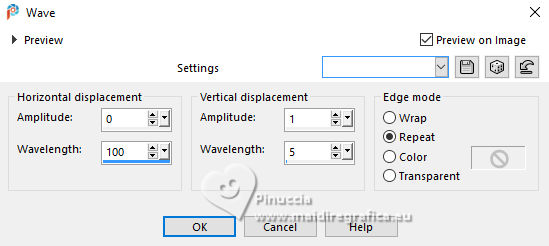 18. Effects>Plugins>Flaming Pear - Flexify 2 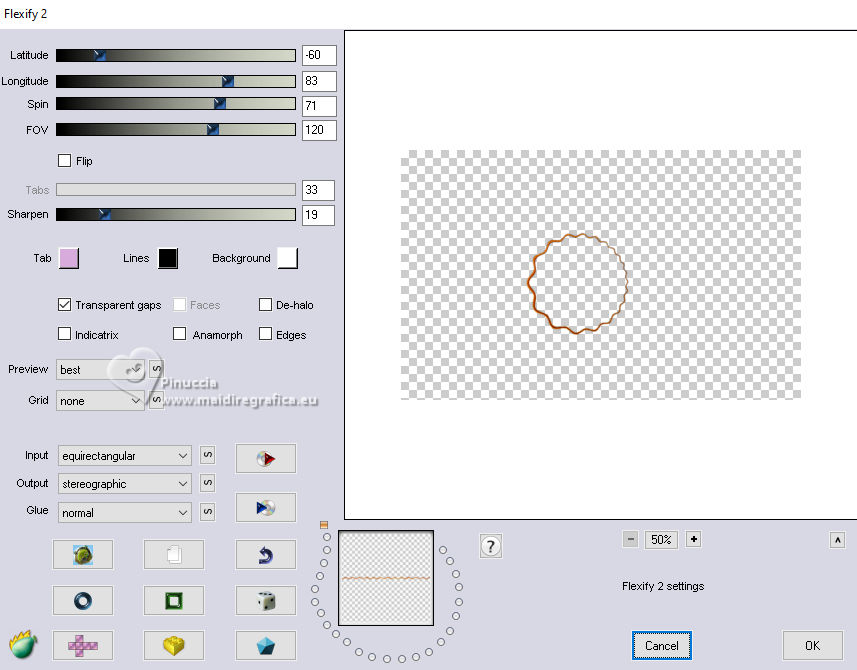 19. Effects>Reflection Effects>Feedback. 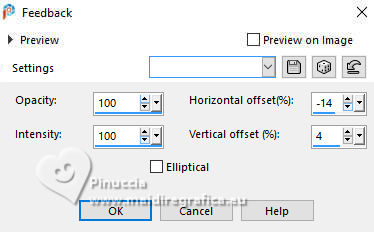 Layers>Duplicate. Layers>Merge>Merge Down. Effects>3D Effects>Drop Shadow, background color 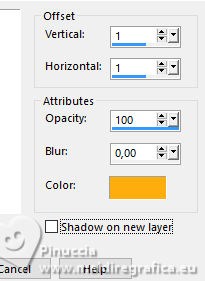 20. Open and activate the layer Copy (2) of Promoted Selection. 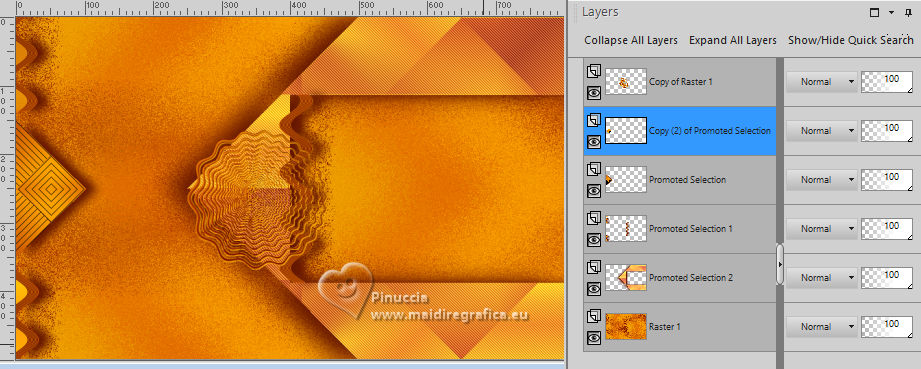 Layers>Arrange>Move up Pick Tool  Position X: 297,00 - Position Y: 215,00. 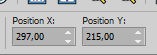 Effects>3D Effects>Drop Shadow, foreground color. 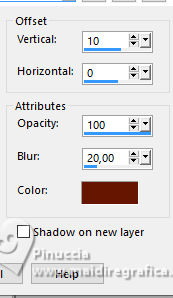 Effects>3D Effects>Drop Shadow, foreground color  Layers>Merge>Merge Down. Pick Tool Position X: 85,00 - Position Y: 4,00. 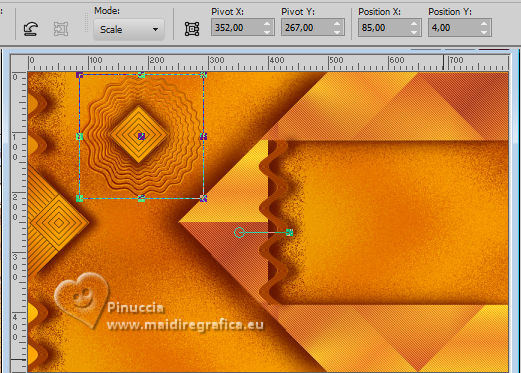 21. Layers>Duplicate. Image>Resize, to 60%, resize all layers not checked. Layers>Duplicate. Layers>Merge>Merge Down. Adjust>Sharpness>Sharpen. Pick Tool Position X: 136,00 - Position Y: 237,00. 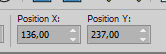 22. Layers>Duplicate. Image>Resize, to 60%, resize all layers not checked. Layers>Duplicate. Layers>Merge>Merge Down. Adjust>Sharpness>Sharpen. Pick Tool Position X: 68,00 - Position Y: 336,00. 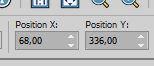 Layers>Merge>Merge Down - 2 times. 23. Activate the layer Raster 1. 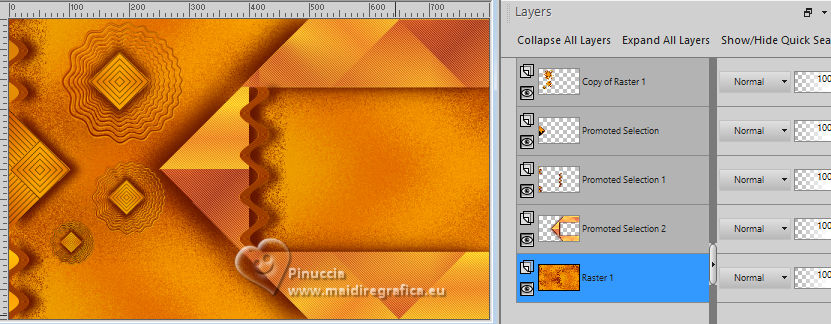 Open the fruit misted 123DiversoByPqnaAlice 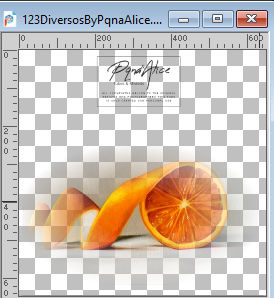 Erase the watermark et Edit>Copy. Go back to your work and go to Edit>Paste as new Layer. Image>Resize, if necessary - for the supplied tube to 60%. Adjust>Sharpness>Sharpen. Move  the tube to the right, the tube to the right,in the rectangular effect, as below *Optional: Blend Mode Overlay. 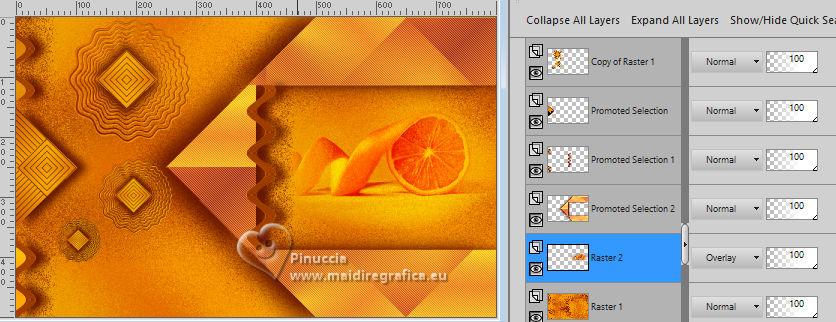 24. Open Decor309_1Xiki 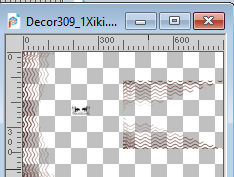 Erase the watermark and go to Edit>Copy. Go back to your work and go to Edit>Paste as new Layer. Layers>Properties>General>Blend Mode: Burn. 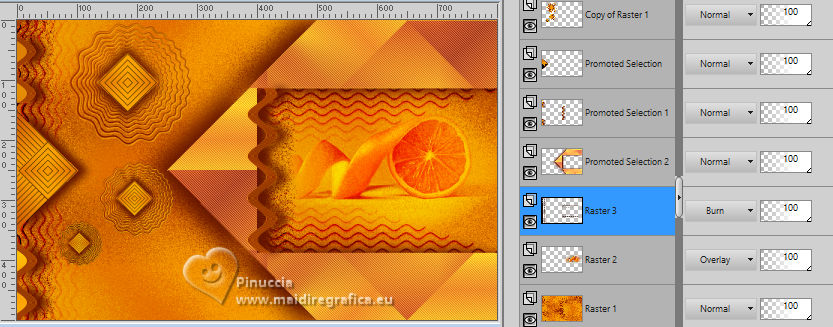 25. Activate your top layer, Copy of Raster 1. Open Decor309_2Xiki 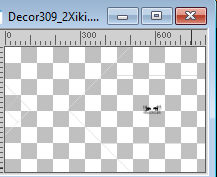 Erase the watermark and go to Edit>Copy. Go back to your work and go to Edit>Paste as new Layer. 26. Image>Add Borders - 5 pixels, symmetric, color 3 #ffffff. Image>Add Borders, 1 pixel, symmetric, foreground color. Selections>Select All. Image>Add Borders, 40 pixels, symmetric, color 3 #ffffff. 27. Effects>3D Effects>Drop Shadow, foreground color. 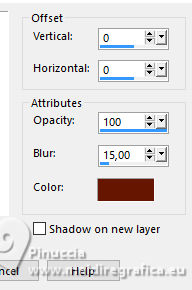 Selections>Select None. 28. Open your main tube 1501MulherByPqnaAlice 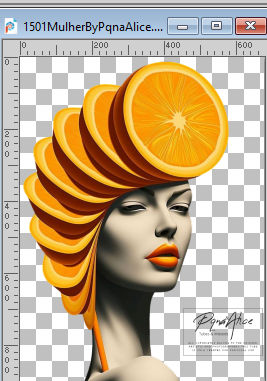 Erase the watermark and go to to Edit>Copy. Go back to your work and go to Edit>Paste as new layer. Image>Resize, if necessary - for the supplied tube to 40%, resize all layers not checked. Adjust>Sharpness>Sharpen. Position the tube to your liking, or see my example.Effects>3D Effects>Drop Shadow, at your choice. 29. Open TituloCitrica_Xiki  Erase the watermark and go to Edit>Copy. Go back to your work and go to Edit>Paste as new Layer. Position the tube to your liking, or see my example.30. Open Creditos-bySoxikibem Edit>Copy. Go back to your work and go to Edit>Paste as new layer. Position to your liking.Please also respect the translator's work and don't forget his or her watermark. 31. Image>Add Borders, 1 pixel, symmetric, foreground color. 32. Sign your work and save as jpg. Version with my tube from Pinterest image 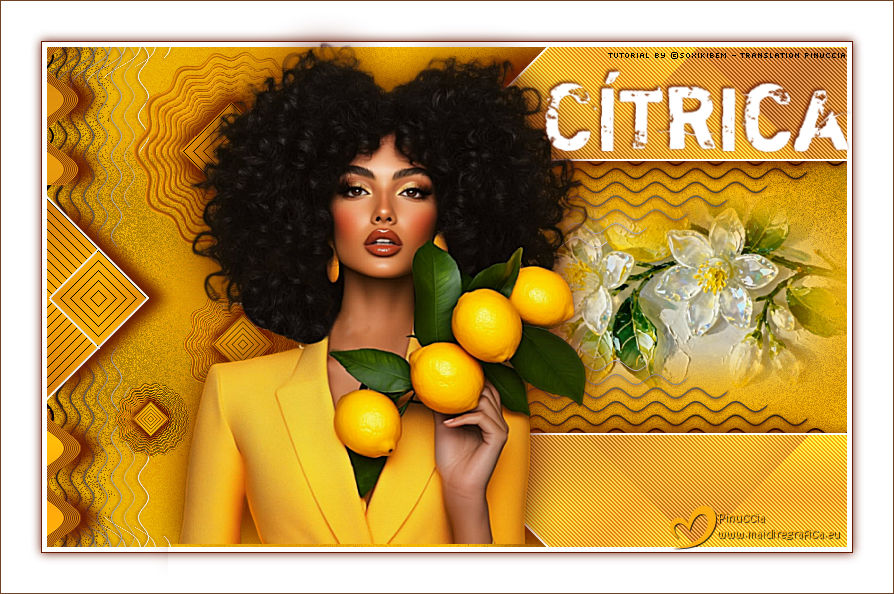   Your versions. Thanks  Irene 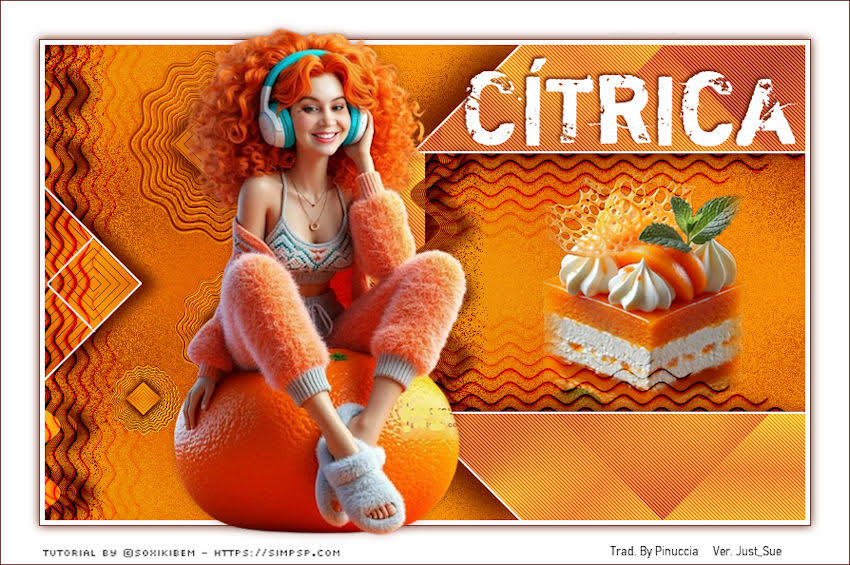 Just Sue  Jolcsi  If you have problems or doubts, or you find a not worked link, or only for tell me that you enjoyed this tutorial, write to me. 7 May 2026 |


