|
CRACKS  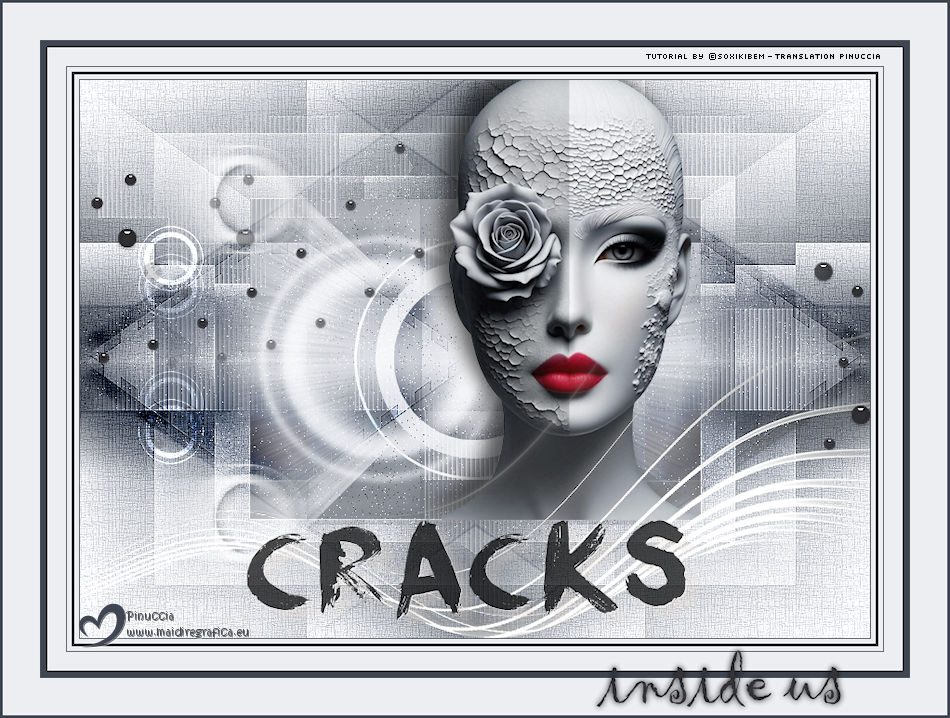
 There are things time doesn’t erase. Even after forgiveness, after silence, the cracks remain — small, almost invisible, but still there. They don’t scream, but whisper memories that still live somewhere inside us. It’s not about constant pain, but about the marks that shape who we are.
This tutorial was written with Psp2022 and translated with PspX2020, but it can also be made using other versions of PSP.
For this tutorial, you will need:  A tube at your choice The rest of the material is by Soxikibem. (The links of the tubemakers here).  consult, if necessary, my filter section here Filters Unlimited 2.0 here Alf's Border FX - Mirror Bevel here DSB Flux - Linear Transmission here Mehdi - Wavy Lab 1.1. here Mura's Meister - Pole Transform here Filters Alf's Border FX can be used alone or imported into Filters Unlimited. (How do, you see here) If a plugin supplied appears with this icon  it must necessarily be imported into Unlimited it must necessarily be imported into Unlimited You can change Blend Modes according to your colors.  Copy the selections in the Selections Folder. 1. Choose two colors to work. Foreground: #3f4651 Background: #edeef2  2. Open a new transparent image 850 x 600 pixels. Effects>Plugins>Mehdi - Wavy Lab 1.1. This filter creates gradients with the colors of your Materials palette. The first is your background color, the second is your foreground color. Keep the last two colors created by the filtre (#969aa1). 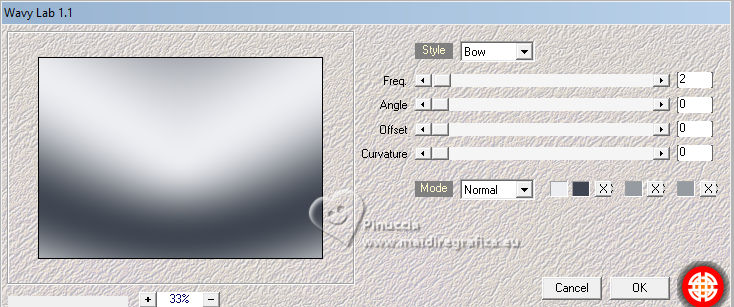 3. Effects>Plugins>Alf's Border FX - Mirror Bevel. 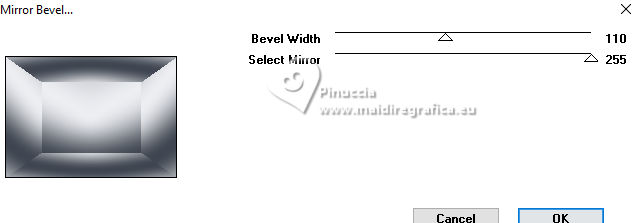 4. Effects>Image Effects>Seamless Tiling. 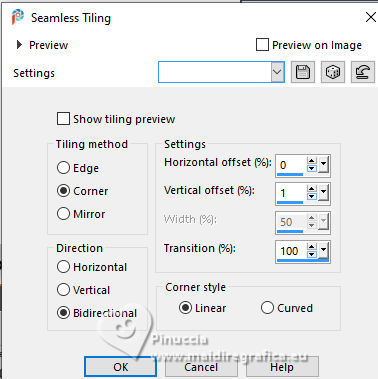 5. Selections>Load/Save Selections>Load Selection From Disk. Look for and load the selection 304_Xiki1 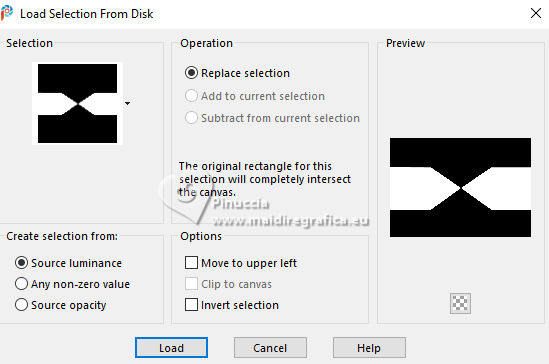 Selections>Promote Selection to Layer. Effects>Plugins>DSB Flux - Linear Transmission. 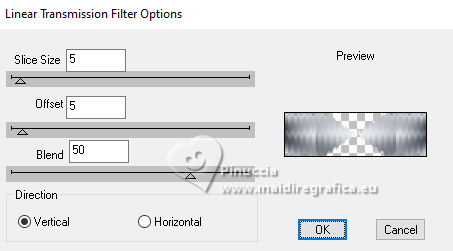 Keep selected. 6. Layers>New Raster Layer. Flood Fill  the selection with your foreground color. the selection with your foreground color.Selections>Modify>Contract - 2 pixels. Press CANC on the keyboard  7. Reduce the opacity of your Flood Fill Tool to 40%, Flood Fill the selection with your background color.Adjust>Add/Remove Noise>Add Noise. 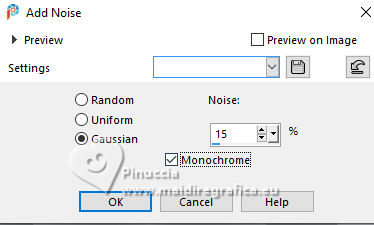 Selections>Select None. 8. Activate the layer below, Promoted Selection. Effects>Image Effects>Seamless Tiling. 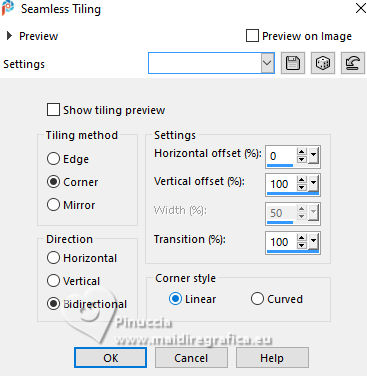 Effects>Edge Effects>Enhance. Effects>3D Effects>Drop Shadow, color black #000000. 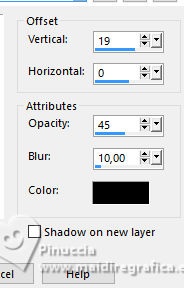 Repeat Effects>3D Effects>Drop Shadow, vertical -19, color black #000000.  Layers>Properties>General>Blend Mode: Burn. 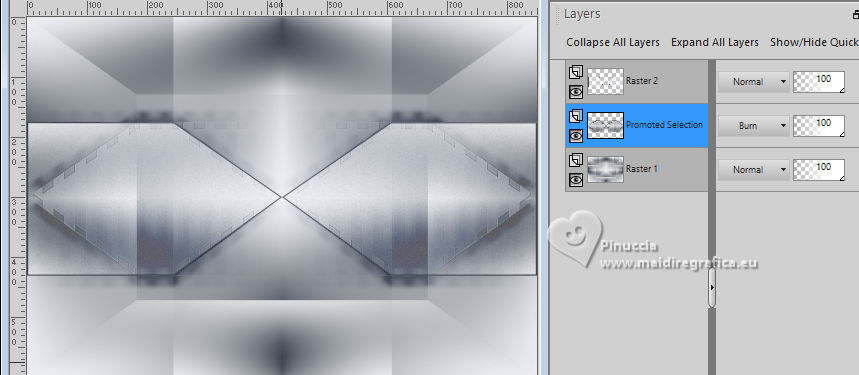 9. Activate again your top layer, Raster 2. Layers>Duplicate. Effects>Distortion Effects>Polar Coordinates  Effects>Plugins>Mura's Meister - Pole Transform. 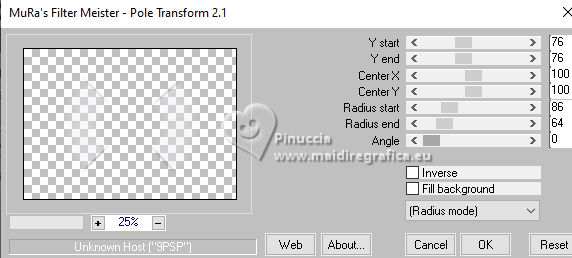 Layers>Properties>General>Blend Mode: Lighten. 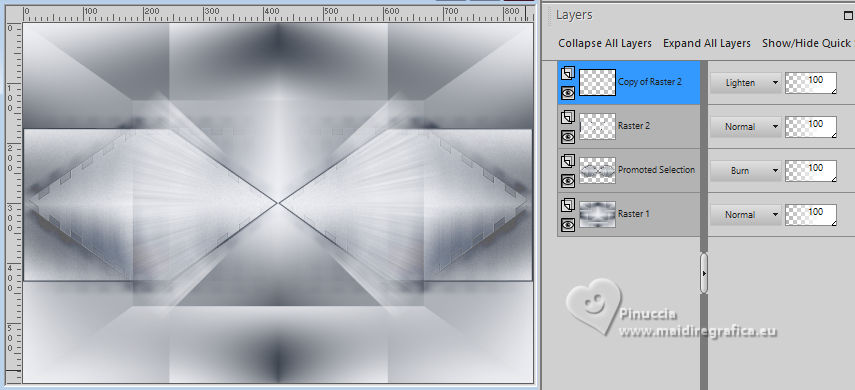 Adjust>Sharpness>Sharpen More. 10. Activate again the layer Raster 2. Effects>Reflection Effects>Kaleidoscope.  Layers>Properties>General>Blend Mode: Soft Light, Opacity 80%. 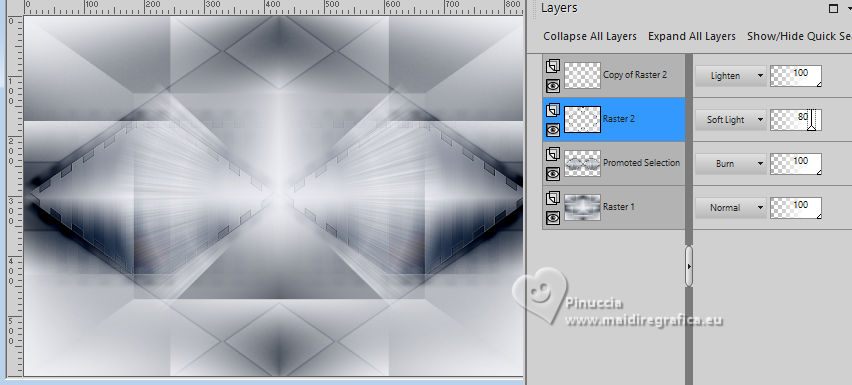 11. Activate your bottom layer, Raster 1. Selections>Load/Save Selections>Load Selection From Disk. Look for and load the selection 304_Xiki2 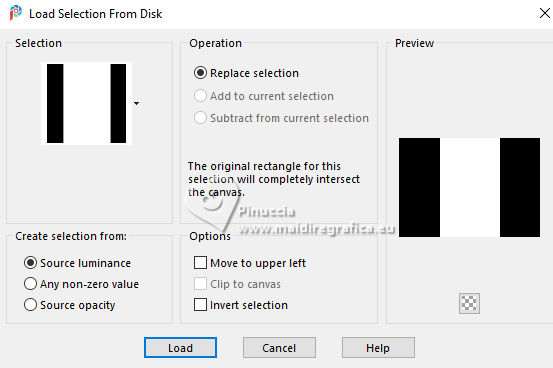 Selections>Promote Selections to Layer. Selections>Select None. Effects>Reflection Effects>Kaleisdoscope. 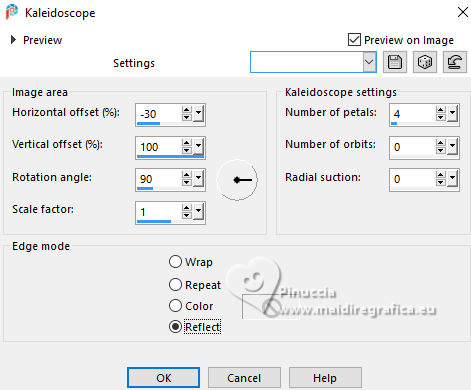 12. Effects>Texture Effects>Blinds - foreground color 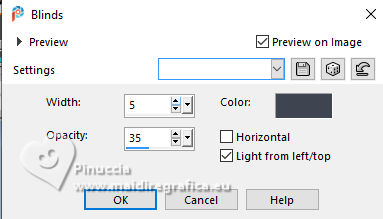 13. Effects>Image Effects>Seamless Tiling. 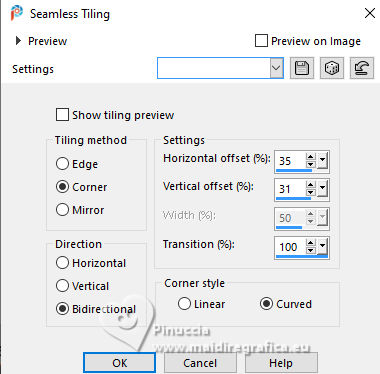 Adjust>Sharpness>Sharpen. Edit>Repeat Sharpen. Layers>Properties>General>Blend Mode: Lighten. 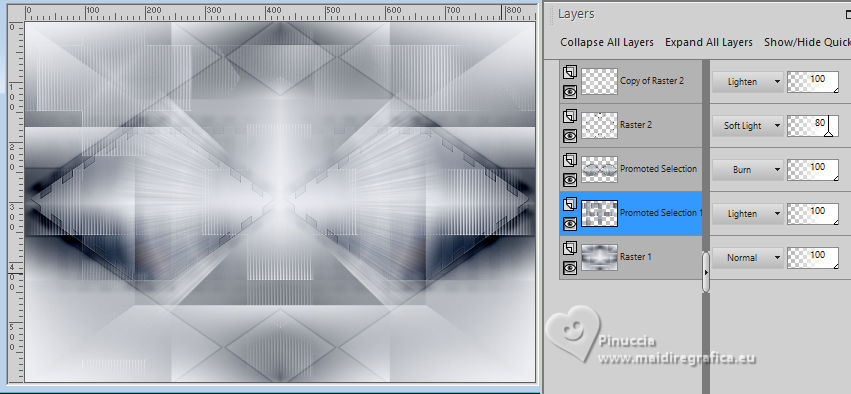 14. Activate again your bottom layer, Raster 1. Selections>Load/Save Selections>Load Selection From Disk. Look for and load the selection 304_Xiki3 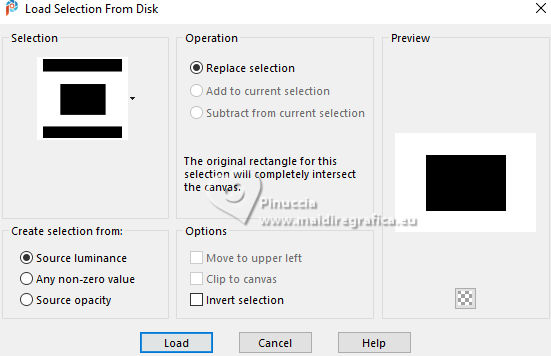 Effects>Plugins>Filters Unlimited 2.0 - Paper Textures - Papyrus 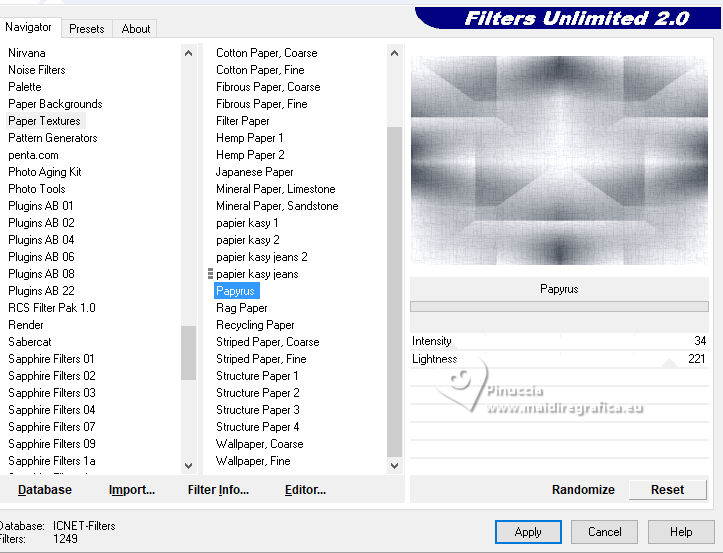 15. Effects>Reflection Effects>Feedback. 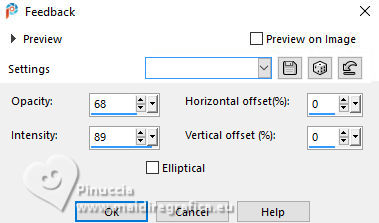 Effects>Edge Effects>Enhance. Selections>Select None. 16. Selections>Load/Save Selections>Load Selection From Disk. Look for and load the selection 304_Xiki4 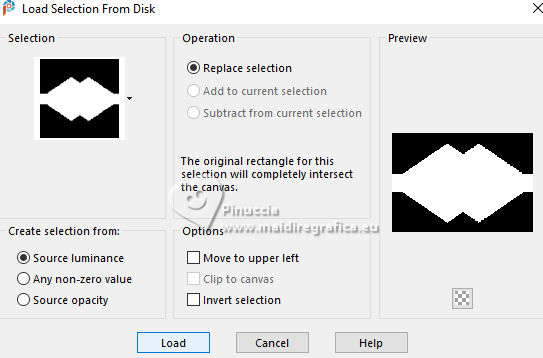 Effects>Texture Effects>Weave - weave color: foreground color. 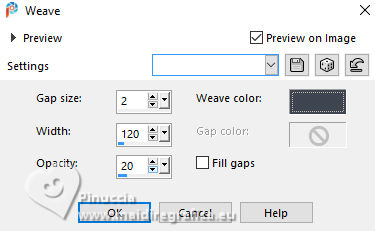 17. Adjust>Add/Remove Noise>Add Noise. 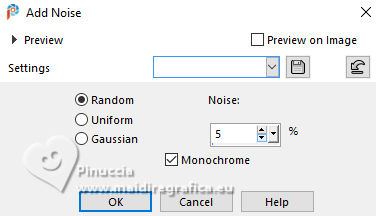 Selections>Select None. 18. Activate your top layer, Copy of Raster 2. Layers>New Raster Layer. Selections>Load/Save Selections>Load Selection From Disk. Look for and load the selection 304_Xiki5 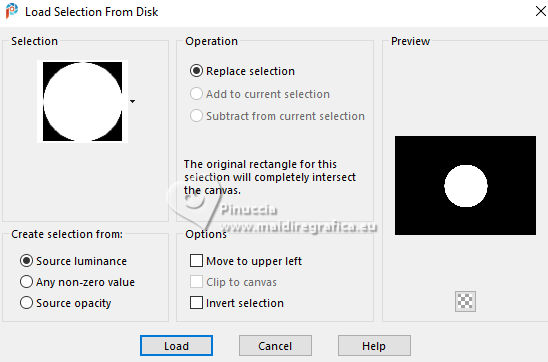 Set again the opacity of your Flood Fill Tool to 100. Flood Fill the selection with your background color.Selections>Modify>Contract - 3 pixels. Press CANC on the keyboard. 19. Selections>Modify>Contract - 20 pixels. Reduce the opacity of your Flood Fill tool to 60%. Flood Fill the selection with your background color.Selections>Modify>Contract - 20 pixels. Press CANC on the keyboard. don't forget to set again the opacity of your Flood Fill Tool to 100 20. Layers>New Raster Layer. Effects>3D Effects>Cutout.  Selcetions>Select None. Layers>Merge>Merge Down. 21. Layers>Duplicate. Image>Resize, to 45%, resize all layers not checked. Pick Tool  Position X: 127,00 - Position Y: 70,00.  Layers>Duplicate. Image>Mirror>Mirror Vertical (Image>Flip). 22. Layers>Duplicate. Image>Resize, to 60%, resize all layers not checked. Pick Tool Position X: 63,00 - Position Y: 343,00 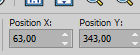 Layers>Duplicate. Image>Mirror>Mirror Vertical (Image>Flip) 23. Layers>Merge>Merge Down. Effects>Imagem Effects>Seamless Tiling. 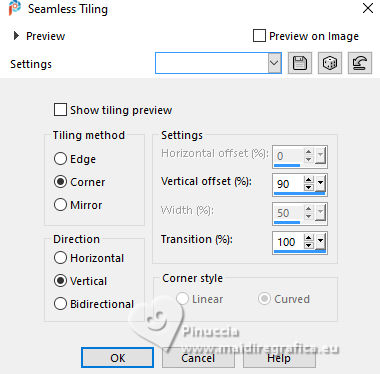 Layers>Properties>General>Blend Mode: Dodge. 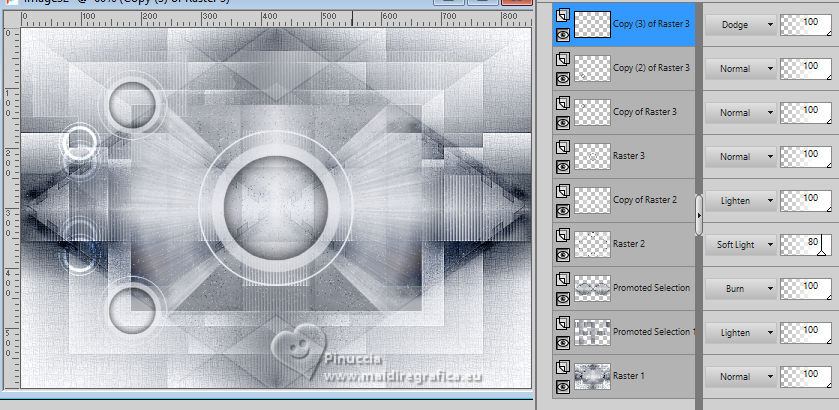 24. Activate the layer below, Copy (2) of Raster 3. Layers>Merge>Merge Down. Effects>Distortion Effects>Wind - from right, strength 90. 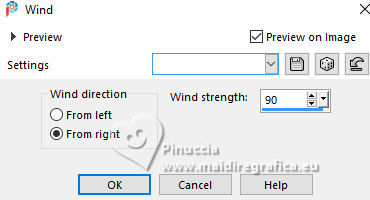 Layers>Properties>General>Blend Mode: Hard Light. 25. Activate the layer below, Raster 3. Effects>3D Effects>Dop Shadow, background color. 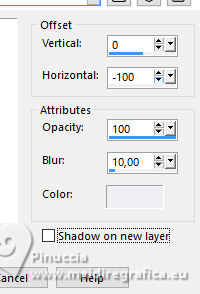 Layers>Properties>General>Blend Mode: Overlay. 26. Activate your top layer (Copy (3) of Raster 3) 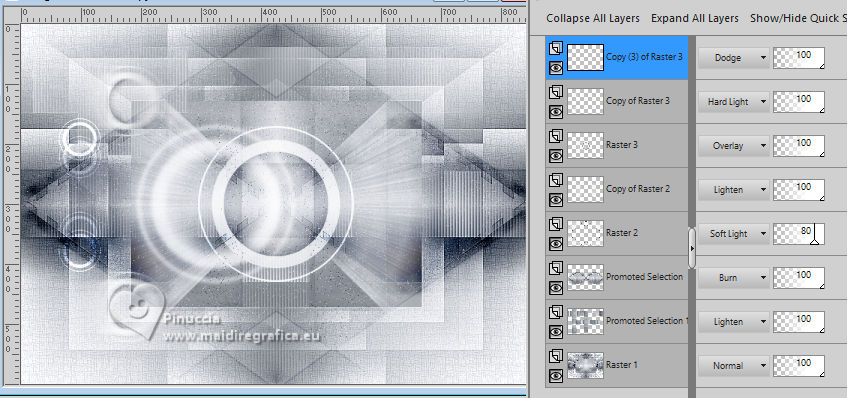 Open your main tube 1381MulherByPqnaAlice  Erase the watermark and go to Edit>Copy. Go back to your work and go to Edit>Paste as New Layer. Image>Resize, if necessary - for the supplied tube to 38%. Move  the tube as in my example. the tube as in my example. Effects>3D Effects>Drop Shadow, color black #000000, or to your liking. 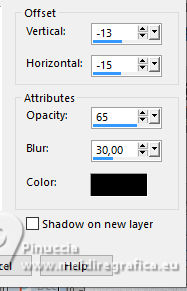 27. Open TituloCracks_Xiki 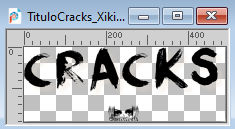 Erase the watermark and go to Edit>Copy. Go back to your work and go to Edit>Paste as New Layer. Pick Tool Position X: 179,00 - Position Y: 472,00. 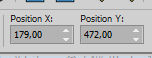 Layers>Properties>General>Opacity 70%. 28. Open DecorCracks_Xiki 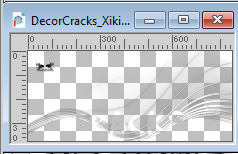 Erase the watermark and go to Edit>Copy. Go back to your work and go to Edit>Paste as new layer. Pick Tool Position X: 1,00 - Position Y: 225,00.  Layers>Properties>General>Blend Mode: Lighten. Layers>Arrange>Move Down. 29. Open DecorCracks_Xiki2  Erase the watermark and go to Edit>Copy. go back to your work and go to Edit>Paste as new layer. Pick Tool Position X: 0,00 - Position Y: 68,00.  Note of the Author: Analyze at this moment if you are happy with the layer blends; you can change them if you wish. At this moment I decided to change it in my second version in the Raster 2 layer from Soft Light to Dodge. 30. Image>Add Borders, 1 pixel, symmetric, foreground color. Image>Add Borders, 5 pixels, symmetric, background color. Image>Add Borders, 3 pixels, symmetric, foreground color. Image>Add Borders, 5 pixels, symmetric, background color. Image>Add Borders, 1 pixel, symmetric, foreground color. Image>Add Borders, 20 pixels, symmetric, background color. Image>Add Borders, 8 pixels, symmetric, foreground color. Image>Add Borders, 40 pixels, symmetric, background color. 31. Open TituloCracks_Xiki2  Erase the watermark and go to Edit>Copy. Go back to your work and go to Edit>Paste as new layer. Pick Tool Position X: 632,00 - Position Y: 640,00.  32. Image>Add Borders, 3 pixels, symmetric, foreground color. 33. Image>Resize, if you want. Sign your work and save as jpg. Version with my tube from Pinterest   Your versions. Thanks  Irene  Melodi  Baby 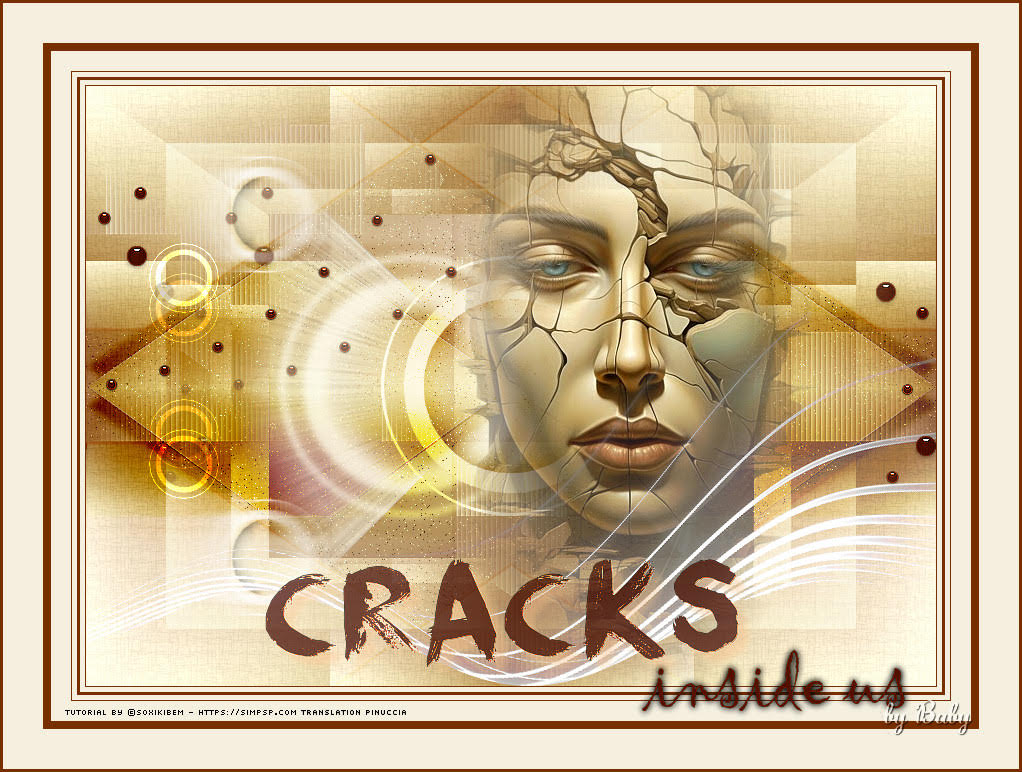 Baby  If you have problems or doubts, or you find a not worked link, or only for tell me that you enjoyed this tutorial, write to me. 12 March 2026 |


