|
CROSS IF YOU DARE  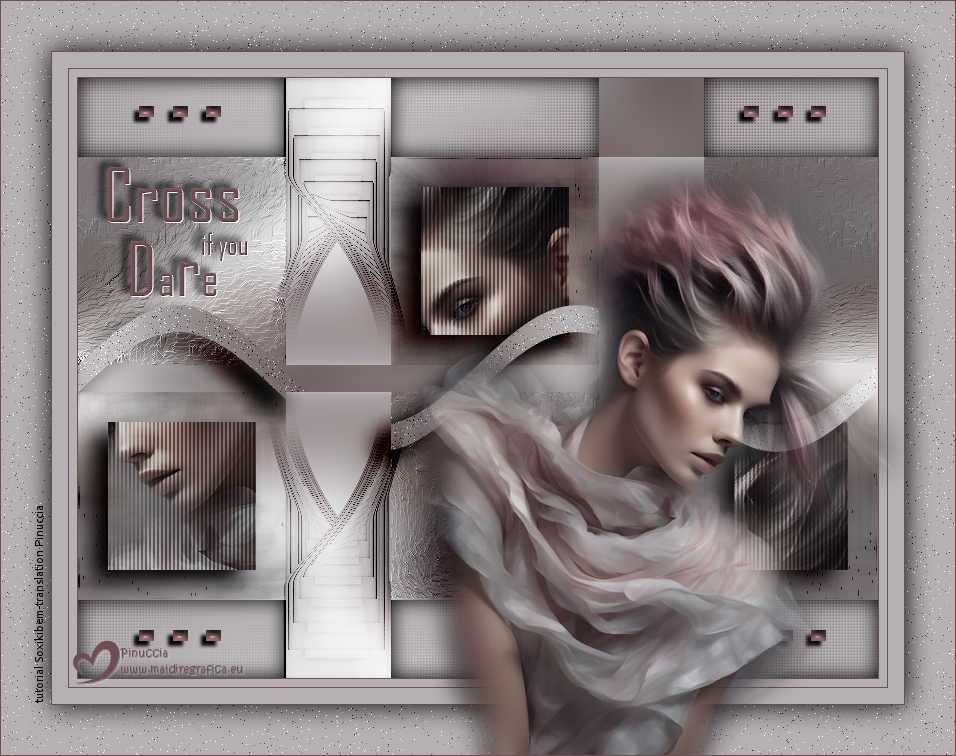
 Some paths are not easily taken. If you truly wish to cross, go ahead. But know that not everything is as simple as it seems.
This tutorial was written with Psp2022 and translated with PspX2020, but it can also be made using other versions of PSP.
For this tutorial, you will need:  Thanks for the tube PqnaAlice. (The links of the tubemakers here). Filters  None  You can change Blend Modes according to your colors.  Copy the Selections in the Selections Folder. 1. Choose 2 colors to work. For the example: Set your foreground color to #6d4f53, and your background color to #b5b0b2.  2. Open a new transparent image 800 x 600 pixels. Selections>Select All. Open your woman's misted 1257MulherbyPqnaAlice  Erase the watermark and go to Edit>Copy. Go back to your work and go to Edit>Paste Into Selection. Selections>Select None. 3. Effects>Image Effects>Seamless Tiling, default settings.  Layers>Merge>Merge All. Adjust>Blur>Gaussian Blur - radius 30. 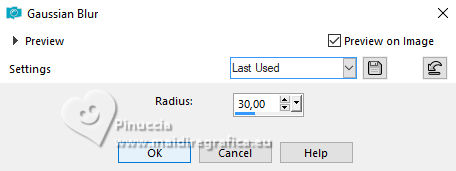 Effects>Texture Effects>Weave weave color: background color 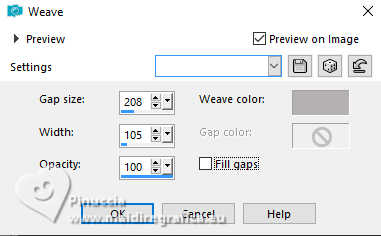 4. Effects>Reflection Effects>Rotating Mirror. 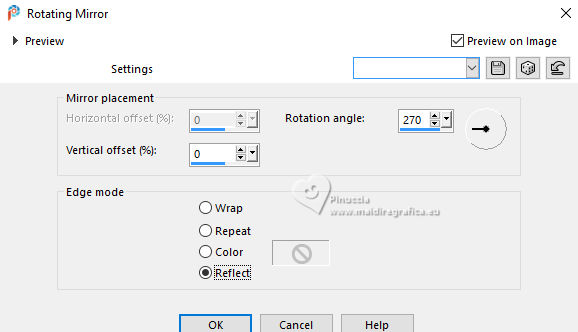 5. Selections>Load/Save Selections>Load Selection From Disk. Look for and load the selection 286_Xiki_1  Selections>Promote Selection to Layer. The woman's misted is still in memory: Edit>Paste Into Selection. Adjust>Blur>Radial Blur.  6. Effects>Edge Effects>Enhance. Edit>Repeat Enhance Edges. Selections>Modify>Select Selection Borders.  7. Layers>New Raster Layer. Effects>3D Effects>Cutout. 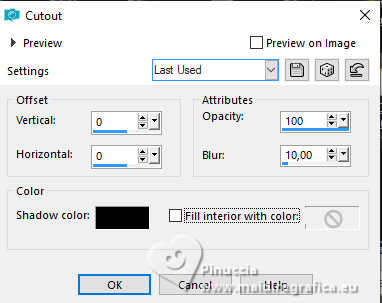 8. Selections>Select None. Layers>Merge>Merge Down. Effects>Reflection Effects>Feedback. 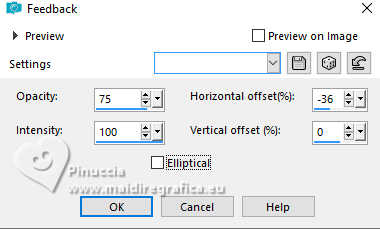 9. Effects>Distortion Effects>Warp. 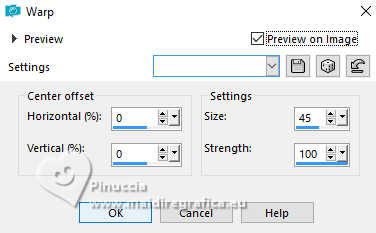 Layers>Duplicate. Image>Flip>Flip Horizontal. Pick Tool  Position X: 205,00 - Position Y: 0.00 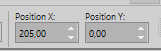 Layers>Merge>Merge Down. 10. Selections>Load/Save Selections>Load Selection From Disk. Look for and load the selection 286_Xiki_7. 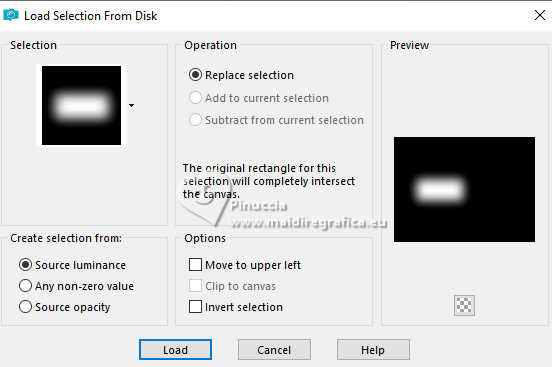 Edit>Cut or press CANC on the keyboard - 2 times. Selections>Select None. Layers>Properties>General> Blend Mode: Burn 11. Activate your background layer. Selections>Load/Save Selections>Load Selection From Disk. Look for and load the selection 286_Xiki_3. 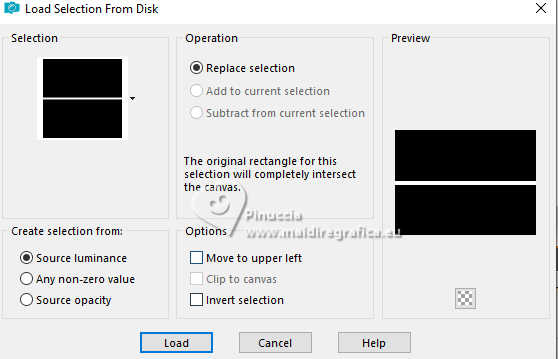 Selections>Promote Selection to Layer. Selections>Select None. Effects>Distortion Effects>Wave. 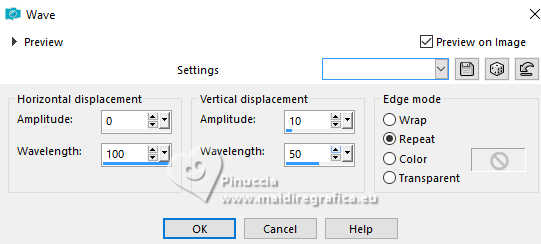 12. Selections>Load/Save Selections>Load Selection From Disk. Look for and load the selection 286_Xiki_2 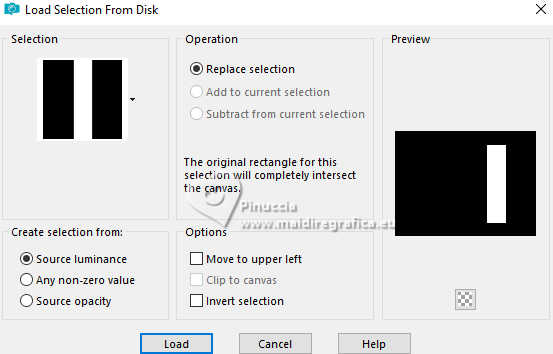 Edit>Cut or press CANC on the keyboard. Selections>Select None. Selections>Load/Save Selections>Load Selection From Disk. Look for and load again the selection 286_Xiki_1 . Edit>Cut or press CANC. Selections>Select None. 13. Adjust>Add/Remove Noise>Add Noise. 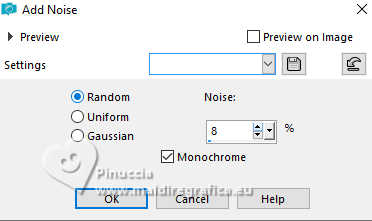 Effects>3D Effects>Drop Shadow, color black #000000 shadow on new layer checked. 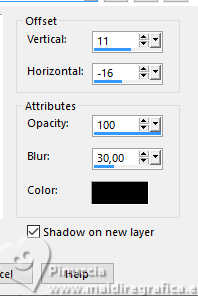 Stay on the shadow's layer: Promoted Selection 1 Shadow 1 Layers>Properties>General> Blend Mode: Overlay. 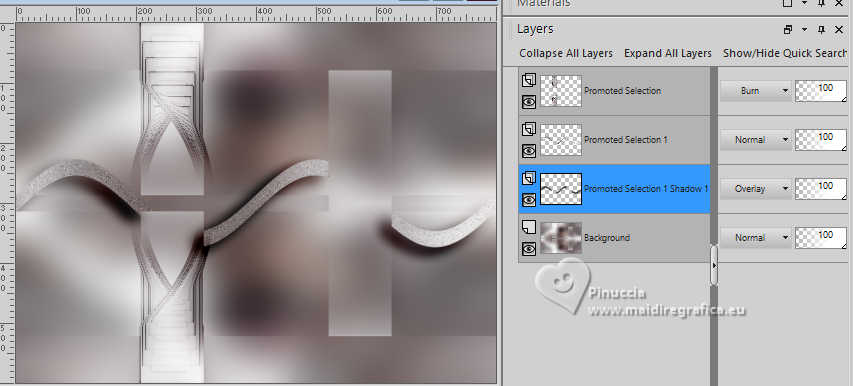 14. Activate your background layer. Selections>Load/Save Selections>Load Selection From Disk. Look for and load the selection 286_Xiki_4 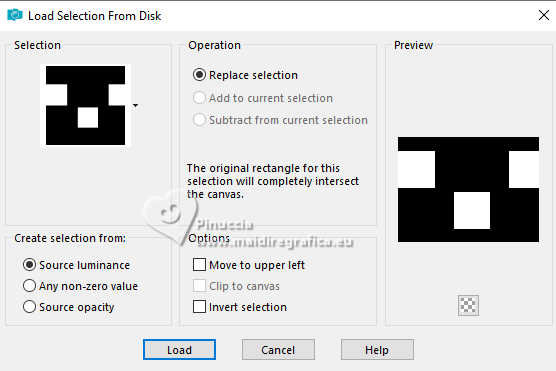 Effects>Art Media Effects>Brush Strokes 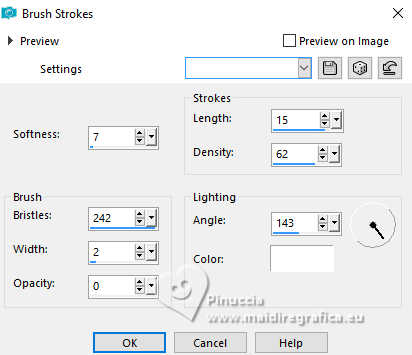 Selections>Select None. 15. Selections>Load/Save Selections>Load Selection From Disk. Look for and load the selection 286_Xiki_5 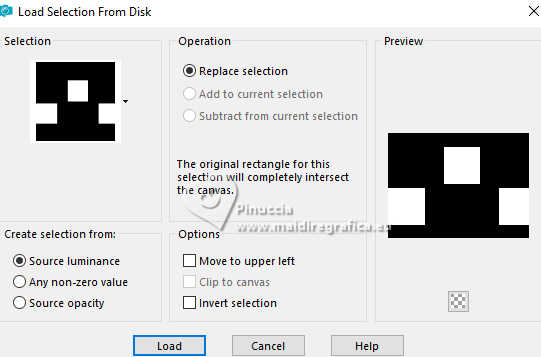 Effects>Texture Effects>Straw Wall. 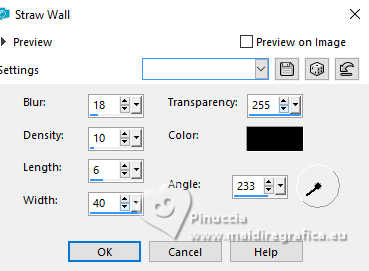 16. Selections>Modify>Contract - 30 pixels. Selections>Invert. Activate again your main tube for my example, before copying the tube, I did Image>Mirror>Mirror horizontal Edit>Copy. Go back to your work and go to Edit>Paste as new layer. With the your Move Tool  , , move and position parts of the misted layer within the selections. I copied and pasted three times to get the parts I wanted, then merged these layers applying Merge Down, before pressing Delete. 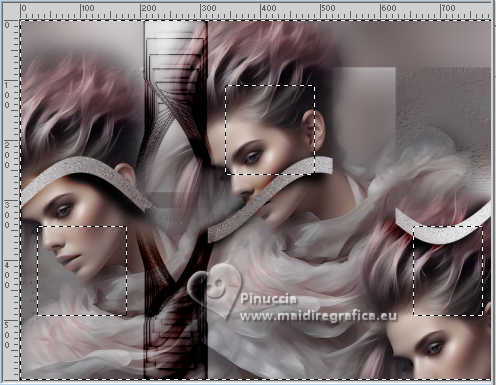 Edit>Cut or press CANC. Selections>Select None. 17. Activate your Crop Tool  Click on Merged Opaque .... 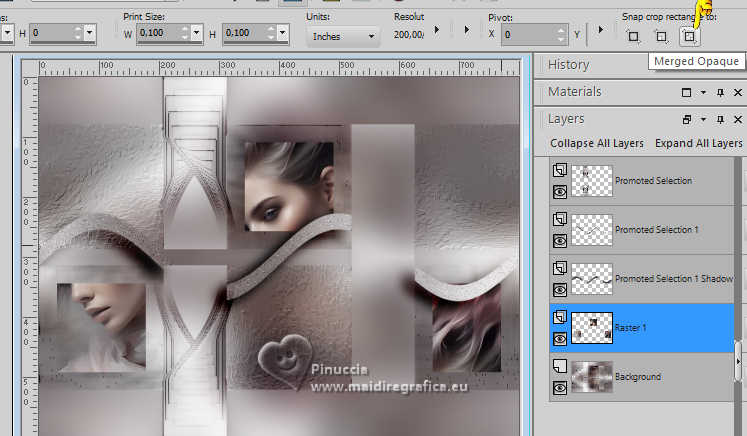 ... and click Apply 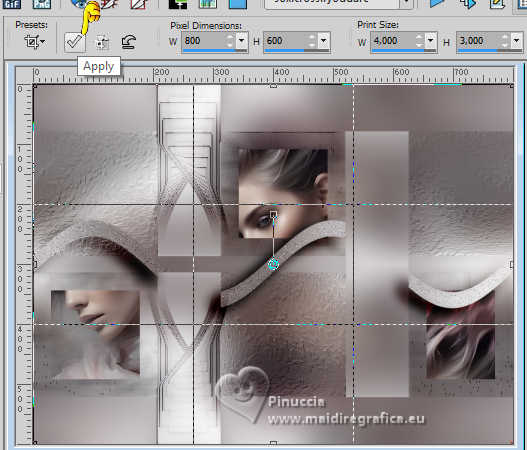 18. Selections>Load/Save Selections>Load Selection From Disk. Look for and load again the selection 286_Xiki_5 Selections>Modify>Contract - 30 pixels. Effects>3D Effects>Drop Shadow, same settings, color black #000000 and shadow on new layer checked. Stay on the shadow's layer, Promoted Selection 1 Shadow. Layers>Properties>General> Blend Mode: Luminance (L). 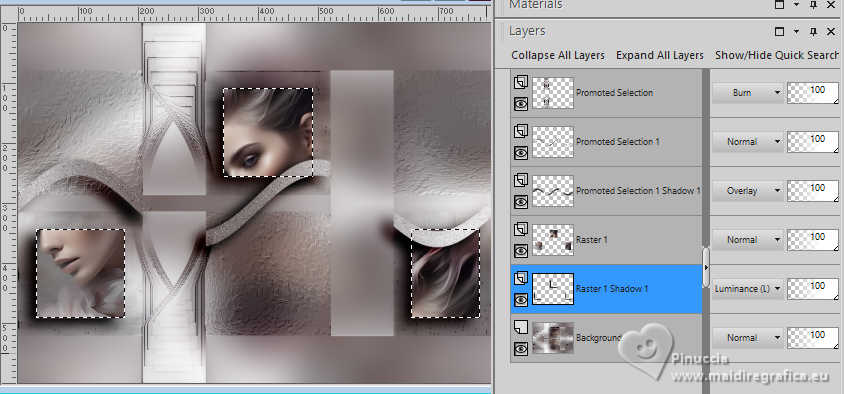 19. Activate the layer above, Raster 1 (the layer with the little squares) Effects>Artistic Effects>Halftone. 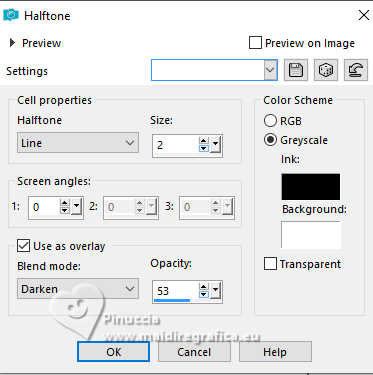 Selections>Select None. 20. Activate your background layer. Selections>Load/Save Selections>Load Selection From Disk. Look for and load the selection 286_Xiki_6 Effects>Texture Effects>Blinds - background color. 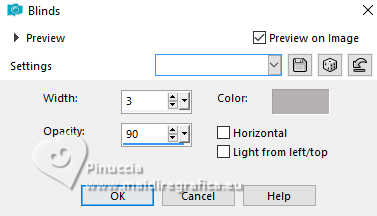 Repeat the Blinds Effect horizontal checked. 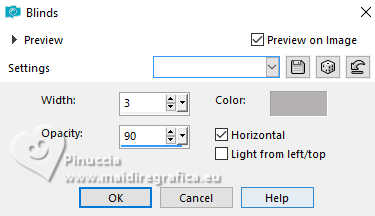 21. Layers>New Raster Layer. Effects>3D Effects>Cutout. 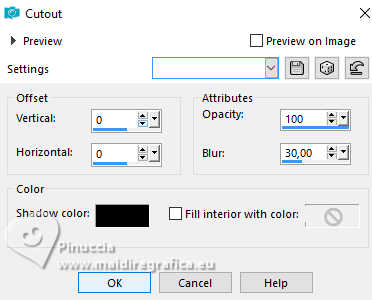 Selections>Select None. 22. Open DecorCIYD_Xiki  Edit>Copy. Go back to your work and go to Edit>Paste as new layer. Pick Tool Position X: 52,00 - Position Y: 28,00. 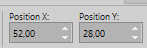 23. Image>Add Borders, 1 pixel, symmetric, foreground color. Image>Add Borders, 8 pixels, symmetric, background color. Image>Add Borders, 1 pixel, symmetric, foreground color. Image>Add Borders, 16 pixels, symmetric, background color. Image>Add Borders, 1 pixel, symmetric, foreground color. Selections>Select All Image>Add Borders, 50 pixels, symmetric, background color. 24. Effects>3D Effects>Drop Shadow, color black #000000, shadow on new layer not checked. 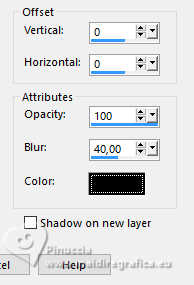 Selections>Invert. Adjust>Add/Remove Noise>Add Noise. 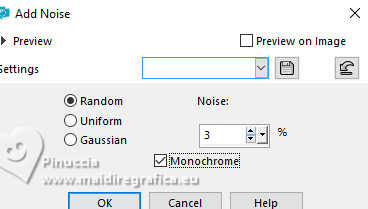 Selections>Select None. 25. Open TituloCIYD_Xiki  Edit>Copy. Go back to your work and go to Edit>Paste as new layer. Pick Tool Position X: 90,00 - Position Y: 153,00.  26. Activate again your main tube and go to Edit>Copy. Go back to your work and go to Edit>Paste as New Layer. Place the tube to your liking, or see my example.for me, I resized the tube to 80%  Effects>3D Effects>Drop Shadow, at your choice. 27. Image>Add Borders, 1 pixel, symmetric, foreground color. 28. Sign your work and save as jpg. For the tube of this version thanks Luz Cristina   Your versions. Thanks 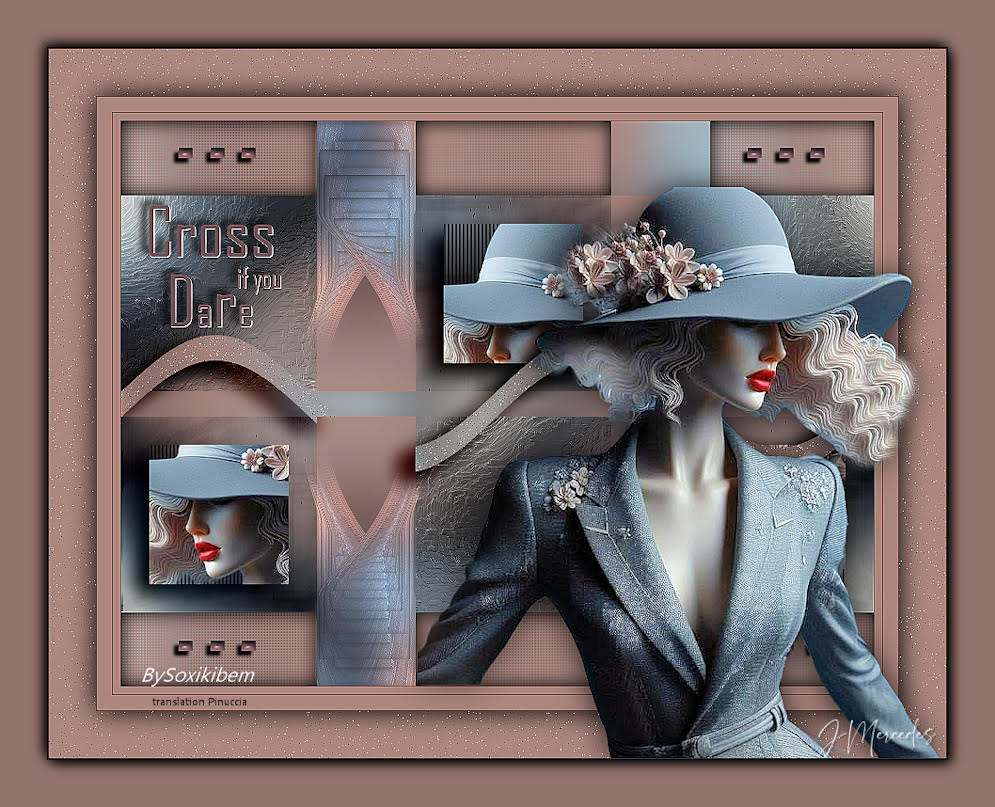 JMercedes 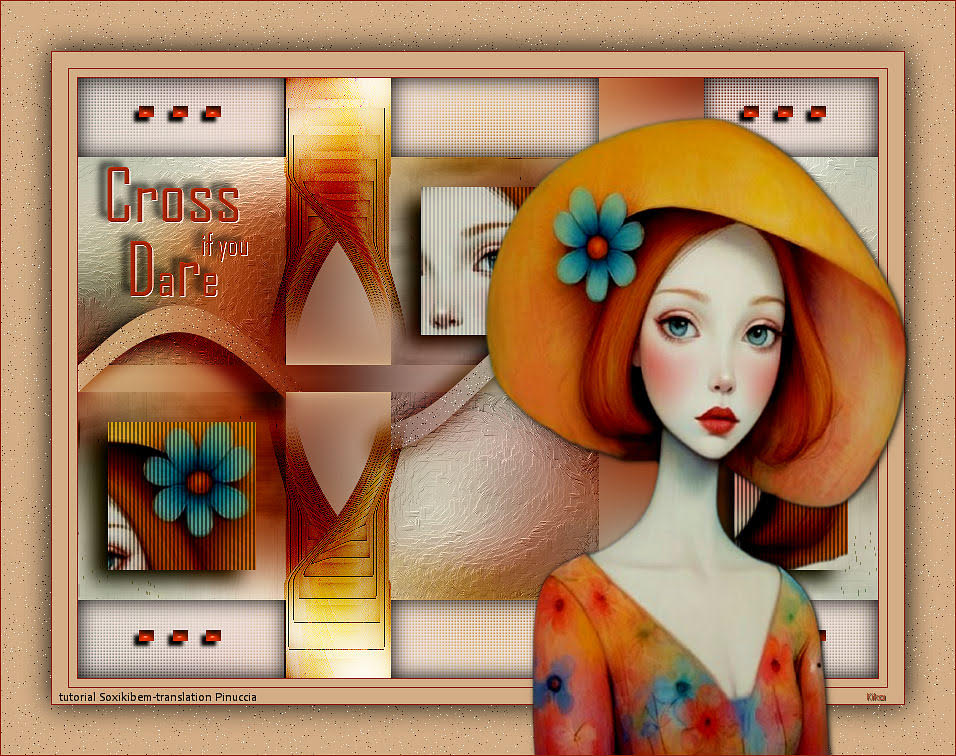 Kika 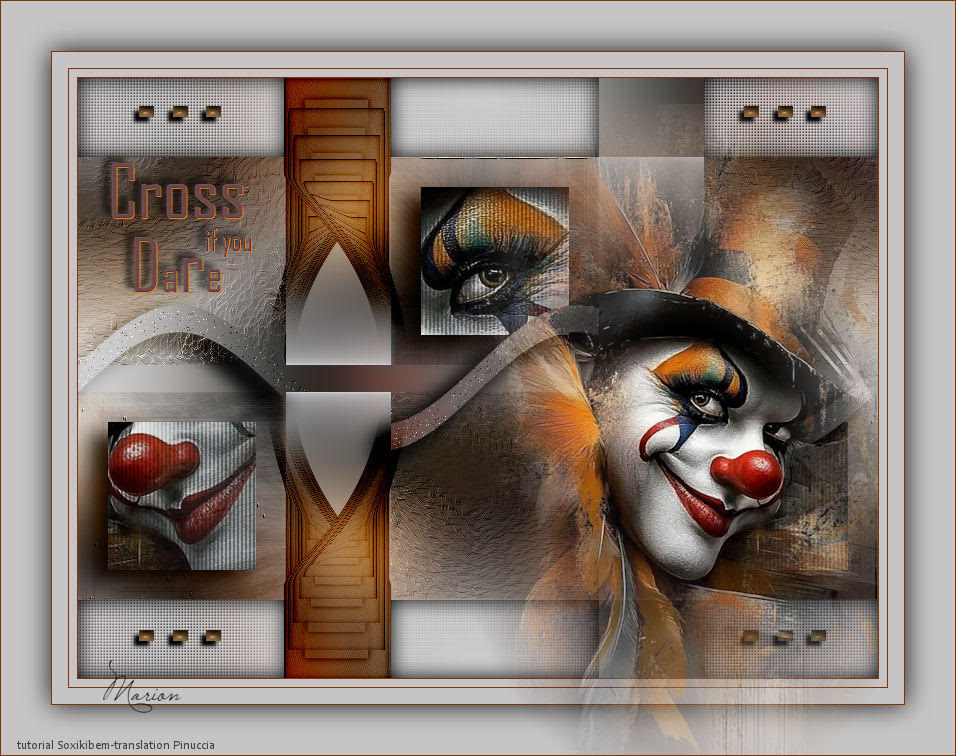 Marion 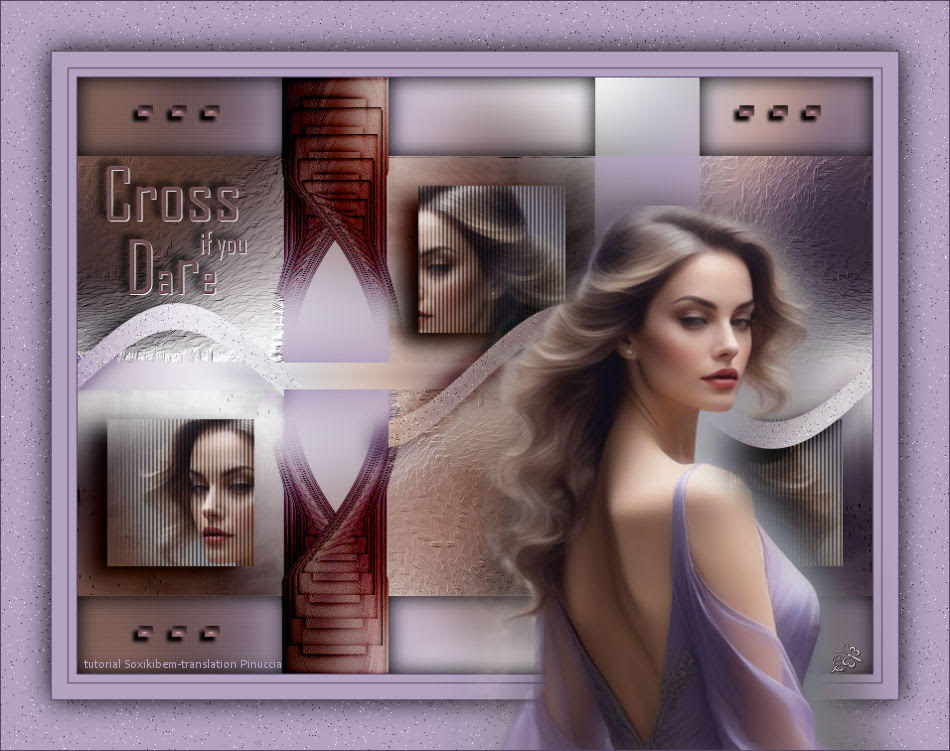 Jolcsi 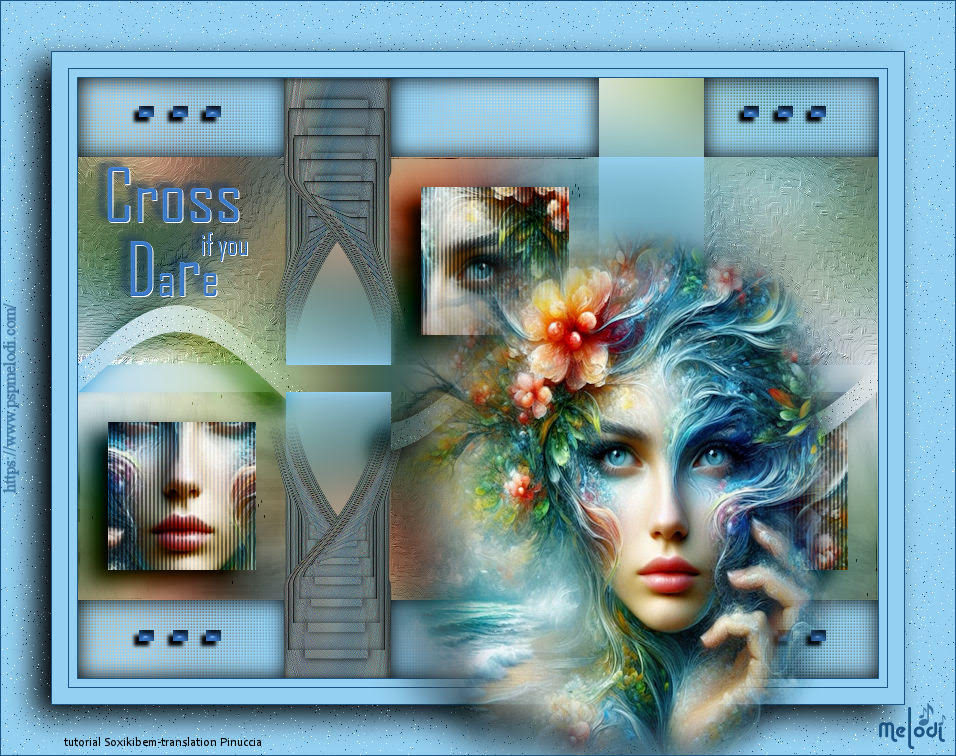 Melodi 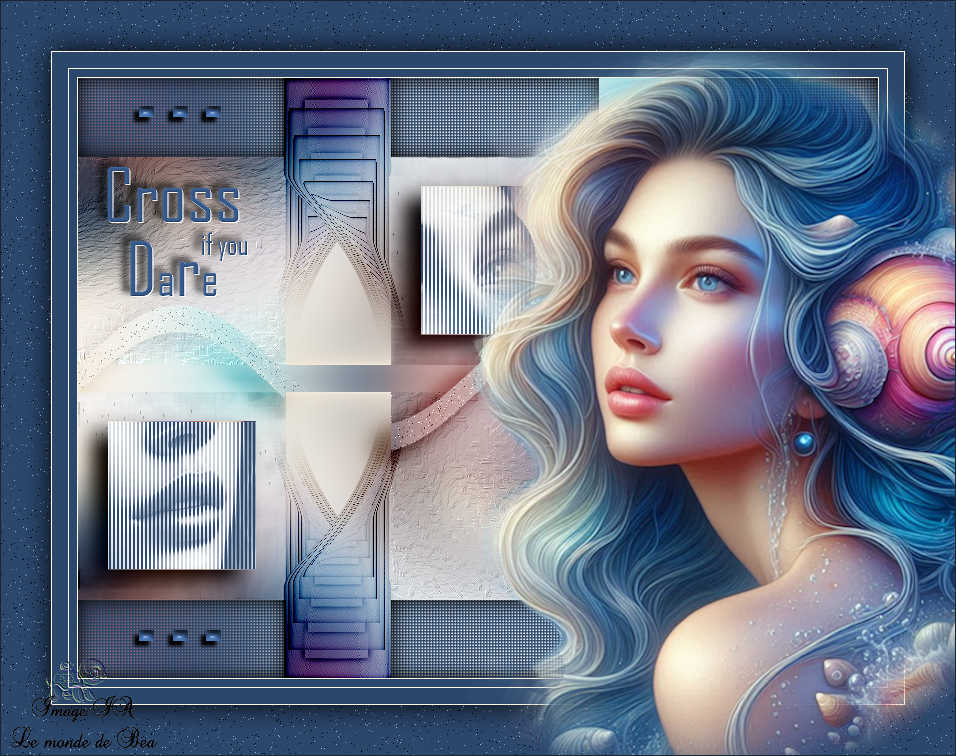 Pia  If you have problems or doubts, or you find a not worked link, or only for tell me that you enjoyed this tutorial, write to me. 7 June 2025 |


