|
DARK BEAUTY  
 There is a charm in the shadows, a magnetism in melancholy. Among flowers blooming in shades of mystery and markings whispering secrets to the wind, she is the poetry of the night—intense, enigmatic, and unforgettable.
This tutorial was written with Psp2022 and translated with PspX2020, but it can also be made using other versions of PSP.
For this tutorial, you will need:  Thanks for the tubes and the mask PqnaAlice and Narah. (The links of the tubemakers here).  consult, if necessary, my filter section here Filters Unlimited 2.0 here &<Bkg Designer sf10II> - DIS Refractor I (to import in Unlimited) here &<Bkg Kaleidoscope> - Swirl Away (to import in Unlimited) here L&K's - L&K's Zitah here Mehdi - Sorting Tiles here Toadies - What are you here Filters Toadies can be used alone or imported into Filters Unlimited. (How do, you see here) If a plugin supplied appears with this icon  it must necessarily be imported into Unlimited it must necessarily be imported into Unlimited You can change Blend Modes according to your colors. In the newest versions of PSP, you don't find the foreground/background gradient (Corel_06_029). You can use the gradients of the older versions. The Gradient of CorelX here  Copy the Selections in the Selections Folder. Open the mask in PSP and minimize it with the rest of the material. 1. Choose 2 colors to work. Set your foreground color to #1a2632, and your background color to #7f5fa5  Set your foreground color to a Foreground/Background, style Radial 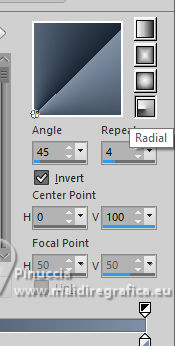 2. Open a new transparent image 800 x 650 pixels. Flood Fill  the transparent image with your Gradient. the transparent image with your Gradient.3. Effects>Plugins>Mehdi - Sorting Tiles. 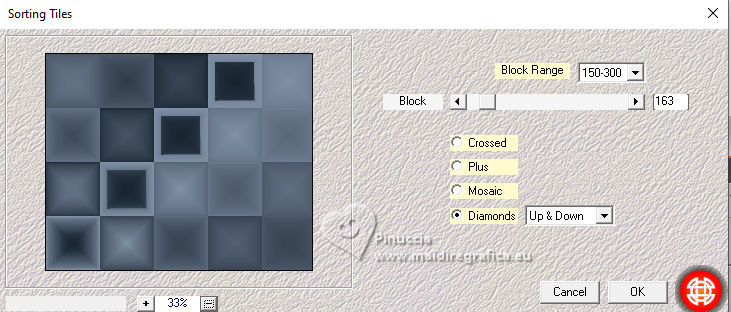 4. Effects>Plugins>Filters Unlimited 2.0 - &<Bkg Designer sf10II> - DIS Refractor I 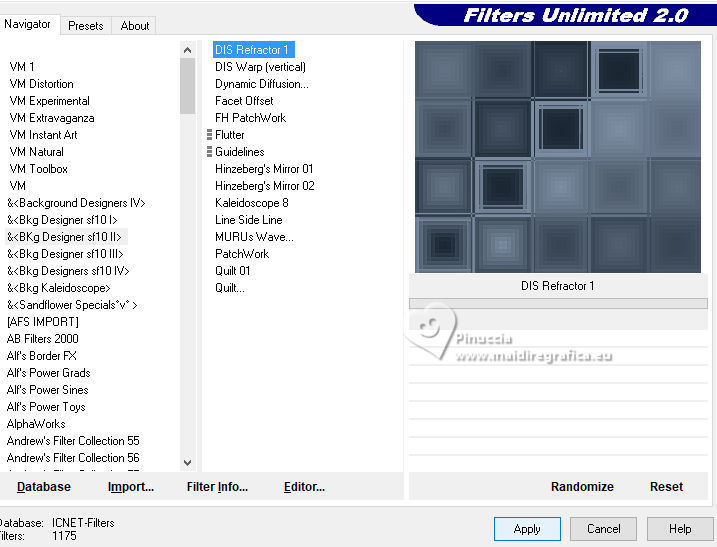 Adjust>Sharpness>Sharpen More. 5. Selections>Load/Save Selections>Load Selection From Disk Look for and load the selection DB_Xiki2 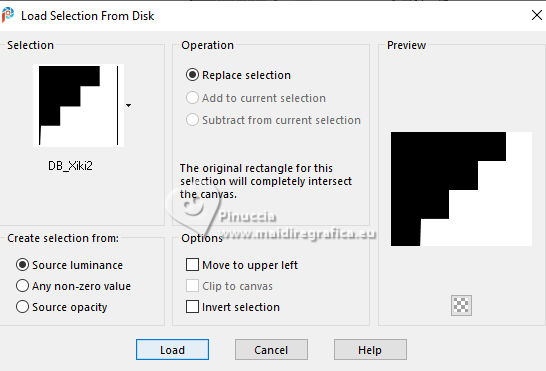 Effects>Plugins>L&K's - L&K's Zitah 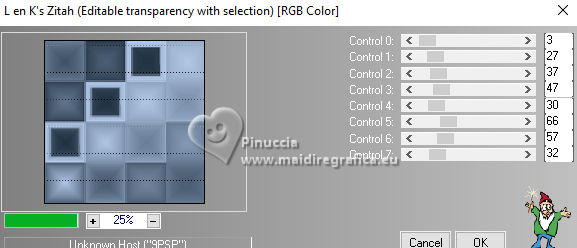 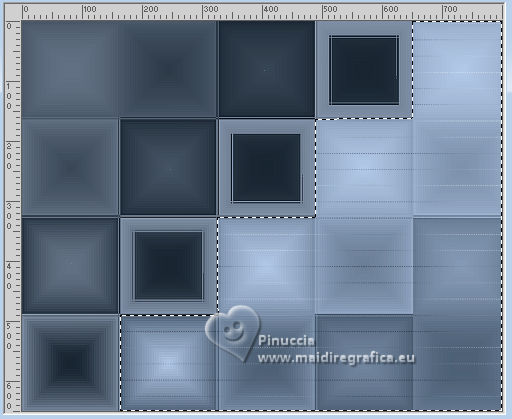 6. Selections>Load/Save Selections>Load Selection From Disk. Look for and load the selection DB_Xiki3 the new selection will replace the previous one 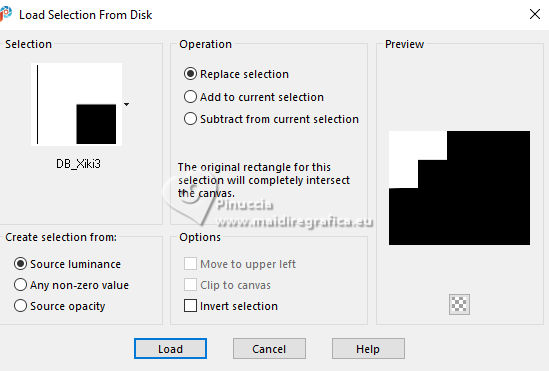 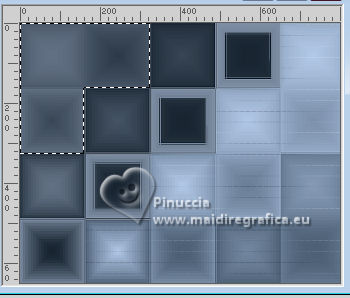 Selections>Promote Selection to Layer. Selections>Select None. Effects>Plugins>Toadies - What are you 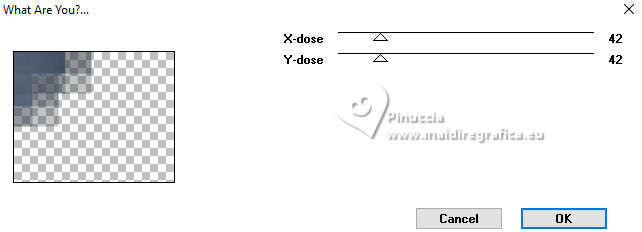 7. Attention, please, before to apply the next plugin, set your background color to white #ffffff. 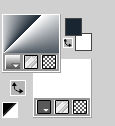 Effects>Plugins>Filters Unlimited 2.0 - &<Bkg Kaleidoscope> - Swirl Away 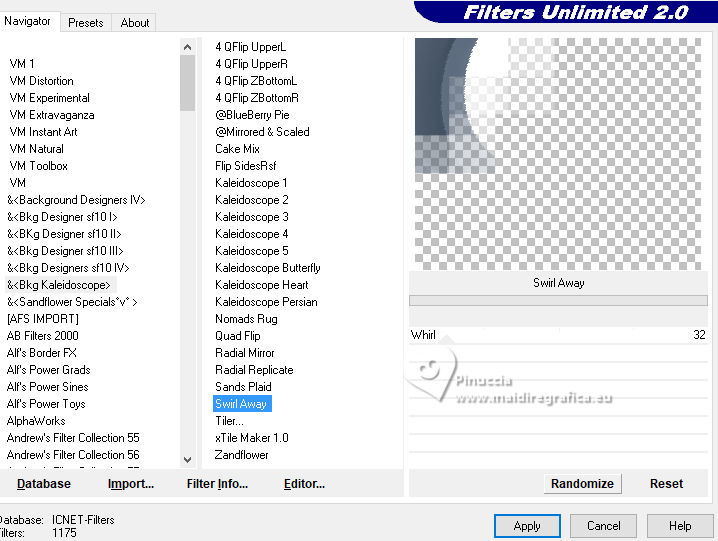 8. Layers>Duplicate. Image>Mirror>Mirror Horizontal. Image>Mirror>Mirror Vertical. Layers>Merge>Merge Down. Effects>Image Effects>Seamless Tiling. 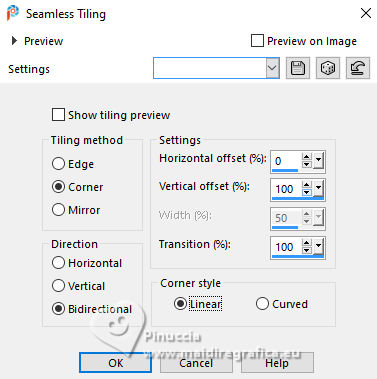 Layers>Properties>General>Blend Mode: Overlay. 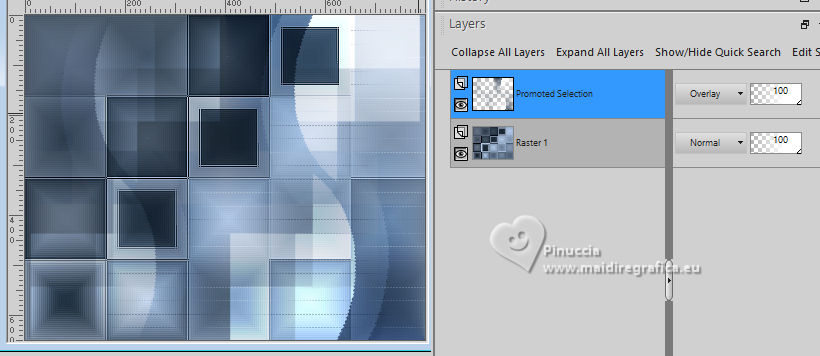 9. Activate the layer Raster 1. Selections>Load/Save Selections>Load Selection From Disk. Look for and load the selection DB_Xiki1 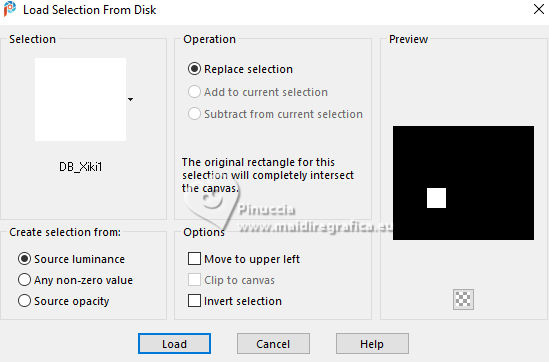 Selections>Promote Selection to Layer. Selections>Select None. Layers>Duplicate. Pick Tool  Position X: 351,00 - Position Y: 188,00. 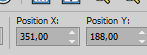 Layers>Duplicate. Pick Tool Position X: 513,00 - Position Y: 25,00. 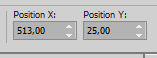 10. Layers>Merge>Merge Down - 2 times. Adjust>Add/Remove Noise>Add Noise. 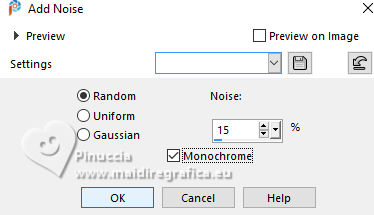 11. Effects>3D Effects>Drop Shadow.  12. Activate the layer Raster 1 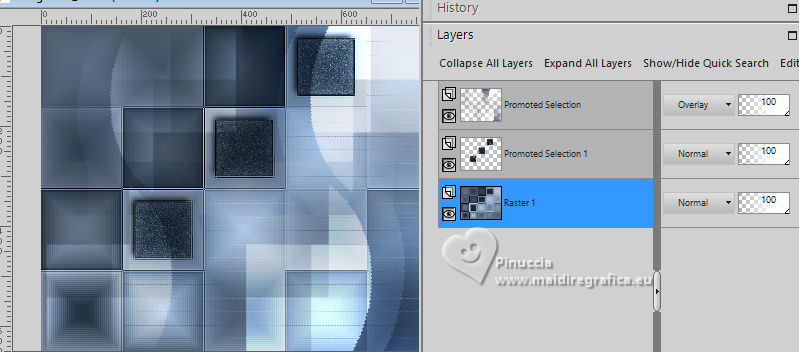 Layers>New Raster Layer. Flood Fill the layer with the color #ffffff (white).Layers>New Mask Layer>From Image. Open the menu under the source window and you'll see all the files open. Select the mask Narah_Mask_1494. 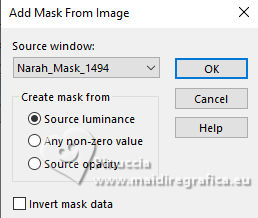 Layers>Merge>Merge Group. Layers>Properties>General>Blend Mode: Dodge. 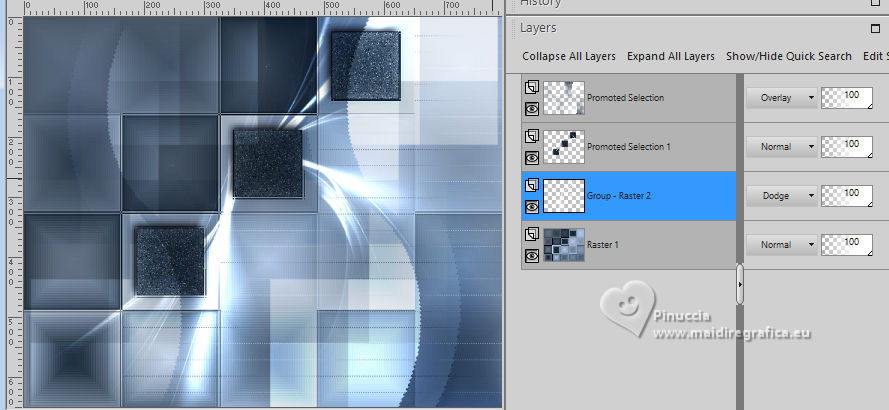 13. For the borders, set again your background color to #7f5fa5. Image>Add Borders, 1 pixel, symmetric, foreground color #1a2632. Edit>Copy Selections>Select All. Image>Add Borders, 5 pixels, symmetric, whatever color. Selections>Invert. Edit>Paste Into Selection 14. Adjust>Blur>Gaussian Blur - radius 10. 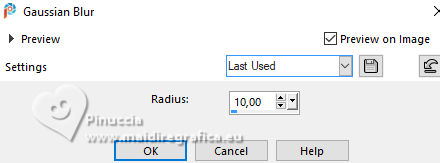 Selections>Select None. Image>Add Borders, 1 pixel, symmetric, foreground color #1a2632. Image>Add Borders, 15 pixels, symmetric, background color #7f8fa5. Image>Add Borders, 1 pixel, symmetric, foreground color #1a2632. 15. Selections>Select All. Image>Add Borders, 5 pixels, symmetric, whatever color. Selections>Invert. Edit>Paste Into Selection - the image of step 13 is still in memory. Adjust>Blur>Gaussian Blur - radius 10. Selections>Select None. 16. Image>Add Borders, 1 pixel, symmetric, foreground color #1a2632. Selections>Select All. Image>Add Bordersm 40 pixels, symmetric, background color: #7f8fa5. Effects>3D Effects>Drop Shadow. 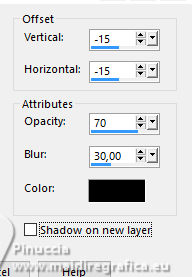 Selections>Select None. 17. Open your main tube 1259MulherByPqnaAlice 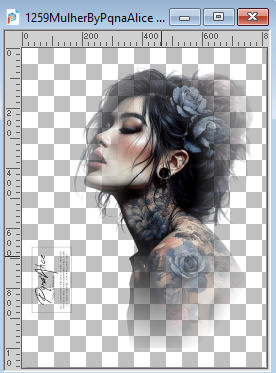 Erase the watermark and go to Edit>Copy. Go back to your work and go to Edit>Paste as new layer. Image>Resize, if necessary, for the provided tube to 57%, resize all layers not checked. Image>Mirror>Mirror Horizontal. Move  the tube to the left. the tube to the left.Effects>3D Effects>Drop Shadow, at your choice. 18. Open TituloDB_Xiki 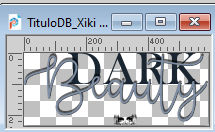 Erase the watermark and go to Edit>Copy. Go back to your work and go to Edit>Paste as New Layer. Move the text to the right, or to your liking.19. Open DecorDB_Xiki 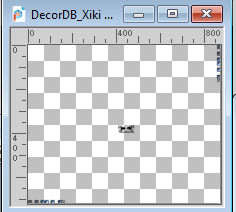 Erase the watermark and go to Edit>Copy. Go back to your work and go to Edit>Paste as new layer. Pick Tool Position X: 50,00 - Position Y: 51,00. 20. Image>Add Borders, 1 pixel, symmetric, foreground color #1a2632. 21. Sign your work and save as jpg. The misted of this version is mine 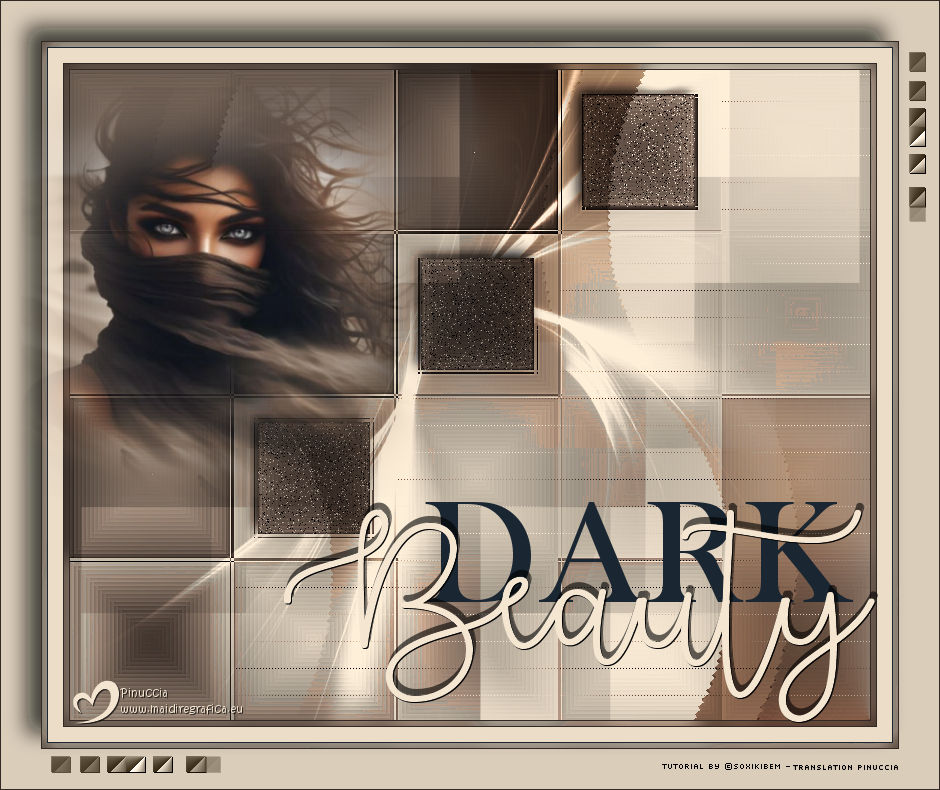  Your versions. Thanks 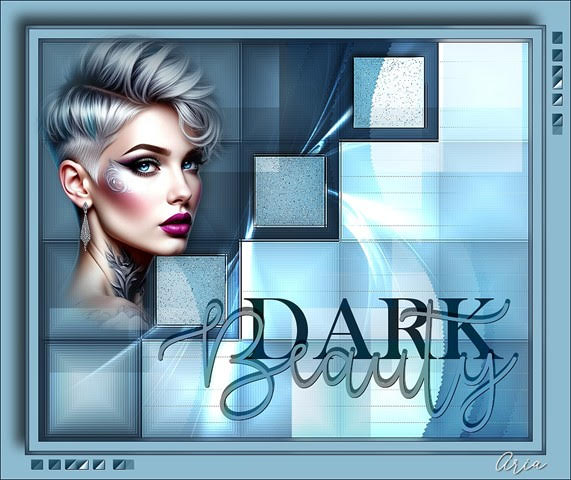 Aria  Lynnette 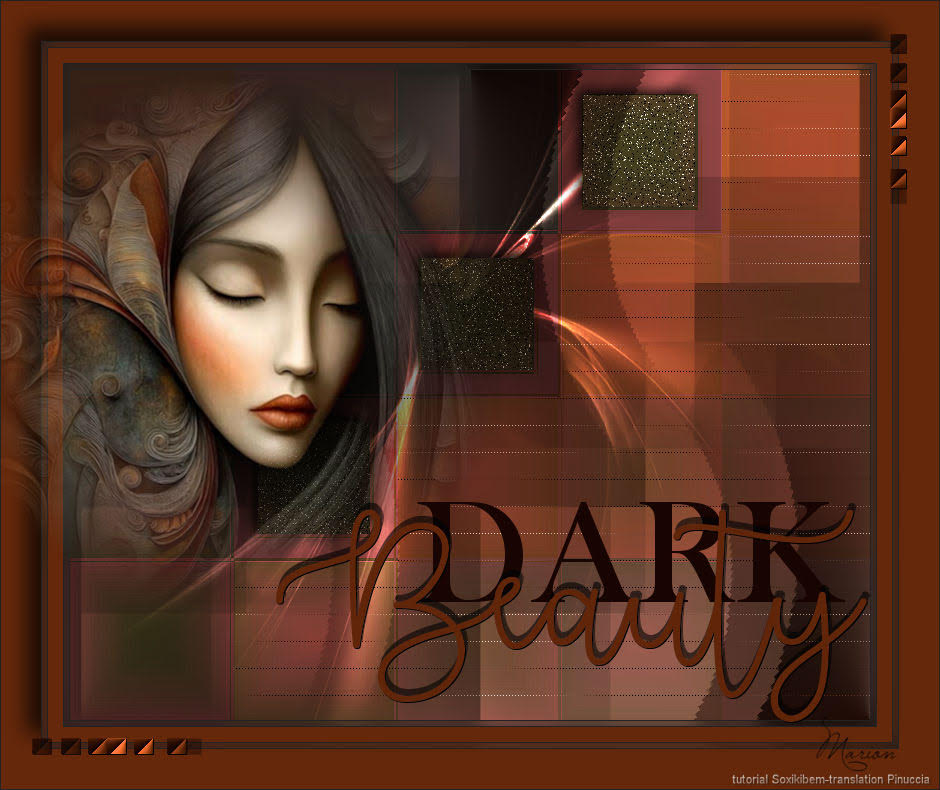 Marion  If you have problems or doubts, or you find a not worked link, or only for tell me that you enjoyed this tutorial, write to me. 3 October 2025 |


