|
ÉCLAT DE NOIR  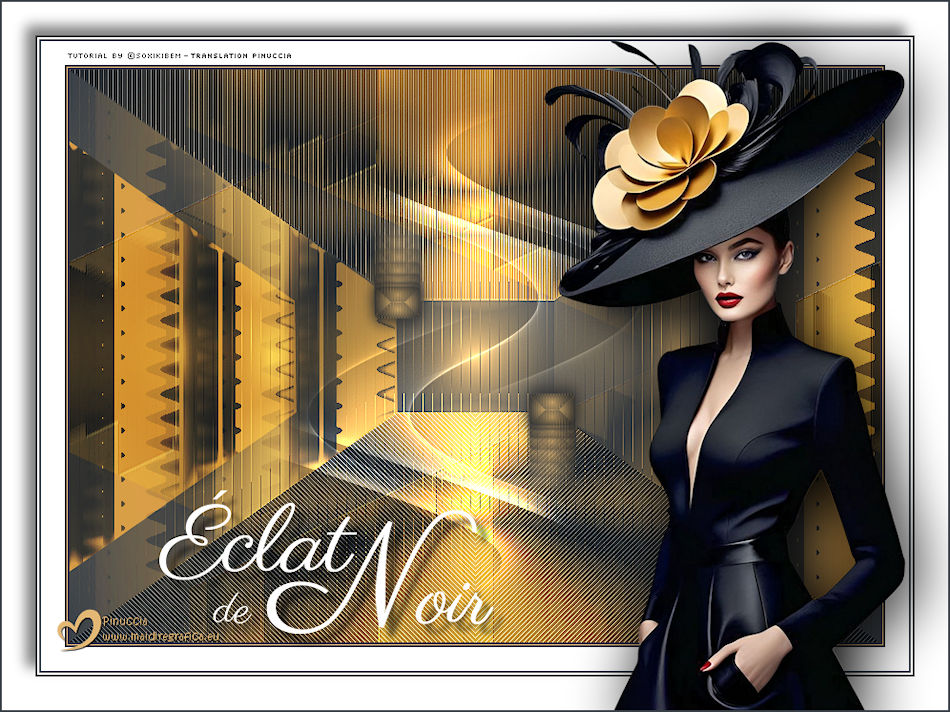
 Éclat de Noir is the essence of refinement, where every shadow shimmers with a secret glow.
This tutorial was written with Psp2022 and translated with PspX2020, but it can also be made using other versions of PSP.
For this tutorial, you will need:  (The links of the tubemakers here).  consult, if necessary, my filter section here Filters Unlimited 2.0 here &<Bkg Designer sf10I> - Alf's Border Mirror Bevel (to import in Unlimited) here Alien Skin Eye Candy 5 Impact - Glass here AP [Blur] - Blur-Bars here AP [Innovations] - Distort-ShiftMesh, here AP [Lines] - Lines SilverLining here FM Tile Tools - Blend Emboss here Mura's Meister - Copies here You can also follow the video tutorial created by Soxikibem   You can change Blend Modes according to your colors. In the newest versions of PSP, you don't find the foreground/background gradient (Corel_06_029). You can use the gradients of the older versions. The Gradient of CorelX here  1. Choose 3 colors to work.  Foreground: #394048 Background: #e3b875 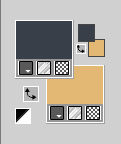 color 3 #ffffff Set your foreground color to a Foreground/Background Gradient, style Sunburst. 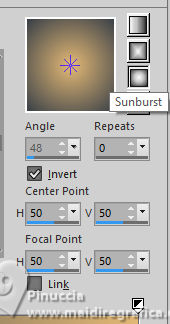 2. Open a new transparent image 850 x 600 pixels. Flood Fill  the transparent image with your Gradient. the transparent image with your Gradient.3. Effects>Distortion Effects>Warp.  4. Effects>Plugins>Filters Unlimited 2.0 - &<Bkg Designer sf10I> - ALFs Border Mirror Bevel. 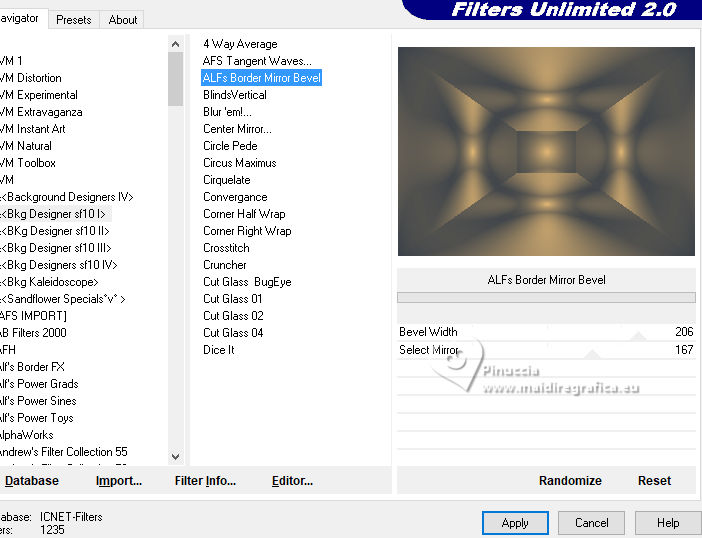 5. Selections>Load/Save Selections>Load Selection From Disk. Look for and load the selection 302_Xiki1 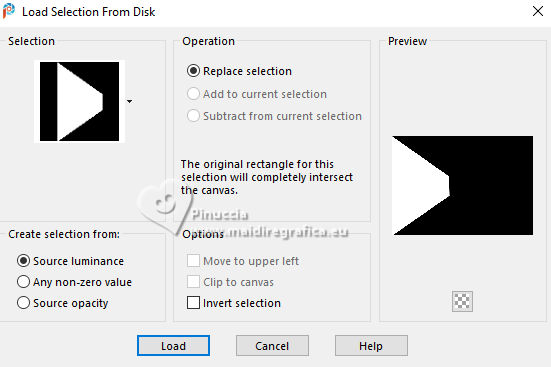 Selections>Promote Selection to Layer. Selections>Select None. Effects>Plugins>AP [Blur] - Blur-Bars. 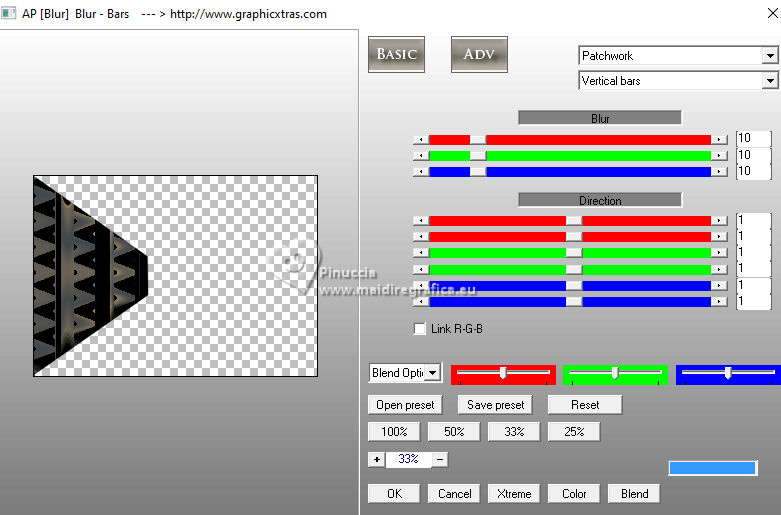 6. Effects>Image Effects>Seamless Tiling. 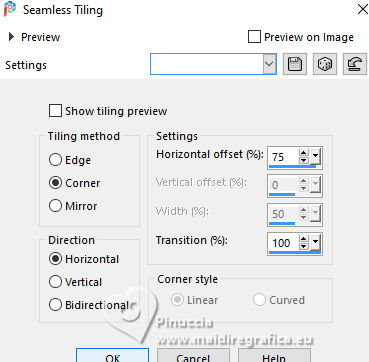 Layers>Properties>General>Blend Mode: Hard Light. 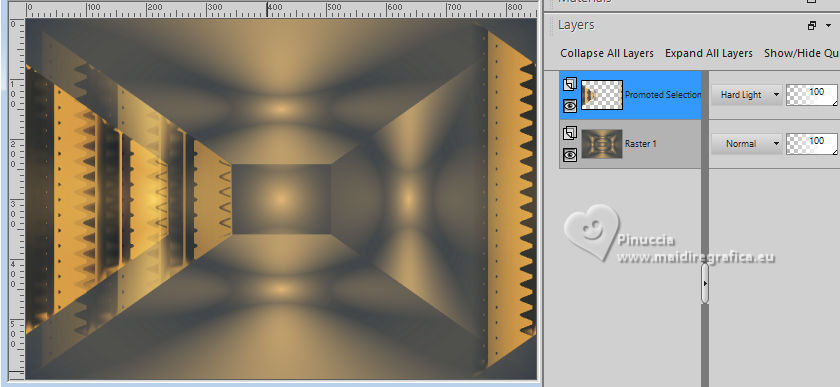 Author's note: In my second version, I used Lighten 7. Activate the layer Raster 1. Selections>Load/Save Selections>Load Selection From Disk Load again the selection 302_Xiki1 Selections>Edit Selection - and the selected zone turns red. 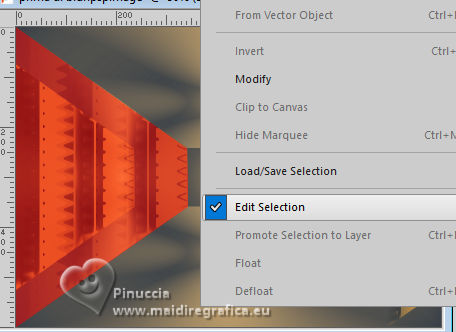 Image>Mirror>Mirror Horizontal. 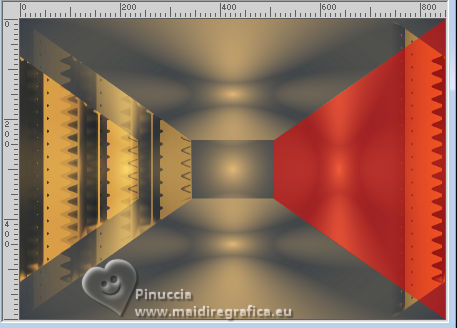 Selections>Edit Selection - and the red zone returns normal. 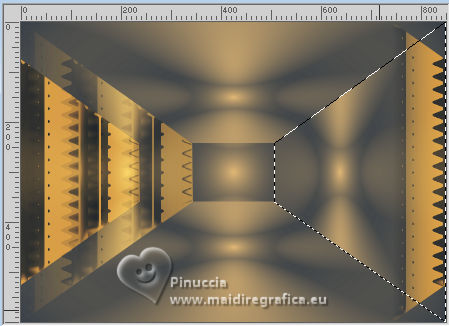 Selections>Promote Selection to Layer. Selections>Select None. 8. Effects>Plugins>AP [Blur] - Blur-Bars. 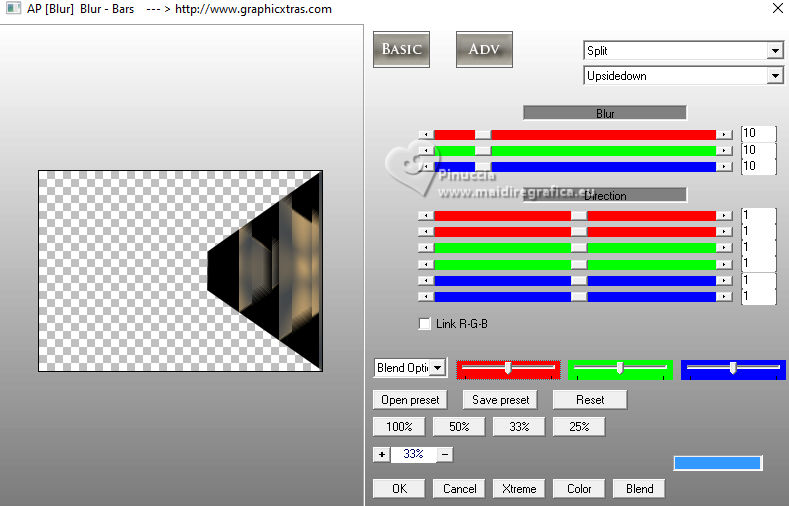 9. Effects>Image Efects>Seamless Tiling. 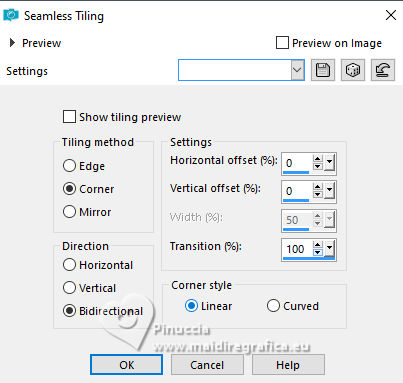 10. Effects>Image Efects>Seamless Tiling. 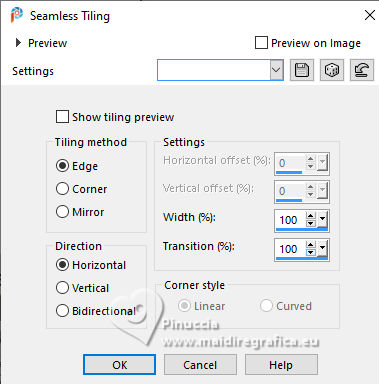 Effects>Plugins>FM Tile Tools - Blend Emboss, default settings. 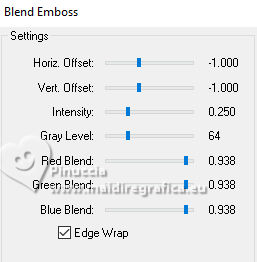 Edit>Repeat Blend Emboss. Layers>Properties>General>Blend Mode: Overlay. 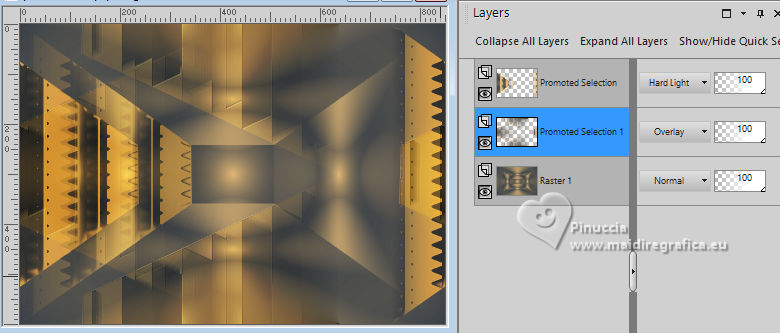 Author's note: In my second version, I used Exclusion. 11. Activate the layer Raster 1. Selections>Load/Save Selections>Load Selection From Disk Look for and load the selection 302_Xiki2 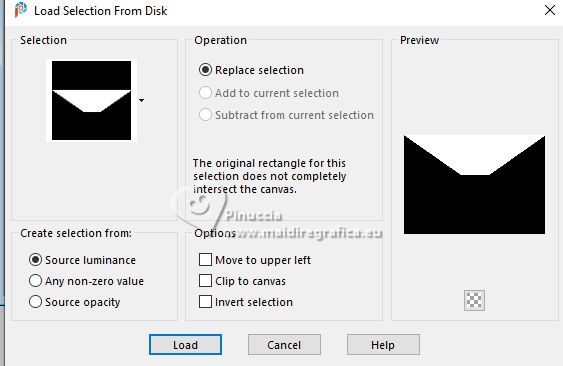 Selections>Promote Selection to Layer. Selections>Select None. Effects>Plugins>AP [Lines] - Lines SilverLining.  Effects>Edge Effects>Enhance. Layers>Properties>General>Blend Mode: Soft Light. 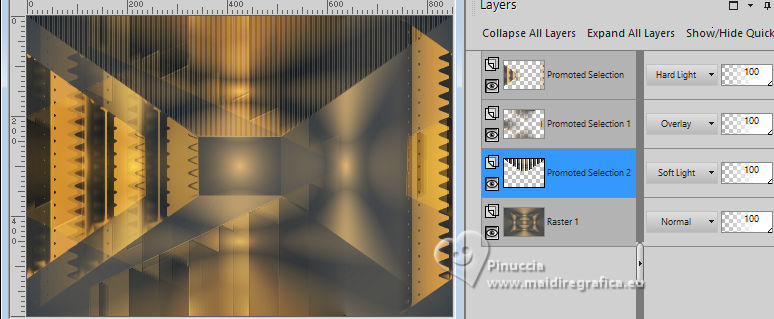 12. Activate the layer Raster 1. Selections>Load/Save Selections>Load Selection From Disk Load again the selection 302_Xiki2 Selections>Edit Selection - and the selected zone turns red.  Image>Mirror>Mirror Vertical (Image>Flip). 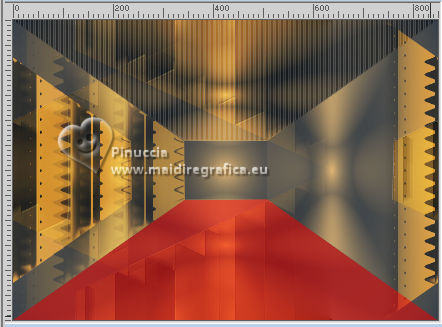 Selections>Edit Selections - and the red zone returns normal. 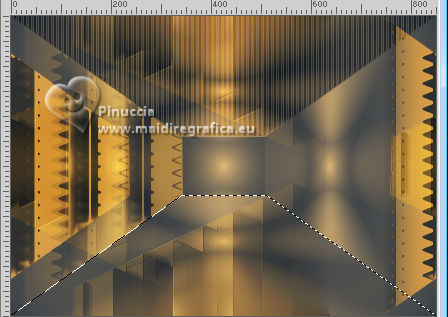 Selections>Promote Selection to Layer. Selections>Select None. Effects>Plugins>AP [Lines] - Lines SilverLining. 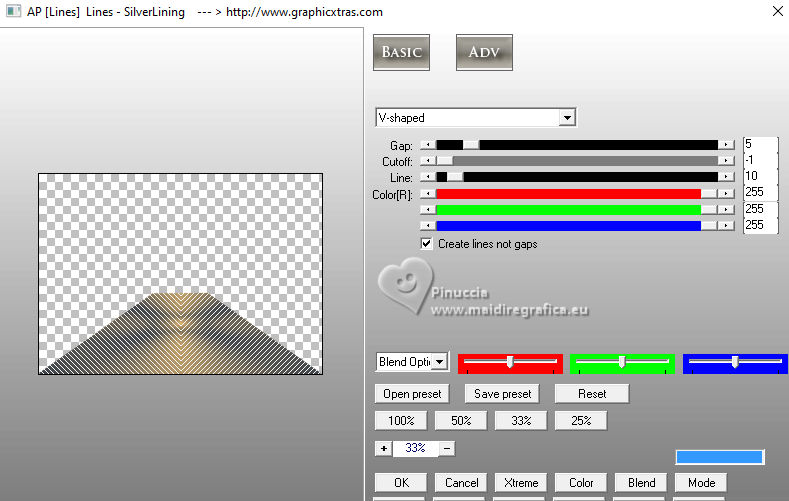 Layers>Properties>General>Blend Mode: Overlay.  13. Activate the layer Raster 1. Effects>Plugins>AP [Distort] - Distort-ShiftMesh 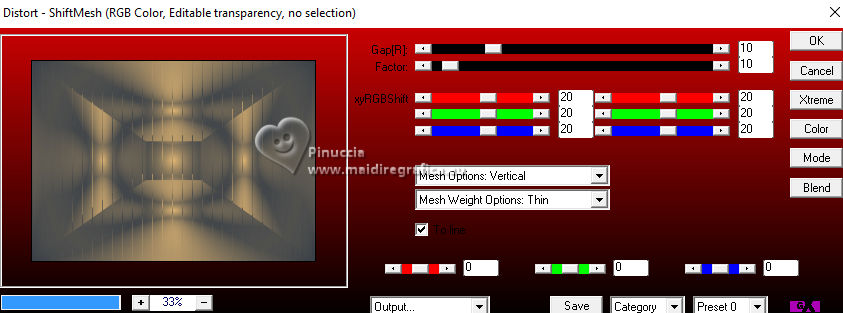 Adjust>Sharpness>Sharpen More. 14. Layers>Merge>Merge Visible. Selections>Load/Save Selections>Load Selection From Disk. Look for and load the selection 302_Xiki3  Selections>Promote Selection to Layer. Selections>Select None. Image>Resize, to 30%, resize all layers not checked. Adjust>Sharpness>Sharpen. Effects>Plugins>Alien Skin Eye Candy 5 Impact - Glass.  15. Effects>Plugins>Mura's Meister - Copies. 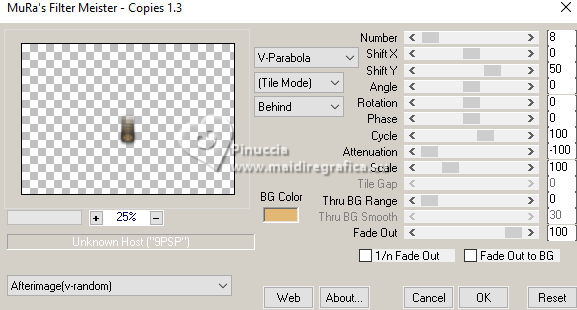 16. Pick Tool  Position X: 300,00 - Position Y: 148,00  Layers>Duplicate. Image>Mirror>Mirror Horizontal. Image>Mirror>Mirror Vertical. 17. Open Decor302_Xiki 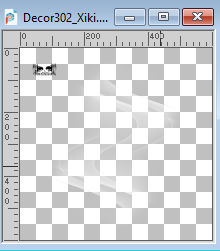 Erase the watermark and go to Edit>Copy. Go back to your work and go to Edit>Paste as new layer. Layers>Properties>General>Blend Mode: Dodge. 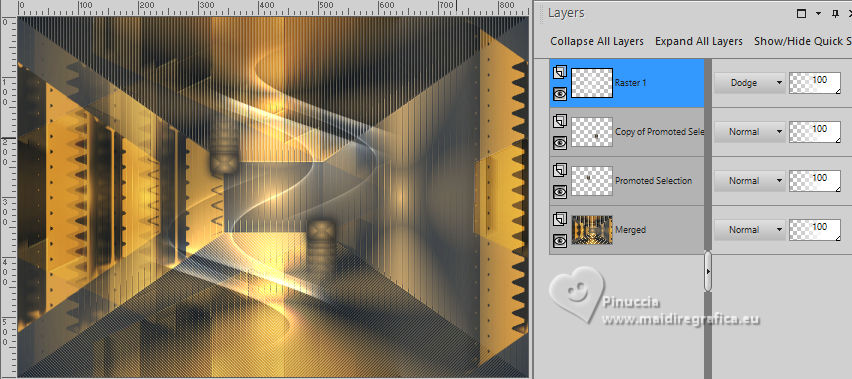 18. Image>Add Borders, 2 pixels, symmetric, foreground color. Image>Add Borders, 1 pixel, symmetric, background color. Image>Add Borders, 2 pixels, symmetric, foreground color. Image>Add Borders, 25 pixels, symmetric, color white. Image>Add Borders, 2 pixels, symmetric, foreground color. Image>Add Borders, 2 pixels, symmetric, color white. Image>Add Borders, 2 pixels, symmetric, foreground color. Selections>Select All. Image>Add Borders, 35 pixels, symmetric, color white. 19. Effects>3D Effects>Drop Shadow, color black.  Selections>Select None. Open your main tube 1359MulherByPqnaAlice 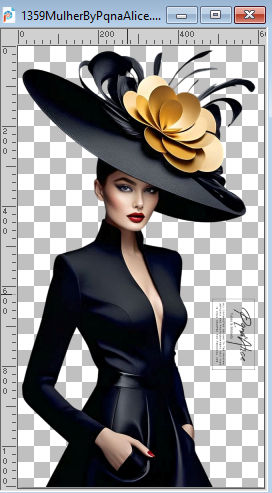 Erase the watermark and go to Edit>Copy. Go back to your work and go to Edit>Paste as New Layer. Image>Resize, if necessary, for the supplied tube to 65%. Position and effect to your liking. 20. Open TituloEN_Xiki  Erase the watermark and go to Edit>Copy. Go back to your work and go to Edit>Paste as New Layer. Place the tube to your liking. 21. Image>Add Borders, 2 pixels, symmetric, foreground color. 22. Sign your work. Image>Resize, if you want. Save as jpg. Version with my tube from Pinterest image 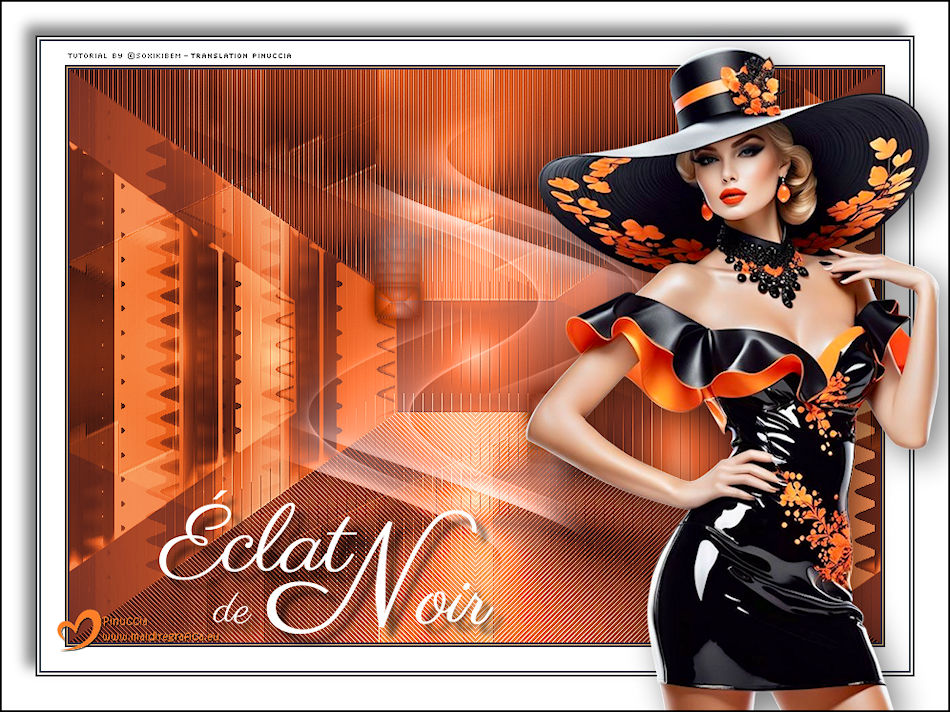  Your versions. Thanks  Irene  Kika 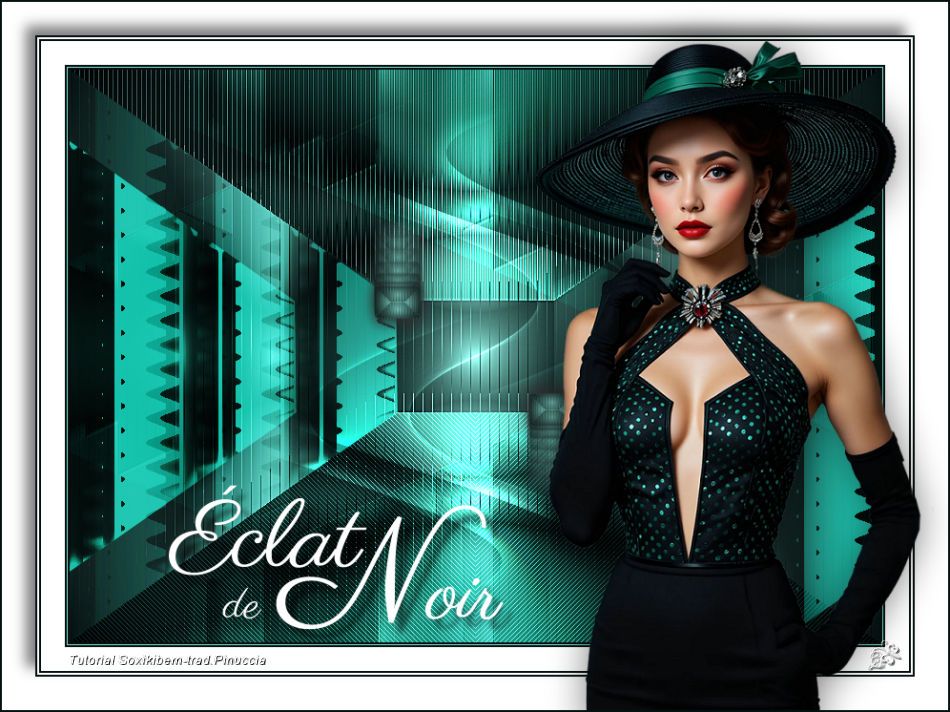 Jolcsi  Lynnette  If you have problems or doubts, or you find a not worked link, or only for tell me that you enjoyed this tutorial, write to me. 14 February 2026 |