|
LET CHRISTMAS SPEAK TO THE SOUL  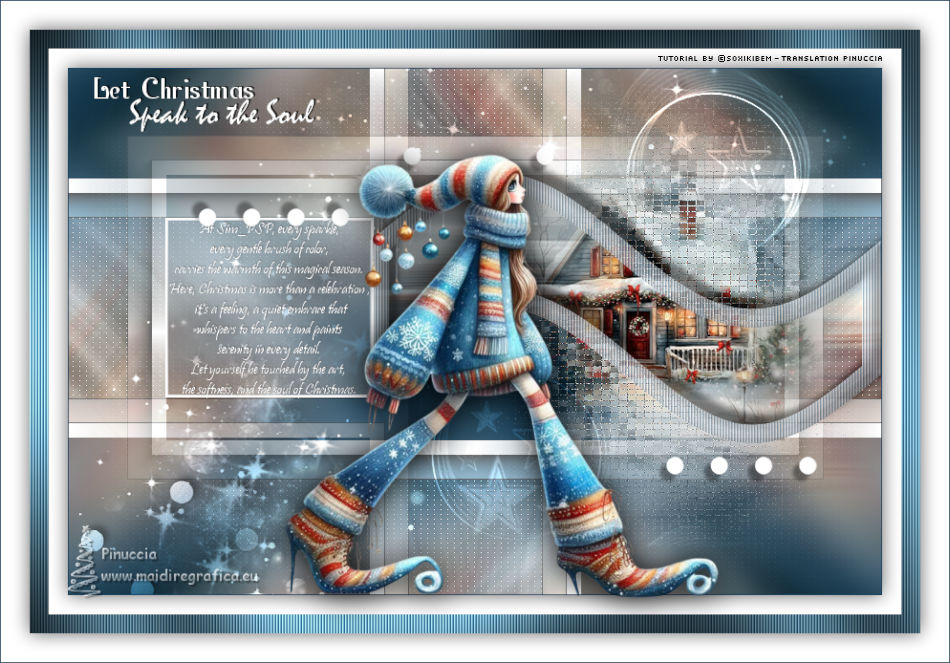
 At Sim_PSP, every sparkle, every gentle brush of color, carries the warmth of this magical season. Here, Christmas is more than a celebration, it's a feeling, a quiet embrace that whispers to the heart and paints serenity in every detail. Let yourself be touched by the art, the softness, and the soul of Christmas.
This tutorial was written with Psp2022 and translated with PspX2020, but it can also be made using other versions of PSP.
For this tutorial, you will need:  Thanks for the tubes PqnaAlice and for the mask Narah. (The links of the tubemakers here).  consult, if necessary, my filter section here Filters Unlimited 2.0 here Graphics Plus - Cross Shadow here L&K's - L&K's Adonis here °V° Kiwi's Oelfilter - 3,5 Promille here AAA Frames - AAA Frame here Filters Graphics Plus and Kiwi can be used alone or imported into Filters Unlimited. (How do, you see here) If a plugin supplied appears with this icon  it must necessarily be imported into Unlimited it must necessarily be imported into Unlimited You can change Blend Modes according to your colors.  Open the mask in PSP and minimize it with the rest of the material. 1. Choose 3 colors to work. Foreground: #1b4563 Background: #c9f7fc  Color 3: #ffffff 2. Open a new transparent image 850 x 500 pixels. Flood Fill  the transparent image with your foreground color. the transparent image with your foreground color.Selections>Select All. 3. Open the misted 059AN_NatalByPqnaAlice 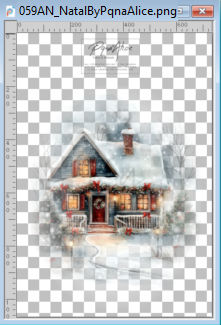 Erase the watermark and go to Edit>Copy. Go back to your work and go to Edit>Paste Into Selection. Selections>Select None. 4. Effects>Image Effects>Seamless Tiling, default settings.  Adjust>Blur>Radial Blur. 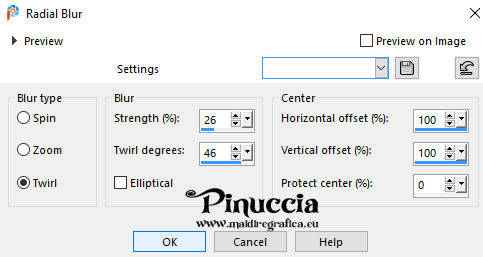 5. Effects>Plugins>°v° Kiwi's Oelfilter - 3,5 Promille 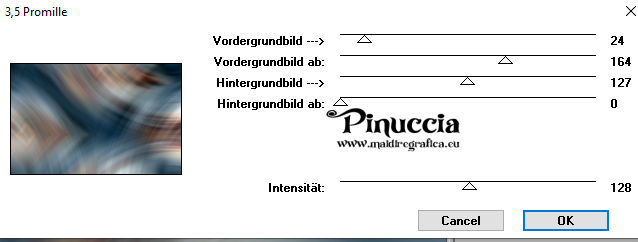 6. Effects>Plugins>L&K's - L&K's Adonis 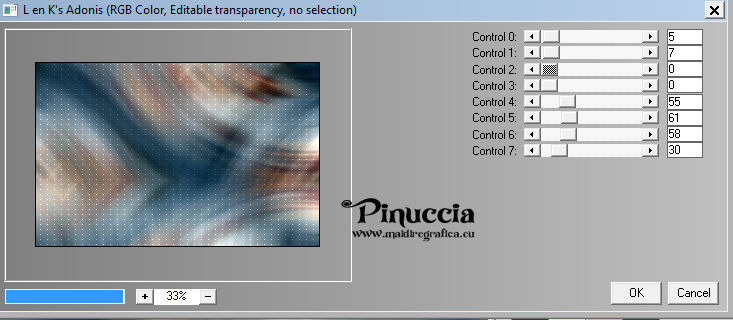 Adjust>Sharpness>Sharpen. 7. Layers>Duplicate. Activate your Selection Tool  (no matter the type of selection, because with the custom selection your always get a rectangle) clic on the Custom Selection 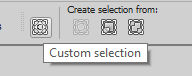 and set the following settings. 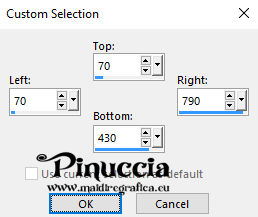 Selections>Invert. Press CANC on the keyboard  Don't forget that you still have the landscape tube you need in memory; so don't use the Edit>Cut command to lose your landscape from memory. 8. Selections>Invert. Adjust>Blur>Gaussian Blur - radius 10. 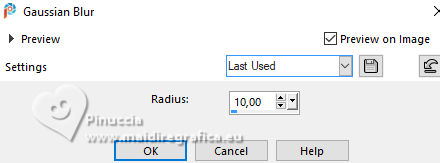 Effects>Plugins>AAA Frames - Foto Frame.  Selections>Select None. 9. Effects>Image Effects>Seamless Tiling. 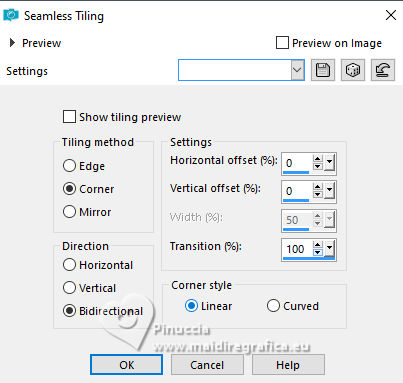 10. Effects>Reflection Effects>Rotating Mirror, default settings. 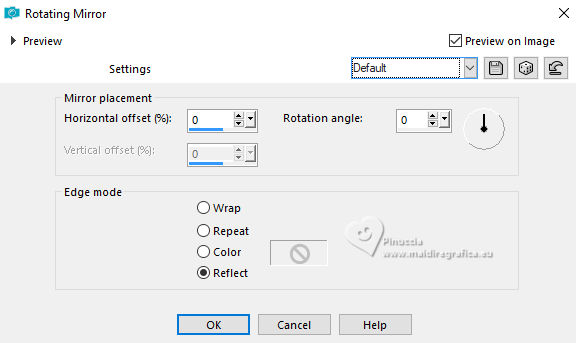 11. Layers>New Raster Layer. Custom Selection 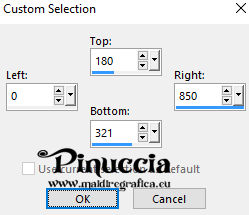 12. Selections>Edit Selection. And the selected area turns red. 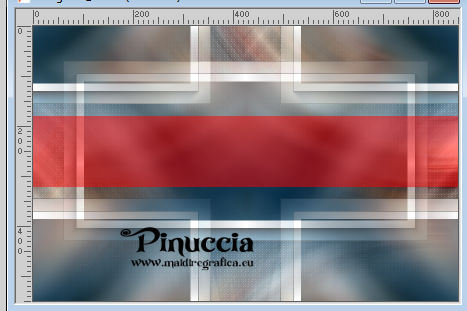 Effects>Distortion Effects>Wave. 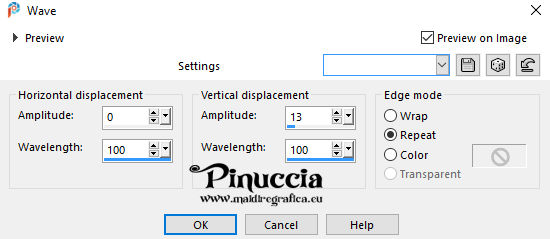 13. K key to activate your Pick Tool  Mode Scale 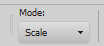 Drag the central left node to the right 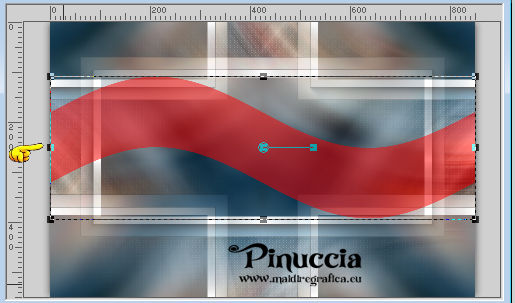 as show in the screenshot 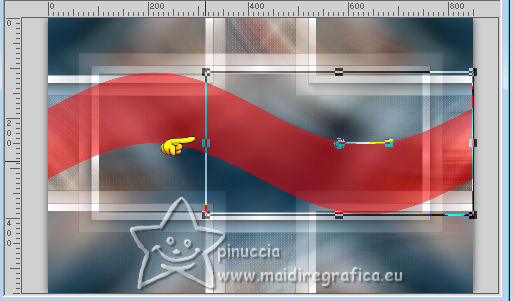 This will reduce the width of the selection. 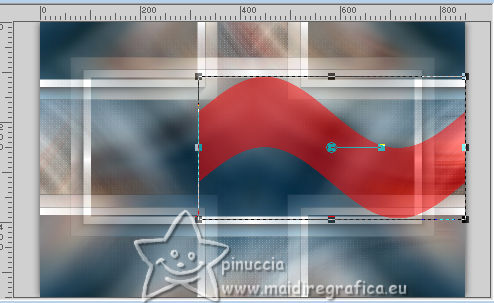 Selections>Edit Selection and the selected area turns normal. 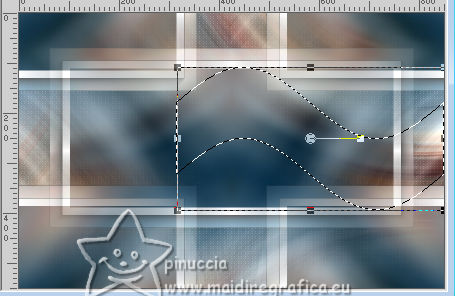 M key to deselect the Tool. 14. Set your background color to white #fffffff. 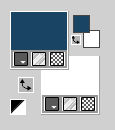 Reduce the opacity of your Flood Fill Tool to 40. Flood Fill the selection with the color white.Edit>Paste Into Selection - your misted is still in memory. Adjust>Sharpness>Sharpen. Keep selected. 15. Adjust>Blur>Motion Blur 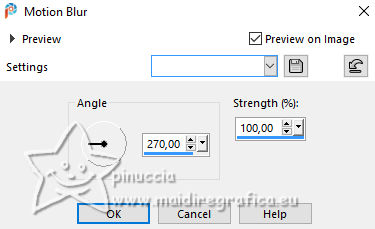 Edit>Repeat Motion Blur. Effects>Edge Effects>Enhance. 16. Selections>Modify>Select Selection Borders. 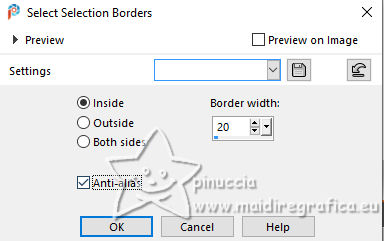 17. Layers>New Raster Layer. Set the opacity of your Flood Fill Tool to 70. Flood Fill the layers with the color white #ffffff.Effects>Texture Effects>Blinds - foreground color 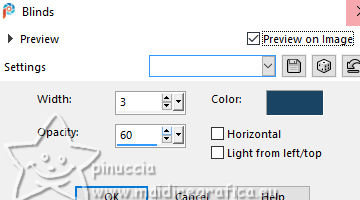 18. Effects>3D Effects>Inner Bevel. 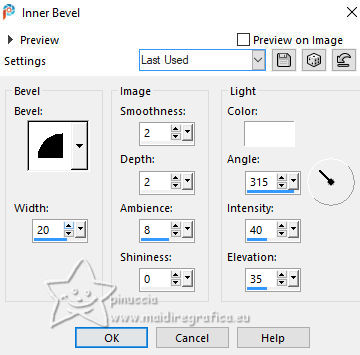 19. Selections>Select None. Activate your Magic Wand Tool  , tolerance and feather 0, , tolerance and feather 0,and click in this effect to select it. 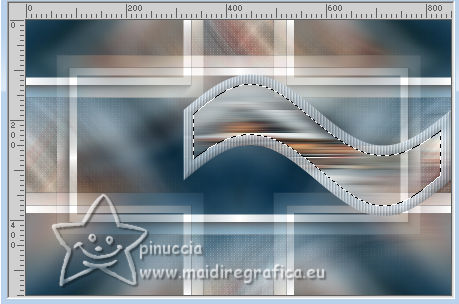 Selections>Modify>Expand - 3 pixels. Edit>Paste as new layer - the misted is always in memory. 20. Layers>Arrange>Move Down. Image>Resize, if necessary - for the provided tube to 50%, resize all layers not checked. Move  the tube to your liking in the selection. the tube to your liking in the selection. 21. Adjust>Sharpness>Sharpen. Selections>Invert. Effects>Texture Effects>Mosaic Antique.  Adjust>Sharpness>Sharpen. Selections>Select None. 22. Activate your top layer, Raster 3. Effects>3D Effects>Drop Shadow, colore black #000000.  23. Activate the layer Copy of Raster 1.  Layers>New Raster Layer. Set the opacity of your Flood Fill Tool to 100. Flood Fill the layer with the color white #ffffff.Layers>New Mask Layer>From Image Open the menu under the source window and you'll see all the files open. Select the mask NarahsMasks_1507  Layers>Duplicate. Layers>Merge>Merge Group. 24. Adjust>Sharpness>Sharpen. Layers>Properties>General>Blend Mode: Overlay. Effects>3D Effects>Drop Shadow, color black #000000. 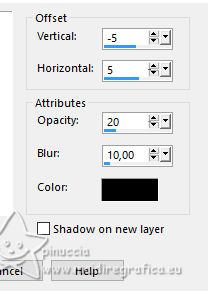 Stay on this layer 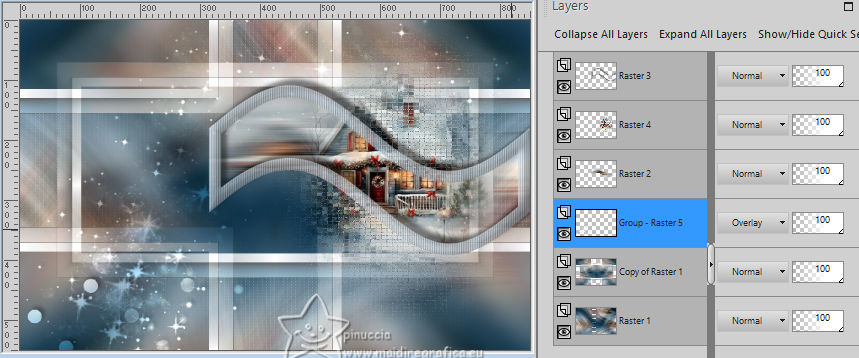 25. Open Decor1Xiki 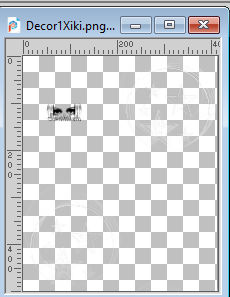 Erase the watermark and go to Edit>Copy. Go back to your work and go to Edit>Paste as New Layer. Pick Tool Position X: 364,00 - Position Y: 0,00. 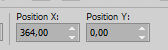 Layers>Properties>General>Blend Mode: Dodge. 26. Activate your top layer Raster 3. Open Decor2Xiki 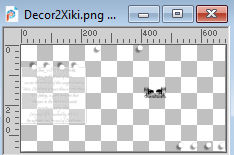 Erase the watermark and go to Edit>Copy. Go back to your work and go to Edit>Paste as New Layer. Pick Tool Position X: 101,00 - Position Y: 82,00.  27. Image>Add Borders - 1 pixel, symmetric, foreground color. Selections>Select All. Image>Add Borders - 20 pixels, symmetric, color #ffffff. Effects>3D Effects>Drop Shadow, color black #000000.  28. Selections>Select All. Image>Add Borders, 20 pixels, symmetric, foreground color. Selections>Invert. Effects>Texture Effects>Blinds - background color #c9f7fc.  29. Effects>Plugins>Graphics Plus - Cross Shadow, default settings.  30. Selections>Select All. Image>Add Borders, 30 pixels, symmetric, color #ffffff. Effects>3D Effects>Drop Shadow, color black #000000. Selections>Select None. 31. Open the tube 062AN_NatalByPqnaAlice  Erase the watermark and go to Edit>Copy. Go back to your work and go to Edit>Paste as New Layer. Image>Resize, if necessary, for the provided tube to 60%, resize all layers not checked. Place the tube to your liking.Effects>3D Effects>Drop Shadow, at your choice. 32. Choose and open one of the texts TituloChristmas_Xiki1 or TituloChristmas_Xiki2  Erase the watermark and go Edit>Copy. Go back to your work and go to Edit>Paste as New Layer. Place the text to your liking.33. Image>Add Borders, 1 pixel, symmetric, foreground color. 34. Open Creditos-bySoxikibem and go to Edit>Copy. Go back to your work and go to Edit>Paste as New Layer. Place to your liking.Don't forget the watermark of your translator. 35. Sign your work on a new layer. Layers>Merge>Merge All and save as jpg. Version with my tube from Pinterest image; for the misted thanks Virginia   Your versions. Thanks  Irene  Kika  Jolcsi  If you have problems or doubts, or you find a not worked link, or only for tell me that you enjoyed this tutorial, write to me. 23 November 2025 |


