|
LIMITLESS DREAMS  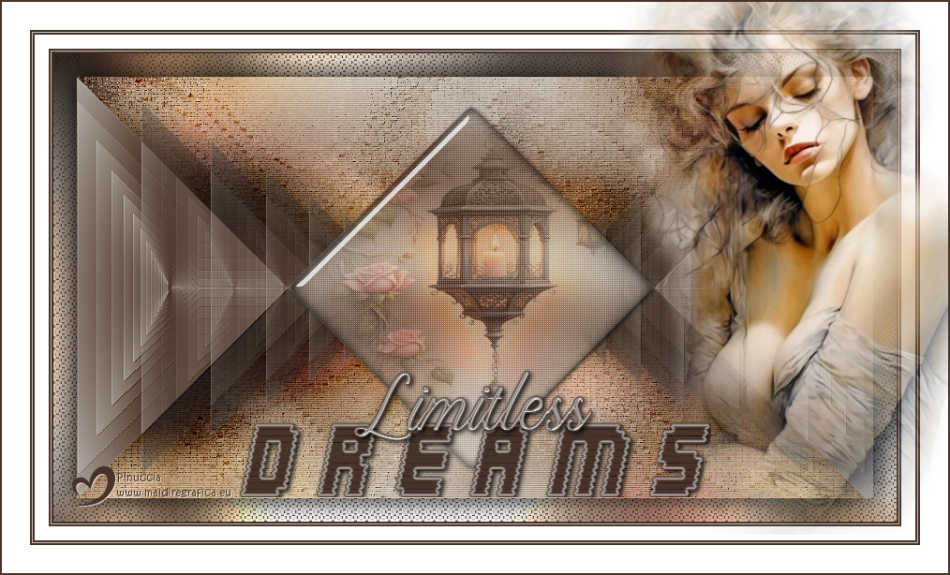

This tutorial was written with Psp2022 and translated with PspX2020, but it can also be made using other versions of PSP.
For this tutorial, you will need:  For the tubes thanks PqnaAlice. The rest of the material is by Soxikibem. (The links of the tubemakers here).  consult, if necessary, my filter section here Filters Unlimited 2.0 here Penta.com - Drag, Dot and Cross here Penta.com - VTR2 here Simple - Pizza Slice Mirror here FM Tile Tools - Blend Emboss here Graphics Plus - Cross Shadow here Alien Skin Eye Candy 5 Impact - Glass here Filters Penta.com, Simple and Graphics Plus can be used alone or imported into Filters Unlimited. (How do, you see here) If a plugin supplied appears with this icon  it must necessarily be imported into Unlimited it must necessarily be imported into Unlimited You can change Blend Modes according to your colors. In the newest versions of PSP, you don't find the foreground/background gradient (Corel_06_029). You can use the gradients of the older versions. The Gradient of CorelX here  Copy the Selections in the Selections Folder. 1. Choose 3 colors to work. Set your foreground color to #473328, and your background color to #c2beb7.  color 3: #ffffff. Set your foreground color to a Foreground/Background Gradient, style Sunburst  2. Open a new transparent image 800 x 550 pixels. Flood Fill  the transparent image with your Gradient. the transparent image with your Gradient.3. Effects>Plugins>Simple - Pizza Slice Mirror. This Effect works without window; result: 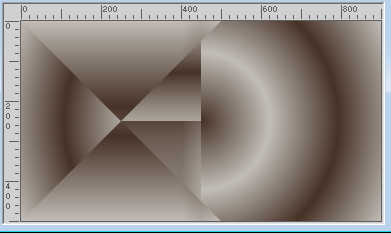 Layers>Duplicate. Image>Mirror>Mirror Horizontal. Layers>Properties>General>Blend Mode: Soft Light. 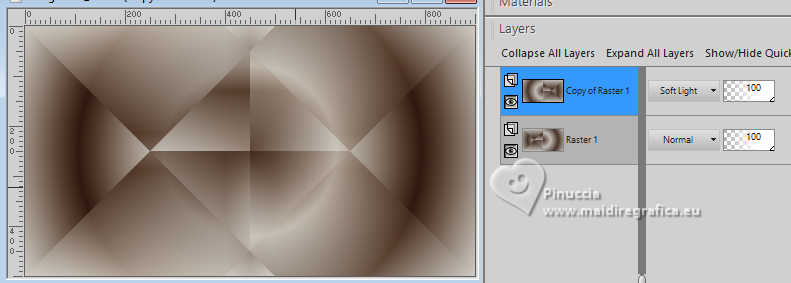 Layers>Merge>Merge Down. 4. Effects>Reflection Effects>Rotating Mirror.  5. Selections>Load/Save Selections>Load Selection From Disk. Look for and load the selection LimitlessDreams_Xiki1 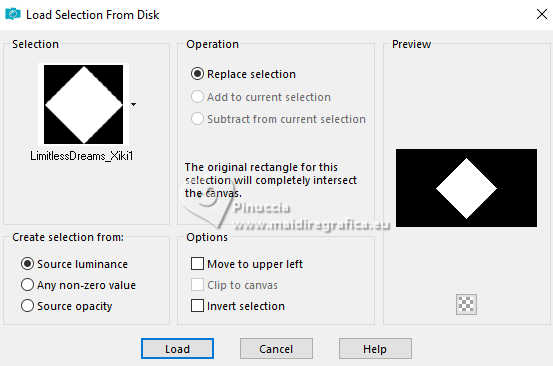 Selections>Promote Selection to Layer. Adjust>Blur>Gaussian Blur - radius 20. 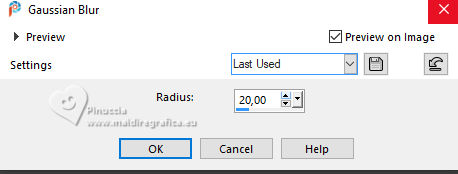 6. Effects>Plugins>Penta.com - Dot and Cross. 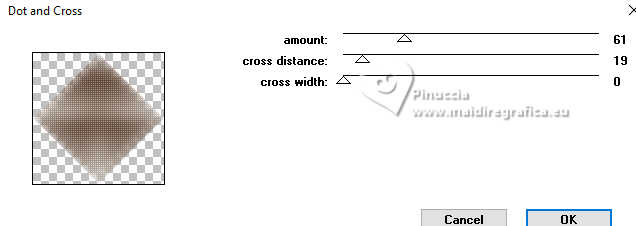 Keep selected. 7. Layers>New Raster Layer. Open the misted 168PaisagemByPqnaAlice (of a flower one) 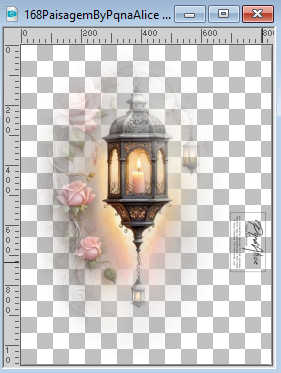 Erase the watermark and go to Edit>Copy. Go back to your work and go to Edit>Paste Into Selection. Adjust>Sharpness>Sharpen. Layers>Properties>General>Blend Mode: Overlay - Opacity: 60%. 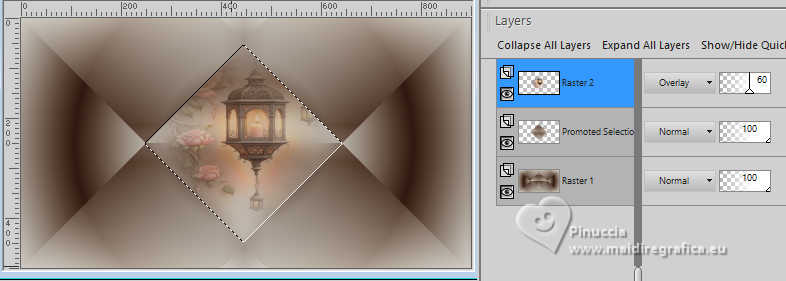 Layers>Merge>Merge Down. Keep always selected. 8. Layers>New Raster Layer. Effects>Plugins>Alien Skin Eye Candy 5 Impact - Glass 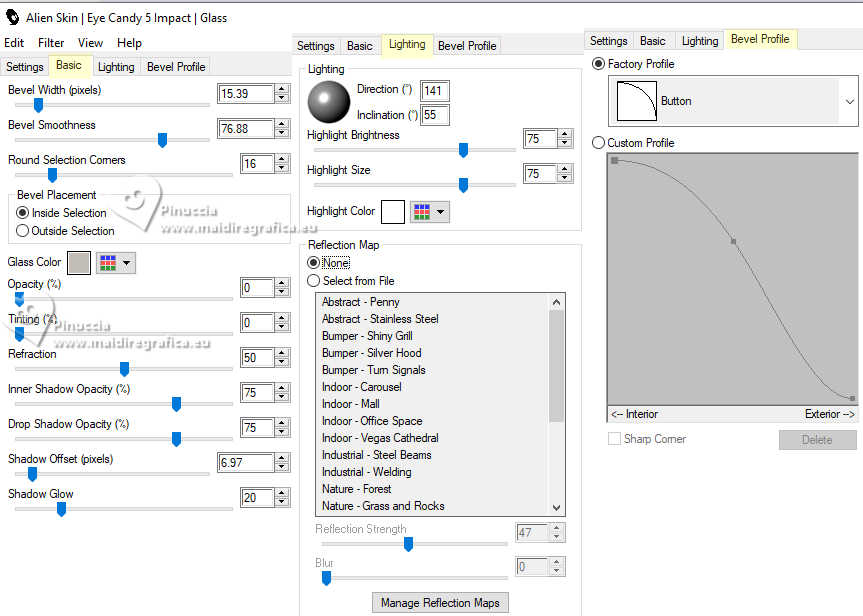 9. Layers>Merge>Merge Down. Selections>Select None. 10. Activate the layer Raster 1. Selections>Load/Save Selections>Load Selection From Disk. Look for and load the selection LimitlessDreams_Xiki2 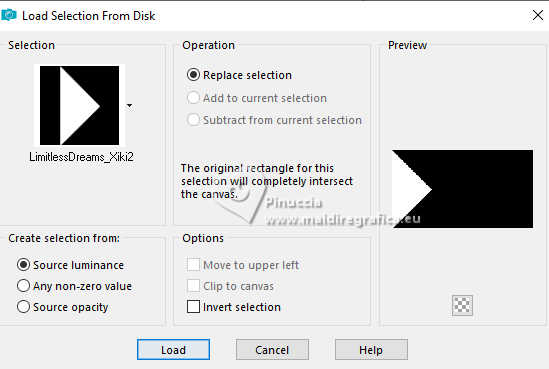 Selections>Promote Selection to Layer. Effects>Reflection Effects>Feedback. 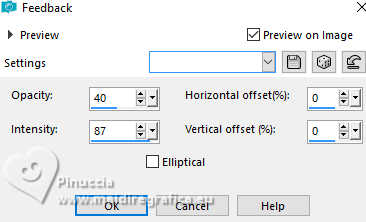 11. Effects>Plugins>Penta.com - Drag. 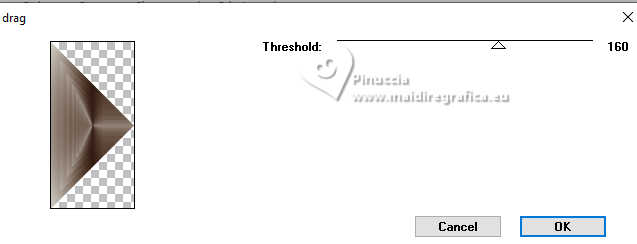 12. Adjust>Sharpness>Sharpen. Selections>Select None. Effects>Refelection Effects>Rotating Mirror, same settings. 13. Effects>Reflection Effects>Feedback, same settings. 14. Effects>Plugins>FM Tile Tools - Blend Emboss, default settings. 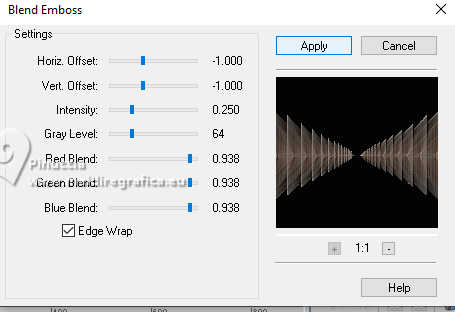 15. Layers>Duplicate. Activate the layer below, Promoted Selection 1. 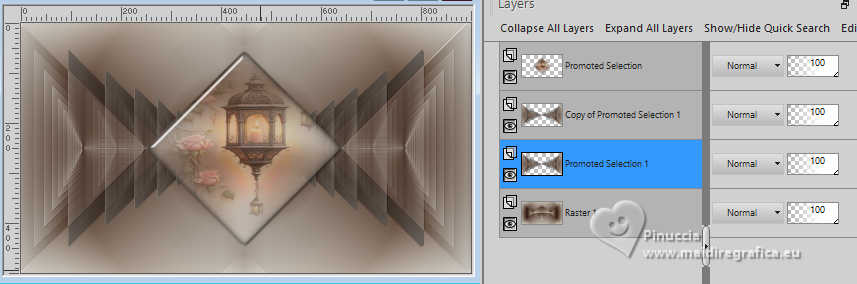 Adjust>Blur>Gaussian Blur - radius 20. Layers>Properties>General>Blend Mode: Multiply. 16. Activate the layer Raster 1. Effects>Plugins>Penta.com - VTR 2 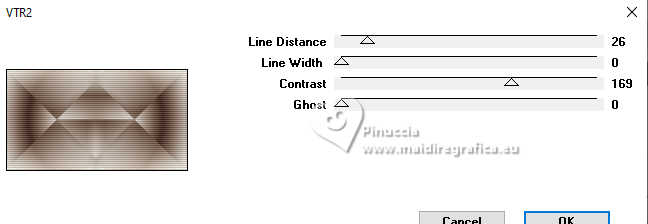 17. Layers>New Raster Layer. Selections>Select All. Edit>Copy into selection - the misted is still in memory 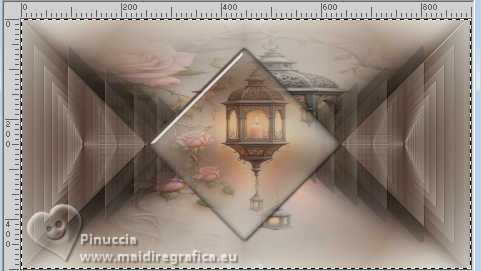 Selections>Select None. 18. Effects>Image Effects>Seamless Tiling, default settings.  Adjust>Blur>Radial Blur. 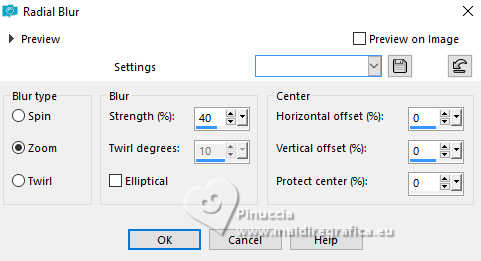 Layers>Properties>General>Blend Mode: Hard Light. * In my second version I used Blend Mode Luminance. 19. Effects>Texture Effects>Mosaic-Antique. 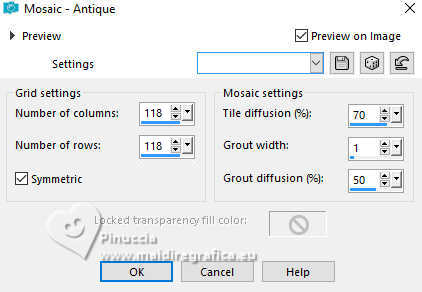 In the previous version to PSP2022, the Grid settings only go up to 100, then apply the numbering 100 in Number of columns and rows. 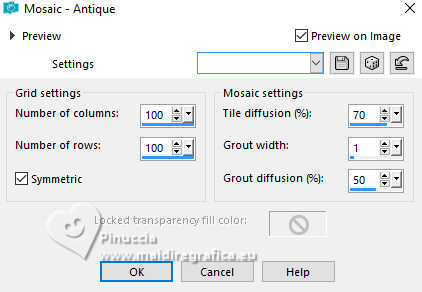 Here below the difference between the two versions 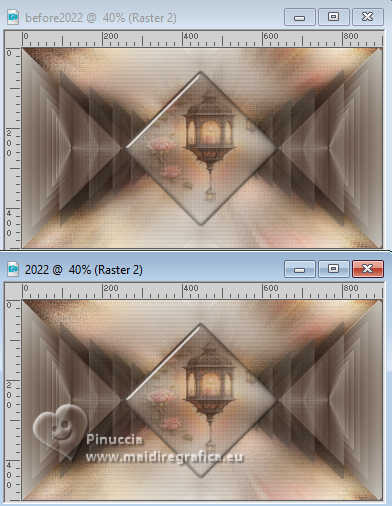 20. Your tag and the layers.  21. Stay on the layer Raster 2. Open DecorXiki  Edit>Copy. Go back to your work and go to Edit>Paste As New Layer. * The Blend Mode of this tube is setting to Burn; change it if you wish or if it is better for your work. 22. Activate your top layer, Promoted Selection. Merge>Merge All. Selections>Select All. Selections>Modify>Contract - 25 pixels. Selections>Invert. Adjust>Blur>Gaussian Blur, radius 20. 23. Effects>Plugins>Graphics Plus - Cross Shadow, default settings.  24. Effects>Texture Effects>Weave, weave color foreground. 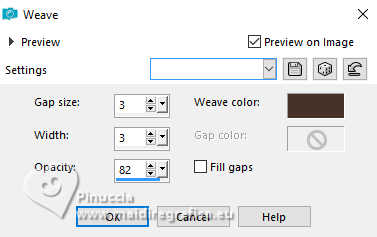 25. Selections>Invert. Effects>3D Effects>Drop Shadow, color black. 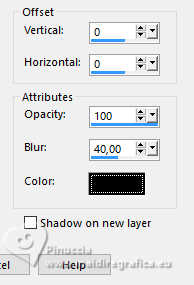 Selections>Select None. 26. Image>Add borders, 2 pixels, symmetric, foreground color. Image>Add borders, 1 pixel, symmetric, background color. Image>Add borders, 2 pixels, symmetric, foreground color. Image>Add borders, 15 pixels, symmetric, color white. Image>Add borders, 2 pixels, symmetric, foreground color. Image>Add borders, 1 pixel, symmetric, background color. Image>Add borders, 2 pixels, symmetric, foreground color. Image>Add borders, 30 pixels, symmetric, color white. 27. Open your main tube 1183MulherByPqnaAlice  Erase the watermark and go to Edit>Copy. Go back to your work and go to Edit>Paste As New Layer. Place and apply the effect to your liking. 28. Open TituloByXiki  Erase the watermark and go to Edit>Copy. Go back to your work and go to Edit>Paste As New Layer. Pick Tool  Position X: 253,00 - Position Y: 389,00.  29. Image>Add Borders, 2 pixels, symmetric, foreground color. 30. Image>Resize, if you want. Sign your work and save as jpg. For the tubes of this version thanks PqnaAlice and Ema 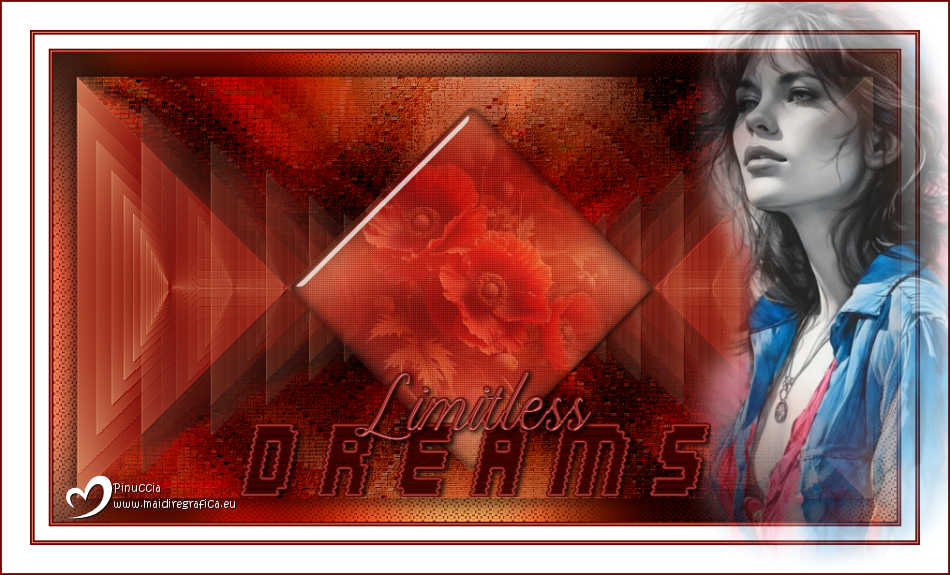  Your versions. Thanks 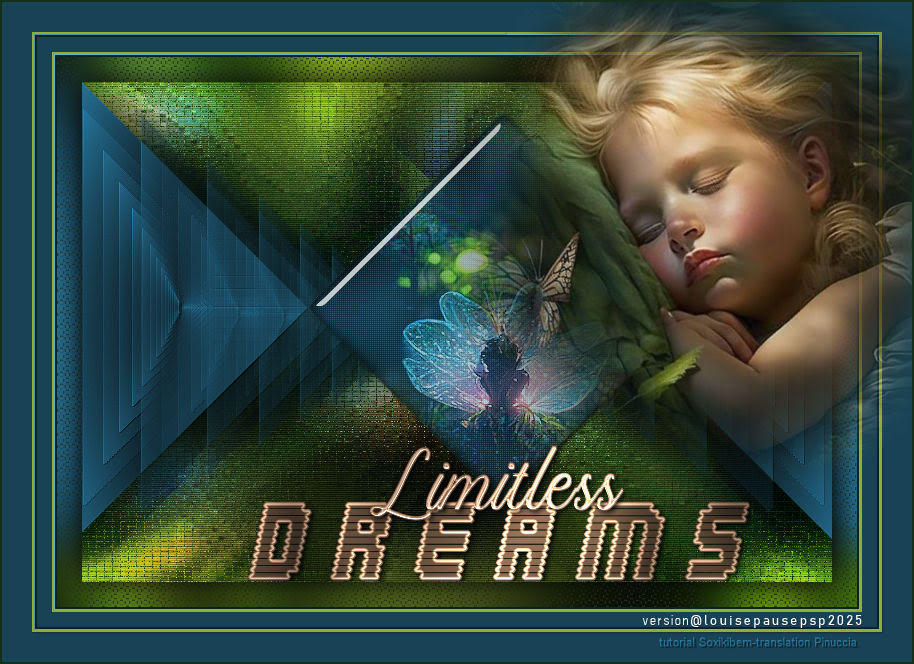 Louise 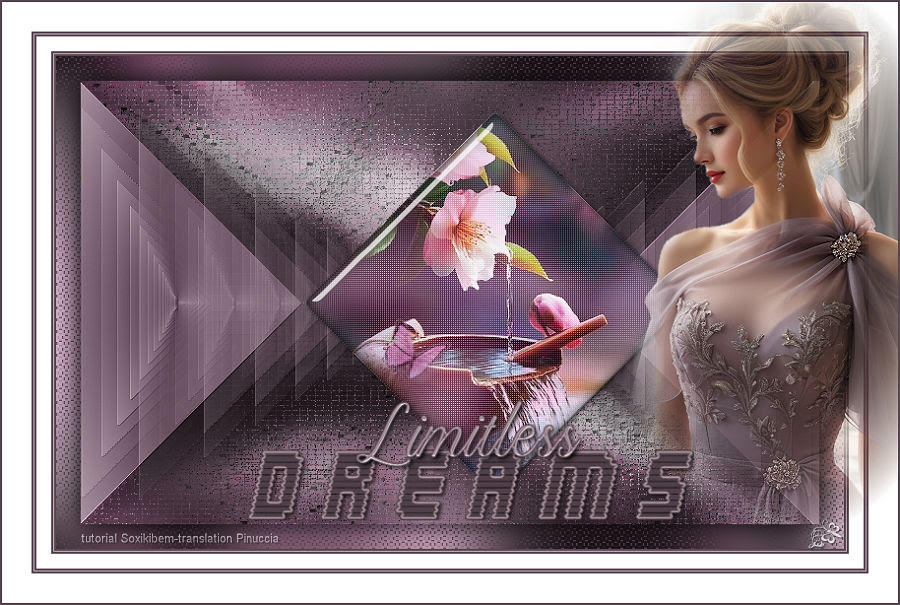 Jolcsi 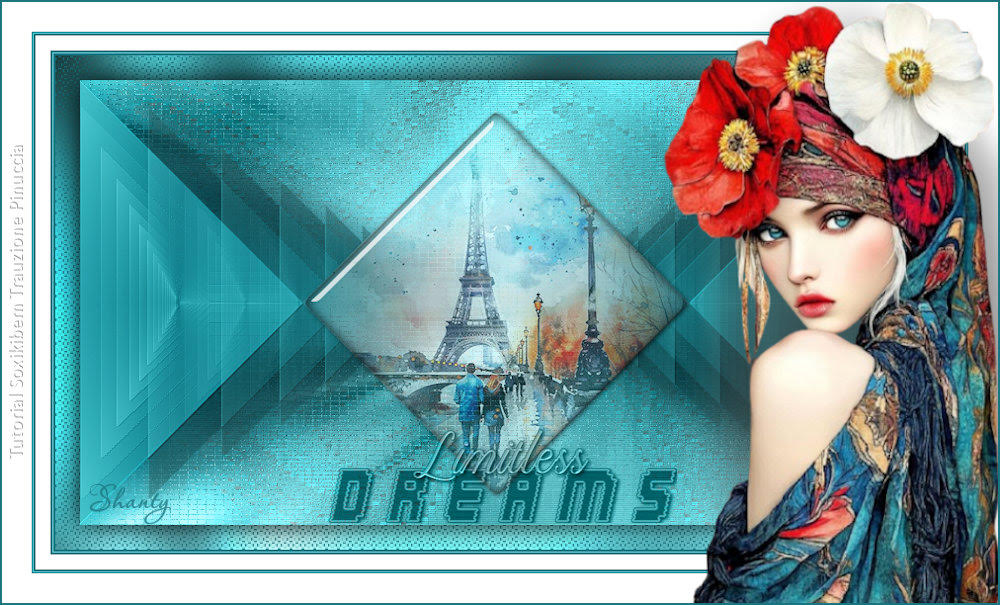 Shanty 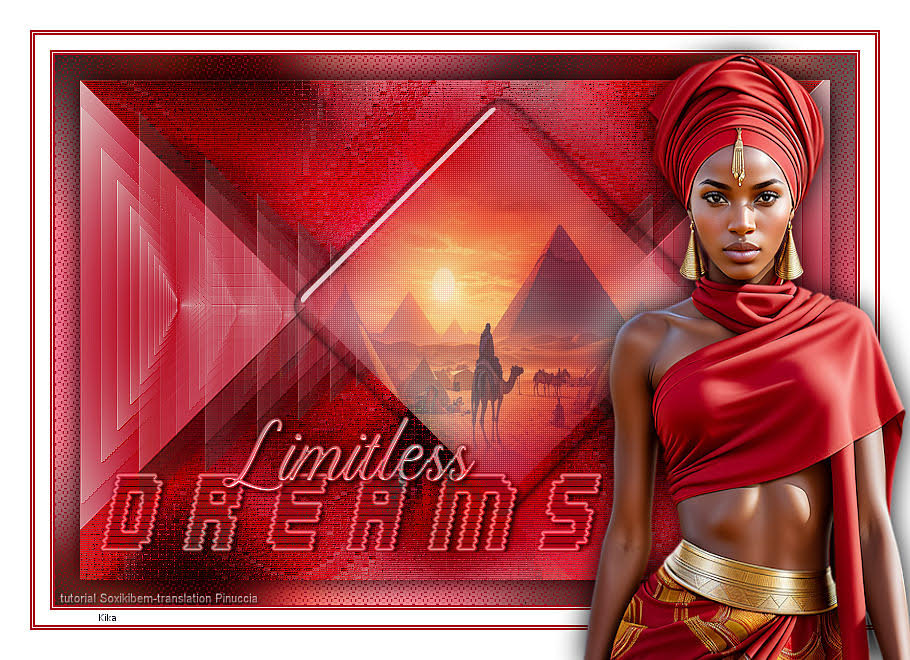 Kika 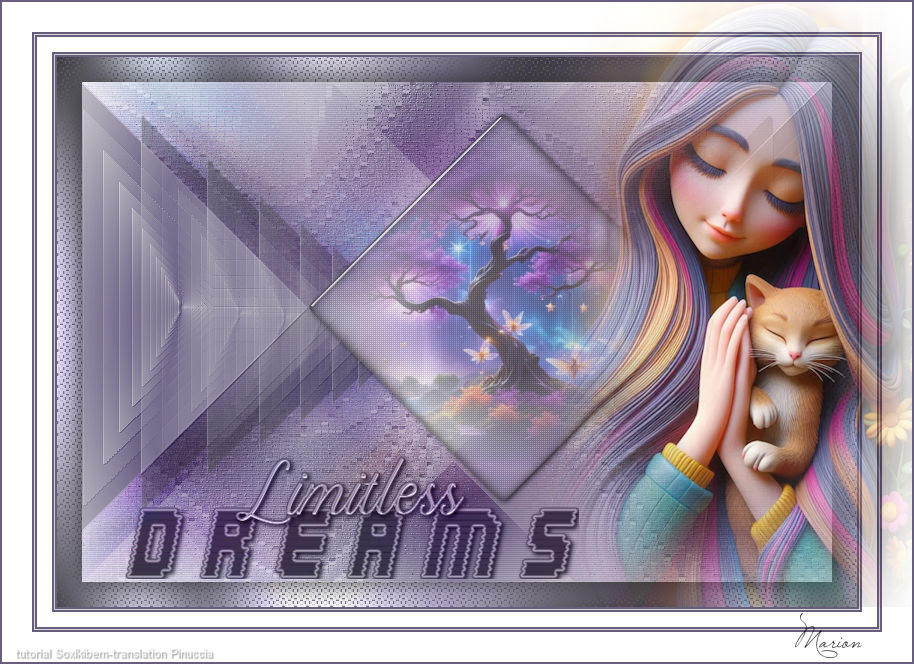 Marion  Pia   If you have problems or doubts, or you find a not worked link, or only for tell me that you enjoyed this tutorial, write to me. 12 February 2025 |


