|
MYSTIC TWILIGHT  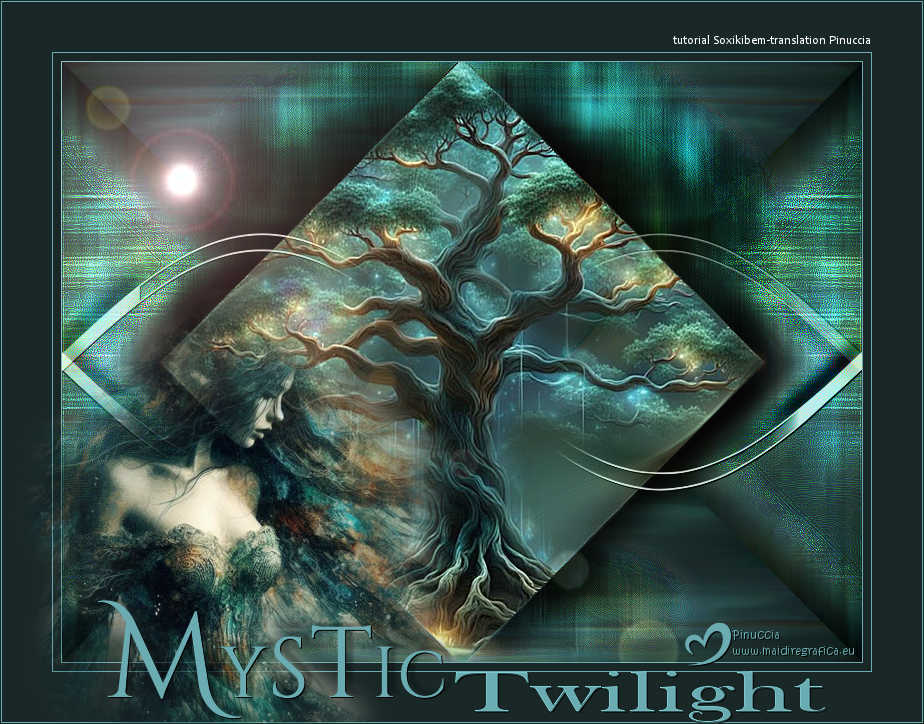
 Among the gentle shadows, an ancient tree glows with an ethereal enchantment, its branches pulsating with mystical light. Time seems suspended, and those who dare to cross this enchanted twilight feel the call of magic, as if the universe itself were revealing its secrets in one last whisper before the night.
This tutorial was written with Psp2022 and translated with PspX2020, but it can also be made using other versions of PSP.
For this tutorial, you will need:  Thanks for the tubes PqnaAlice. (The links of the tubemakers here).  consult, if necessary, my filter section here Filters Unlimited 2.0 here Mehdi - Sorting Tiles here Mock - Windo here Mirror Rave - Quadrant Flip here Photo Aging Kit - Dirt &Dust (to import in Unlimited) here Filters Mirror Rave and Mock can be used alone or imported into Filters Unlimited. (How do, you see here) If a plugin supplied appears with this icon  You can change Blend Modes according to your colors.  Copy the Selections in the Selections Folder. 1. Choose 2 colors to work. For the example: Set your foreground color to #192727, and your background color to #6aacb2. 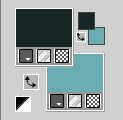 2. Open a new transparent image 800 x 600 pixels. Flood Fill  the transparent image with your foreground color. the transparent image with your foreground color.Selections>Select All. Open your landscape misted 091DiversosbyPqnaAlice 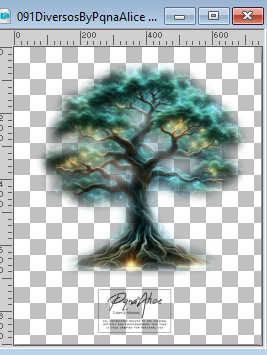 Erase the watermark and go to Edit>Copy. Go back to your work and go to Edit>Paste Into Selection. Selections>Select None. 3. Effects>Image Effects>Seamless Tiling, default settings.  Effects>Plugins>Mehdi - Sorting Tiles 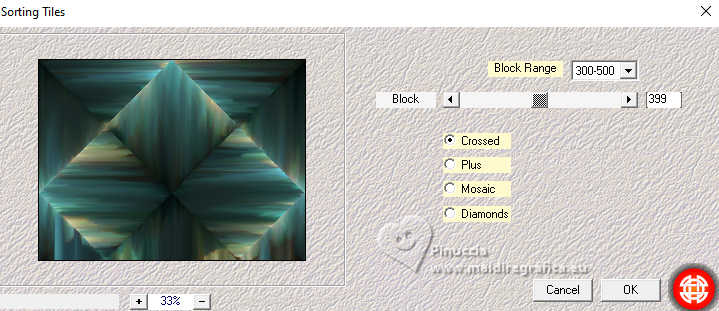 4. Effects>Plugins>Mirror Rave - Quadrant Flip 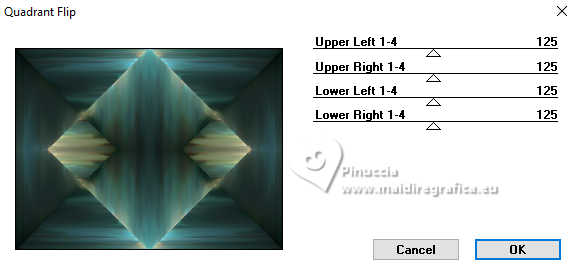 5. Selections>Load/Save Selections>Load Selection From Disk. Look for and load the selection 285_Xiki_1 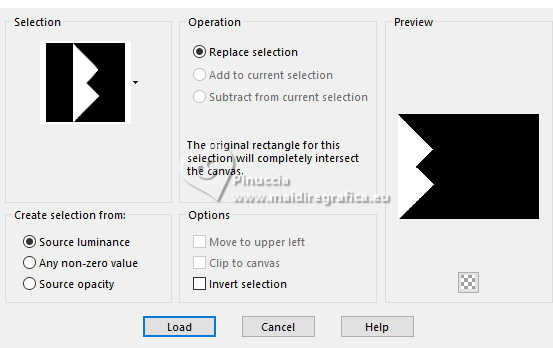 Selections>Promote Selection to Layer. The landscape's misted is still in memory: Edit>Paste Into Selection. Adjust>Blur>Motion Blur. 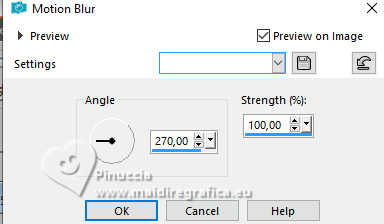 Edit>Repeat Motion Blur. Effects>Edge Effects>Enhance More. Edit>Repeat Enhance Edges More. 6. Effects>Plugins>Filters Unlimited 2.0 - Photo Aging Kit - Dirt & Dust 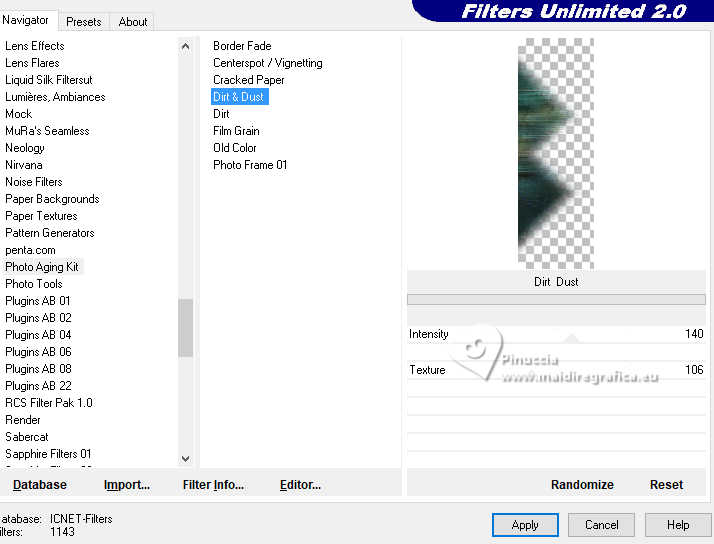 7. Selections>Select None. Layers>Duplicate. Image>Mirror>Mirror Horizontal. Layers>Merge>Merge Down. 8. Layers>New Raster Layer. Effects>Plugins>Mock - Windo 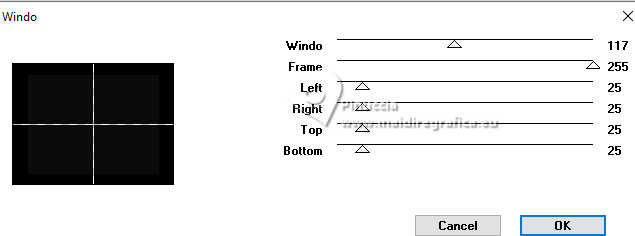 9. Activate your Magic Wand Tool  , ,Add(Shift) - Tolerance and Feather 0, and click in the 4 squares to select them 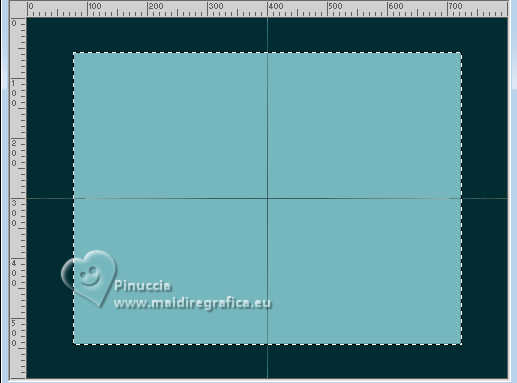 Press CANC on the keyboard  don't use Edit>Cut because you have in memory the landscape's misted, and you'll have to use it again. Selections>Select None. 10. Effects>Geometric Effects>Perspective - Horizontal: 98, Transparent.  Effects>Geometric Effects>Perspective - Horizontal: -98, Transparent. 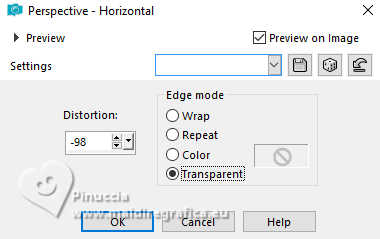 You'll have this 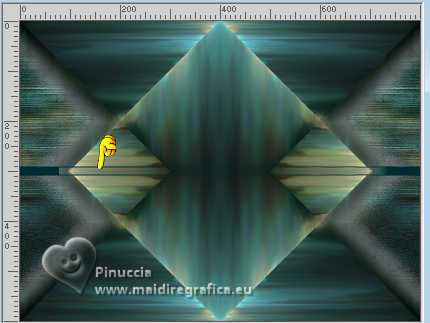 Effects>Distortion Effects>Wave. 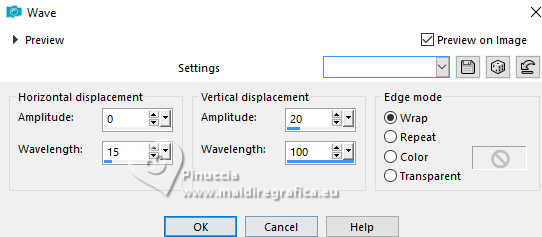 11. Image>Negative Image. You'll have this 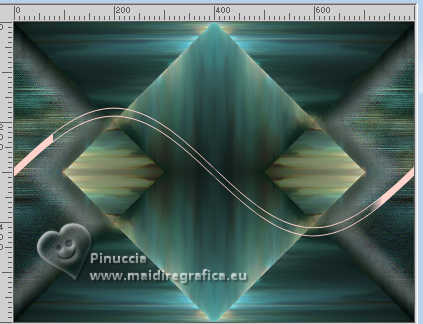 Effects>3D Effects>Drop Shadow, color black #000000 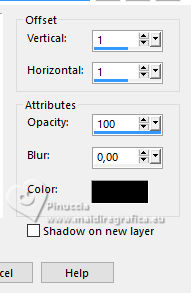 Effects>3D Effects>Drop Shadow, color black #000000. 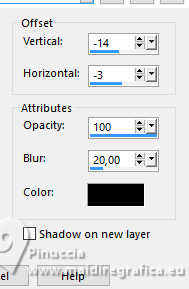 Layers>Properties>General> Blend Mode: Luminance (L). 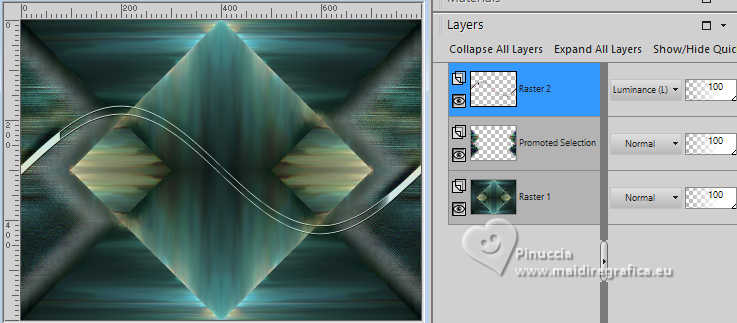 12. Activate the layer Raster 1. Selections>Load/Save Selections>Load Selection From Disk. Look for and load the selection 285_Xiki_2 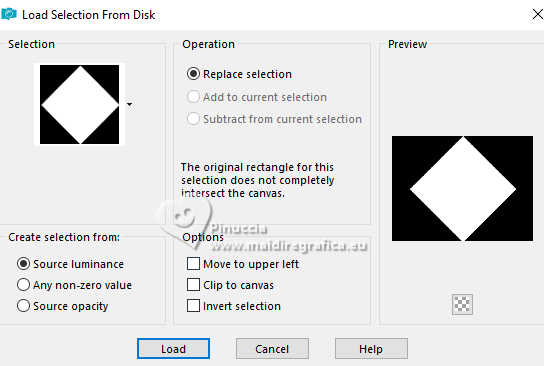 Selections>Promote Selection to Layer. Adjust>Blur>Radial Blur. 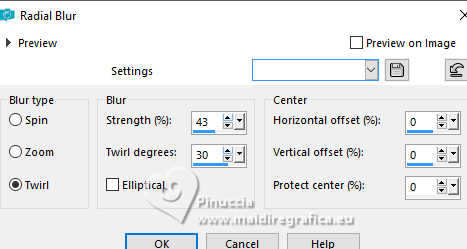 Effects>Edge Effects>Enhance More. 13. Your landscape's misted should be still in memory: Edit>Paste as New Layer. Place  the tube in the selection to your liking. the tube in the selection to your liking.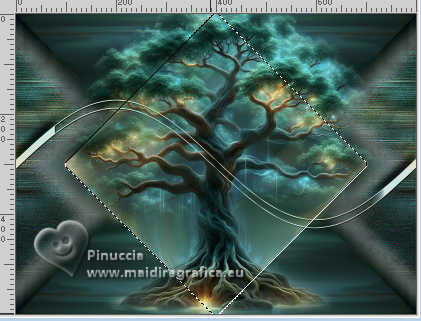 14. Selections>Invert. Adjust>Blur>Motion Blur. 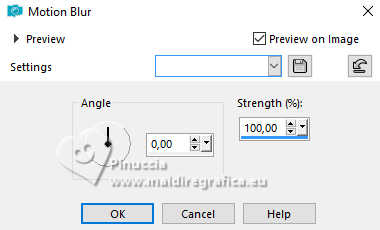 Effects>Edge Effects>Enhance Edit>Repeat Enhance Edges. 15. Selection>Promote Selection to Layer. Activate the layer Raster 3 Edit>Cut or press CANC on the keyboard. Selections>Select None. Activate the layer Promoted Selection 2 Layers>Arrange>Move Down 2 times. 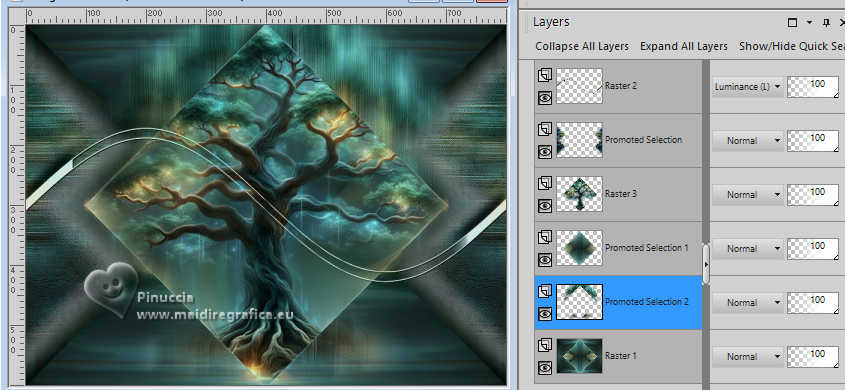 16. Activate your Crop Tool  Click on Merged Opaque .... 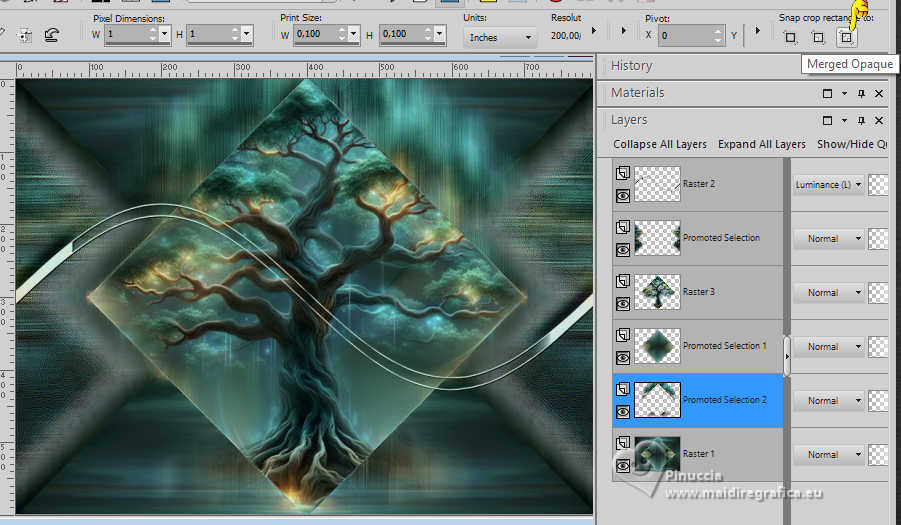 ... and after click Apply 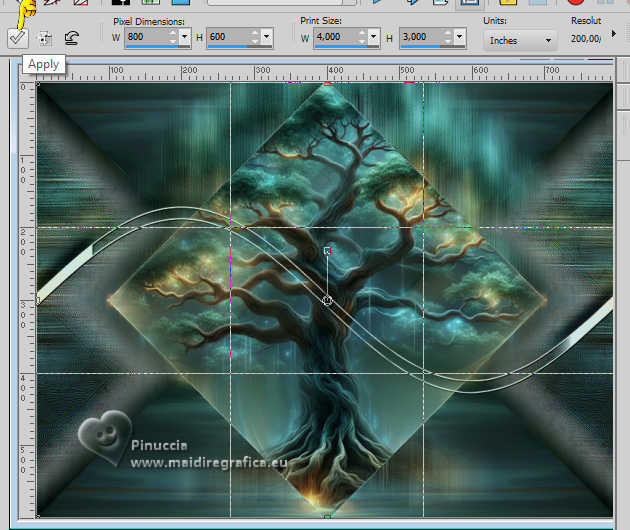 17. Change the Blend Mode of this layer, Promoted Selection 2 to Hard Light. Activate the layer above, Promoted Selection 1 Effects>3D Effects>Drop Shadow, color black #000000. 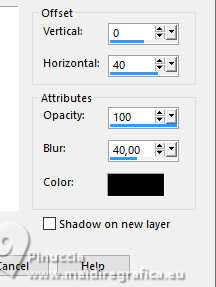 Repeat Drop shadow, horizontal -40. 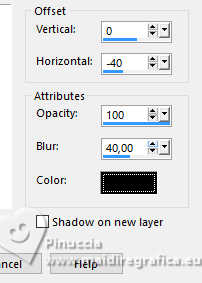 18. Activate the layer above, Raster 3 Adjust>Sharpness>Sharpen More 19. Activate the layer above, Promoted Selection Layers>Properties>General> Blend Mode: Dodge. 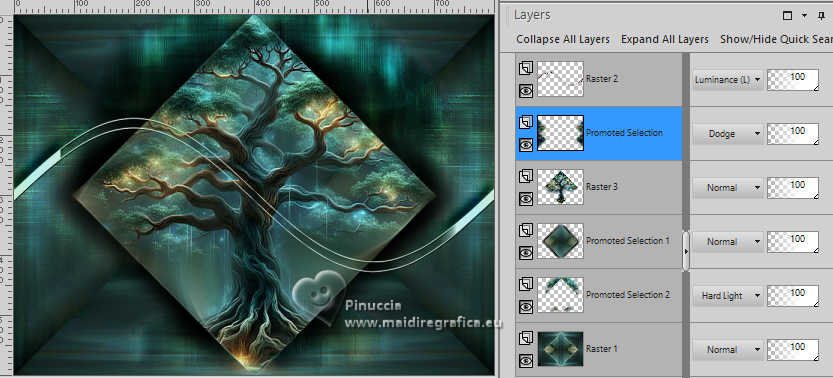 Layers>Duplicate. 20. Activate your top layer Raster 2 Effects>Image Effects>Seamless Tiling. 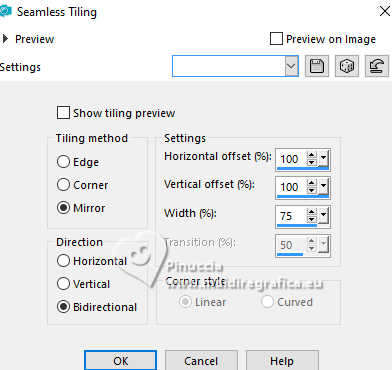 Selections>Load/Save Selections>Load Selection From Disk. Look for and load the selection 285_Xiki_3 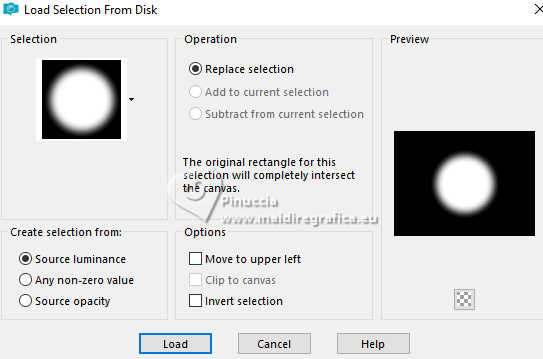 Edit>Cut or press CANC on the keyboard. Selections>Select None. Layers>Duplicate. 21. Your tag and the layers - They should be in the sequence as shown in the print below. Remember that you can change the blends as you prefer. 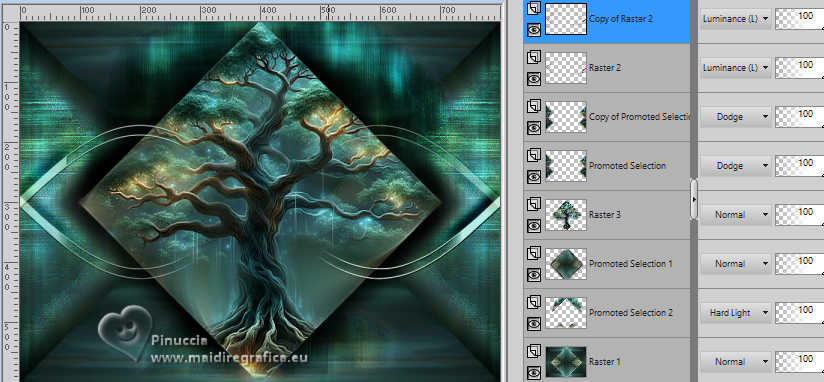 22. Image>Add Borders, 1 pixel, symmetric, background color. Effects>Plugins>Filters Unlimited 2.0 - Lens Flares - Flare 03. 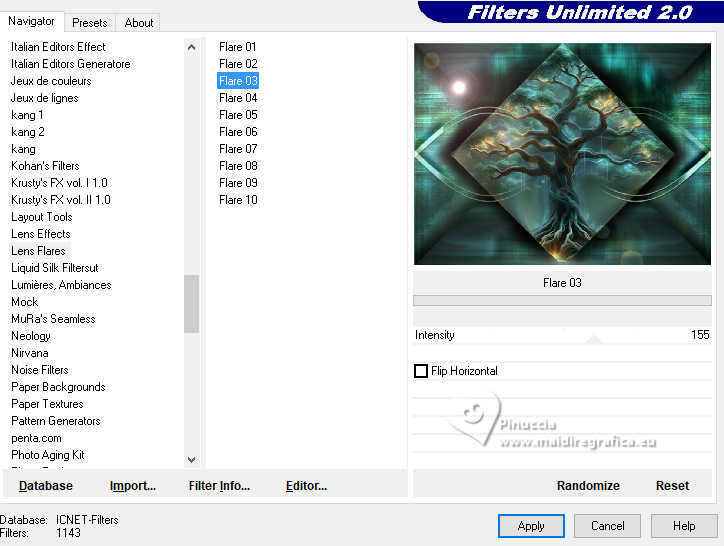 23. Image>Add Borders, 8 pixels, symmetric, foreground color. Image>Add Borders, 1 pixel, symmetric, background color. Image>Add Borders, 50 pixels, symmetric, foreground color. Image>Add Borders, 1 pixel, symmetric, background color. 24. Open your person's misted 1249MulherbyPqnaAlice  Erase the watermark and go to Edit>Copy. Go back to your work and go to Edit>Paste as new layer. Place  the tube to your liking. the tube to your liking.For me: Image>Mirror>Mirror Horizontal and I resized to 70%  25. Open TituloMT_Xiki  Erase the watermark and go to Edit>Copy. Go back to your work and go to Edit>Paste as new layer. Pick Tool  Position X: 97,00 - Position Y: 591,00.  26. Image>Add Borders, 1 pixel, symmetric, foreground color. 27. Sign your work and save as jpg. For the tube of this version thanks PqnaAlice; the misted is mine   Your versions. Thanks  Marion  Kika  Celine  If you have problems or doubts, or you find a not worked link, or only for tell me that you enjoyed this tutorial, write to me. |


