|
NOTES OF A DREAM  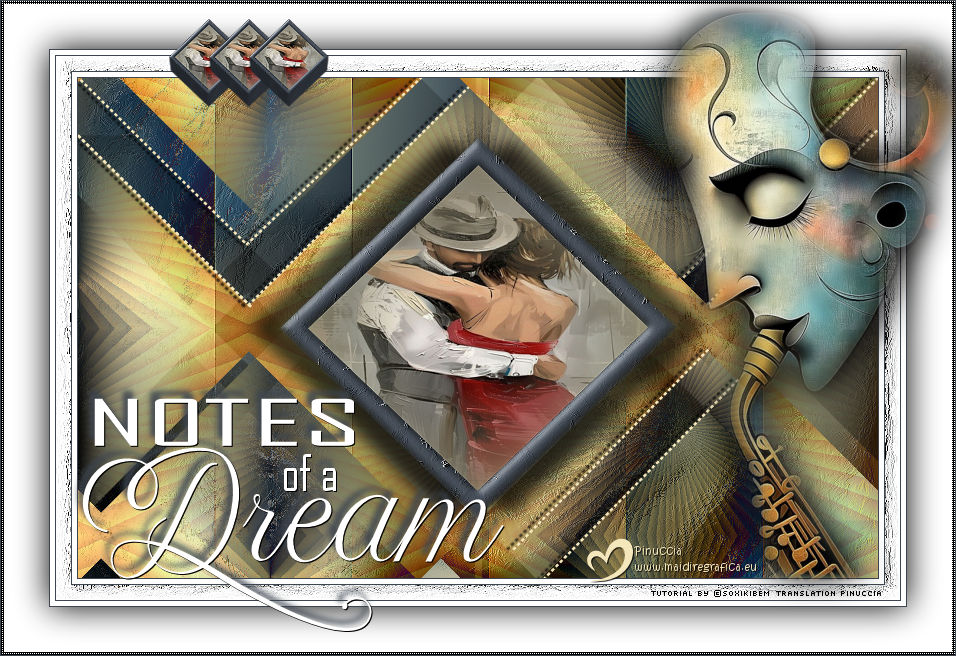
 Between soft shadows and golden lights, the melody floats like a whisper from the subconscious. Each note is a fragment of a dream, echoing in the air like memories dancing through time. The saxophone sings silent stories, carried by the rhythm of the heart.
This tutorial was written with Psp2022 and translated with PspX2020, but it can also be made using other versions of PSP.
For this tutorial, you will need:  Thanks for the tubes and the mask PqnaAlice and Narah. (The links of the tubemakers here).  consult, if necessary, my filter section here Filters Unlimited 2.0 here &<Bkg Designer sf10II> - Fan Blades (to import in Unlimited) here Alien Skin Eye Candy 5 Impact - Perspective Shadow - Extrude here Mehdi - Wavy Lab 1.1. here VanDerLee - Unplugged-X here  You can change Blend Modes according to your colors. In the newest versions of PSP, you don't find the foreground/background gradient (Corel_06_029). You can use the gradients of the older versions. The Gradient of CorelX here  Copy the Selection in the Selections Folder. 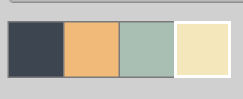 1. Choose 2 colors to work. Set your foreground color to color 2 #f0ba78, and your background color to color 1 #3d4550 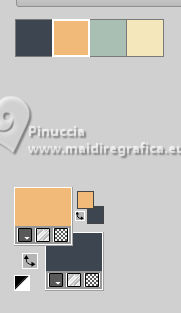 color 3 #a9bfb3 color 4 #f5e7bc 2. Open a new transparent image 800 x 500 pixels. Effects>Plugins>Mehdi - Wavy Lab 1.1. This filter creates gradients with the colors of your Materials palette. The first is your background color #3d4550, the second is your foreground color #f0ba78. Change the last two colors created by the filtre: the third color with color 3 #09bfb3 and the fourth color with color 4 #f5e7bc. 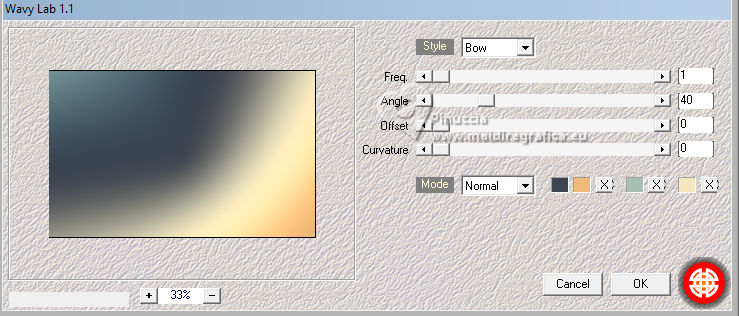 3. Layers>Duplicate. Effects>Geometric Effects>Skew. 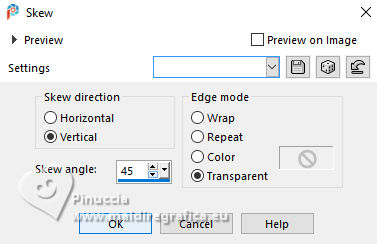 4. Effects>Plugins>Filters unlimited 2.0 - &<Bkg Designer sf10II> - Fan Blades. 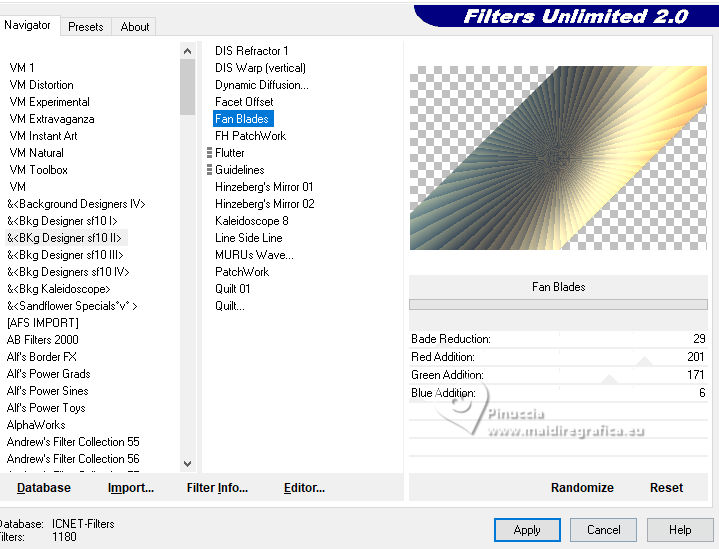 5. Effects>Reflection Effects>Kaleidoscope. 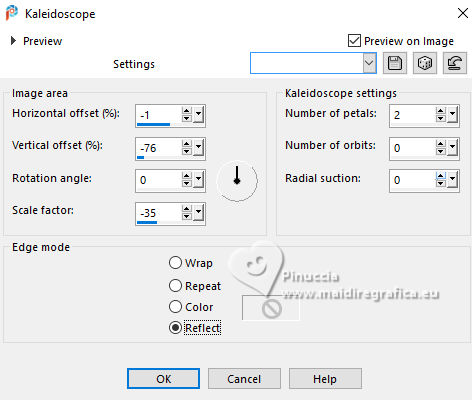 6. Layers>Duplicate. Activate the layer below, Copy of Raster 1. Effects>Plugins>VanDerLee - Unplugged-X - Defocus 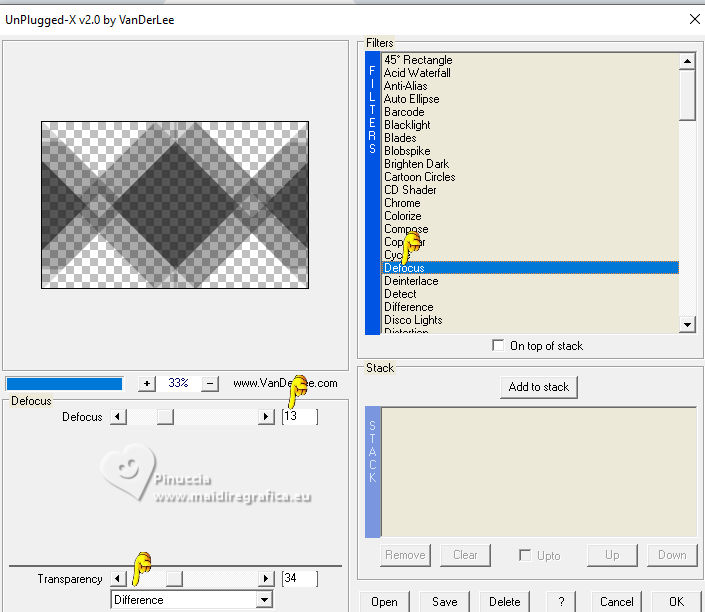 7. Activate the layer Raster 1. Layers>New Raster Layer. Selections>Select All. Open the tube 100DiversosByPqnaAlice 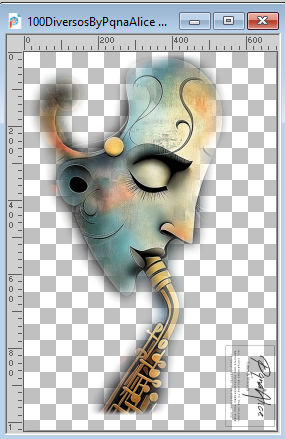 Erase the watermark and go to Edit>Copy. Minimize the tube Go back to your work and go to Edit>Paste Into Selection. Selections>Select None. 8. Effects>Image Effects>Seamless Tiling, default settings.  Adjust>Blur>Radial Blur. 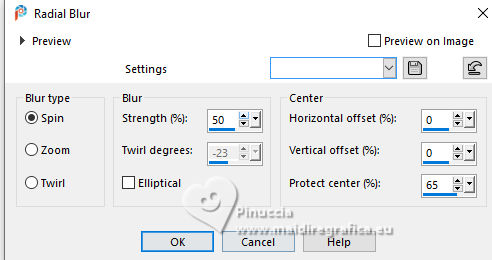 9. Effects>Art Media Effects>Brush Strokes. 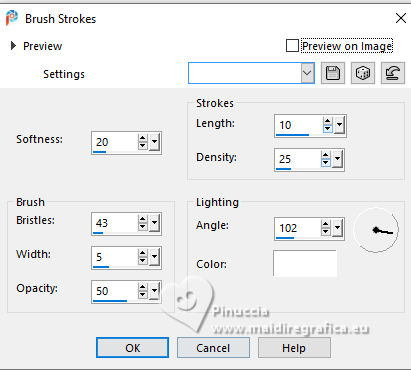 Layers>Properties>General>Blend Mode: Difference. 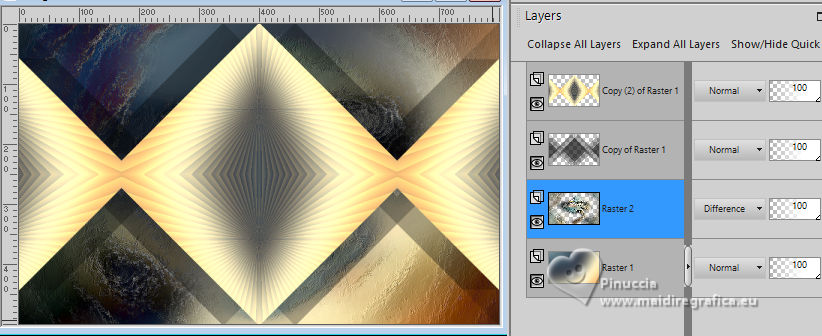 10. Activate the layer Raster 1. Effects>Texture Effects>Blinds - color 3 #09bfb3, or one of your colors, according to your work. 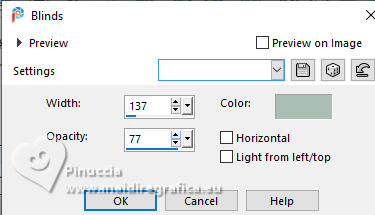 11. Effects>Edge Effects>Enhance. Activate again the layer Copy (2) of Raster 1. Effects>Image Effects>Seamless Tiling. 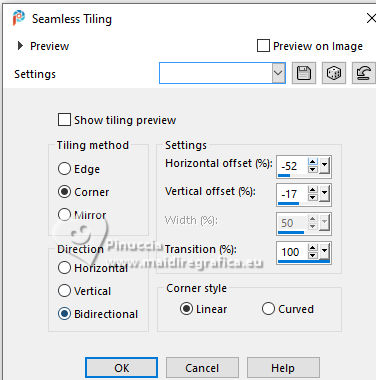 Layers>Properties>General>Blend Mode: Difference. Note of the author: in my second version I used Hard Light 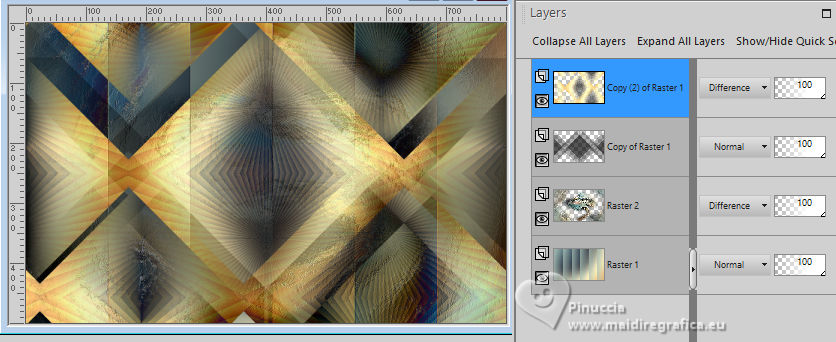 12. Selections>Load/Save Selections>Load Selection From Disk. Look for and load the selection NOAD_Xiki1 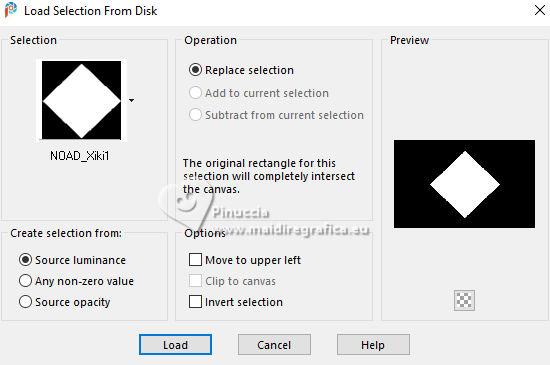 Layers>New Raster Layer. Flood fill  the selection with your dark background color #3d4550. the selection with your dark background color #3d4550.Selections>Modify>Contract - 20 pixels. Press CANC on the keyboard  13. Layers>New Raster Layer. Set your foreground color to the color 4. 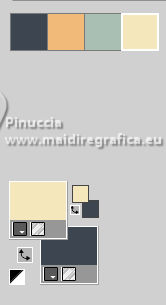 Reduce the opacity of your Flood Fill Tool to 50%.Flood Fill the selection with your foreground color.Set again the opacity of your Flood Fill Tool to 100. Open the misted 031CasalByPqnaAlice 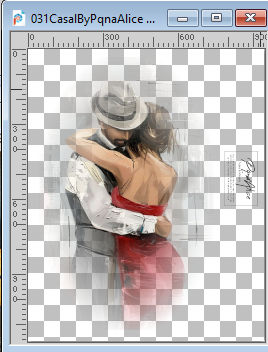 Edit>Copy. Go back to your work and go to Edit>Paste Into Selection. Adjust>Sharpness>Sharpen. Selections>Select None. 14. Activate the layer Raster 3. Selections>Select All. Selections>Float. Selections>Defloat. Effects>Art Media Effects>Brush Strokes, last settings. 15. Effects>3D Effects>Inner Bevel. 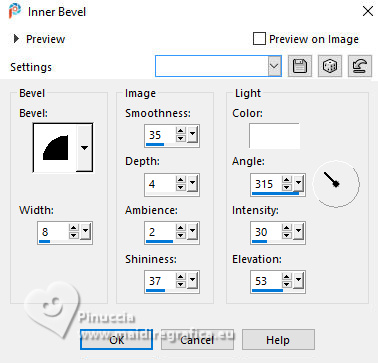 Selections>Select None. 16. Activate the layer Raster 4. Layers>Merge>Merge Down. Edit>Copy. Edit>Paste as New Image. Minimize this image: you'll use it later. 17. Open DecorNOAD_Xiki 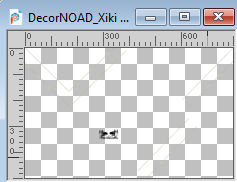 Erase the watermark and go to Edit>Copy. Go back to your work and go to Edit>Paste as New Layer. Don't move it. 18. Effects>Plugins>Alien Skin Eye Candy 5 Impact - Perspective Shadow. 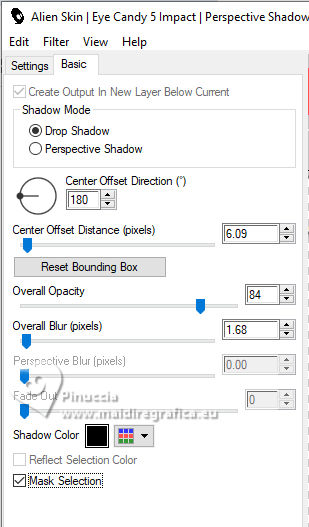 19. Activate the layer Raster 3. Effects>Plugins>Alien Skin Eye Candy 5 Impact - Perspective Shadow. Shadow color: color black, or your dark background color. 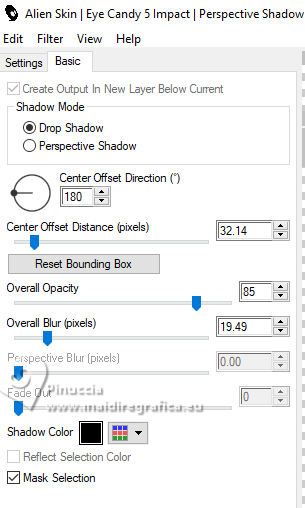 20. Repeat Effects>Plugins>Alien Skin Eye Candy 5 Impact - Perspective Shadow. Change Center Offset Direction to 0  21. Image>Add Borders, 1 pixel, symmetric, dark background color. Image>Add Borders, 5 pixels, symmetric, color #ffffff. Image>Add Borders, 1 pixel, symmetric, dark background color. Selections>Select All. Image>Add Borders, 15 pixels, symmetric, color #ffffff. Selections>Invert. 22. Effects>Art Media Effects>Brush Strokes, last settings. Selections>Select None. 23. Image>Add Borders, 1 pixel, symmetric, dark background color. Image>Add Borders, 5 pixels, symmetric, color #ffffff. Image>Add Borders, 1 pixel, symmetric, dark background color. Selections>Select All. Image>Add Borders, 45 pixels, symmetric, color #ffffff. 24. Effects>3D Effects>Drop Shadow, color #000000. 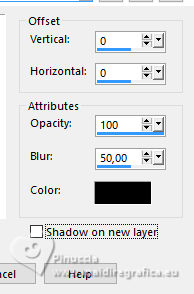 Selections>Select All. Image>Add Borders>3 pixels, symmetric, color #ffffff. Selections>Invert. 25. Effects>Texture Effects>Blinds. 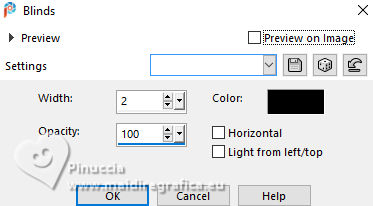 Repeat Effects>Texture Effects>Blinds, Horizontal checked. 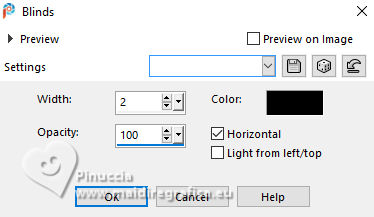 Selections>Select None. 26. Image>Add Borders, 1 pixel, symmetric, dark background color. 26. Open minimized at step 16 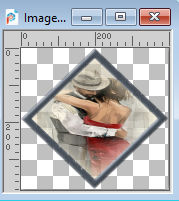 Edit>Copy. Go back to your work and go to Edit>Paste as new layer. Image>Resize, to 20%, resize all layers not checked. Adjust>Sharpness>Sharpen. 28. Effects>Plugins>Alien Skin Eye Candy 5 Impact - Extrude. 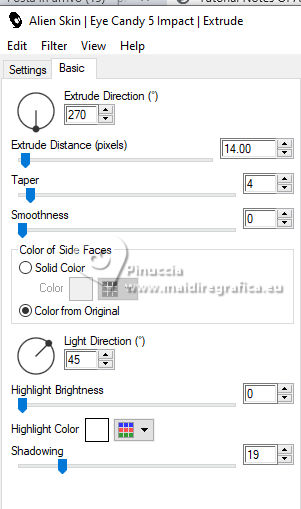 29. Pick Tool  Position X: 169,00 - Position Y: 19,00. 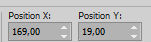 Layers>Duplicate. Position X: 209,00 - Position Y: 19,00. 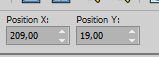 Layers>Duplicate. Position X: 249,00 - Position Y: 19,00. 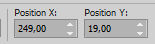 30. Activate again the tube 100DiversosByPqnaAlice Erase the watermark and go to Edit>Copy. Go back to your work and go to Edit>Paste as New Layer. Image>Mirror>Mirror Horizontal. Image>Resize, to 59%, resize all layers not checked. Move  the tube tu the right side. the tube tu the right side.Effects>3D Effects>Drop shadow, at your choice. 31. open TituloNOAD_Xiki 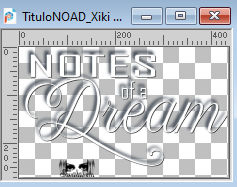 Erase the watermark and go to Edit>Copy. Go back to your work and go to Edit>Paste as New Layer. Move the text to your liking.32. Sign your work and save as jpg. The misted of this version is mine   Your versions. Thanks  If you have problems or doubts, or you find a not worked link, or only for tell me that you enjoyed this tutorial, write to me. 8 October 2025 |


