|
ONE LOOK  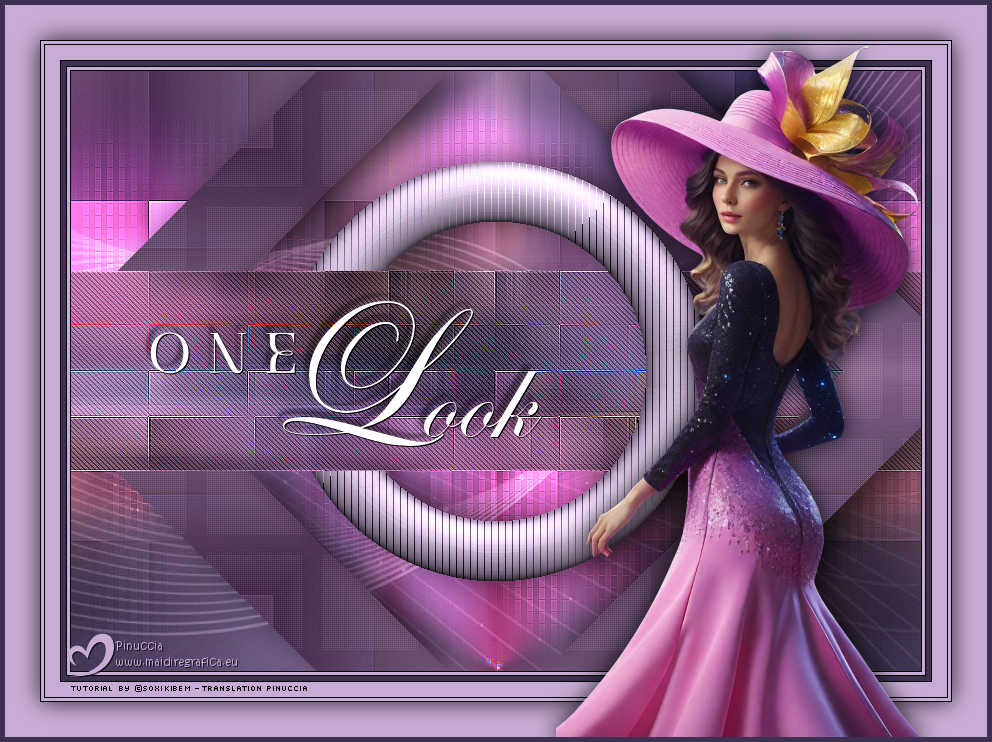
 She turned her head, unexpecting, and then she saw it - a moment that held time still, a glow that touched her soul. Her gaze met something beyond the visible, a whisper of destiny. And in that instant, she knew nothing would ever be the same.
This tutorial was written with Psp2022 and translated with PspX2020, but it can also be made using other versions of PSP.
For this tutorial, you will need:  Thanks for the tube and the mask PqnaAlice and Narah. (The links of the tubemakers here).  consult, if necessary, my filter section here Filters Unlimited 2.0 here Carolaine and Sensibility - CS-DLines here Filter Factory Gallery B - Circulator here Penta.com - Dot and Cross here Toadies - Weaver here Tramages - Tow the line here Filters Factory Gallery, Penta, Toadies, Tramages can be used alone or imported into Filters Unlimited. (How do, you see here) If a plugin supplied appears with this icon  it must necessarily be imported into Unlimited it must necessarily be imported into Unlimited You can change Blend Modes according to your colors. In the newest versions of PSP, you don't find the foreground/background gradient (Corel_06_029). You can use the gradients of the older versions. The Gradient of CorelX here  Colors 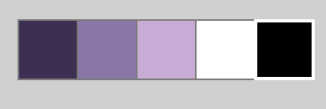 1. Choose 5 colors to work. Foreground: #3d3052 Background: #8b76a8 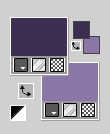 Color 3: #c9acd6 Color 4: #ffffff Color 5: #000000 Set your foreground color to a Foreground/Background Gradient, style Linear. 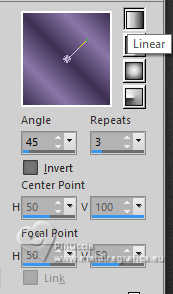 2. Open a new transparent image 850 x 600 pixels. Flood Fill  the transparent image with your Gradient. the transparent image with your Gradient.3. Selections>Select All. Open the tube 1289MulherByPqnaAlice  Erase the watermark and go to Edit>Copy. Minimize the tube: you'll use it again Go back to your work and go to Edit>Paste Into Selection. Selections>Select None. 4. Effects>Image Effects>Seamless Tiling, default settings  Adjust>Blur>Radial Blur. 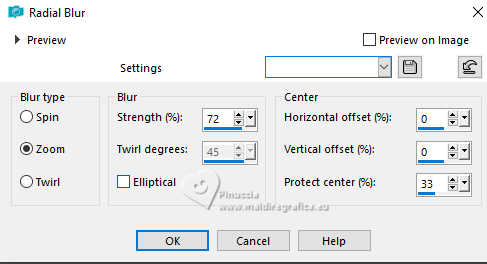 5. Effects>Plugins>Toadies - Weaver. 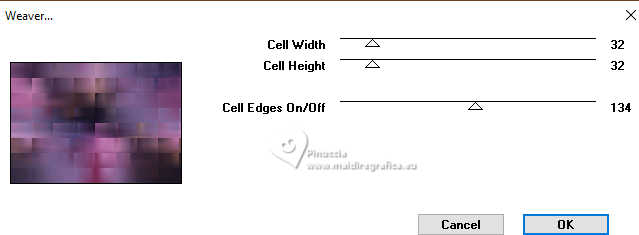 6. Effects>Distortion Effects>Pinch 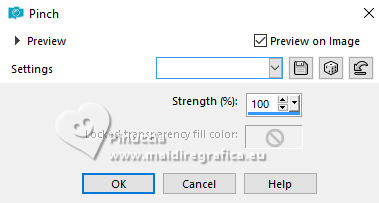 Effects>Edge Effects>Enhance. Effects>Image Effects>Seamless Tiling. 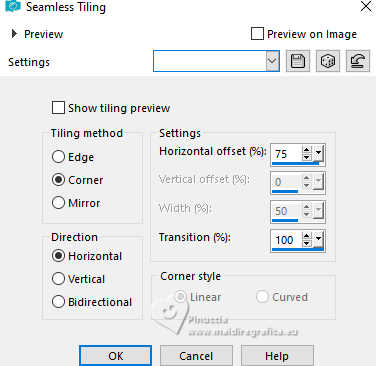 7. Activate your Selection Tool  (no matter the type of selection, because with the custom selection your always get a rectangle) clic on the Custom Selection 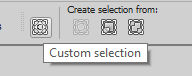 and set the following settings. 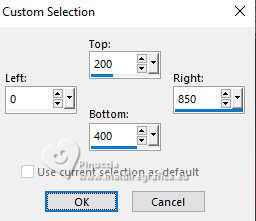 Selections>Promote Selection to Layer. Selections>Select None. 8. Effects>Plugins>Carolaine and Sensibility - CS-DLines. 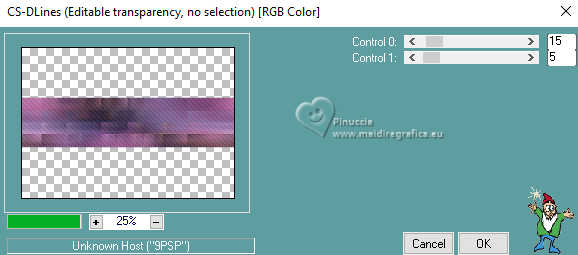 Effects>Edge Effect>Enhance. 9. Layers>New Raster Layer. Set your foreground color to the color 3 #c9acd6. 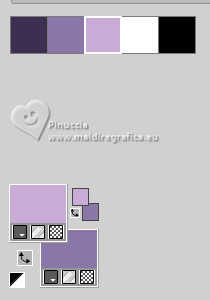 Flood Fill the layer with your foreground color.Effects>Plugins>Filter Factory Gallery B - Circulator. 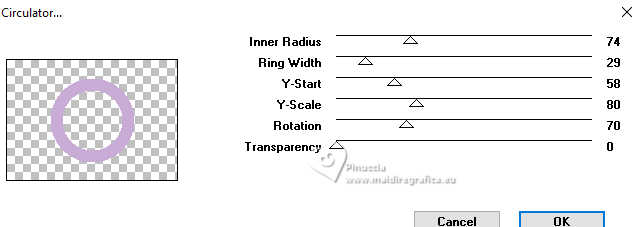 10. Effects>Plugins>Tramages - Tow The Line. 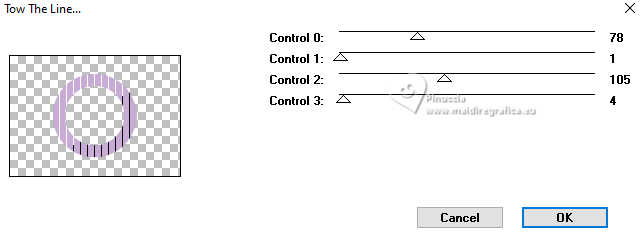 11. Effects>3D Effects>Inner Bevel. 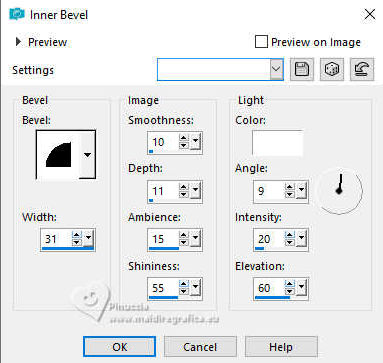 12. Custom Selection , last settings13. Activate your Erase Tool   Delete the left part of the circle that is inside the selection. 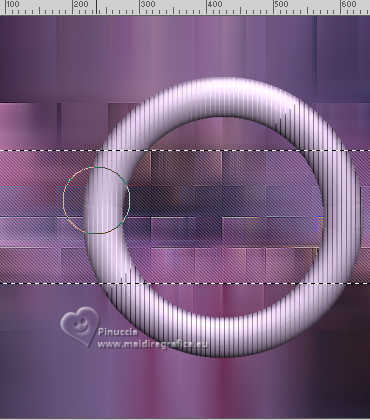 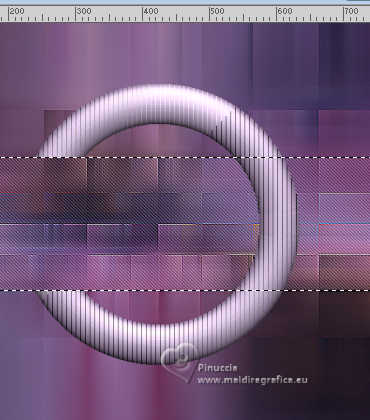 14. Selections>Select None. Effects>3D Effects>Drop Shadow, color black #000000. 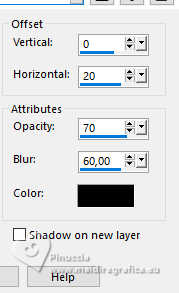 15. Activate the layer Raster 1.  Custom Selection 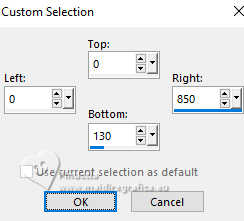 Selections>Promote Selection To layer. Selections>Select None. 16. Effects>Geometric Effects>Skew. 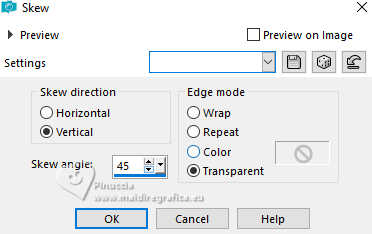 17. Effects>Reflection Effects>Kaleidoscope. 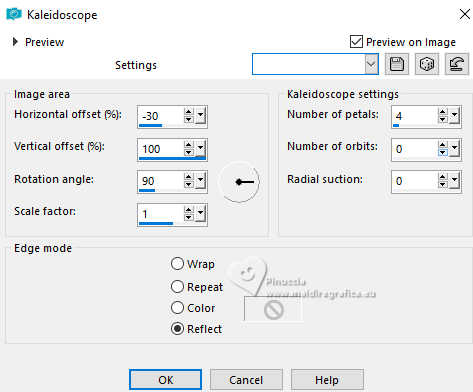 18. Effects>Plugins>Penta - Dot and Cross. 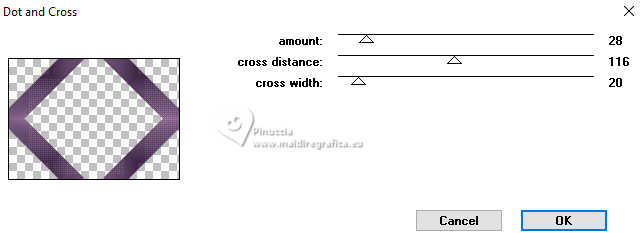 Layers>Arrange>Move Up. 19. Custom Selection 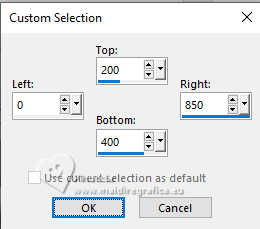 Activate your Erase Tool , same settings,Delete the left part of the effect. 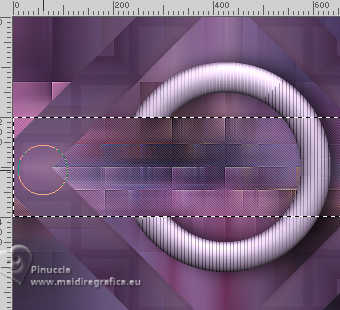 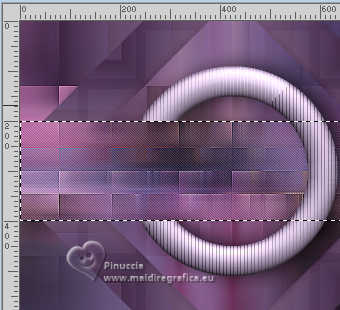 20. Selections>Select None. Effects>3D Effects>Drop Shadow, last settings. 21. Activate the layer Raster 1. 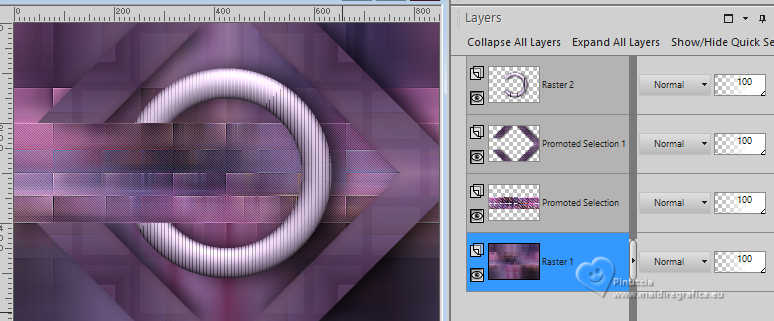 Layers>New Raster Layer. Selections>Select All. Activate again your main tube 1289MulherByPqnaAlice (If you haven't done any other work, your tubes should still be in memory) Edit>Copy. Go back to your work and go to Edit>Paste into Selection. Selections>Select None. Adjust>Blur>Gaussian Blur - radius 30. 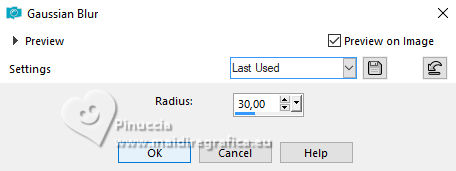 Effects>Image Effects>Seamless Tiling, default settings 22. Effects>Plugins>L&K's - L&K's Katharina. 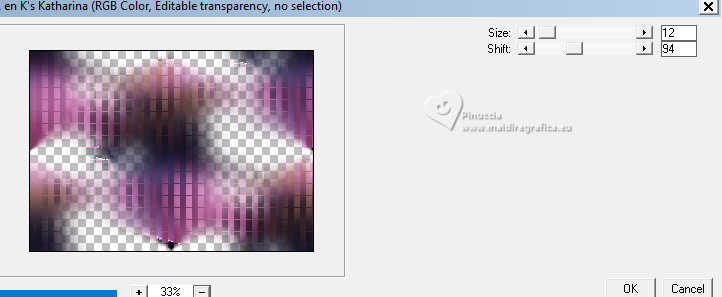 Effects>Edge Effects>Enhance. Layers>Properties>General>Blend Mode: Dodge, Opacity: 70%. 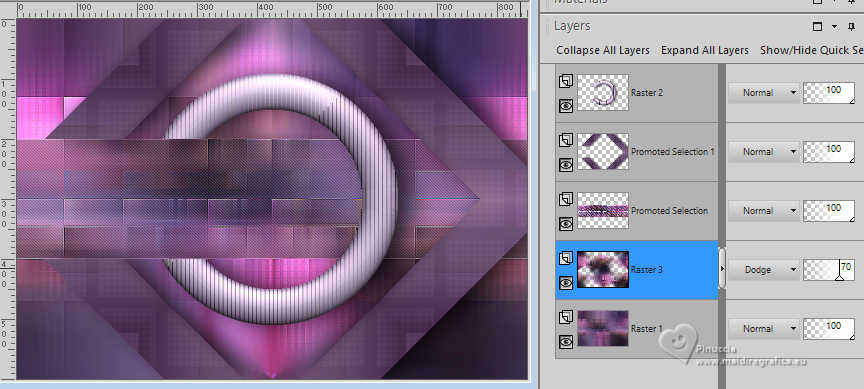 23. Activate the layer Raster 1. Set your foreground color to the color 4: white #ffffff. 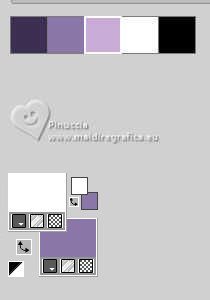 Layers>New Raster Layer. Flood Fill the layer with your foreground color.Layers>New Mask layer>From image Open the menu under the source window and you'll see all the files open. Select the mask Narah_Mask_1299  Effects>Edge Effects>Enhance. Layers>Merge>Merge Group. Layers>Properties>General>Blend Mode: Soft Light. 24. For the borders, set again your foreground color to #3d3052 and your background color to the color 3 #c9acd6. 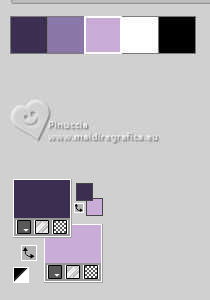 Image>Add Borders, 1 pixel, symmetric, color 5 black #000000. Image>Add Borders, 3 pixels, symmetric, color 3 (background) #c9acd6. Image>Add Borders, 1 pixel, symmetric, color 5 black #000000. Image>Add Borders, 5 pixels, symmetric, foreground color. Image>Add Borders, 1 pixel, symmetric, color 5 black #000000. Image>Add Borders, 15 pixels, symmetric, color 3 (background) #c9acd6. Image>Add Borders, 1 pixel, symmetric, color 5 black #000000. Image>Add Borders, 3 pixels, symmetric, color 3 (background) #c9acd6. Image>Add Borders, 1 pixel, symmetric, color 5 black #000000. Selections>Select All. 25. Image>Add Borders, 35 pixels, symmetric, color 3 (background) #c9acd6. Effects>3D Effects>Drop Shadow, color 5 black #000000. 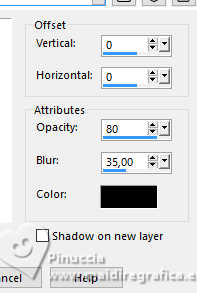 Selections>Select None. 26. Activate again your main tube 1289MulherByPqnaAlice and go to Edit>Copy. Go back to your work and go to Edit>Paste as new layer. Image>Resize if necessary, for the provided tube tu 55%, resize all layers not checked. Image>Mirror>Mirror Horizontal. Move  the tube to the right. the tube to the right.Effects>3D Effects>Drop shadow, at your choice. 27. Ouvrir TituloOL_Xiki  Erase the watermark and go to Edit>Copy. Go back to your work and go to Edit>Paste as New Layer. Pick Tool  Position X: 136,00 - Position Y: 284,00.  28. Image>Add Borders, 5 pixels, symmetric, foreground color. 29. Sign your work and save as jpg. For the tube of this version thanks Nara Pamplona (tribute to her memory) 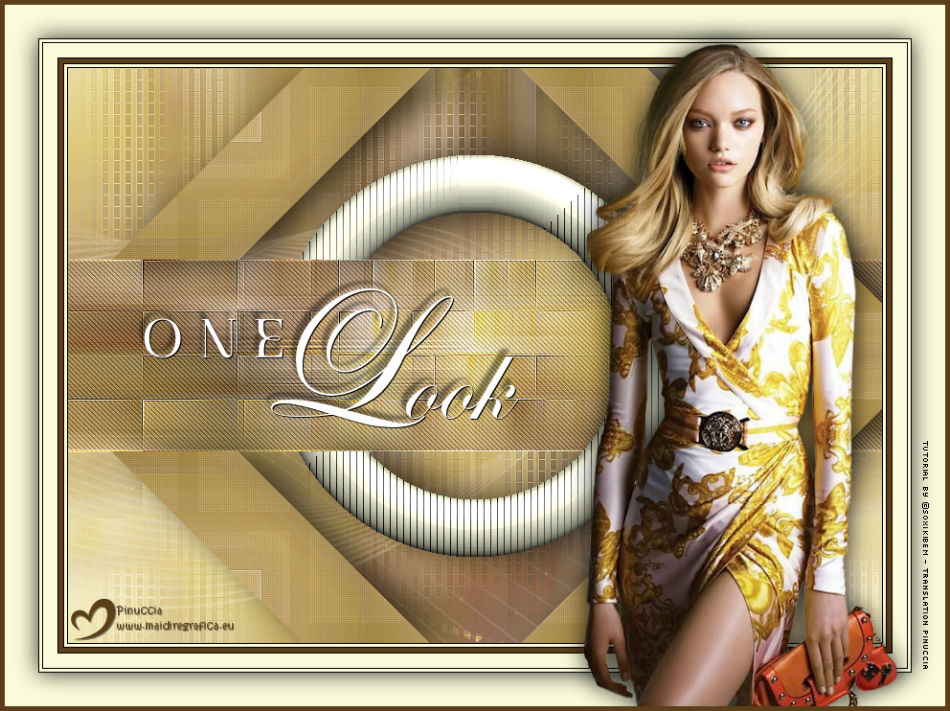  Your versions. Thanks 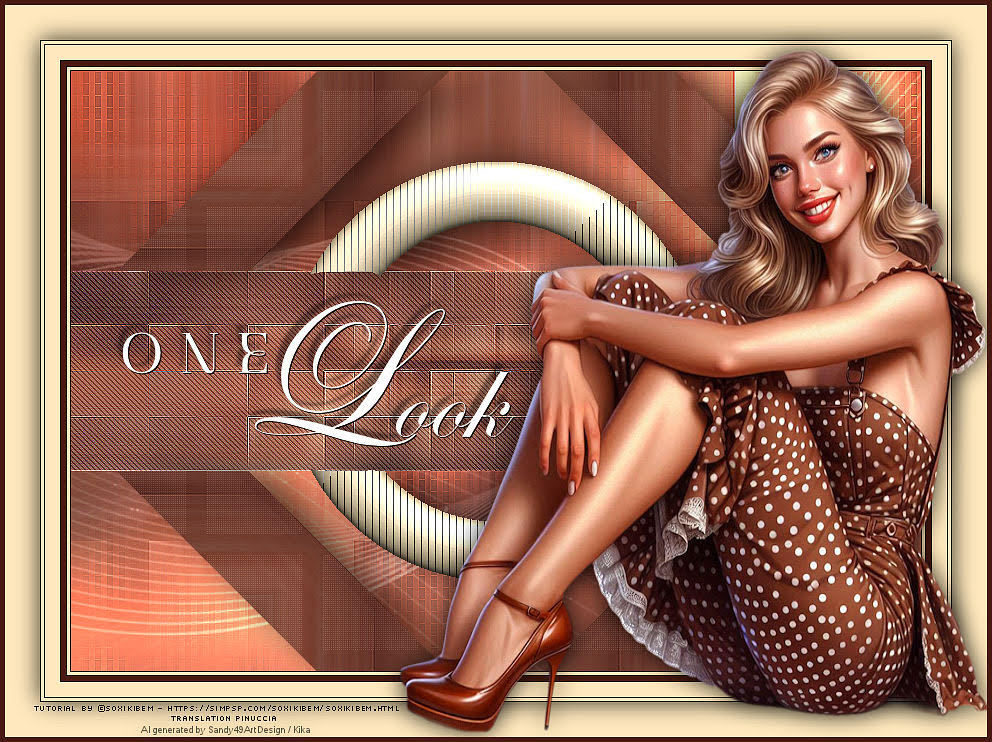 Kika 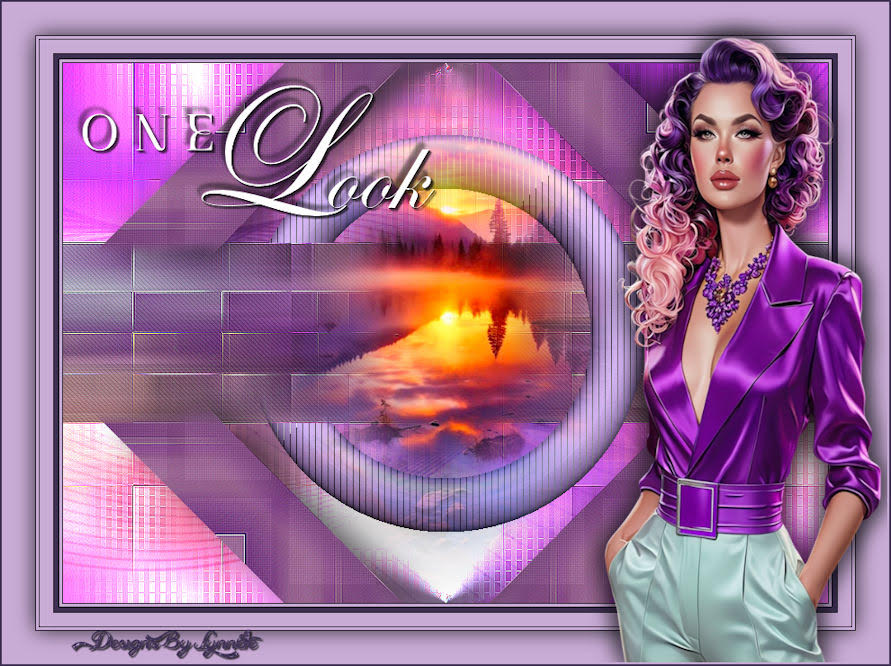 Lynnette 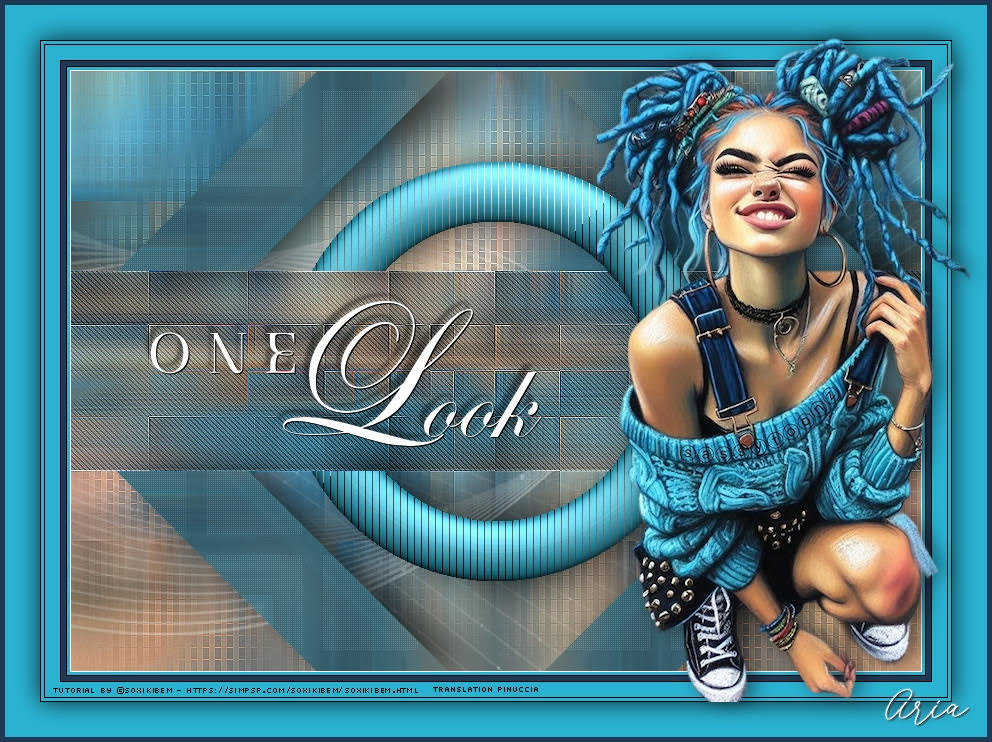 Aria 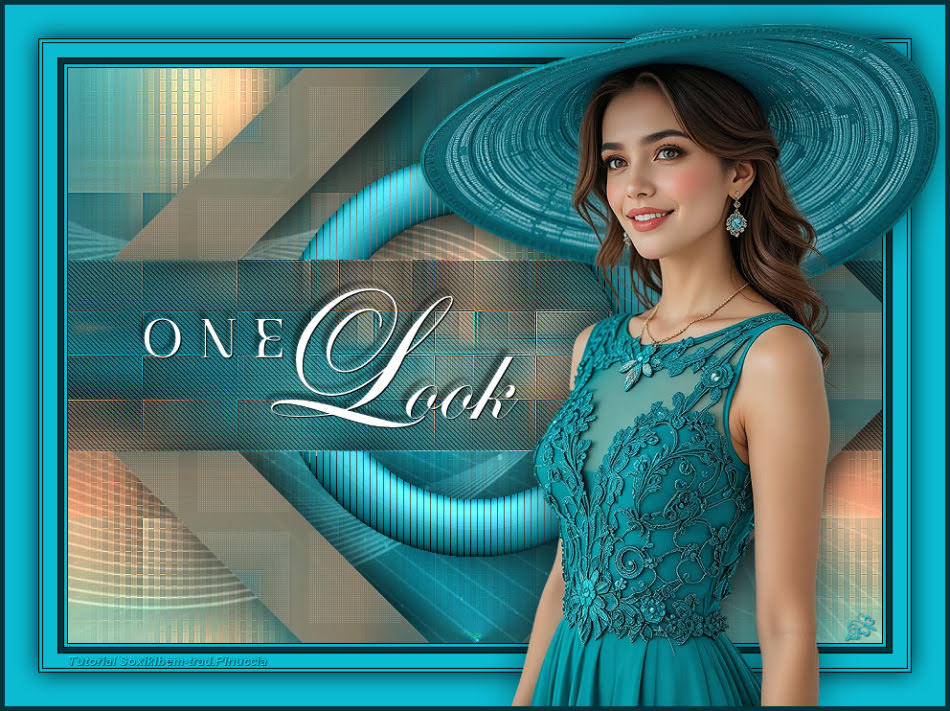 Jolcsi 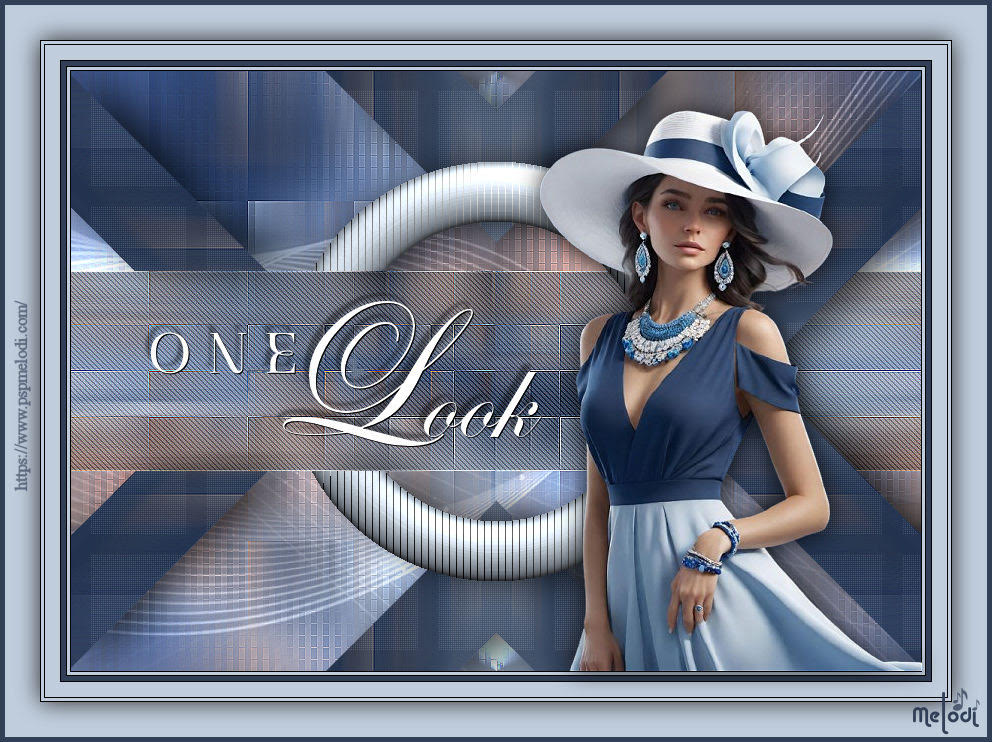 Melodi 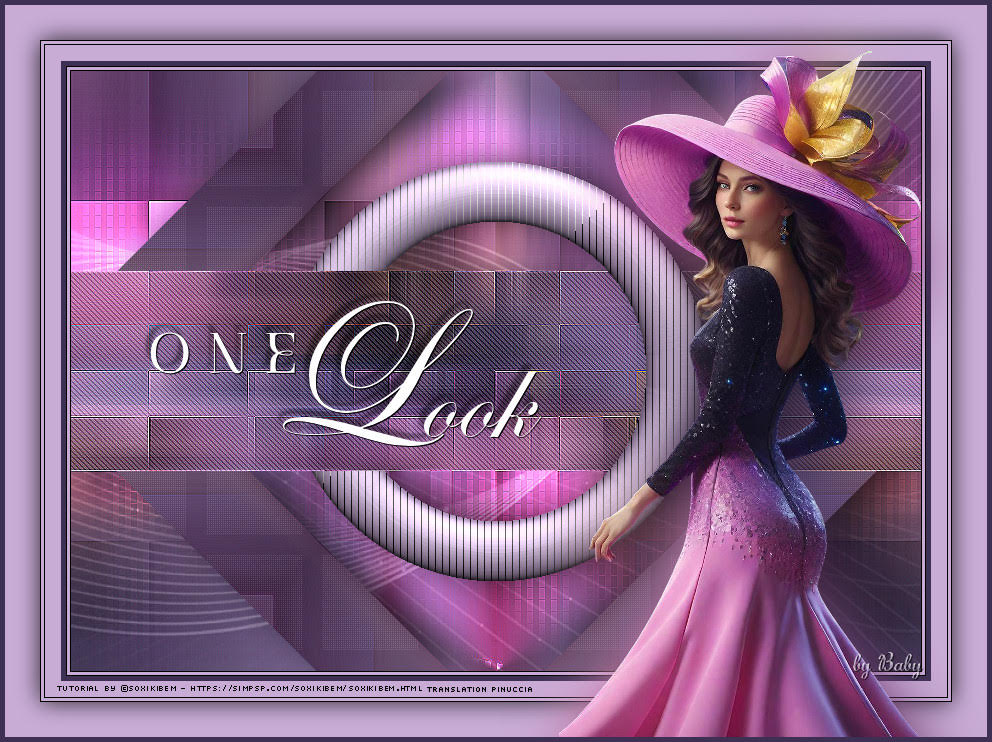 Baby 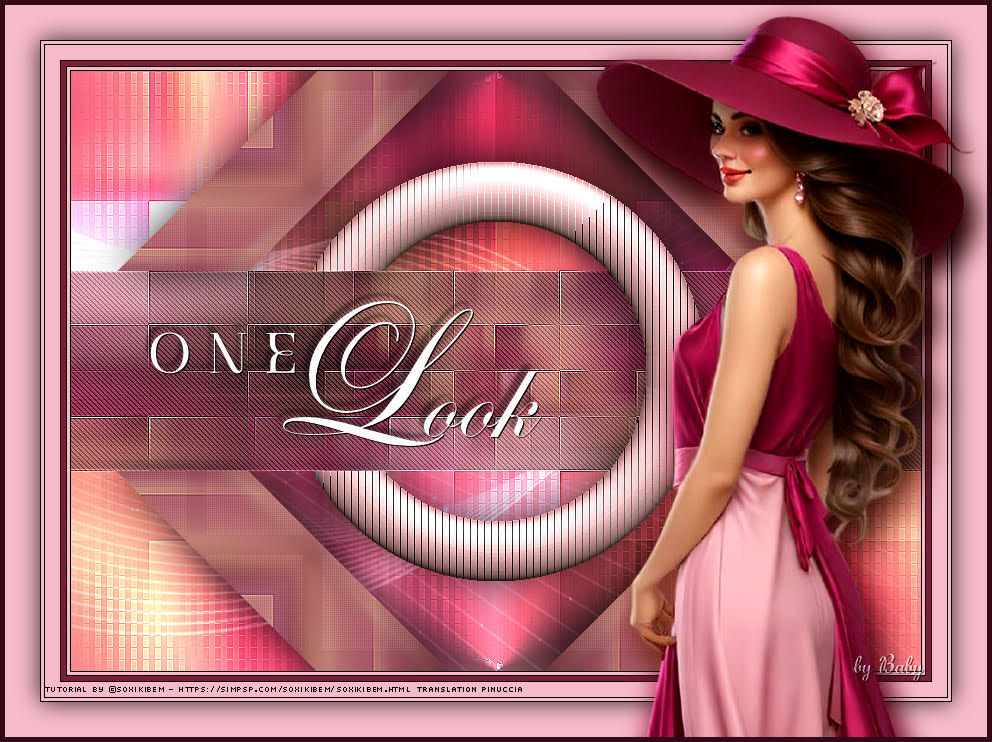 Baby  If you have problems or doubts, or you find a not worked link, or only for tell me that you enjoyed this tutorial, write to me. 14 October 2025 |


