|
OUTLANDISH  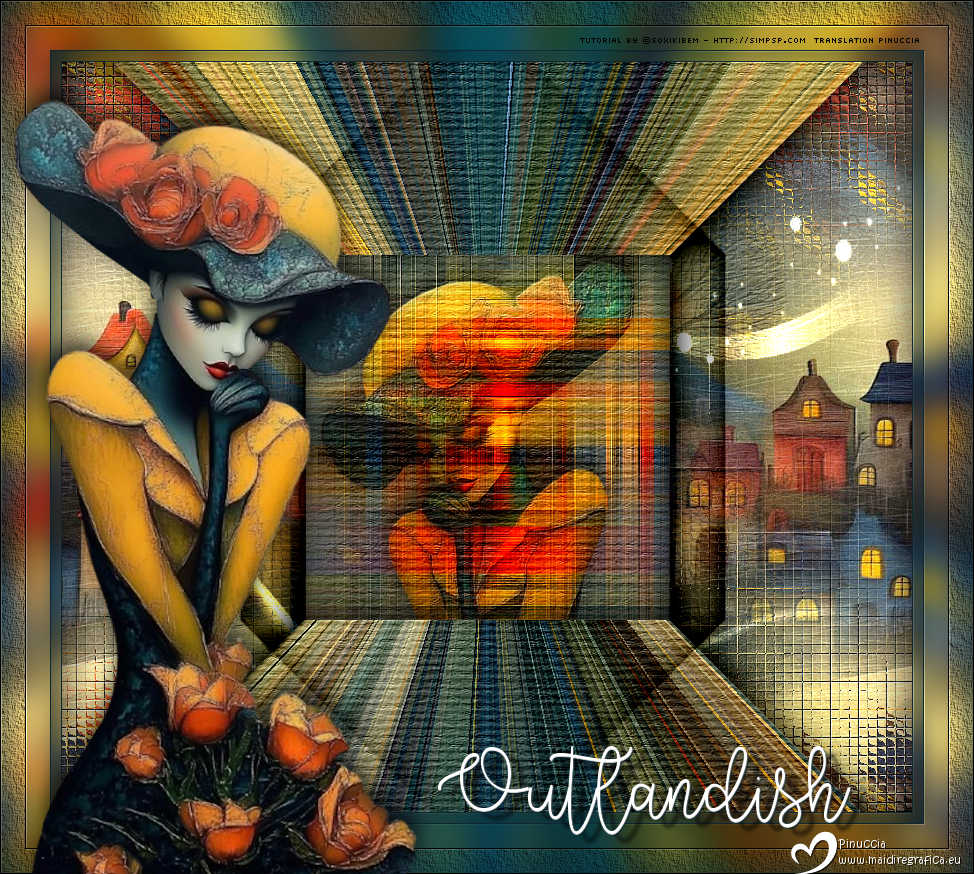
 The lights reflected off her pale skin, making her seem almost unreal a fleeting vision between concrete and neon glow. Those who saw her couldn't tell if she was a dream, a hallucination, or just a woman who didn't quite belong.
This tutorial was written with Psp2022 and translated with PspX2020, but it can also be made using other versions of PSP.
For this tutorial, you will need:  Thanks for the tubes and the mask PqnaAlice and Narah. The rest of the material is by Soxikibem. (The links of the tubemakers here).  consult, if necessary, my filter section here Filters Unlimited 2.0 here &<Bkg Designer sf10II> - Hinzeberg's Mirror 02 (to import in Unlimited) here Filter Factory Gallery B - Button Deluxe here Mehdi - Weaver here AAA Frames - Texture Frame here FM Tile Tools - Saturation Emboss here It@lian Editors Effect - Vetro here Filters It@lian Editors Effect can be used alone or imported into Filters Unlimited. (How do, you see here) If a plugin supplied appears with this icon  it must necessarily be imported into Unlimited it must necessarily be imported into Unlimited You can change Blend Modes according to your colors.  Open the mask in PSP and minimize it with the rest of the material 1. Choose 2 colors to work. Foreground color #0f2731, Background color #ffffff  2. Open a new transparent image 850 x 750 pixels. Flood Fill  the transparent image with your foreground color. the transparent image with your foreground color.3. Selections>Select All. Open the misted 178PaisagemByPqnaAlice 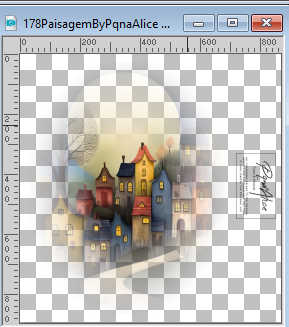 Erase the watermark and go to Edit>Copy. Go back to your work and go to Edit>Paste Into Selection. Selections>Select None. 4. Effects>Image Effects>Seamless Tiling, default settings.  Effects>Plugins>It@lian Editors Effect - Vetro 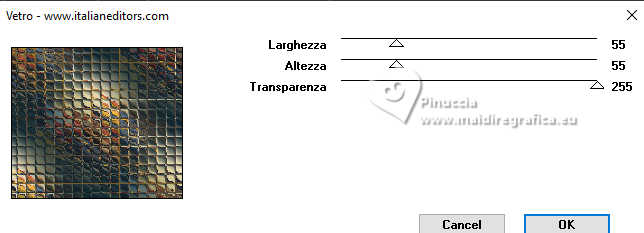 5. Layers>New Raster Layer. Selections>Select All. Edit>Paste into Selection - the landscape misted is still in memory. Selections>Select None. Effects>Image Effects>Seamless Tiling. 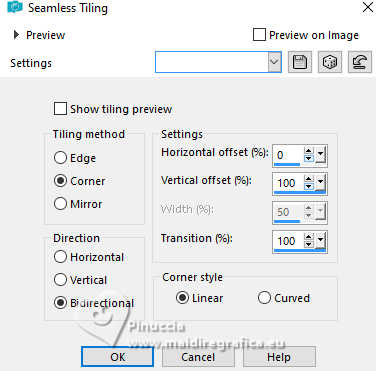 6. Layers>Merge>Merge Down. Effects>Plugins>FM Tile Tools - Saturation Emboss, default settings (Optional). 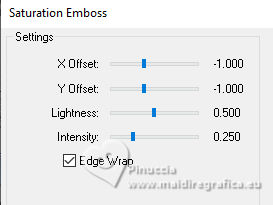 7. Layers>Duplicate. Effects>Plugins>Filters Unlimited 2.0 - &<Bkg Designer sf10II> - Hinzeberg's Mirror 2.  8. Effects>Plugins>Filter Factory Gallery B - Button Deluxe.  9. Activate your Magic Wand Tool  , tolerance and feather 0, , tolerance and feather 0,and click in the right and left black zones to select them. 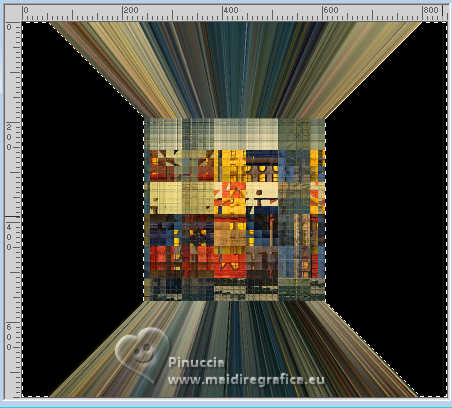 Press CANC on the keyboard  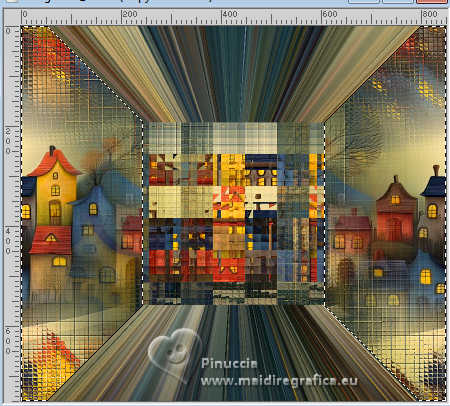 10. Layers>New Raster Layer. Effects>3D Effects>Cutout.  Selections>Select None. 11. Activate the layer Copy of Raster 1. 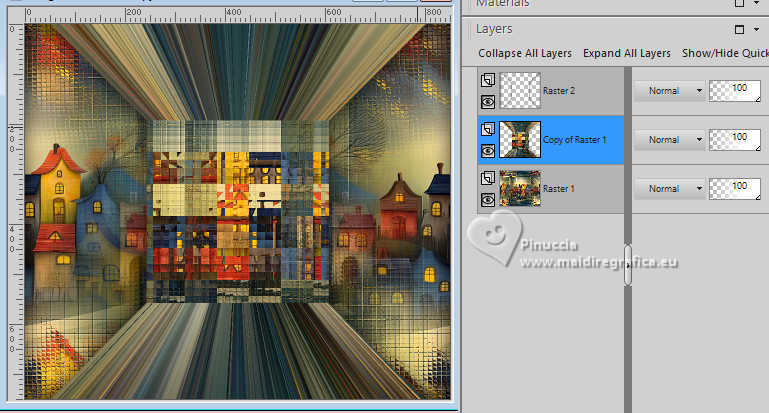 Activate your Selection Tool  (no matter the type of selection, because with the custom selection your always get a rectangle) clic on the Custom Selection 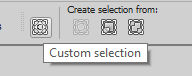 and set the following settings. 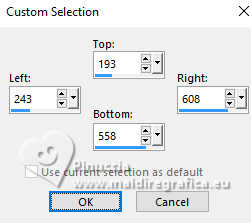 12. Effects>Plugins>Mehdi - Weaver. 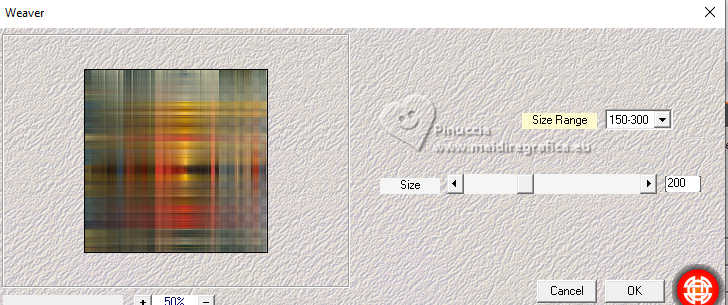 13. Open your main tube 1266MulherByPqnaAlice 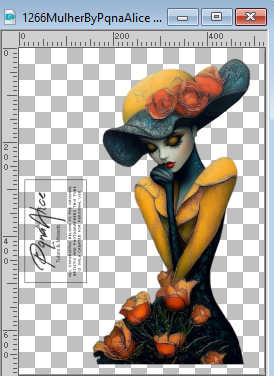 Erase the watermark and go to Edit>Copy. Go back to your work and go to Edit>Paste as New Layer. Move  the tube as below the tube as below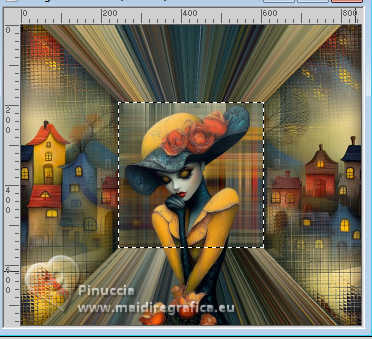 Selections>Invert. Press CANC on the keyboard. 14. Selections>Invert. Layers>New Raster Layer. Effects>3D Effects>Cutout.  Selections>Select None. 15. Activate the layer Raster 3 (the tube) Layers>Properties>General>Blend Mode: Overlay - Opacity: 80%. 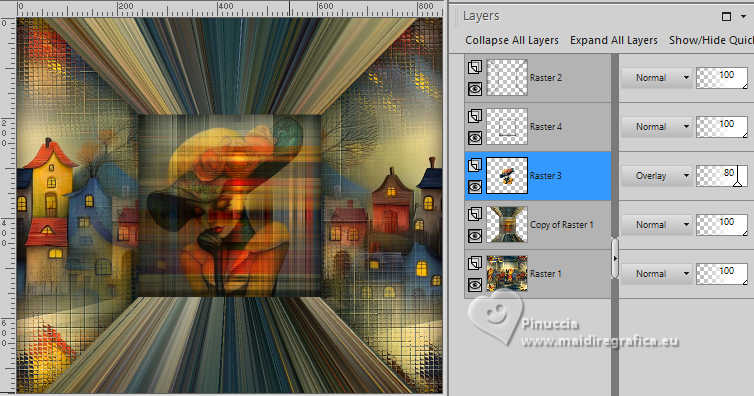 (in her second version Soxikibem used Blend Mode: Hard Light) Effects>3D Effects>Drop Shadow, color black #000000. 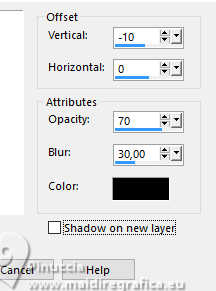 Layers>Merge>Merge Down. 16. Effects>Plugins>Filters Unlimited 2.0 - Paper Textures - Structure Paper 1. 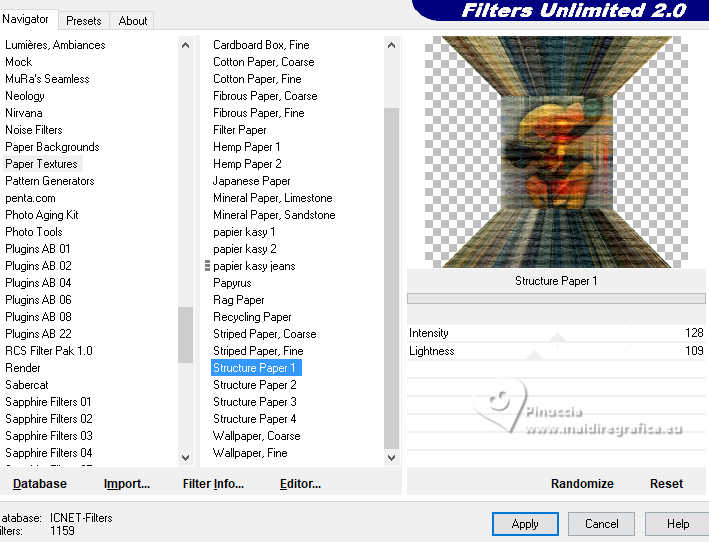 17. Effects>Plugins>FM Tile Tools - Saturation Emboss, default setting (Optional) 18. Activate the layer Raster 1. Layers>New Raster Layer. Flood Fill the layer with the your background white color #ffffff.Layers>New Mask layer>From image Open the menu under the source window and you'll see all the files open. Select the mask Narah_mask_Abstract127.  Effects>Edge Effects>Enhance. Layers>Duplicate. Layers>Merge>Merge Group. Layers>Properties>General>Blend Mode: Dodge. 19. Activate the layer Raster 1. Effects>Plugins>Filters Unlimited 2.0 - Paper Textures - Papier Kasy 1. 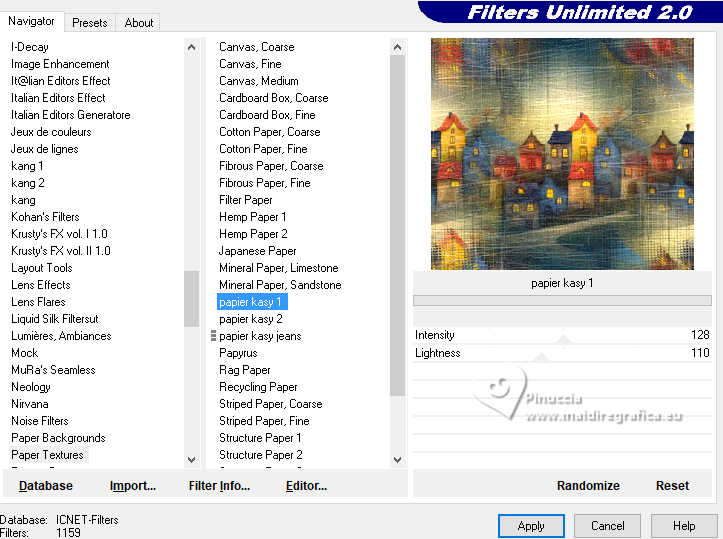 20. Activate your top layer, Raster 2. 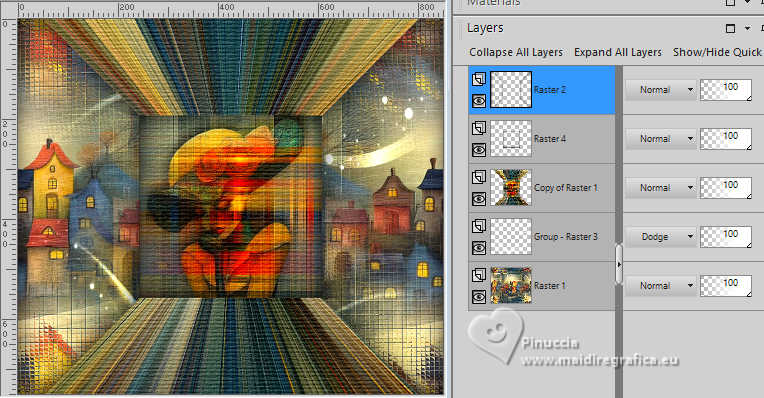 Layers>Duplicate. Effects>Image Effects>Seamless Tiling. 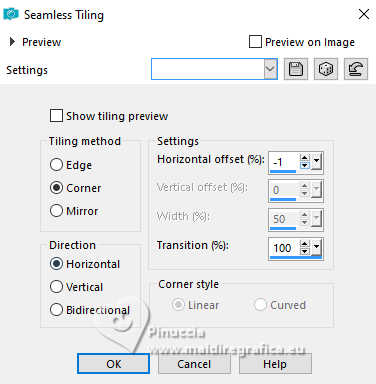 Layers>Properties>General>Blend Mode: Multiply. Layers>Duplicate. Layers>Properties>General>Blend Mode: Burn. 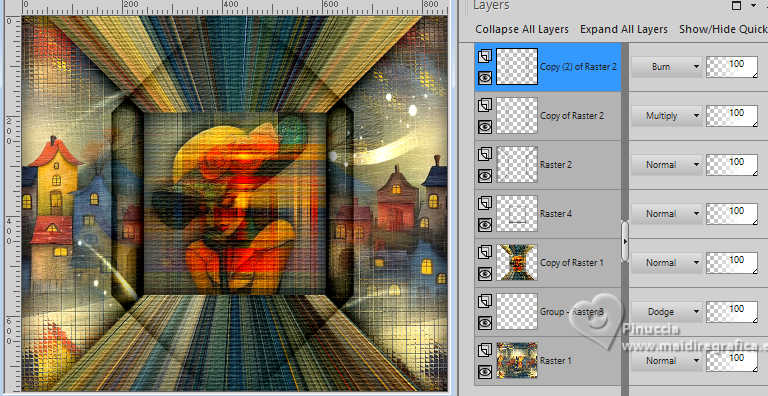 21. Image>Add Borders, 1 pixel, symmetric, foreground color. Edit>Copy. Selections>Select All. Image>Add Borders, 10 pixels, symmetric, whatever color. Selections>Invert. Edit>Paste Into Selection. Adjust>Blur>Gaussian Blur - radius 15. 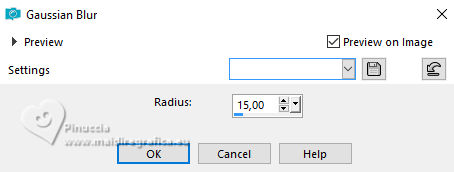 22. Effects>Plugins>FM Tile Tools - Saturation Emboss, default settings. Selections>Select None. 23. Image>Add Borders, 1 pixel, symmetric, foreground color. Selections>Select All. Image>Add Borders, 50 pixels, symmetric, whatever color. Selections>Invert. Edit>Paste Into Selection Adjust>Blur>Gaussian Blur - radius 15. 24. Effects>Plugins>AAA Frames - Texture Frame. 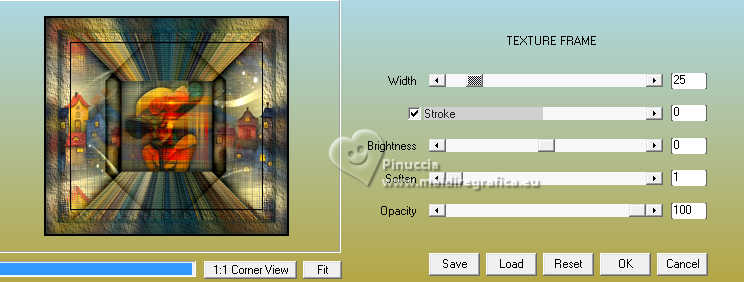 25. Effects>Plugins>FM Tile Tools - Saturation Emboss, default settings. Selections>Select None. 26. Activate again your main tube 1266MulherByPqnaAlice and go to Edit>Copy. Go back to your work and go to Edit>Paste as New Layer. Move the tube to your liking.Effects>3D Effects>Drop Shadow, at your choice. 27. Open TituloO_Xiki 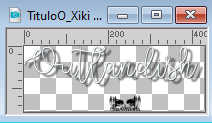 Edit>Copy. Go back to your work and go to Edit>Paste as New Layer. Move the text to your liking.28. Sign your work and save as jpg. For the tube of this version thanks Luz Cristina 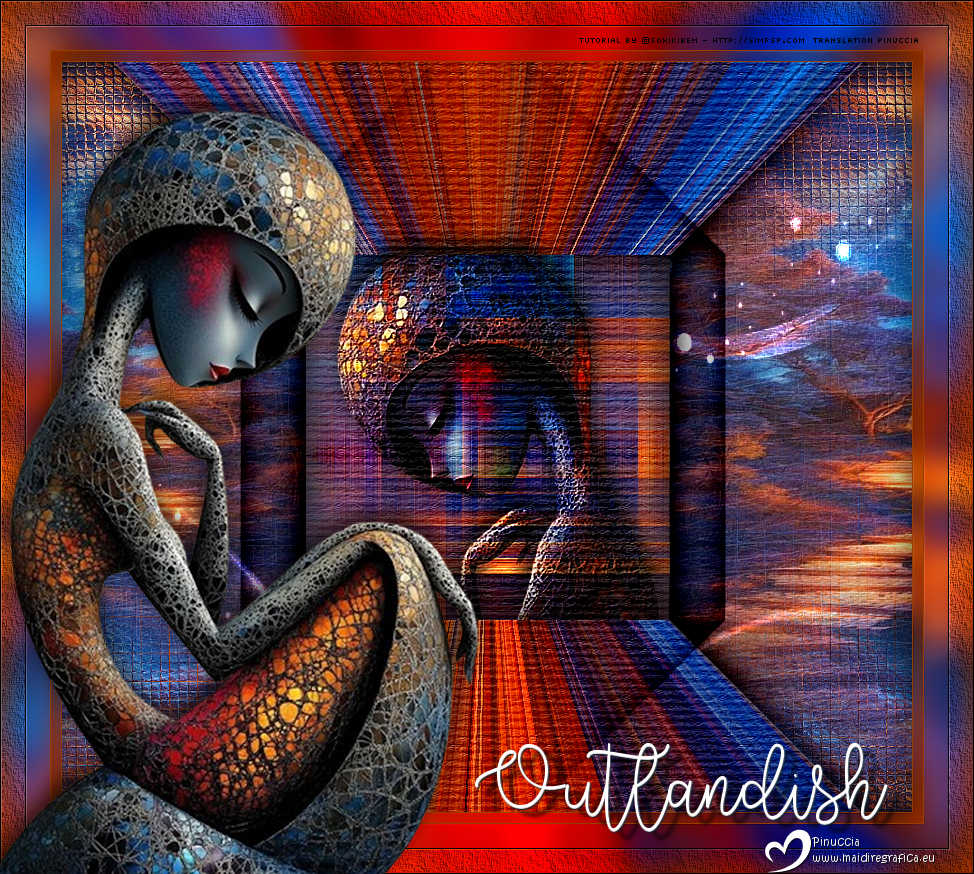  Your versions. Thanks  Aria 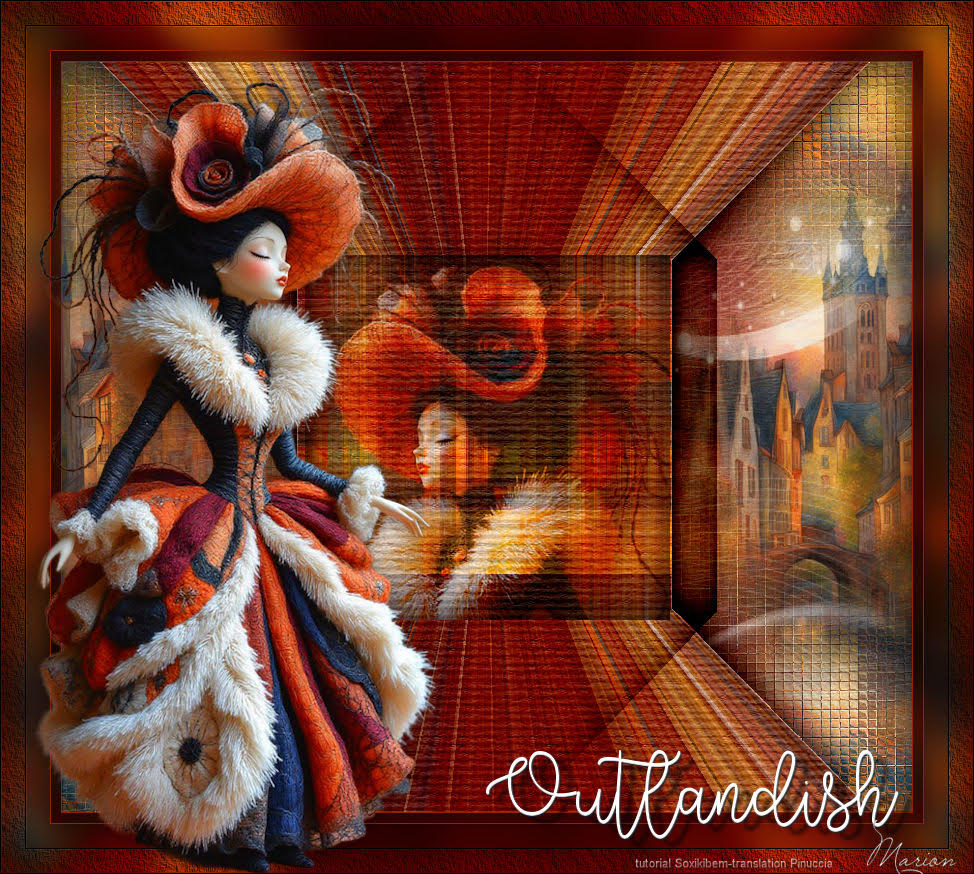 Marion 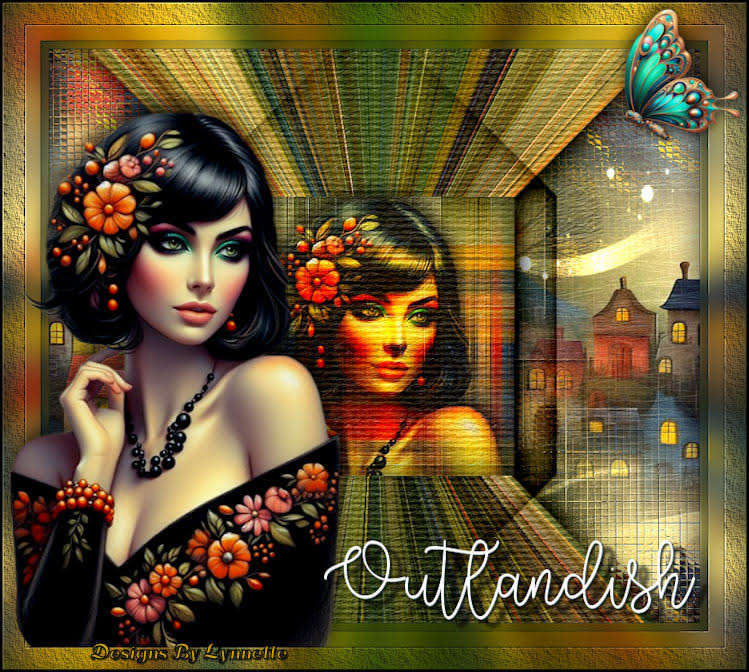 Lynnette 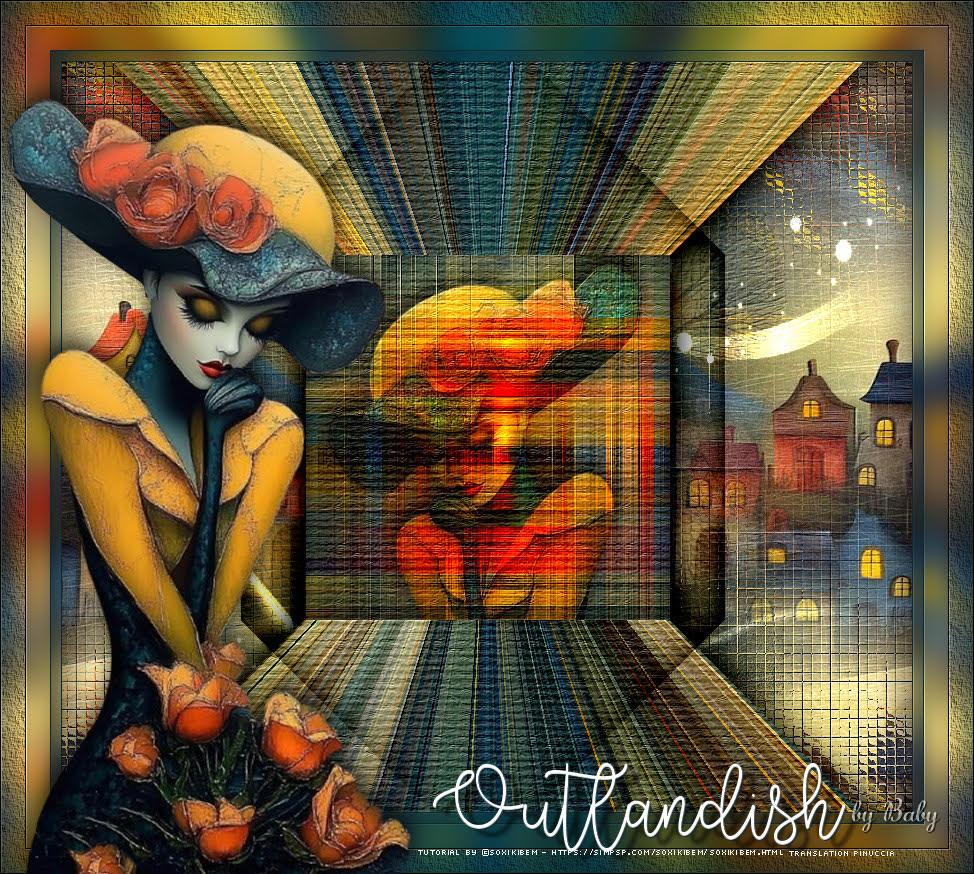 Baby 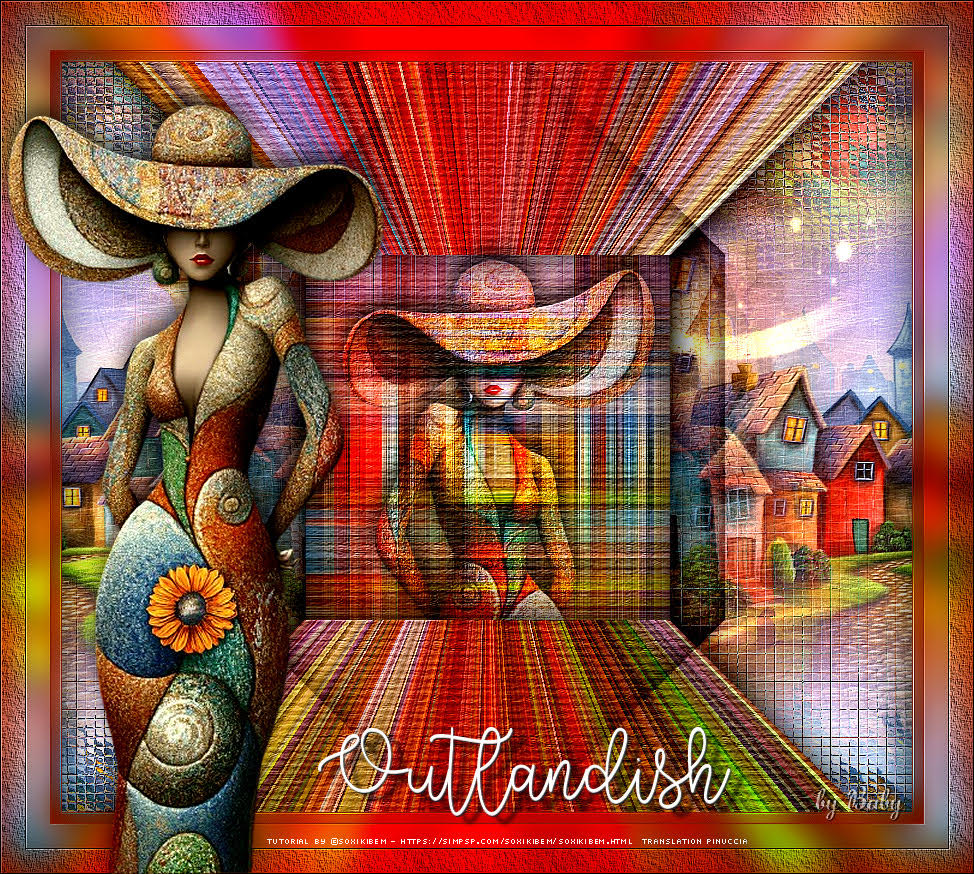 Baby 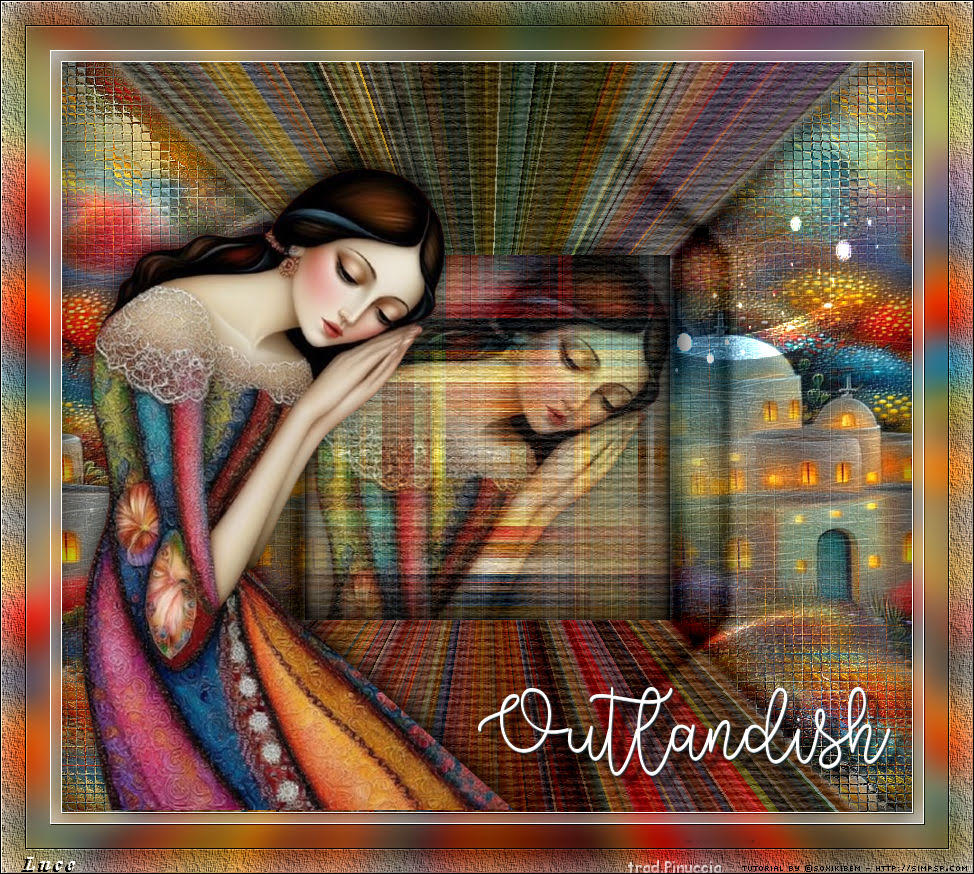 Luce 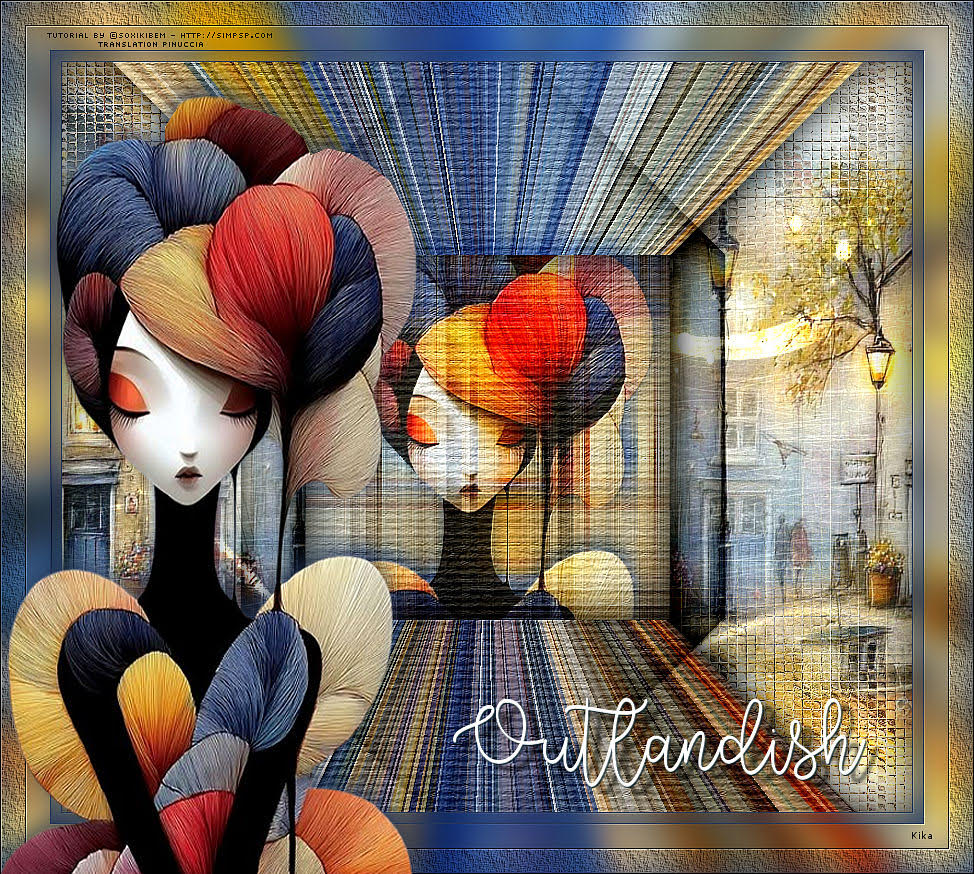 Kika 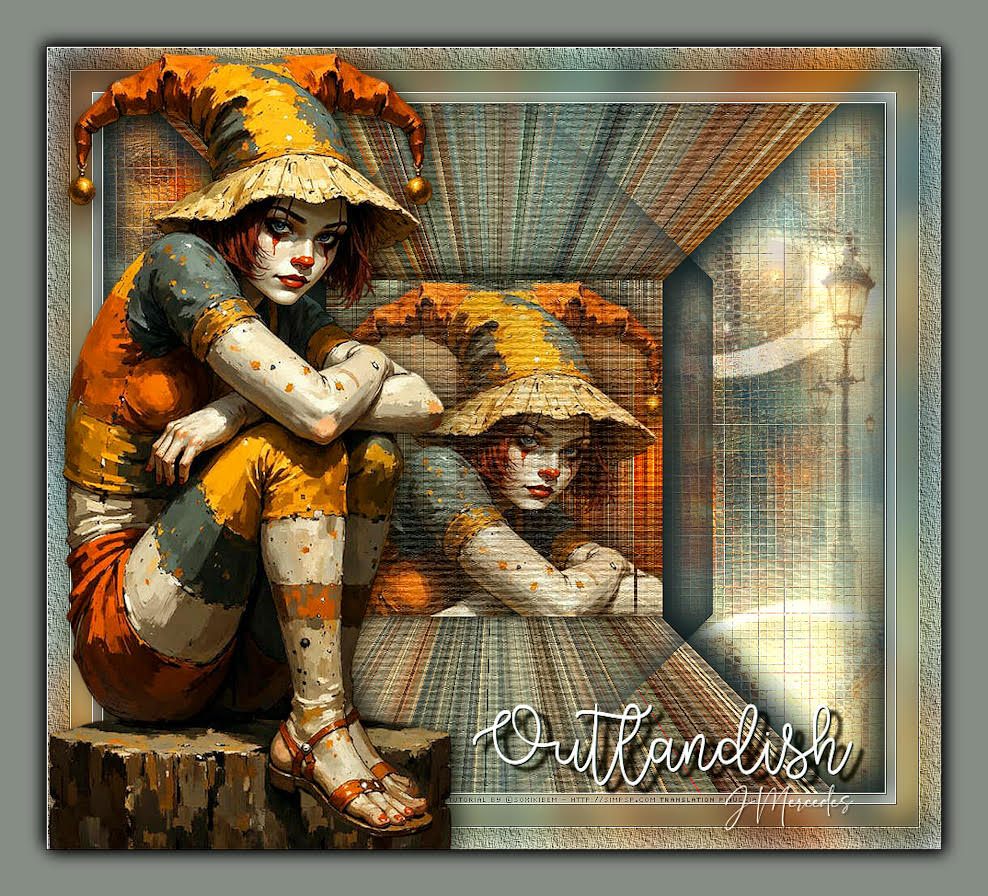 JMercedes  If you have problems or doubts, or you find a not worked link, or only for tell me that you enjoyed this tutorial, write to me. 18 August 2025 |


