|
SINFONIA  
 In this tutorial, you will be guided through a visual composition where shapes, colors, and textures intertwine like notes in a harmonious melody. Every detail has been carefully considered to create a unique atmosphere. Prepare your Paint Shop Pro, sharpen your creative eye, and allow yourself to be guided by this art that unites the classic with the modern, the delicate with the vibrant. Let's compose together with rhythm, elegance, and color. Sim PSP — where art meets the soul. 
This tutorial was written with Psp2022 and translated with PspX2020, but it can also be made using other versions of PSP.
For this tutorial, you will need:  For the mask thanks Narah. The rest of the material is by Soxikibem. (The links of the tubemakers here).  consult, if necessary, my filter section here Mehdi - Wavy Lab 1.1. here AAA Filters - Granularity here  You can change Blend Modes according to your colors. Copy the selections in the Selections Folder. Open the mask in PSP and minimize it with the rest of the material. 1. Choose 4 colors to work. 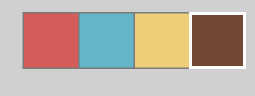 Foreground: #d45d59 Background: #65b5c8 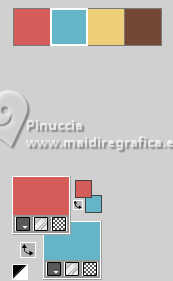 color 3: #eece78 color 4: #754834 2. Open a new transparent image 800 x 500 pixels. Effects>Plugins>Mehdi. Wavy Lab 1.1 This filter creates gradients with the colors of your Materials palette. The first is your background color, the second is your foreground color. Change the last two colors created by the filtre: the third color with color 4 #754834 and the fourth color with color 3 #eece78. 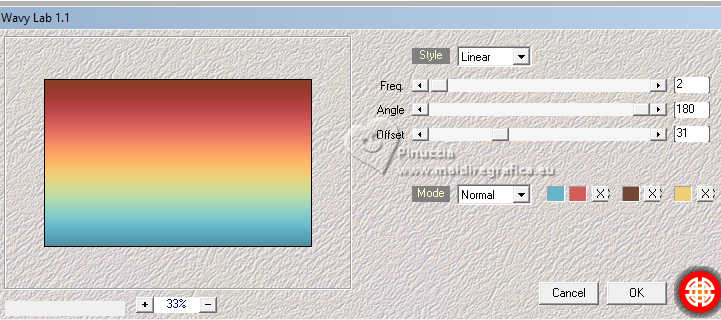 3. Layers>New Raster Layer. Selections>Select All. Open your main tube 1499MulherByPqnaAlice  Erase the watermark and go to Edit>Copy Go back to your work and go to Edit>Paste Into Selection. Selections>Select None. 4. Effects>Image Effects>Seamless Tiling, default settings.  Adjust>Blur>Radial Blur. 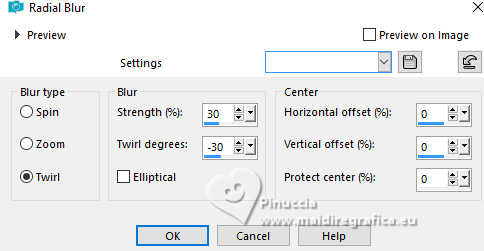 5. Effects>Reflection Effects>Rotating Mirror. 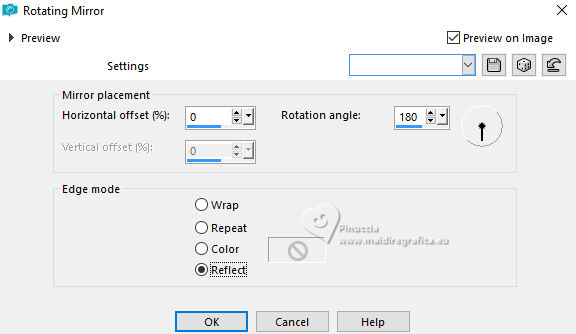 6. Effects>Plugins>AAA Filters - Granularity. 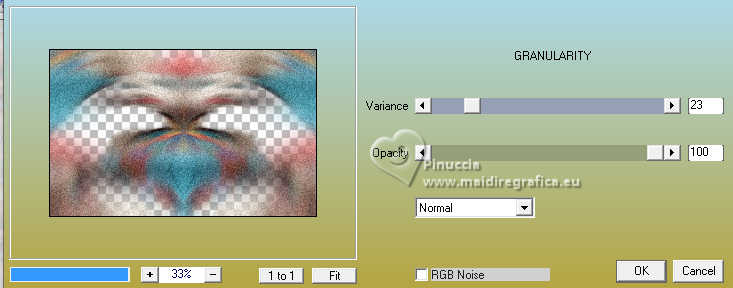 7. Effects>Image Effects>Seamless Tiling. 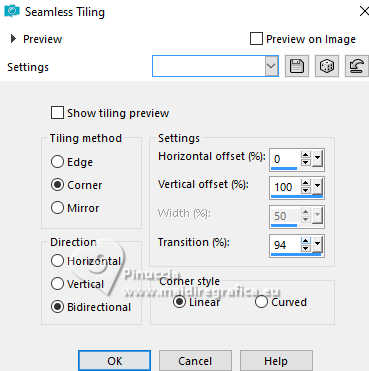 8. Layers>New Raster Layer. Set your foreground color to the color 3 #eece78 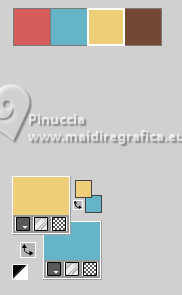 Layers>New Mask layer>From image Open the menu under the source window and you'll see all the files open. Select the mask Narah_Mask_1126. 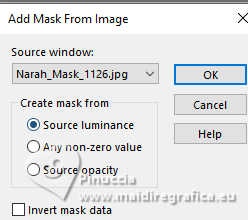 Effects>Edge Effects>Enhance. Layers>Merge>Merge Group. 9. Set your foreground color to color 4 #754834. 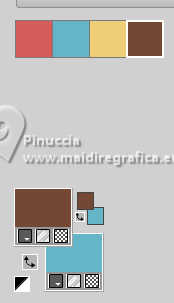 Effects>3D Effects>Drop Shadow, color 4 #754834  Layers>Properties>General>Blend Mode: Dodge. 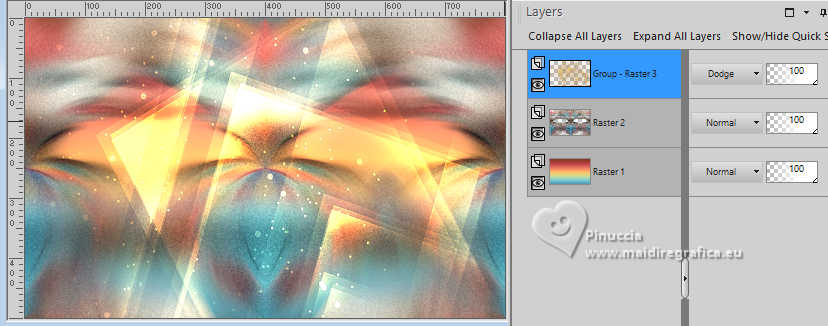 10. Layers>New Raster Layer. Selections>Load/Save Selections>Load Selection from Disk. Look for and load the selection 308_Xiki1. 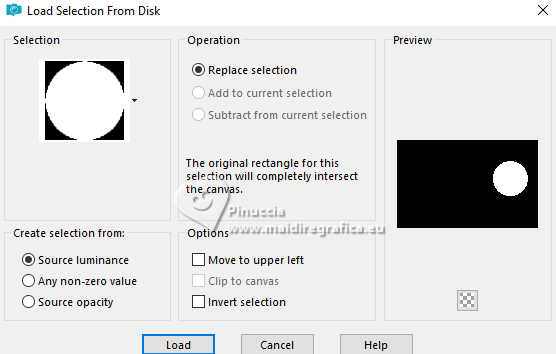 Flood Fill  the selection with color 4 (foreground) #754834. the selection with color 4 (foreground) #754834.Selections>Modify>Contract - 2 pixels. Press CANC on the keyboard  Set again your foreground color to color 1 11. Layers>New Raster Layer. Reduce the opacity of your Flood Fill Tool to 50% Flood fill the layer with your foreground color.Layers>Arrange>Move Down. 12. Selections>Modify>Contract - 20 pixels. Your main tube 1499MulherByPqnaAlice is still in memory: Edit>Paste as new layer. Position  the tube to place a portion of it within the selection. the tube to place a portion of it within the selection.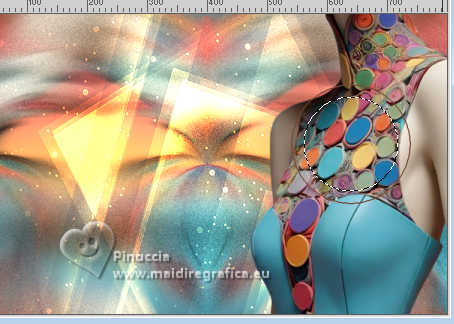 13. Selections>Invert. Press CANC on the keyboard. Selections>Invert. Effects>Edge Effects>Enhance. Effects>3D Effects>Drop Shadow, color black. 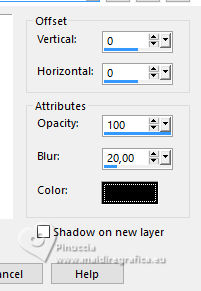 14. Selections>Modify>Select Selection Borders. 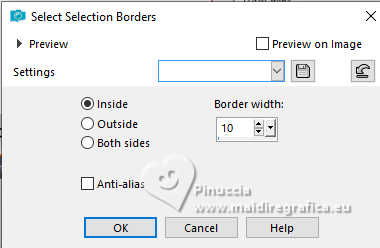 15. Effects> 3D Effects>Inner Bevel. 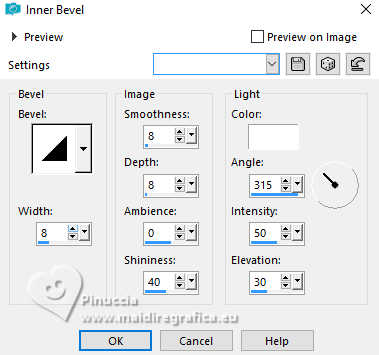 Selections>Select None. 16. Activate your top layer, Raster 4. 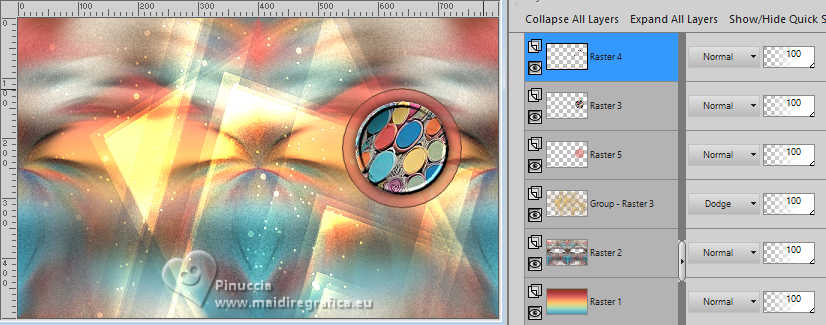 Layers>Merge>Merge down - 2 times. 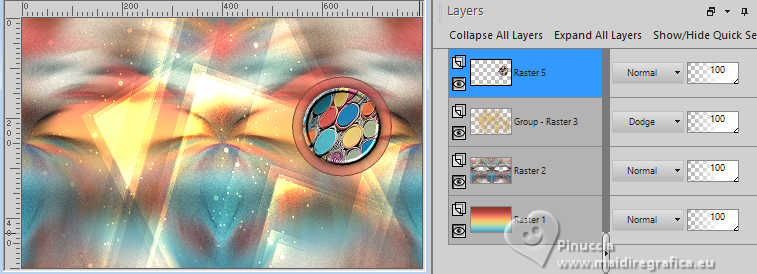 Layers>Duplicate. Image>Resize, to 80%, resize all layers not checked. Pick Tool  Position X: 389,00 - Position Y:45,00 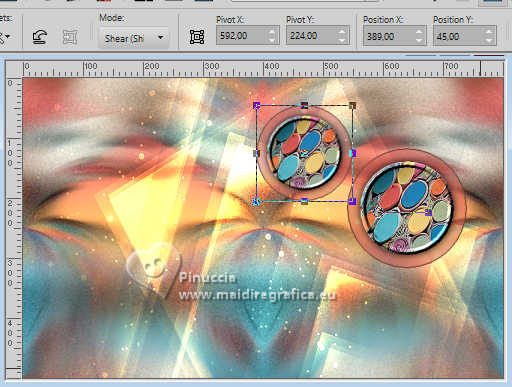 Layers>Duplicate. Image>Resize, to 60%, resize all layers not checked. Pick Tool: Position X: 463,00 - Position Y: 166,00. 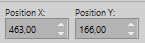 Layers>Merge>Merge Down - 2 times. 17. Your tag and the layers  18. Layers>New Raster Layer. Selections>Load/Save Selections>Load Selection from Disk Look for and load the selection 308_Xiki2.  Flood Fill>Opacity 100% Set your foreground color to white #ffffff. Flood Fill the selection with color white #ffffff.Selections>Modify>Contract - 1 pixel. Press CANC on the keyboard. 19. Flood Fill>Opacity 40% Flood Fill the selection with color white #ffffff.Selections>Select none. Layers>Properties>General>Blend Mode: Dodge.  Set again the opacity of your Flood Fill Tool to 100. 20. Layers>Duplicate. Effects>Distortion Effects>Wave.  21. Move this layer under the layer Raster 2. 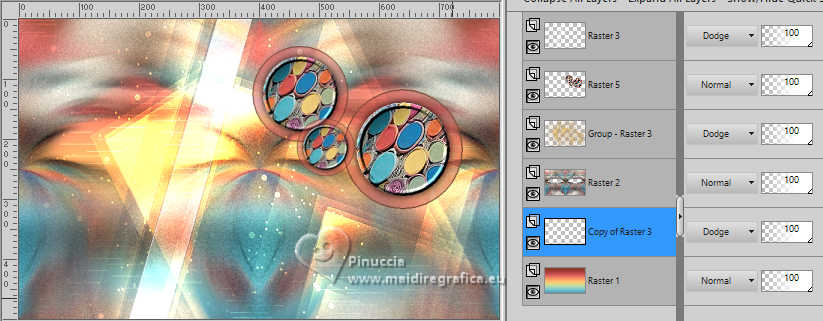 22. Activate the layer Group Raster 3. Open Decor308_Xiki 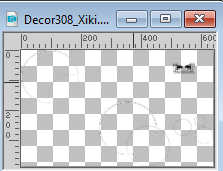 Erase the watermark and go to Edit>Copy. Go back to your work and go to Edit>Paste as new layer. Pick Tool Position X: 80,00 - Position Y: 99,00. 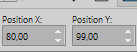 Layers>Properties>General>Blend Mode: Overlay. 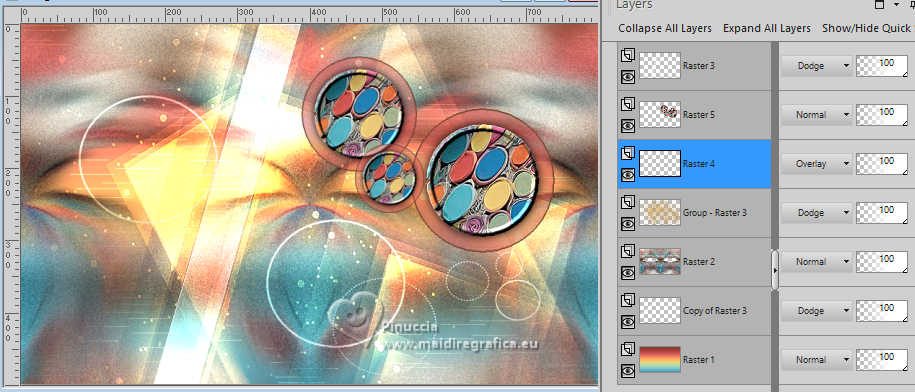 23. Set again your foreground color to color 1 Image>Add Borders, 1 pixel, symmetric, foreground color. Image>Add Borders, 5 pixels, symmetric, color white. Image>Add Borders, 1 pixel, symmetric, foreground color. Image>Add Borders, 40 pixels, symmetric, color white. Image>Add Borders, 2 pixels, symmetric, foreground color. Image>Add Borders, 15 pixels, symmetric, color white. 24. Activate again your main tube and go to Edit>Copy. Go back to your work and go to Edit>Paste as new layer. For the supplied tube: Image>Resize, to 50%, resize all layers not checked. Image>Mirror>Mirror Horizontal. Move the tube to the left.Effects>3D Effects>Drop Shadow, at your choice. 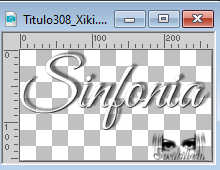 Erase the watermark and go to Edit>Copy. Go back to your work and go to Edit>Paste as New Layer. Pick Tool Position X: 464,00 - Position Y: 374,00. 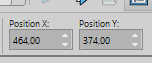 26. Open Decor308_Xiki2 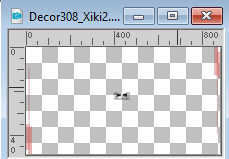 Erase the watermark and go to Edit>Copy. Go back to your work and go to Edit>Paste as New Layer. Pick Tool Position X: 22,00 - Position Y: 69,00. 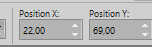 27. Open Creditos-bySoxikibem and go to Edit>Copy. Go back to your work and go to Edit>Paste As New Layer. Position at your choice.Don't forget the translator's watermark. 28. Image>Add Borders, 2 pixels, symmetric, foreground color. Sign your work and save as jpg. Version with my tube from Pinterest image   Your versions. Thanks  If you have problems or doubts, or you find a not worked link, or only for tell me that you enjoyed this tutorial, write to me. 22 April 2026 |


