|
SOLARIS  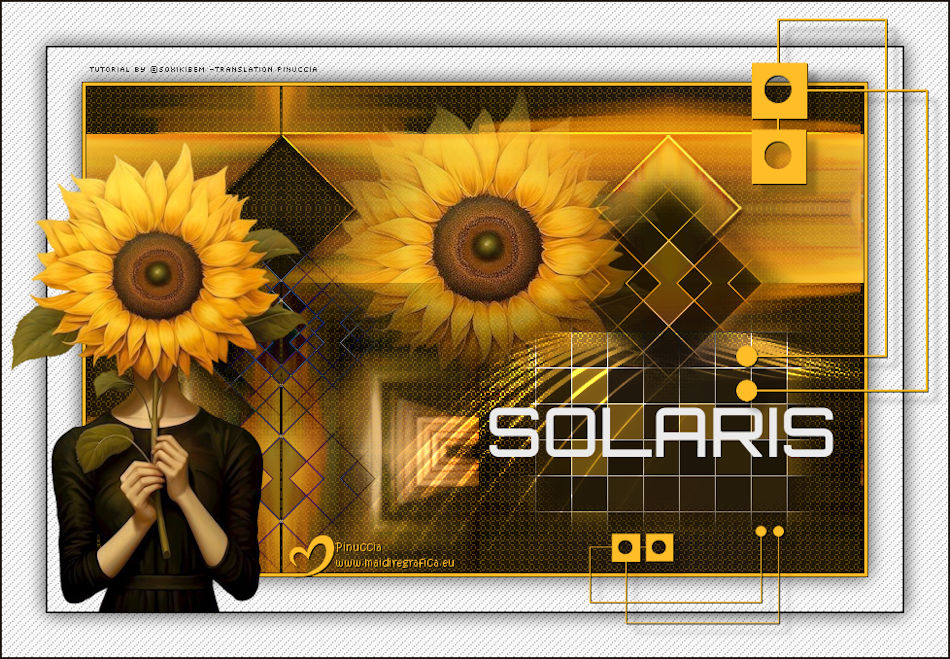
 Light that is born, travels, and reflects in forms. Between the instant and infinity, the sunflower learns from the sun how to follow. Solaris is the encounter of beauty with geometry, of energy with silence, of art with time. 
This tutorial was written with Psp2022 and translated with PspX2020,
For this tutorial, you will need:  For the tube thanks PqnaAlice. The rest of the material is by Soxikibem. (The links of the tubemakers here).  consult, if necessary, my filter section here Filters Unlimited 2.0 here Mehdi - Sorting Tiles here Simple - Blintz, Centre Tile here Rosenman - Pixelate here Filters Simple can be used alone or imported into Filters Unlimited. (How do, you see here) If a plugin supplied appears with this icon  it must necessarily be imported into Unlimited it must necessarily be imported into Unlimited You can change Blend Modes according to your colors.  Copy the selection in the Selections Folder. 1. Choose 2 colors to work. Foreground: #ffbd28 Background: #1d1511  2. Open a new transparent image 800 x 500 pixels. Flood Fill  the transparent image with your background color. the transparent image with your background color.Selections>Select All. 3. Open the tube 1504MulherByPqnaAlice 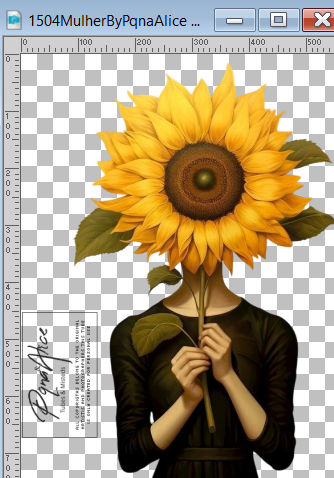 Erase the watermark and go to Edit>Copy. Minimize the tube Go back to your work and go to Edit>Paste Into Selection. Selections>Select None. 4. Effects>Image Effects>Seamless Tiling, default settings  Effects>Plugins>Mehdi - Sorting Tiles  5. Effects>Plugins>Simple - Blintz 6. Effects>Texture Effects>Weave weave color: foreground color 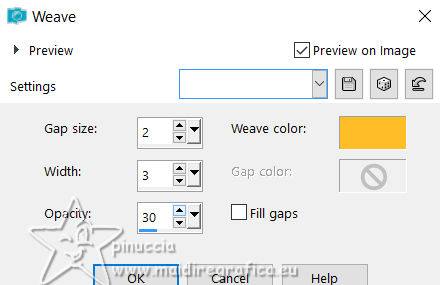 7. Effects>Plugins>Simple - Centre Tile We have this 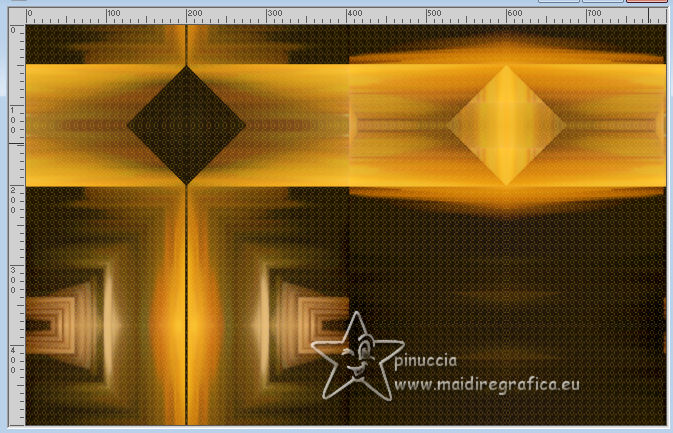 8. Seletions>Load/Save Selections>Load Selection from Disk Look for and load the selection 310_Xiki1 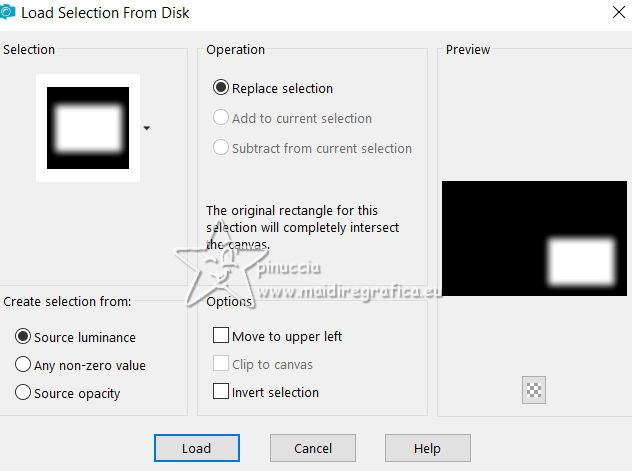 Selections>Promote Selection to Layer. Effects>Plugins>Richard Rosenman - Pixelate 9. Selections>Select None. Layers>Duplicate. Effects>Reflection Effects>Rotating Mirror. 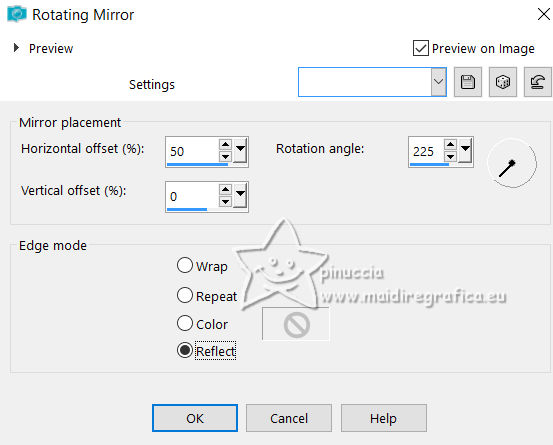 10. Image>Free rotate - 45 degrees to right. 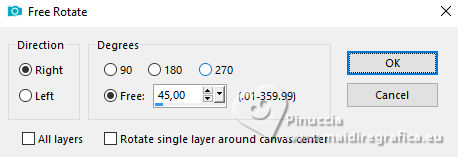 11. Pick Tool  Position X: 450,00 - Position Y: 71,00. 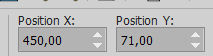 Layers>Properties>General>Blend Mode: Luminance. 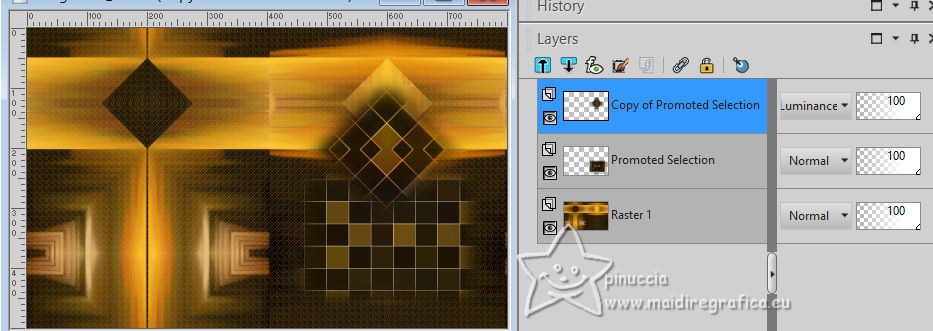 12. Layers>Duplicate. Image>Mirror>Mirror Horizontal. Pick Tool Position X: 51,00 - Position Y: 112,00. 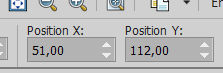 Layers>Properties>General>Blend Mode: Difference. 13. Layers>Duplicate. Pick Tool Position X: 51,00 - Position Y: 132,00. 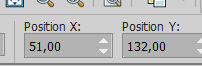 14, Layers>Duplicate. Pick Tool Position X: 51,00 - Position Y: 272,00. 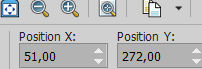 15. The layers 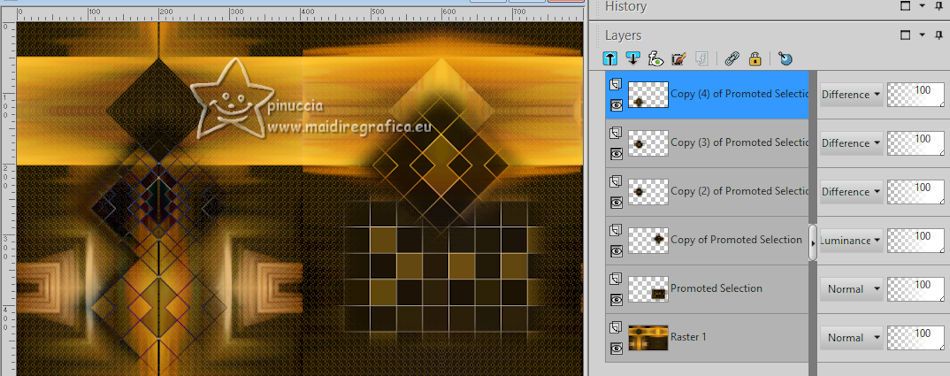 15. Activate the layer Promoted Selection. Open Decor312_Xiki1  Erase the watermark and go to Edit>Copy. Go back to your work and go to Edit>Paste As New Layer. Pick Tool Position X: 224,00 - Position Y: 253,00. 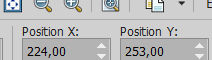 Layers>Properties>General>Blend Mode: Dodge. 16. Activate your top layer. Open Decor312_Xiki2 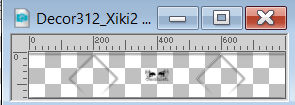 Erase the watermark and go to Edit>Copy. Go back to your work and go to Edit>Paste As New Layer. Pick Tool Position X: 0,00 - Position Y: 44,00.  Layers>Properties>General>Blend Mode: Overlay. 17. Open the misted 223FlorByPqnaAlice 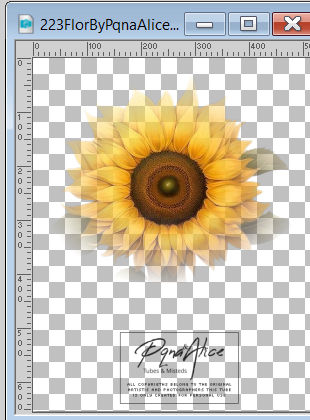 Erase the watermark and go to Edit>Copy. Go back to your work and go to Edit>Paste As New Layer. Image>Resize, if necessary - for the provided tube to 80%, resize all layers not checked. Pick Tool Position X: 240,00 - Position Y: 0,00, or according to your work.  18. Open 312_titulo_Xiki 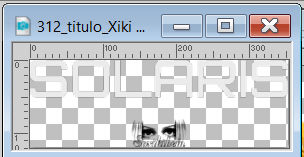 Erase the watermark and go to Edit>Copy. Go back to your work and go to Edit>Paste As New Layer. Pick Tool Position X: 415,00 - Position Y: 330,00. 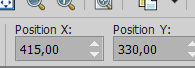 19. Activate your Color Changer tool to change the text's color, or colorize to your liking. 20. Image>Add Borders, 1 pixel, symmetric, background color. Image>Add Borders, 3 pixels, symmetric, foreground color. Image>Add Borders, 1 pixel, symmetric, background color. 21. Selections>Select All. Image>Add Borders, 25 pixels, symmetric, color white. Effects>3D Effects>Drop Shadow, color black. 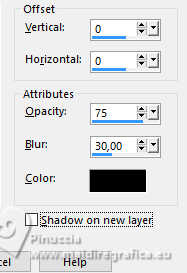 22. Selections>Invert. Effects>Texture Effects>Weave weave color: background color. 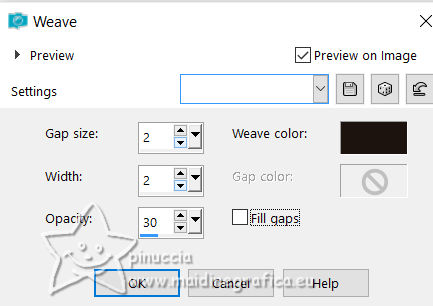 Selections>Select None. 23. Image>Add Borders, 2 pixels, symmetric, background color. Selections>Select All. 24. Image>Add Borders, 45 pixels, symmetric, color white. Effects>3D Effects>Drop Shadow, color black. Selections>Invert. 25. Effects>Texture Effects>Weave - background color. Selections>Select None. 26. Activate again your main tube 1504MulherByPqnaAlice and go to Edit>Copy. Go back to your work and go to Edit>Paste As New Layer. Image>Resize, if necessary - for the provided tube to 66%, resize al layers not checked. Position and apply the effect you like better. 27. Open Decor312_Xiki3  Erase the watermark and go to Edit>Copy. Go back to your work and go to Edit>Paste As New Layer. Pick Tool Position X: 604,00 - Position Y: 17,00.  28. Image>Add Borders, 2 pixels, symmetric, background color. 29, Edit>Copy the Creditos-bySoxikibem. Go back to your work and go to Edit>Paste As New Layer. Position  to your liking. to your liking.Don't forget the credit or your translator. 30. Sign your work on a new layer. Layers>Merge>Merge All and save as jpg. Author's note Because every detail makes a difference... I've prepared an exclusive Solaris tutorial signature as a special little gift for you to use in your artwork. Click on the image to download yours.  Versions with my tubes from Pinterest image 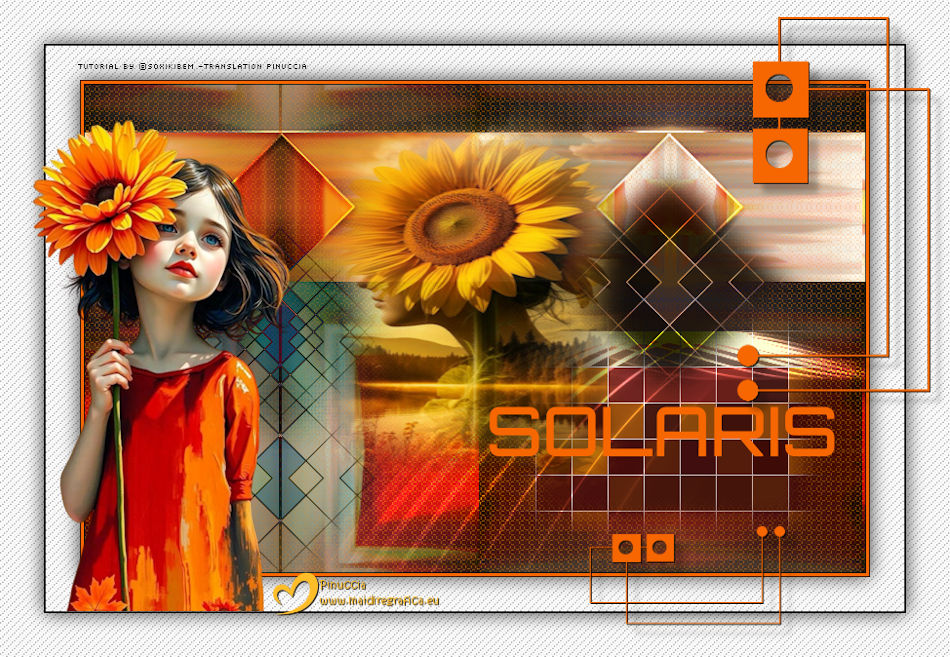   Your versions. Thanks 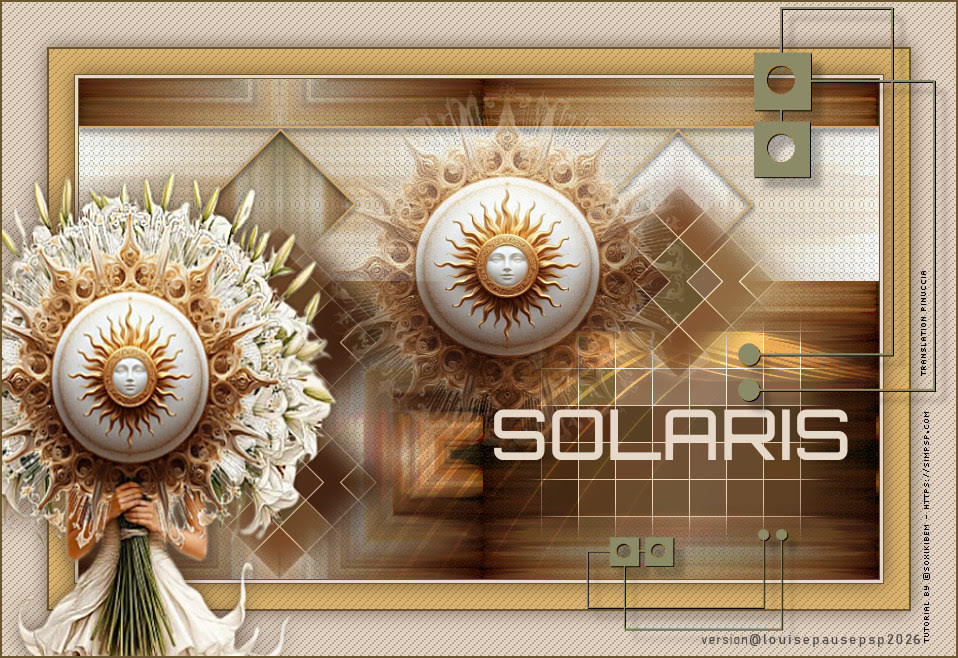 Louise If you have problems or doubts, or you find a not worked link, or only for tell me that you enjoyed this tutorial, write to me. 30 May 2026 |


