|
STYLE  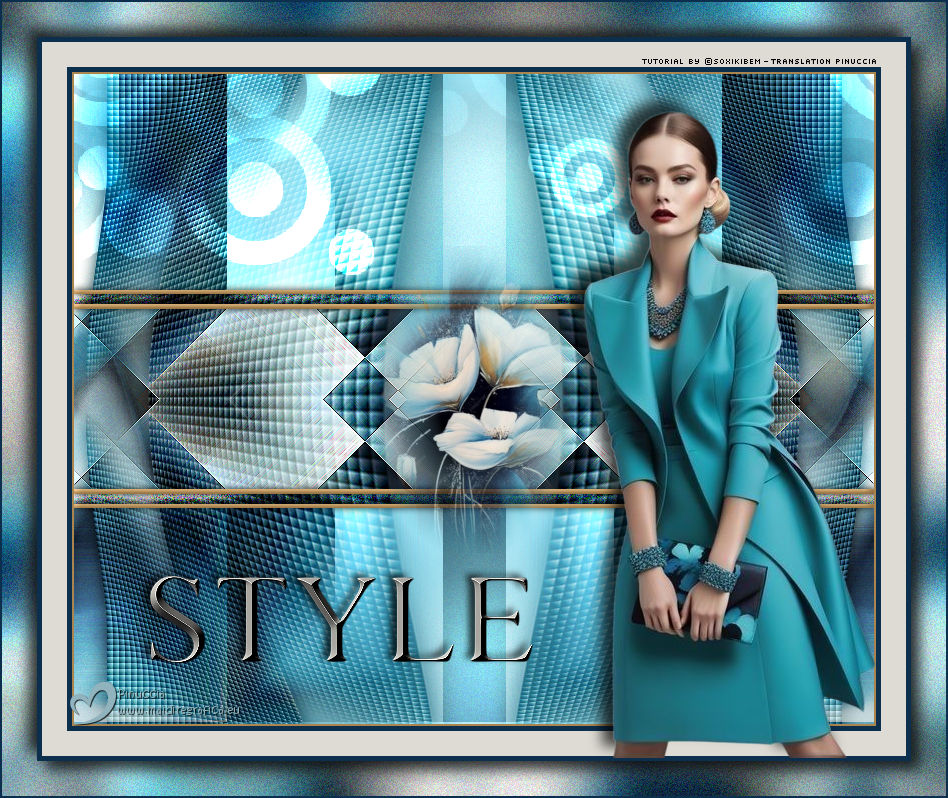
 A touch of sophistication, a whisper of delicacy. Where light meets shadow, shapes and tones dance in perfect harmony. Style is more than a name, it is the essence of elegance unveiled in every detail.
This tutorial was written with Psp2022 and translated with PspX2020, but it can also be made using other versions of PSP.
For this tutorial, you will need:  (The links of the tubemakers here).  consult, if necessary, my filter section here Filters Unlimited 2.0 here &<Bkg Designer sf10IV> - @Night Shadow, sf10Diamond Mountain, sf10 Slice N Dice, sf10 Square Bumps (to import in Unlimited) here Scribe - 4Way Mirror, Noise here Mehdi - Sorting Tiles here Simple - Left Right Wrap (bonus) here Filters Scribe and Simple can be used alone or imported into Filters Unlimited. (How do, you see here) If a plugin supplied appears with this icon  it must necessarily be imported into Unlimited it must necessarily be imported into UnlimitedYou can also follow the video tutorial created by Soxikibem   You can change Blend Modes according to your colors. In the newest versions of PSP, you don't find the foreground/background gradient (Corel_06_029). You can use the gradients of the older versions. The Gradient of CorelX here  1. Choose 4 colors to work. 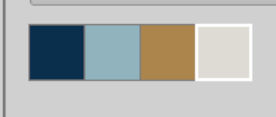 Foreground: #0c2f4e Background: #91b3bd 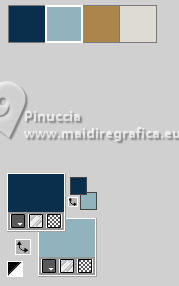 color 3 #ac854e color 4 #dedbd4. 2. Open a new transparent image 800 x 650 pixels. Flood Fill  the transparent image with your background color. the transparent image with your background color.Selections>Select All. Open your flower misted 218FlorByPqnaAlice 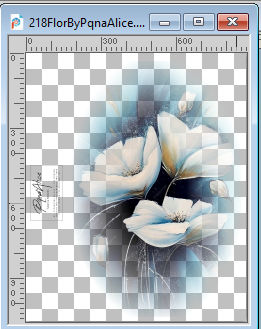 Erase the watermark and go to Edit>Copy. Go back to your work and go to Edit>Paste Into Selection. Selections>Select None. 3. Adjust>Blur>Radial Blur. 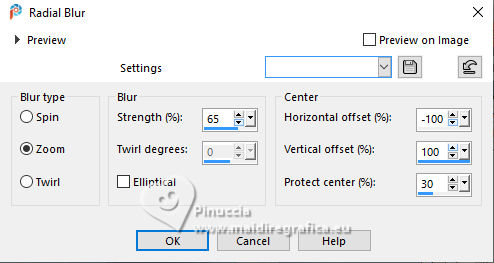 4. Layers>Duplicate. Image>Mirror>Mirror Horizontal. Layers>Properties>General>Opacity: 50%. Layers>Merge>Merge Down. Effects>Plugins>Filters Unlimited 2.0 - &<Background Designers IV> - sf10 Diamond Mountain. 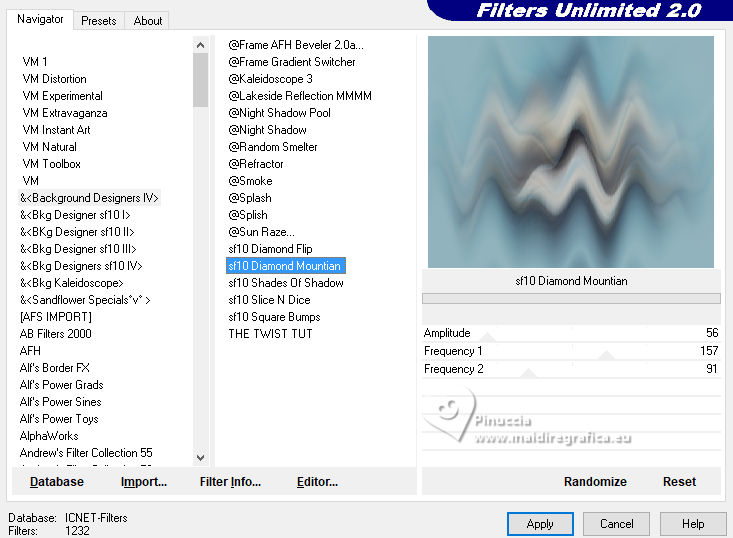 5. Effects>Plugins>Simple - Left Right Wrap. Effects>Plugins>Filters Unlimited 2.0 - Scribe - Noisey 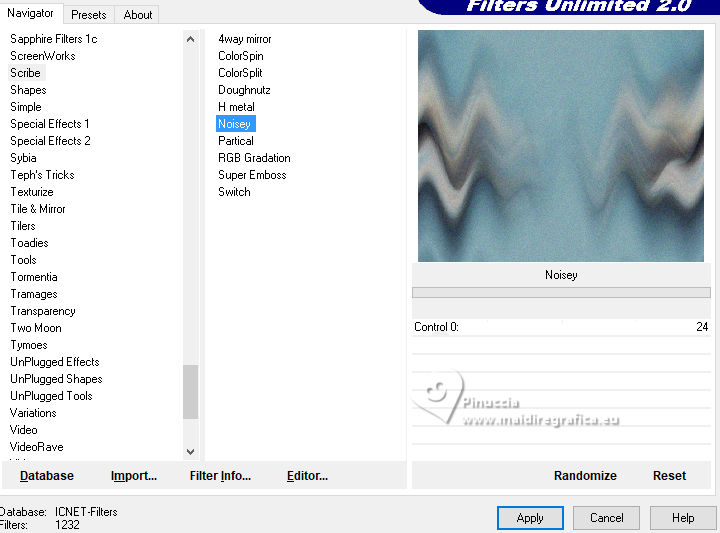 Effects>Plugins>Filters Unlimited 2.0 - &<Background Designers IV> - @Night Shadow, default settings. 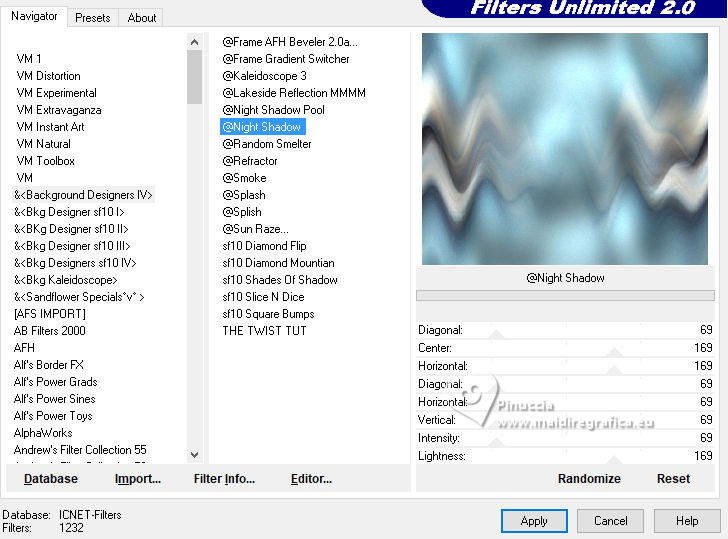 6. Layers>Duplicate. Effects>Plugins>Mehdi - Sorting Tiles. 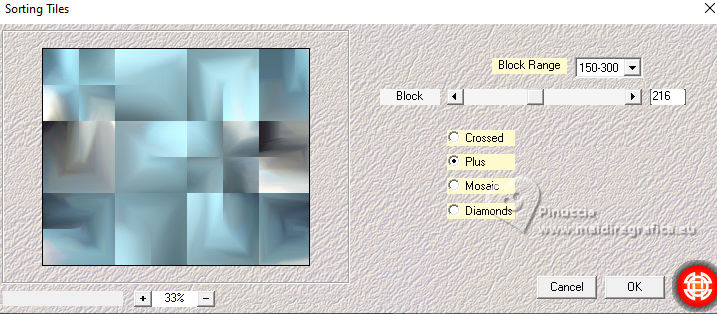 7. Effects>Reflection Effects>Rotating Mirror, default settings 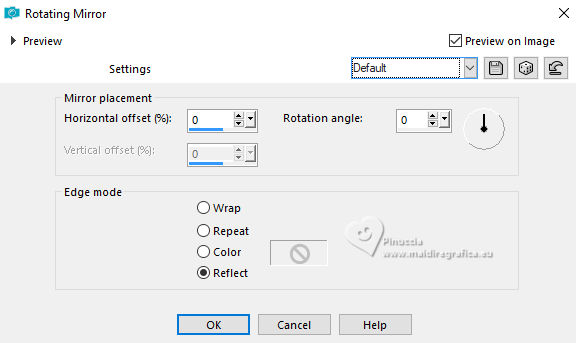 Layers>Properties>General>Blend Mode: Hard Light. 8. Layers>New Raster Layer. Activate your Selection Tool  (no matter the type of selection, because with the custom selection your always get a rectangle) clic on the Custom Selection 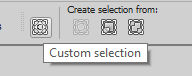 and set the following settings. 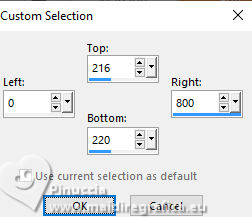 Set your foreground color to color 3 #ac854e. 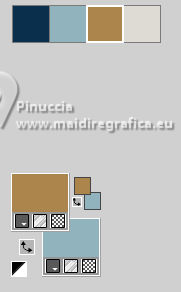 Flood Fill the selection with your foreground color.Selections>Select None. Layers>Duplicate. Image>Mirror>Mirror Vertical (Image>Flip) Layers>Merge>Merge Down. 9. Layers>New Raster Layer. Custom Selection 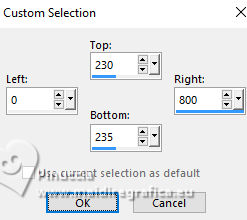 Flood Fill the selection with your foreground color.Selections>Select None. Layers>Duplicate. Image>Mirror>Mirror Vertical (Image>Flip). Layers>Merge>Merge Down - 2 times. 10. Activate your Magic Wand Tool  , tolerance and feather 0. , tolerance and feather 0.Click in the lines to select them, see below. 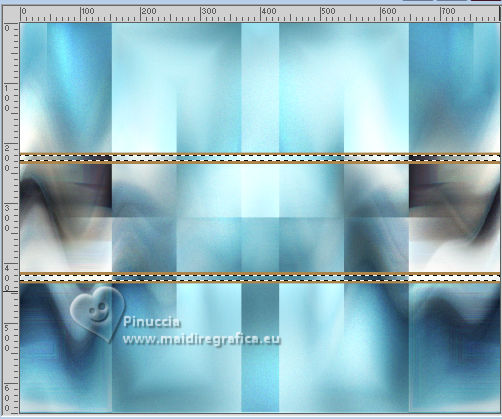 11. Activate the layer Copy of Raster 1 Adjust>Blur>Gaussian Blur - radius 20. 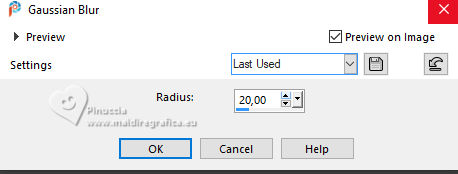 Effects>Plugins>Filters Unlimited 2.0 - Scribe - Noisey, default settings  Effects>3D Effects>Inner Bevel. 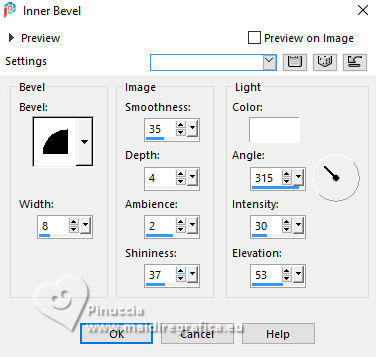 Selections>Select None. 12. Activate the layer Raster 2 Activate your Magic Wand Tool , tolerance and feather 0.Click between the lines, as below. 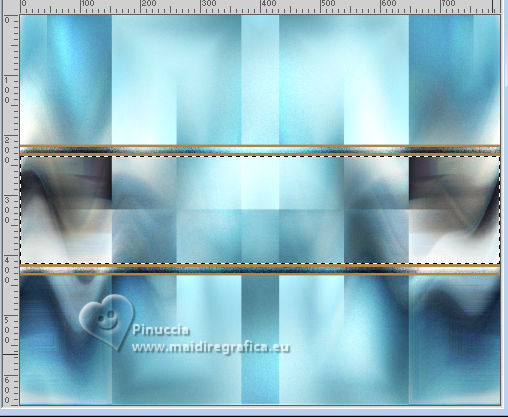 13. Activate the layer Copy of Raster 1 Effects>Plugins>Filters Unlimited 2.0 - &<Background Designers IV> - sf10 Slice N Dice. 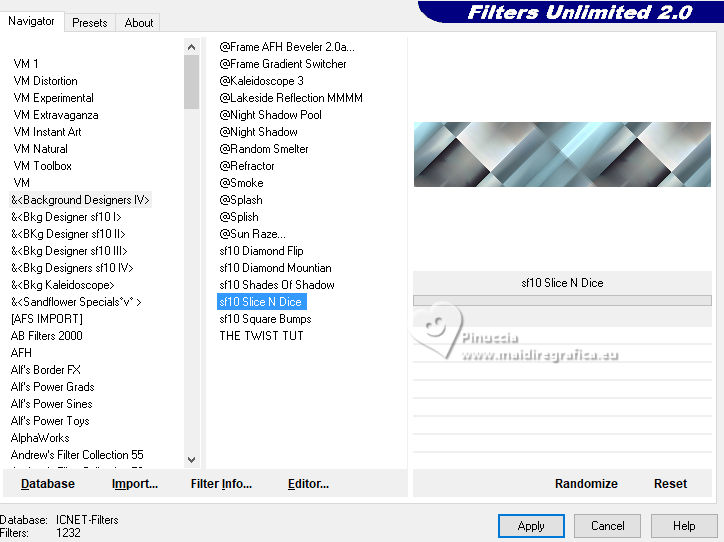 14. Effects>Plugins>Filters Unlimited 2.0 - Scribe - 4Way Mirror, default settings 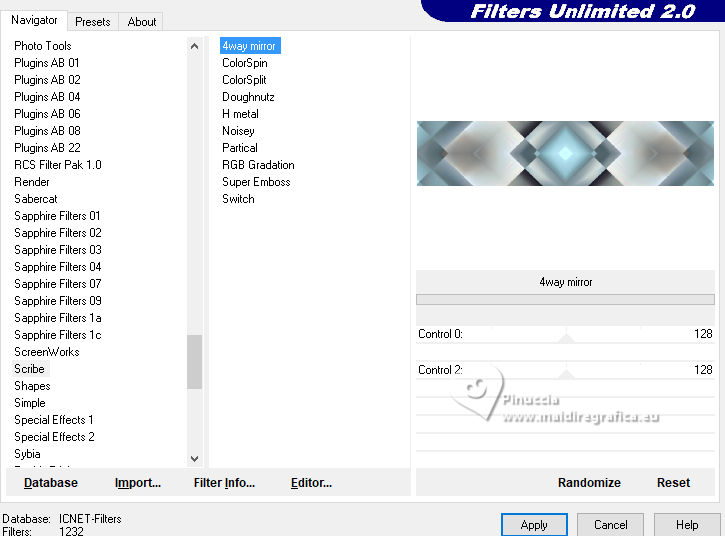 Effects>Edge Effects>Enhance. Selections>Select None. 15. Activate the layer Raster 1 Custom Selection 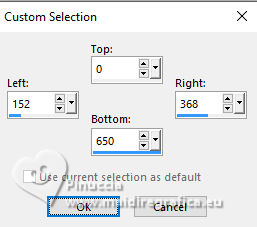 Selections>Promote Selection to Layer. 16. Effects>Plugins>Filters Unlimited 2.0 - &<Background Designers IV> - sf10 Square Bumps. 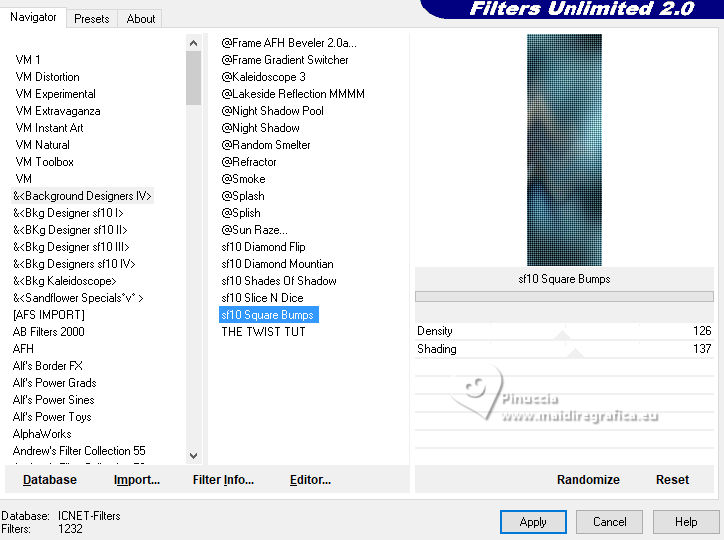 Effects>3D Effects>Drop Shadow, color black #000000.  Selections>Select None. Layers>Duplicate. Image>Mirror>Mirror Horizontal. Layers>Merge>Merge Down. Efects>Image Effects>Seamless Tiling, default settings.  17. Effects>Distortion Effects>Warp. 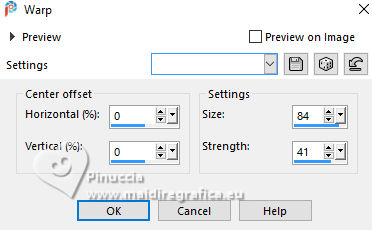 Author's note: in my second version I changed the Blend Mode to Dodge, because I used darker colors. 18. Activate the layer Raster 2 Effects>3D Effects>Inner Bevel, last settings. Effects>3D Effects>Drop Shadow, color black #000000. 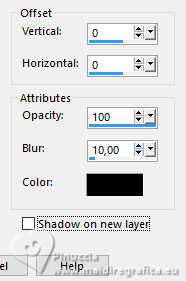 19. Edit>Paste as new layer - your flower misted is still in memory. Image>Resize, if necessary, for the supplied tube to 30%. Place  the tube in the center. the tube in the center.20. Open Decor301_Xiki 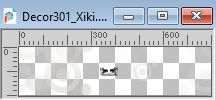 Erase the watermark and go to Edit>Copy. Go back go your work and go to Edit>Paste a New Layer. Pick Tool  Position X: 0,00 - Position Y: 0,00.  Layers>Properties>General>Blend Mode: Dodge. 21. Image>Add Borders, 2 pixels, symmetric, color 3 Image>Add Borders, 5 pixels, symmetric, foreground color. Image>Add Borders, 25 pixels, symmetric, color 4. Image>Add Borders, 5 pixels, symmetric, foreground color. Selections>Select All. Selections>Invert 22. Effects>Plugins>Filters Unlimited 2.0 - &<Background Designers IV> - sf10 Slice N Dice. 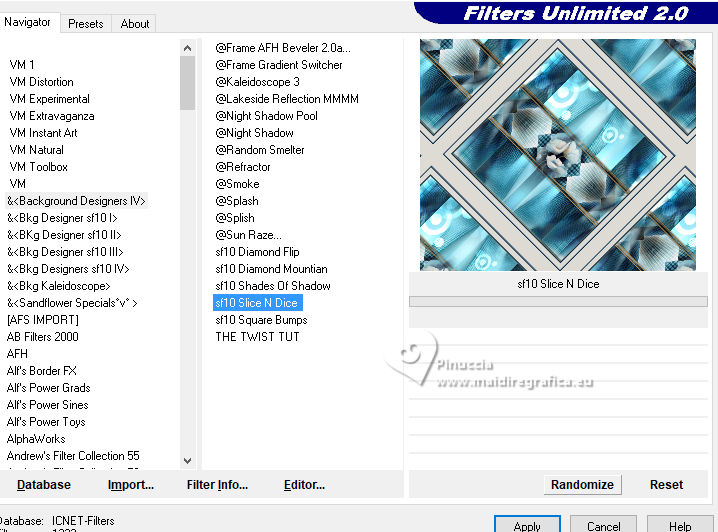 Adjust>Blur>Gaussian Blur - radius 20. Effects>Plugins>Filters Unlimited 2.0 - &<Background Designers IV> - @Night Shadow. 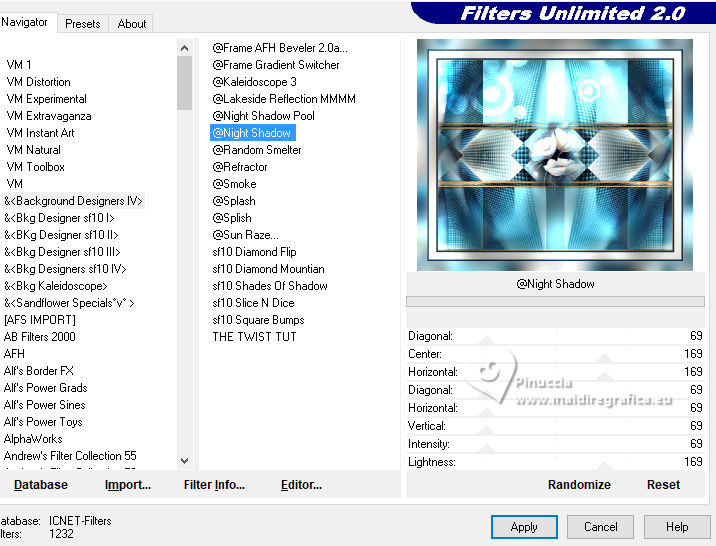 23. Effects>Plugins>Filters Unlimited 2.0 - Scribe - Noisey 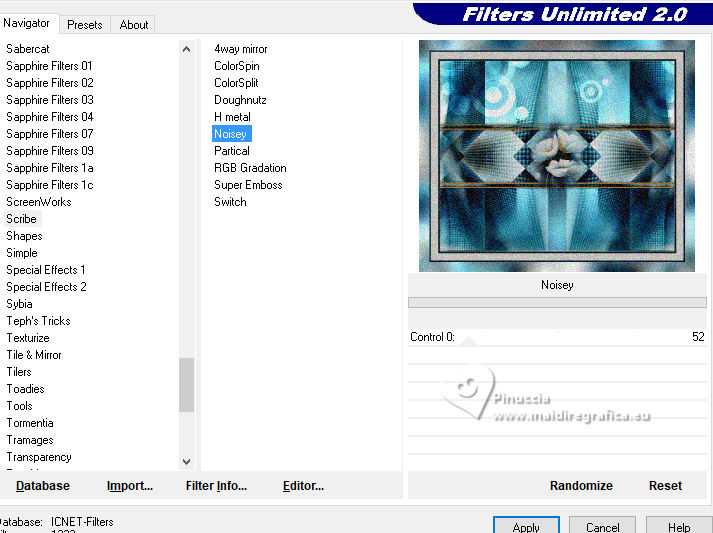 Selections>Invert. Effects>3D Effects>Drop Shadow, color black.  Effects>3D Effects>Drop Shadow, color black. 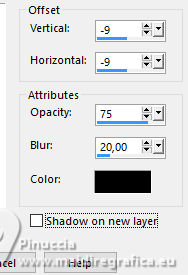 Selections>Select None. 24. Open your tube 1357MulherByPqnaAlice 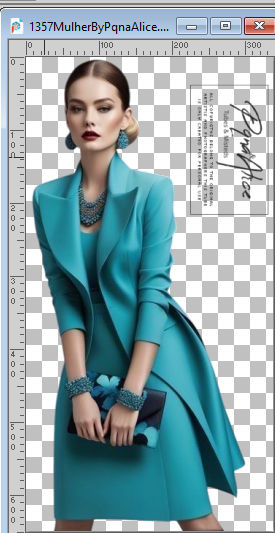 Erase the watermark and go to Edit>Copy. Go back to your work and go to Edit>Paste as New Layer. Place and apply the effect to your liking. 25. Open Titulo301_Xiki 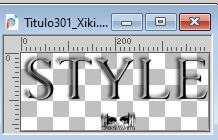 Erase the watermark and go to Edit>Copy. Go back to your work and go to Edit>Paste as New Layer. Pick Tool Position X: 134,00 - Position Y: 562,00.  26. Image>Add Borders - 2 pixels, symmetric, foreground color. 27. Image>Resize, if you want. Sign your work and save as jpg. Version with my tube from Pinterest; for the misted thanks PqnaAlice   Your versions. Thanks  Kika  Irene  Lynnette  Poppy  Jolcsi  Baby  Baby2  If you have problems or doubts, or you find a not worked link, or only for tell me that you enjoyed this tutorial, write to me. 20 Janvier 2026 |