|
THE ORIENT  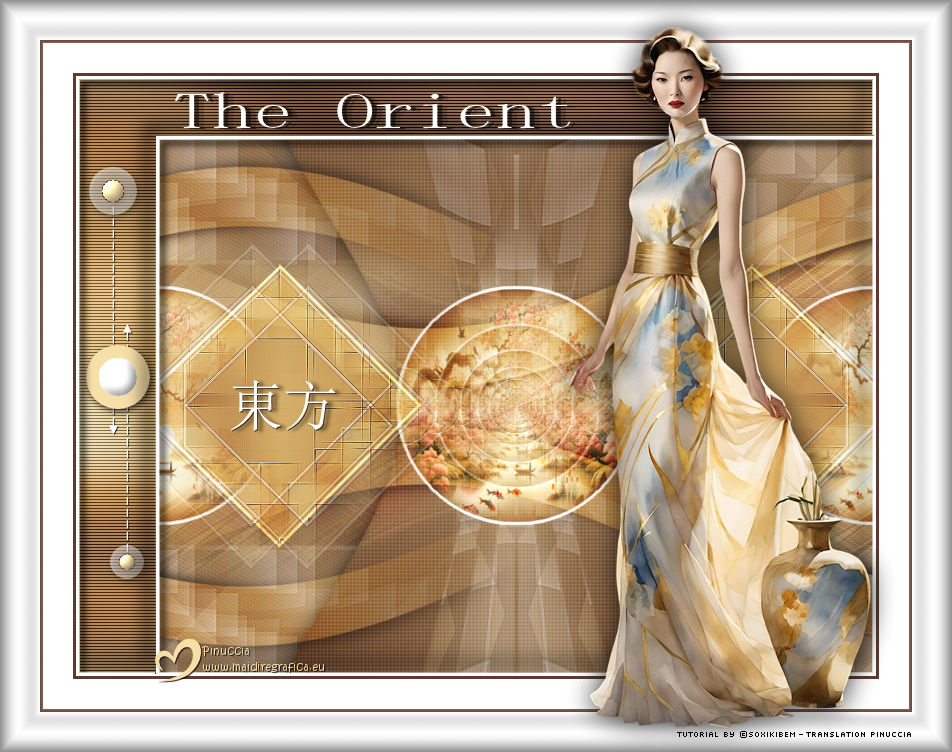
 The winds whisper ancient secrets, unfolding in silk and gold beneath the moon's glow. Every shadow holds a tale, every fragrance carries a memory. The Orient is an eternal poem, written in the breath of time.
This tutorial was written with Psp2022 and translated with PspX2020, but it can also be made using other versions of PSP.
For this tutorial, you will need:  Thanks for the tubes PqnaAlice. (The links of the tubemakers here).  consult, if necessary, my filter section here Filters Unlimited 2.0 here &<Bkg Designer sf10I> - Cruncher (to import in Unlimited) here Funhouse - Xaggerate here Mura's Seamless - Checks with Gradation here Carolaine and Sensibility - cs-texture here RCS Filter Pak 1.0 - RCS TripleExposure here Toadies - Weaver here Simple - Top Bottom Wrap (bonus) here Simple - Half Wrap here Filters Funhouse, Mura's Seamless, RCS Filter Pak, Simple and Toadies can be used alone or imported into Filters Unlimited. (How do, you see here) If a plugin supplied appears with this icon  it must necessarily be imported into Unlimited it must necessarily be imported into Unlimited You can change Blend Modes according to your colors. In the newest versions of PSP, you don't find the foreground/background gradient (Corel_06_029). You can use the gradients of the older versions. The Gradient of CorelX here  Copy the selections in the Selections Folder. 1. Choose 3 colors to work. Foreground: #5c3a2f Background: #f7dfa8  Color 3: #ffffff Set your foreground color to a Foreground/Background Gradient, style Radial. 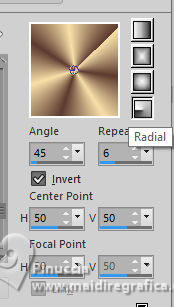 2. Open a new transparent image 800 x 600 pixels. Flood Fill  the transparent image with your Gradient. the transparent image with your Gradient.3. Effects>Plugins>Simple - Top Bottom Wrap This effect works without window; result: 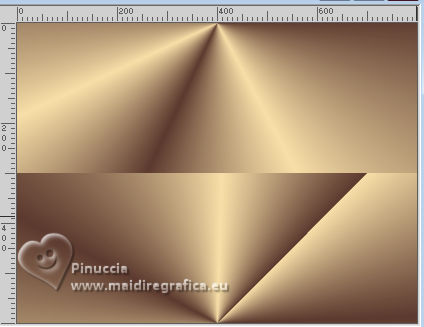 Effects>Image Effects>Seamless Tiling.  4. Effects>Plugins>Filters Unlimited 2.0 - &<Bkg Designer sf10I> - Cruncher. 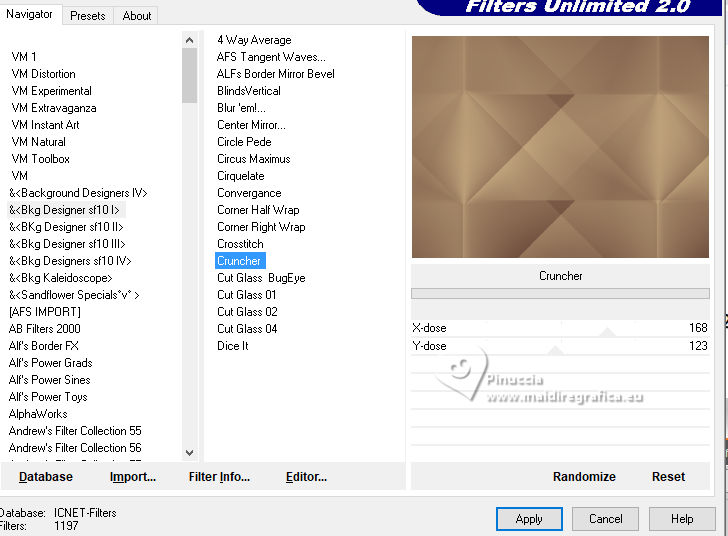 5. Selections>Load/Save Selections>Load Selection From Disk Look for and load the selection 297_Xiki1 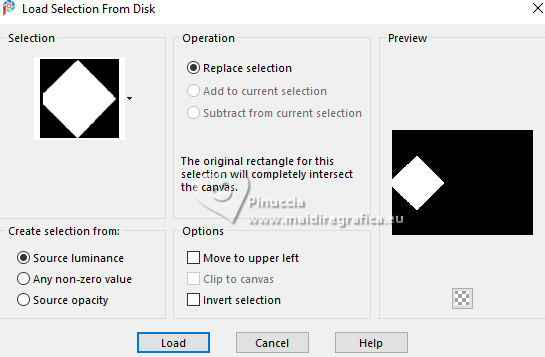 Selections>Promote Selection To Layer. Effects>Plugins>Toadies - Weaver. 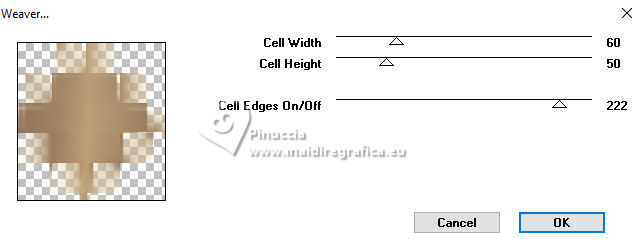 Effects>Edge Effects>Enhance. Layers>New Raster Layer. 6. Selections>Load/Save Selections>Load Selection From Disk. Look for and load the selection 297_Xiki2 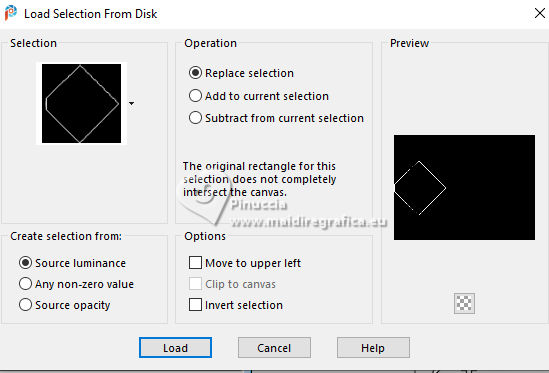 Set your background color to white #fffffff.  Flood Fill the selection with the color white #ffffff.Selections>Select None. Layers>Merge>Merge Down. Layers>Duplicate. Image>Mirror>Mirror Horizontal. Layers>Merge>Merge Down. 7. Layers>Duplicate. Effects>Filters Unlimited 2.0 - &<Bkg Designer sf10I> - Cruncher, default settings. 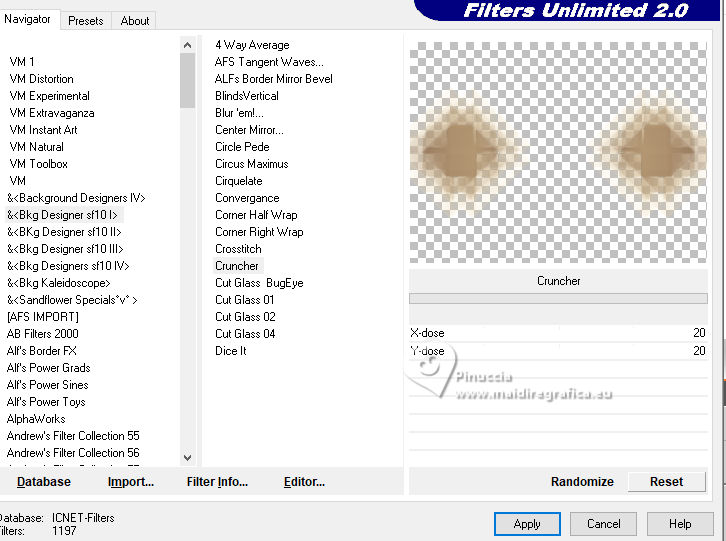 Layers>Arrange>Move Down. Effects>Edge Effects>Enhance. Activate the layer Promoted Selection. Layers>Properties>General>Blend Mode: Overlay. 8. Activate the layer Raster 1. 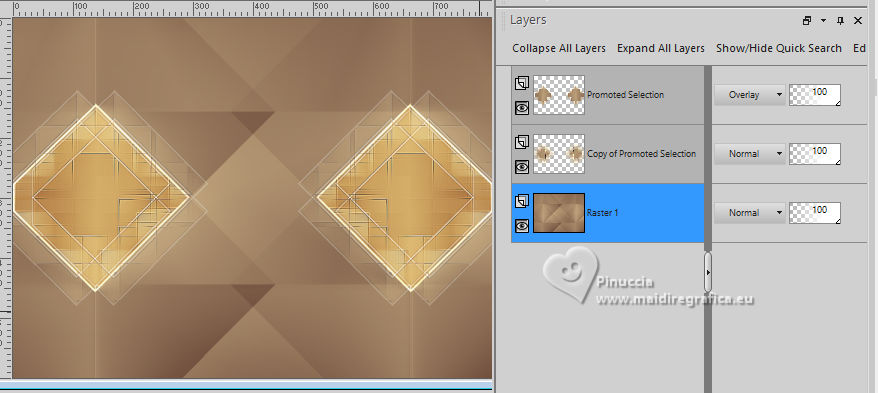 Selections>Load/Save Selections>Load Selection From Disk. Look for and load the selection 297_Xiki3 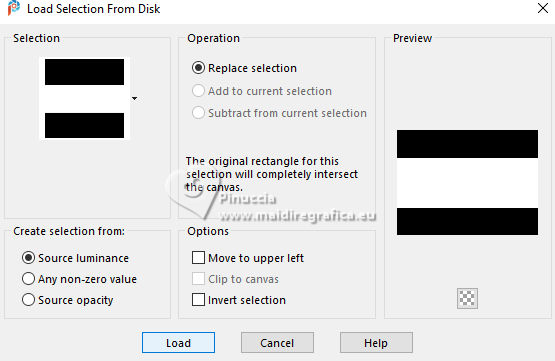 Selections>Promote Selection To Layer. Close the layer Promoted Selection 1. Keep selected. 9. Activate the layer Raster 1. Effects>Plugins>Mura's Seamless - Checks with Gradation 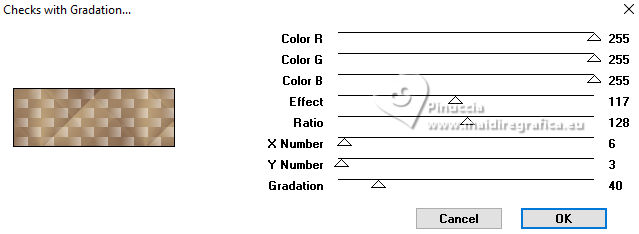 10. Effects>Plugins>RCS Filter Pak 1.0 - RCS Triple Exposure, default settings. 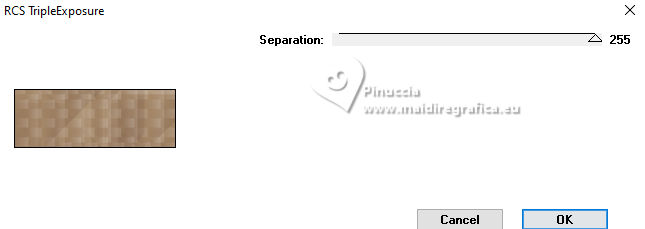 Adjust>Sharpness>Sharpen More. Selections>Load/Save Selections>Load Selection From Disk. Look for and load the selection 297_Xiki4 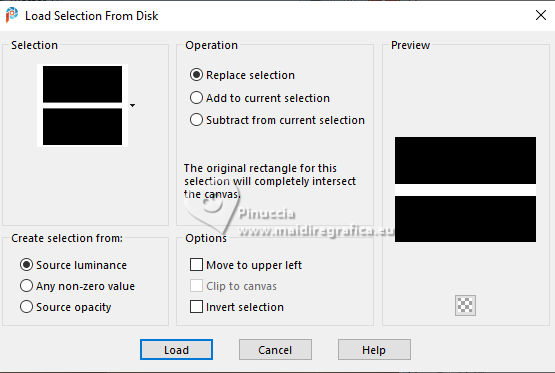 Effects>Distortion Effects>Wave  Selections>Promote Selection to Layer. Selections>Select None. 11. Stay on the layer Promoted Selection 2 Pick Tool  Position X: 0,00 - Position Y: 321,00. 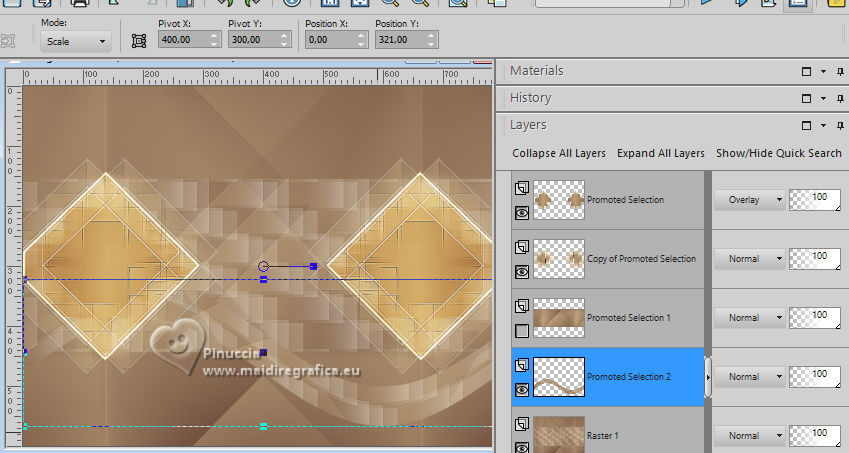 Effects>3D Effects>Drop Shadow, color black. 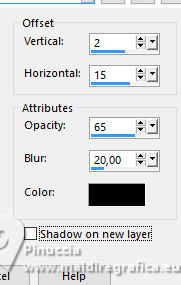 Layers>Properties>General>Blend Mode: Hard Light, Opacity: 70%. 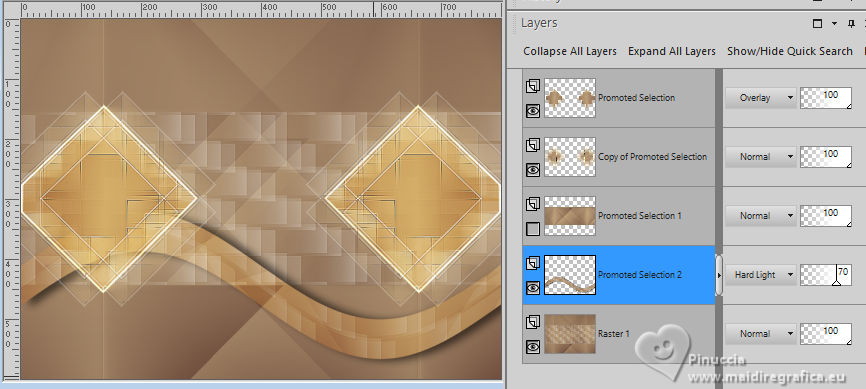 12. Effects>Reflection Effects>Rotating Mirror. 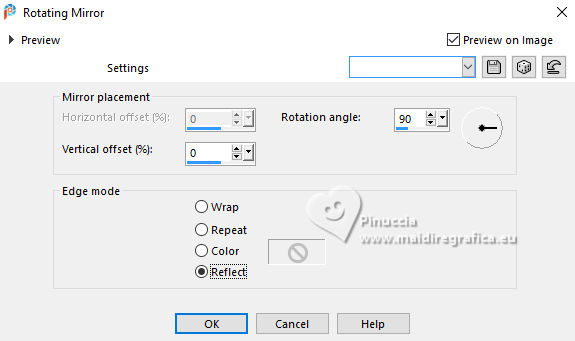 13. Layers>New Raster Layer. Selections>Load/Save Selections>Load Selection From Disk. Look for and load the selection 297_Xiki5 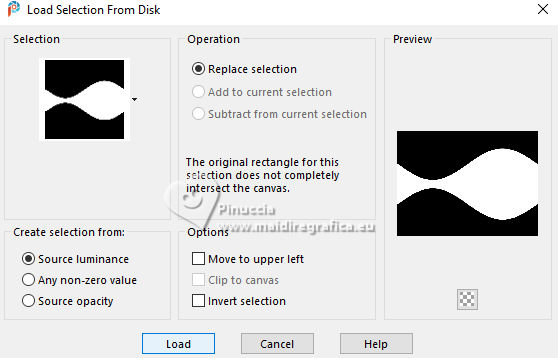 Open the landscape misted 192PaisagemByPqnaAlice 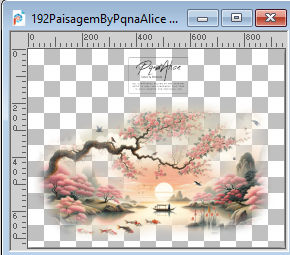 Erase the watermark and go to Edit>Copy. Go back to your work and go to Edit>Paste Into Selection. Adjust>Blur>Gaussian Blur - radius 10. 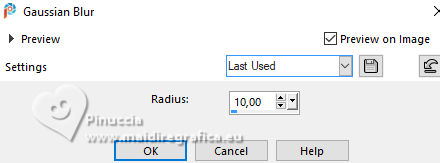 Effects>Plugins>Funhouse - Xaggerate 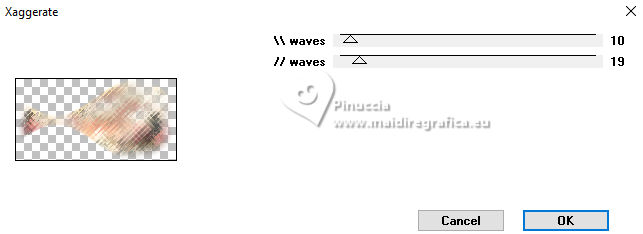 14. Selections>Select None. Layers>Arrange>Move Down. Layers>Properties>General>Blend Mode: Hard Light, Opacity: 60%. 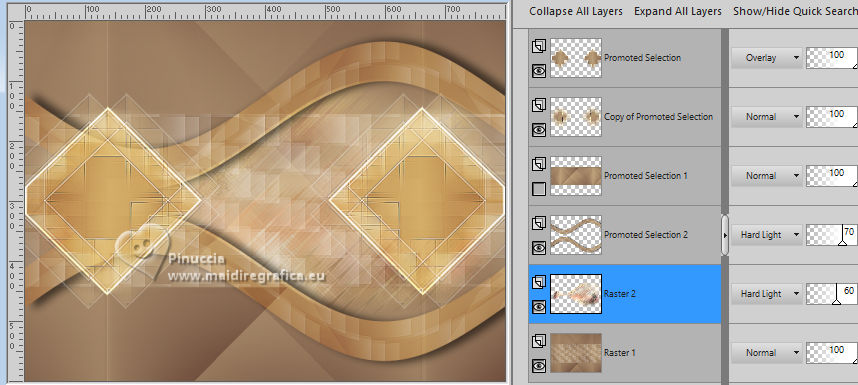 Activate the layer Promoted Selection 2. Layer>Merge>Merge Down. Effects>Image Effects>Seamless Tiling. 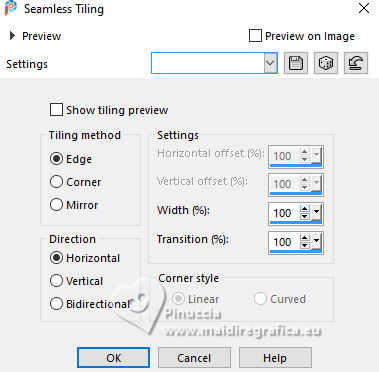 15. Open and activate the layer Promoted Selection 1. Selections>Load/Save Selections>Load Selection From Disk. Look for and load again the selection 297_Xiki3 Effects>Plugins>Filters Unlimited 2.0 - Buttons & Frames - Kaleidoscope Frame (round). 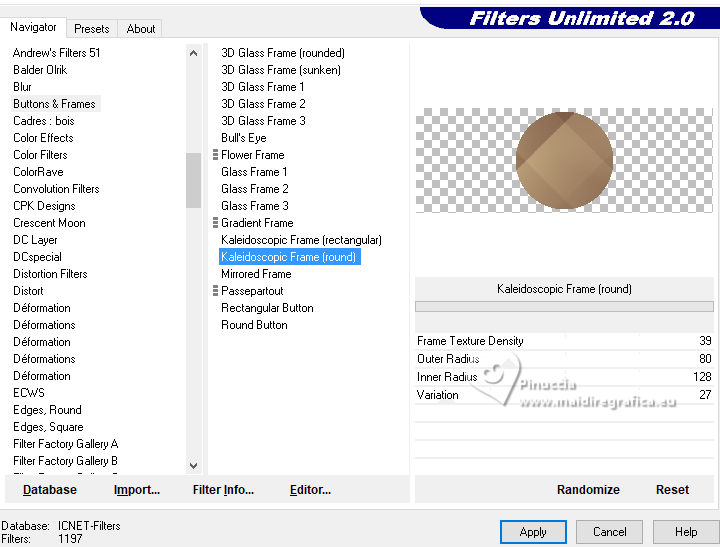 16. Selections>Load/Save Selections>Load Selection From Disk. Look for and load the selection 297_Xiki6 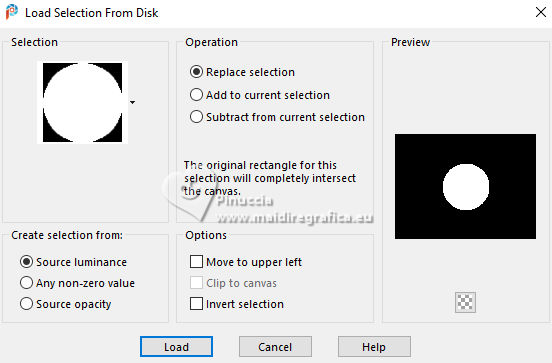 Edit>Paste into Selection - the landscape misted is still in memory. Adjust>Sharpness>Sharpen. Layers>New Raster Layer. Effects>3D Effects>Cutout. 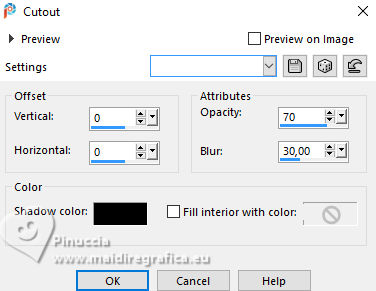 Layers>Merge>Merge Down. 17. Selections>Load/Save Selections>Load Selection From Disk. Look for and load the selection 297_Xiki7 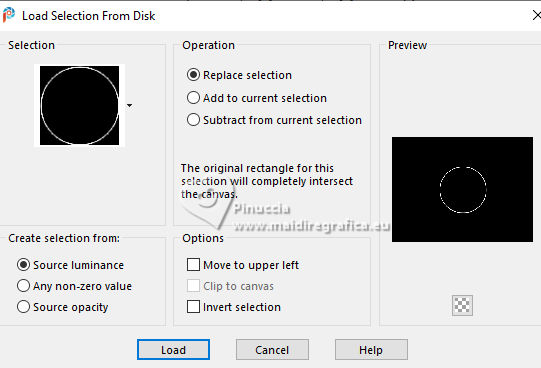 Layers>New Raster Layer. Flood Fill with your white background color #ffffff.Layers>Merge>Merge Down. Selections>Select None. Effects>Image Effects>Seamless Tiling  18. Effects>Reflection Effects>Feedback. 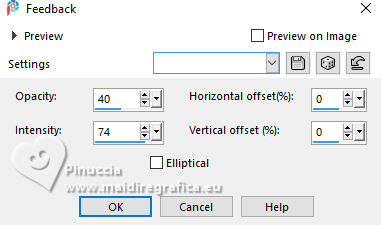 19. Adjust>Brightness and Contrast>Brightness/Contrast. 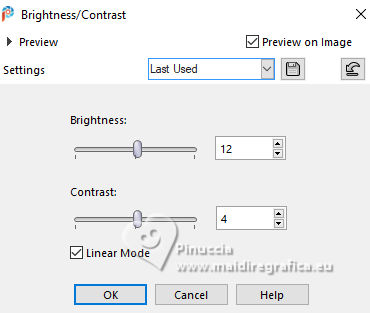 Layers>Properties>General>Blend Mode: Hard Light. 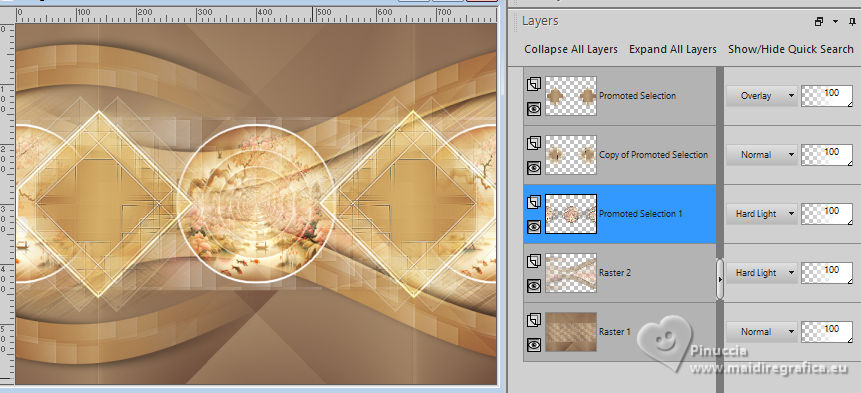 20. Activate the layer Raster 1. Layers>Duplicate. Image>Free Rotate - 90 degrees to right. 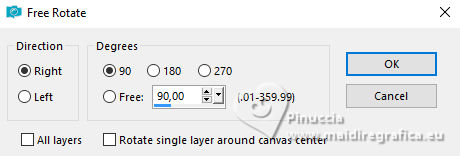 21. Effects>Distortion Effects>Warp. 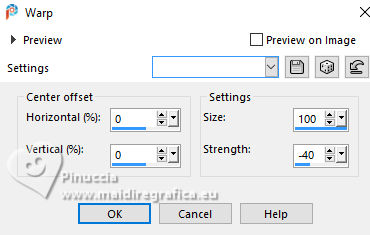 Effects>3D Effects>Drop Shadow, color black #000000. 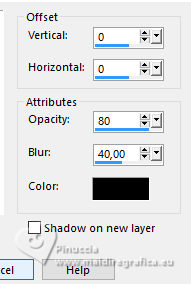 22. Effects>Reflection Effects>Rotating Mirror. 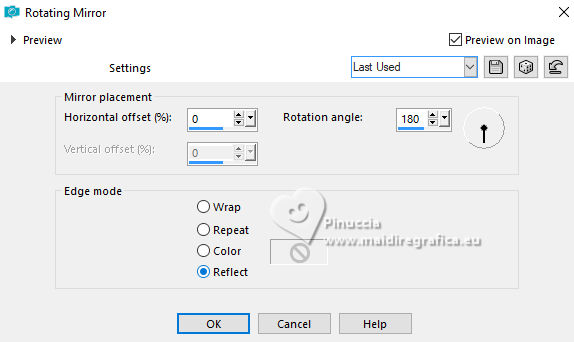 23. Effects>Artistic Effects>Halftone.  24. Activate the layer Raster 1. Effects>Plugins>Simple - Half Wrap  Effects>Artistic Effects>Halftone.  Your tag and the layers  25. Layers>Merge>Merge Visibile. Layers>Duplicate. Image>Resize, to 90%, resize all layers not checked. Activate the layer Merged. Adjust>Blur>Gaussian Blur - radius 20.  Effects>Plugins>Carolaine and Sensibility - CS-Texture 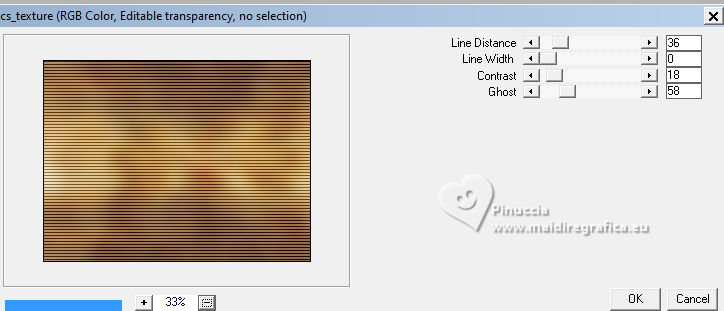 26. Activate the layer Copy of Merged. Objects>Align>Bottom. Objects>Align>Right. Open 297Decor_Xiki  Erase the watermark and go to Edit>Copy. Go back to your work and go to Edit>Paste as New Layer. 27. Image>Add Borders, 3 pixels, symmetric, foreground color. Image>Add Borders, 30 pixels, symmetric, color white. Image>Add Borders, 3 pixels, symmetric, foreground color. Image>Add Borders, 40 pixels, symmetric, color white. 28. Effects>Plugins>Filters Unlimited 2.0 - Buttons & Frames - Glass Frame2.  29. Open JapaneseTheOrient_Xiki  Erase the watermark and go to Edit>Copy. Go back to your work and go to Edit>Paste as New Layer. Pick Tool Position X: 230,00 - Position Y : 378,00.  30. Open your woman's tube 1351MulherByPqnaAlice  Erase the watermark and go to Edit>Copy. Go back to your work and go to Edit>Paste as New Layer. Move  the tube to the right. the tube to the right.Apply Effects to your liking. 31. Open TituloTheOrient_Xiki  Erase the watermark and go to Edit>Copy. Go back to your work and go to Edit>Paste as New Layer. Pick Tool Position X: 175,00 - Position Y : 91,00.  32. Open Credit-Tutorial_bySoxikibem  Choose a layer and go to Edit>Copy. Go back to your work and go to Edit>Paste as new layer. Don't forget your translator's watermark. Layers>Merge>Merge All and save as jpg. Version with my tubes from Pinterest images   Your versions. Thanks  Kika  Carmen Darder  Aria 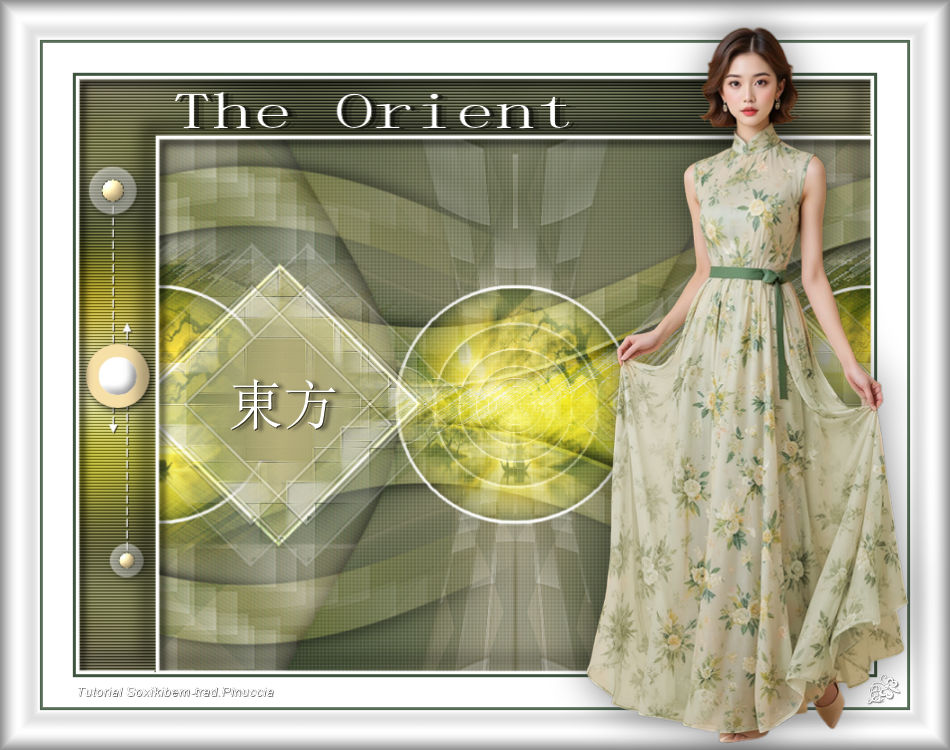 Jolcsi  If you have problems or doubts, or you find a not worked link, or only for tell me that you enjoyed this tutorial, write to me. 17 November 2025 |


