|
THE TOUCH OF SILENCE  
 The Touch of Silence Her delicate fingers trace the contours of her face, as if embracing the quiet whisper of a dream. With closed eyes, she listens to the silence—not as absence, but as a melody only the soul can hear. In this gentle stillness, time dissolves, and she becomes one with the hush of the universe.
This tutorial was written with Psp2022 and translated with PspX2020, but it can also be made using other versions of PSP.
For this tutorial, you will need:  For the tubes thanks PqnaAlice and for the mask thanks Narah. (The links of the tubemakers here).  consult, if necessary, my filter section here XE Xtras - Elemental here  You can change Blend Modes according to your colors. In the newest versions of PSP, you don't find the foreground/background gradient (Corel_06_029). You can use the gradients of the older versions. The Gradient of CorelX here  Open the mask in PSP and minimize it with the rest of the material. 1. Choose 3 colors to work. For the example: 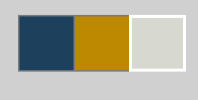 Foreground color to #1e425c, Background color to #bd8901. 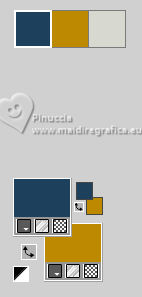 color 3 #d7d8d0 To begin, set your background color to the color 3 #d7d8d0.  2. Open a new transparent image 850 x 600 pixels. Flood Fill  the transparent image with your background color #d7d8d0. the transparent image with your background color #d7d8d0.Selections>Select All. Open the landscape misted 177PaisagemByPqnaAlice 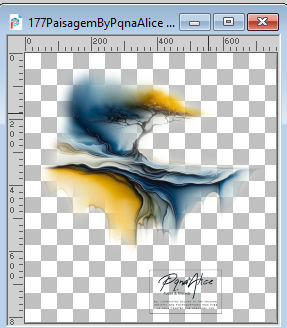 Edit>Copy. Go back to your work and go to Edit>Paste Into Seletion. Selections>Select None. 3. Effects>Image Effects>Seamless Tiling, default settings.  Adjust>Blur>Motion Blur. 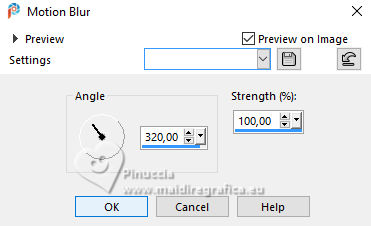 Edit>Repeat Motion Blur - 2 times. Effects>Edge Effects>Enhance More. Edit>Repeat Enhance Edges More. 4. Layers>Duplicate. Image>Mirror>Mirror Horizontal. Layers>Properties>General>Blend Mode: Soft Light.  Layers>Merge>Merge Visible. 5. Effects>Reflection Effects>Rotating Mirror, default settings. 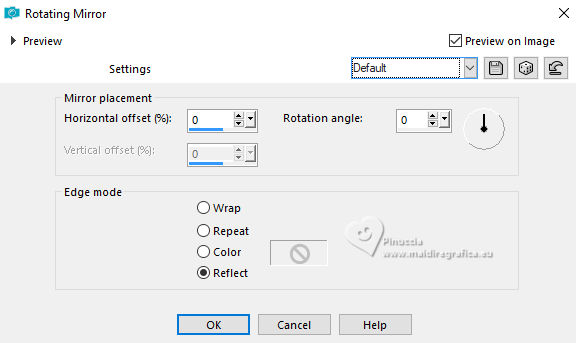 6. Layers>New Raster Layer. Flood Fill with your background color (color 3).Effects>Plugins>XE Xtras - Elemental. 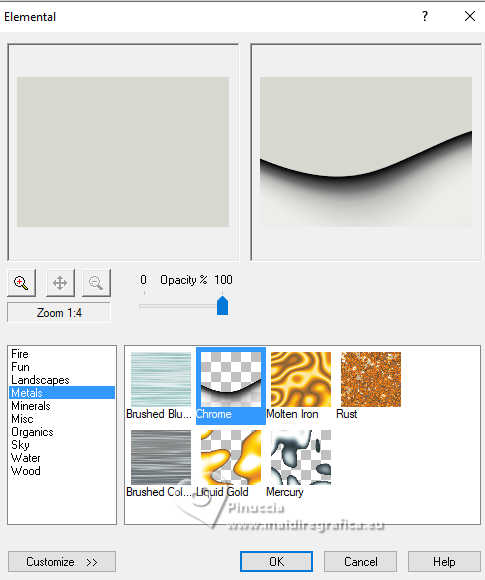 7. Activate your Magic Wand Tool  , tolerance and feather 0, , tolerance and feather 0,and click in the top part to select it.  Selections>Modify>Expand - 1 pixel. Edit>Cut or press CANC on the keyboard  Selections>Select None.  8. Layers>Duplicate. Image>Mirror>Mirror Vertical. Image>Mirror>Mirror Horizontal. Pick Tool  Position X: 0,00 - Position Y: -64.00. 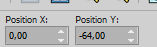 Layers>Merge>Merge Down. Activate your Crop Tool 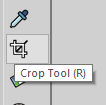 and click Merged Opaque 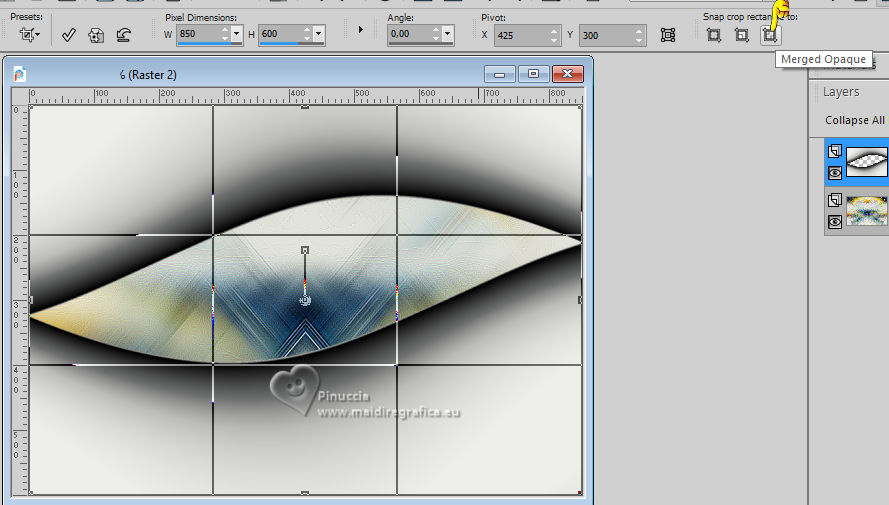 Click on the sign to apply  9. Effects>Distortion Effects>Polar Coordinates. 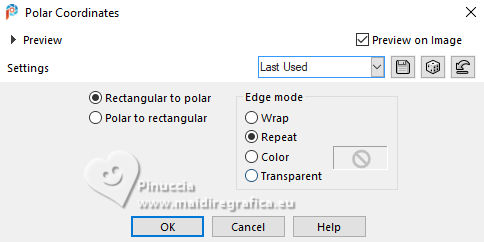 10. Effects>Reflection Effects>Kaleidoscope, default settings. 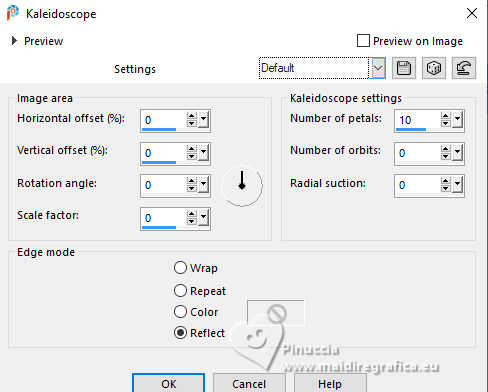 Layers>Properties>General>Blend Mode: Soft Light. 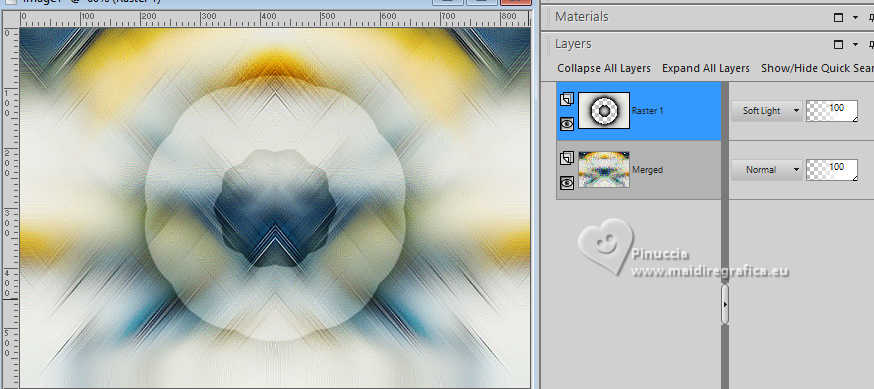 11. Activate your Magic Wand Tool , tolerance and feather 0,and click in the circle's border to select it. 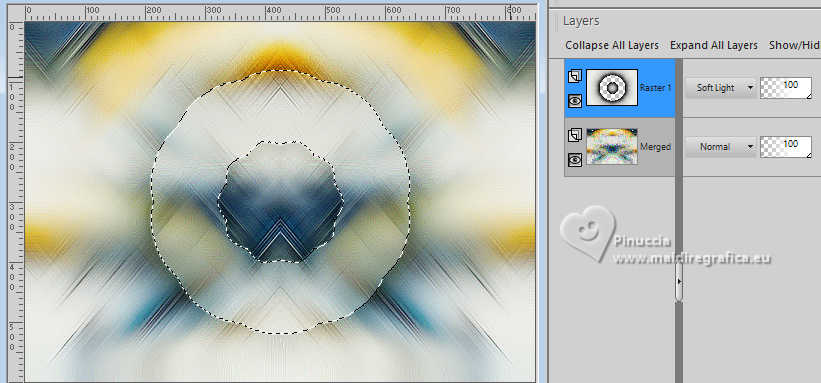 Selections>Modify>Expand - 3 pixels. 12. Layers>New Raster Layer. Foreground color: color 1. Background color: color 3. Set your foreground color to a Foreground/Background Gradient, style Sunburst. 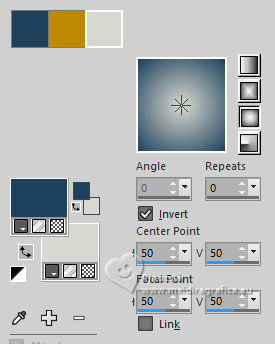 Flood Fill the selection with your Gradient.13. Effects>Art Media Effects>Brush Strokes. 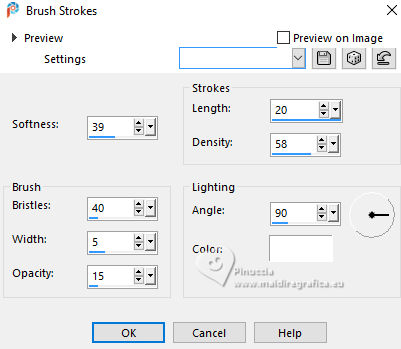 14. Selections>Modify>Contract - 25 pixels. Layers>New Raster Layer. Activate the layer Merged. Edit>Copy Activate again your top layer, Raster 3. Edit>Paste into Selection.  15. Adjust>Blur>Gaussian Blur - 10 pixels. 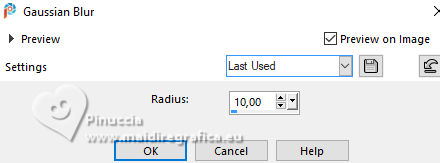 Effects>Texture Effects>Weave, foreground color. 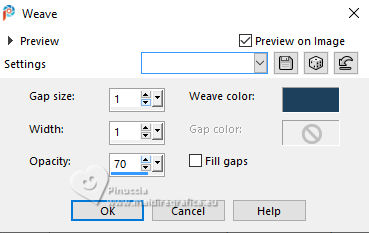 16. Effects>3D Effects>Inner Bevel. 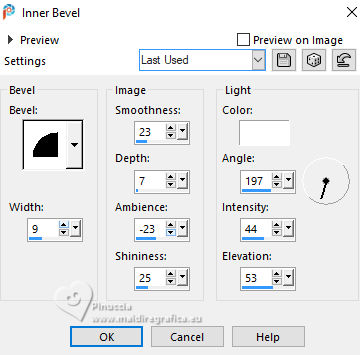 Effects>3D Effects>Drop Shadow, color black #000000. 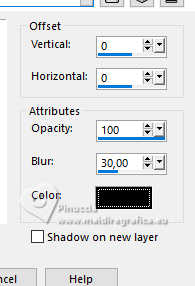 Selections>Select None. 17. Activate the layer Raster 1. Activate again your landscape's misted and go to Edit>Copy. Go back to your work and go to Edit>Paste as new layer. Resize, if necessary, and place it in the center, as below. 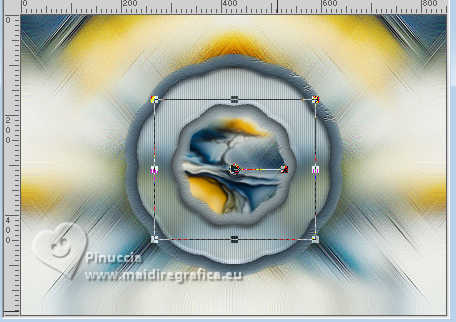 Adjust>Sharpness>Sharpen. 18. Activate again the layer Raster 1 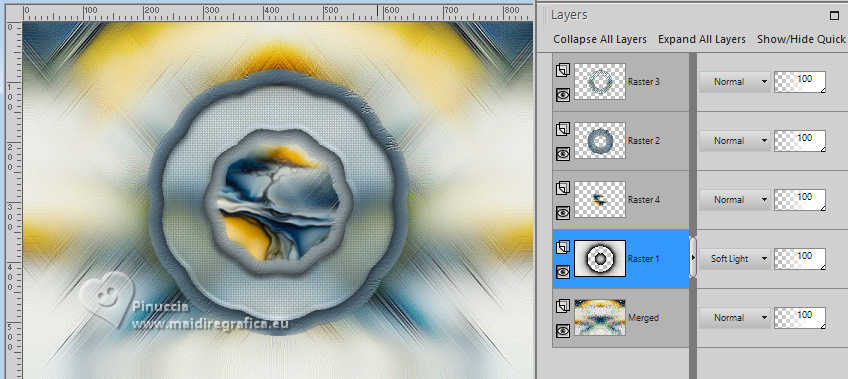 Effects>Geometric Effects>Perspective - Horizontal 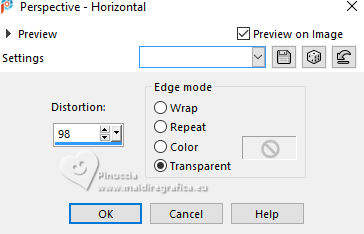 Repeat Effects>Geometric Effects>Perspective - Horizontal, -98.  Effects>Distortion Effects>Wave. 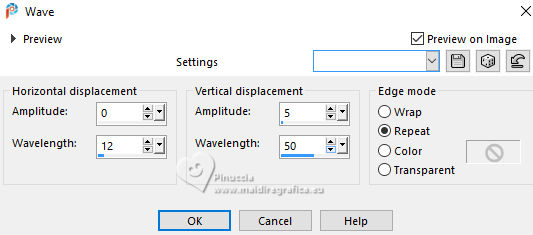 19. Layers>Duplicate. Layers>Merge>Merge Down. Pick Tool Position X: 0,00 - Position Y: 140,00. 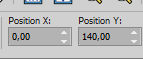 Layers>Duplicate. Image>Mirror>Mirror Vertical. Layers>Merge>Merge Down. 20. Effects>Reflection Effects>Rotating Mirror, same settings 21. Activate your Magic Wand Tool , tolerance and feather 0,click in the center of the effect to select it.  Activate the layer Merged. Selections>Promote Selection to Layer. 22. Effects>Art Media Effects>Brush Strokes. 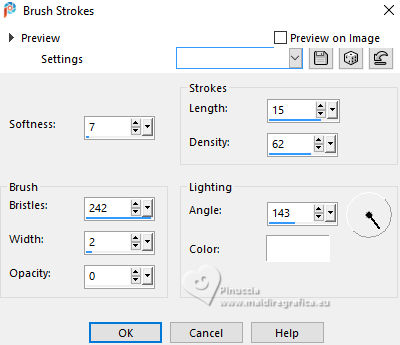 Adjust>Sharpness>Sharpen. Selections>Select None. 23. Activate the layer Raster 1. Layers>Duplicate. Layers>Properties>General>Blend Mode: Screen. 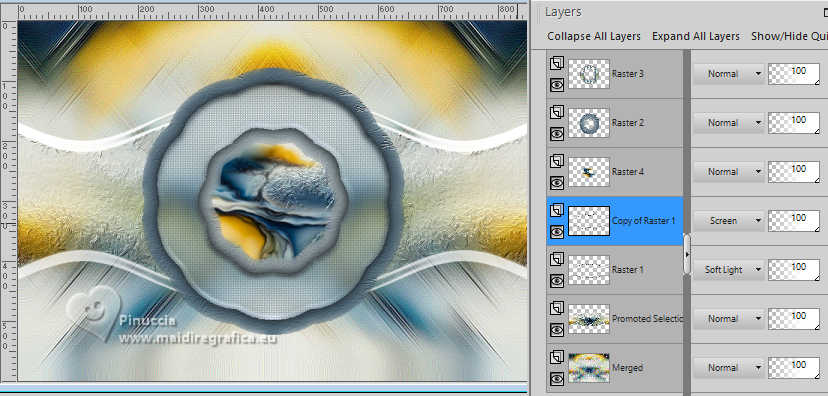 24. Open Decor282_Xiki  Edit>Copy no Decor282_Xiki. Go back to your work and go to Edit>Paste as New Layer. Layers>Properties>General>Blend Mode: Overlay. 25. Activate the layer Raster 2. 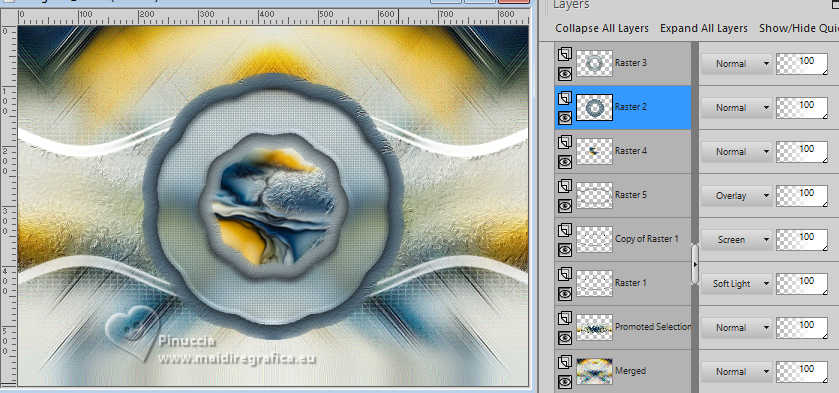 Effects>3D Effects>Drop Shadow - color #000000, shadow on new layer checked.  26. Activate the layer Merged. Edit>Copy For the borders: foreground color - color 3 background color - color 2 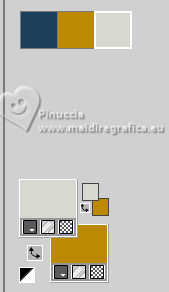 Image>Add Borders, 1 pixel, symmetric, background color. Selections>Select All. Image>Add Borders, 10 pixels, symmetric, whatever color. Selections>Invert. Edit>Paste Into Seletion Adjust>Blur>Gaussian Blur - 10 pixels. Selections>Select None. 27. Image>Add Borders, 2 pixels, symmetric, background color. Selections>Select All Image>Add Borders, 40 pixels, symmetric, color 3. Effects>3D Effects>Drop Shadow, last settings, but shadow on new layer not checked. 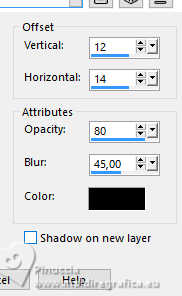 Selections>Select None. 28. Image>Add Borders, 2 pixels, symmetric, background color. Layers>New Raster Layer. Flood Fill the layer with the color 3.29. Layers>New Mask Layer>from Image Open the menu under the source window and you'll see all the files open. Select the mask NarahsMasks_1619 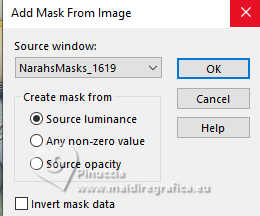 Effects>Edge Effects>Enhance. Layers>Merge>Merge Group. Effects>3D Effects>Drop Shadow, color #000000. 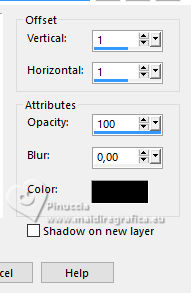 Image>Mirror>Mirror Horizontal. Image>Mirror>Mirror Vertical. Layers>Properties>General>Blend Mode: Dodge. 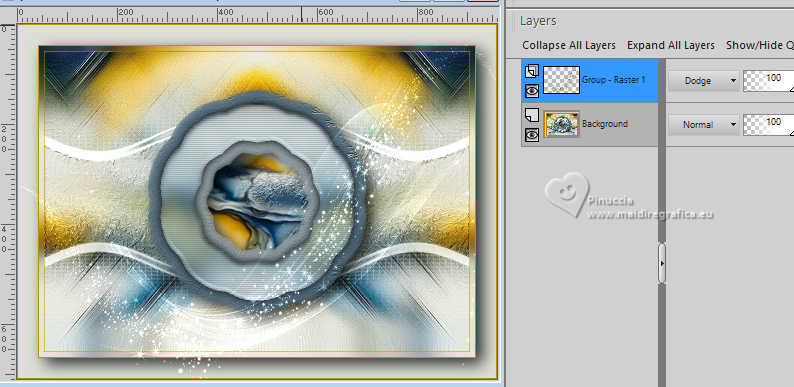 30. Open TituloTTS_Xiki  Erase the watermark and go to Edit>Copy. Go back to your work and go to Edit>Paste a New Layer. Pick Tool Position X: 296,00 - Position Y: 168,00. 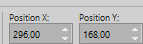 in my second version I change the Blend Mode to Luminance (L) 31. Open the woman's tube 1227MulherByPqnaAlice 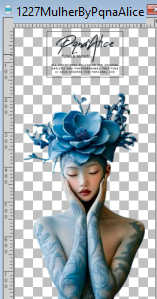 Erase the watermark and go to Edit>Copy. Go back to your work and go to Edit>Paste as New Layer. Move  the tube to the right side. the tube to the right side.Effects>3D Effects>Drop Shadow, at your choice. 32. Sign your work and save as jpg. For the tubes of this version thanks PqnaAlice   Your versions. Thanks  Kika  Lynnette  Jolcsi  Marion  If you have problems or doubts, or you find a not worked link, or only for tell me that you enjoyed this tutorial, write to me. 19 Mai 2025 |


