|
URBAN SYMPHONY  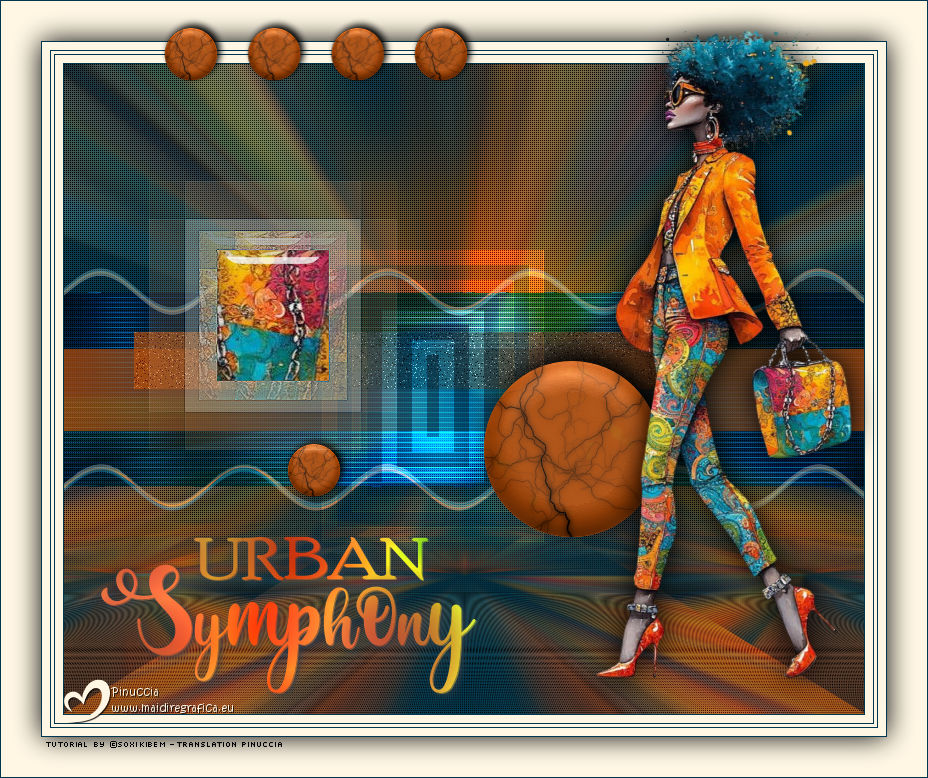
 Each step is a note, each glance, a chord. Her elegance composes the urban symphony, where art and style meet in perfect cadence.
This tutorial was written with Psp2022 and translated with PspX2020, but it can also be made using other versions of PSP.
For this tutorial, you will need:  Thanks for the tube and the mask PqnaAlice and Narah. (The links of the tubemakers here).  consult, if necessary, my filter section here Filters Unlimited 2.0 here &<Background Designers IV> - @Night Shadow (to import in Unlimited) here Carolaine and Sensibility - CS-Texture here AFS IMPORT - sqborder2 here Alien Skin Eye Candy 5 Impact - Glass here Alien Skin Eye Candy 5 Textures - Marble here Toadies - What are you here Mura's Meister - Copies, Perspective Tiling here Filters AFS IMPORT and Toadies can be used alone or imported into Filters Unlimited. (How do, you see here) If a plugin supplied appears with this icon  You can change Blend Modes according to your colors. In the newest versions of PSP, you don't find the foreground/background gradient (Corel_06_029). You can use the gradients of the older versions. The Gradient of CorelX here  1. Choose 4 colors to work. Foreground: #00374e Background: #157289 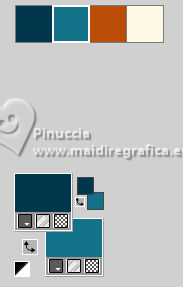 Color 3: #bb4e07 Color 4: #fff7e4 2. Open AlphaChannel_Ziki Window>Duplicate or, on the keyboard, shift+D to make a copy.  Close the original. The copy, that will be the basis of your work, is not empty, but contains the selections saved to alpha channel. Flood Fill  the transparent image with your foreground color. the transparent image with your foreground color.Selections>Select All. 3. Open the tube 1298MulherByPqnaAlice 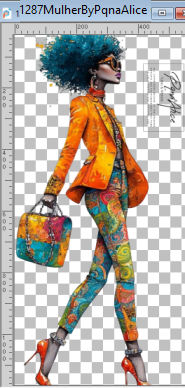 Erase the watermark and go to Edit>Copy. Minimize the tube. Go back to your work and go to Edit>Paste Into Selection. Selections>Select None. Effects>Image Effects>Seamless Tiling, default settings  4. Adjust>Blur>Radial Blur. 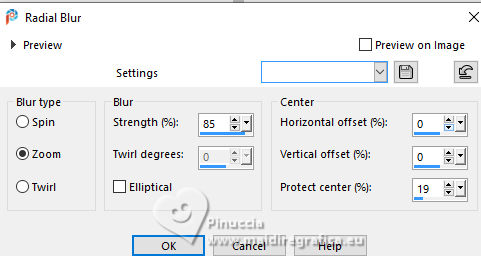 5. Layers>Duplicate. Close the layer Copy of Raster 1. Activate the layer below of the original, Raster 1. Effects>Plugins>AFS IMPORT - sqborder2. 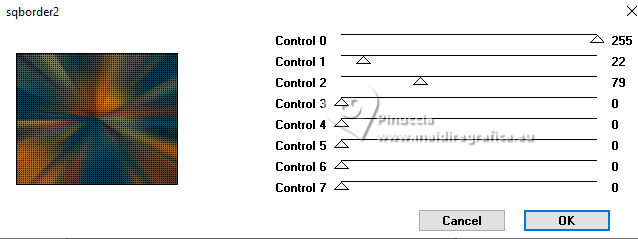 6. Open and activate the layer above, Copy of Raster 1. Effecs>Geometric Effects>Perspective - Horizontal. 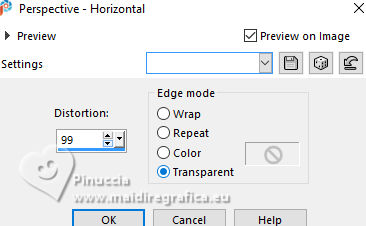 Repeat Effecs>Geometric Effects>Perspective, -99. 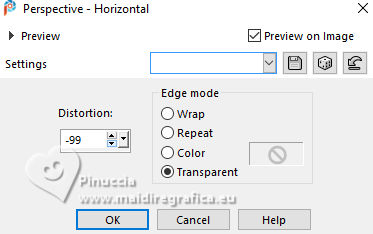 Effects>Reflection Effects>Kaleidoscope. 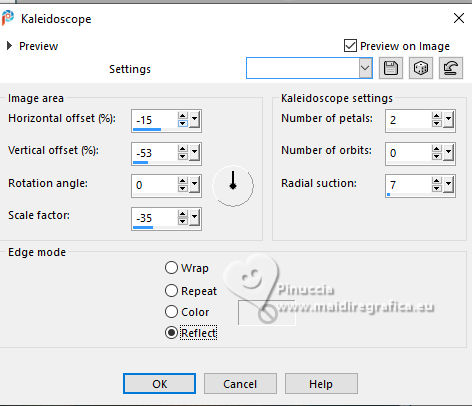 7. Activate your Magic Wand Tool  , tolerance and feather 0, , tolerance and feather 0,and click between the lines to select them. 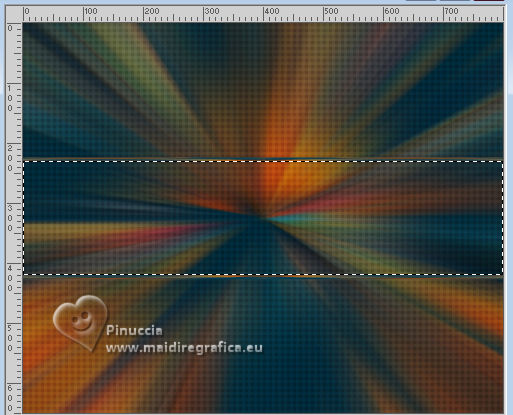 Selections>Modify>Expand - 3 pixels. Layers>New Raster Layer. Set your foreground color to a Foreground/Background Gradient, style Linear.  Flood fill  the selection with your Gradient. the selection with your Gradient.8. Effects>Plugins>Carolaine and Sensibility - Cs_Texture.  9. Effects>Plugins>Filters Unlimited 2.0 - &<Background Designers IV> - @Night Shadow. 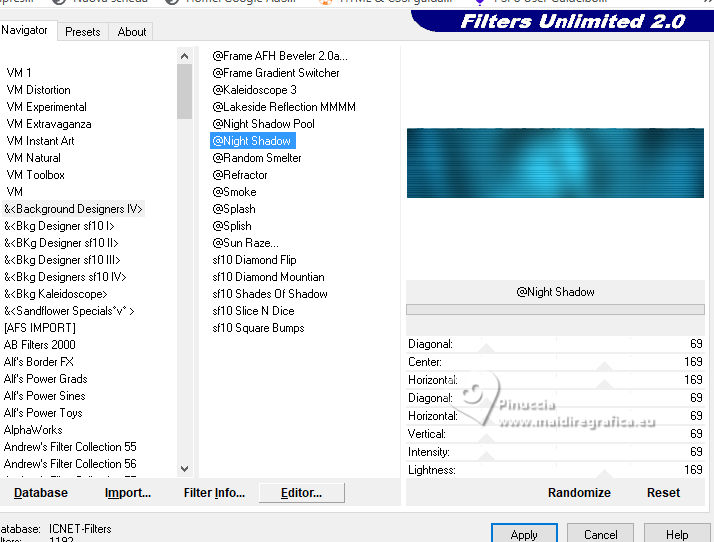 Selections>Select None. Layers>Arrange>Move Down. Layers>Properties>General>Blend Mode: Hard Light. 10. Activate the layer Copy of Raster 1. 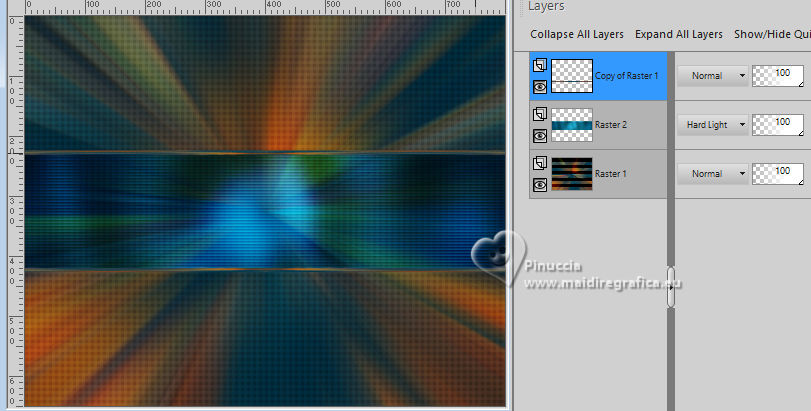 Effects>Distortion Effects>Wave.  Layers>Properties>General>Blend Mode: Screen.  11. Selections>Load/Save Selections>Load Selection From Alpha Channel. The selection Selection #1 is immediately available. You just have to click Load.  Layers>New Raster Layer. Reduce the opacity of your Flood Fill Tool to 70%. Set your background color to the color 3 and keep the Linear Foreground Gradient 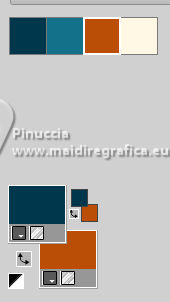  Flood Fill  the selection with your Gradient. the selection with your Gradient.Selections>Select None. 12. Layers>Duplicate. Image>Resize, to 70%, resize all layers not checked. Pick Tool  Position X: 70,00 - Position Y: 268,00.  Adjust>Add/Remove Noise>Add Noise.  13. Selections>Load/Save Selections>Load Selection From Alpha Channel. Open the selections menu and load the selection Selection #2  Layers>New Raster Layer. Reduce the opacity of your Flood Fill Tool to 30% Set your foreground color to the color4. 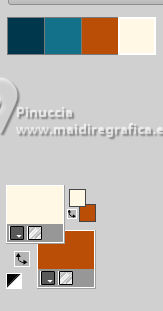 Flood Fill  the selection with your foreground color. the selection with your foreground color.Selections>Modify>Contarct - 50 pixels. 14. Activat again the tube 1298MulherByPqnaAlice and go to Edit>Copy. Go back to your work and go to Edit>Paste as New Layer. Move  the tube on the selection the tube on the selectionleaving a portion visible: I placed a very colorful part of the bag.  Selections>Invert. Press CANC on the keyboard  . .15. Selections>Invert. Effects>Plugins>Alien Skin Eye Candy 5 Impact - Glass. 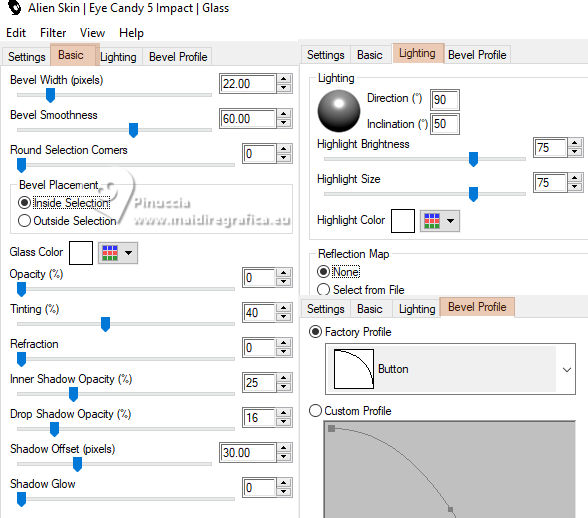 Selections>Select None. 16. Layers>Merge>Merge Down. Selections>Load/Save Selections>Load Selection From Alpha Channel. Open the selections menu and load again the selection Selection #2  Selections>Modify>Contract - 50 pixels. Selections>Invert. Effects>Plugins>Toadies - What are you.  Effects>Edge Effects>Enhance. Selections>Select None. 17. Activate the layer Copy of Raster 3.  Layers>New Raster Layer. Selections>Load/Save Selections>Load Selection From Alpha Channel. Open the selections menu and load the selection Selection #3  Reduce the opacity of your Flood Fill Tool to 40%. Flood Fill  the selection with your background color (color 3). the selection with your background color (color 3).Selections>Modify>Contract - 15 pixels. Press CANC on the keyboard. Selections>Modify>Contract - 15 pixels. Flood Fill  the selection with your background color. the selection with your background color.Selections>Modify>Contract - 15 pixels. Press CANC on the keyboard. Selections>Modify>Contract - 15 pixels. Flood Fill  the selection with your foreground color. the selection with your foreground color.Selections>Modify>Contract - 15 pixels. Press CANC on the keyboard. Selections>Modify>Contract - 15 pixels. Flood Fill  the selection with the color 4 (now foreground color). the selection with the color 4 (now foreground color).Selections>Modify>Contract - 15 pixels. Press CANC on the keyboard. Selections>Select None. Layers>Properties>General>Blend Mode: Dodge. Effects>Edge Effects>Enhance. 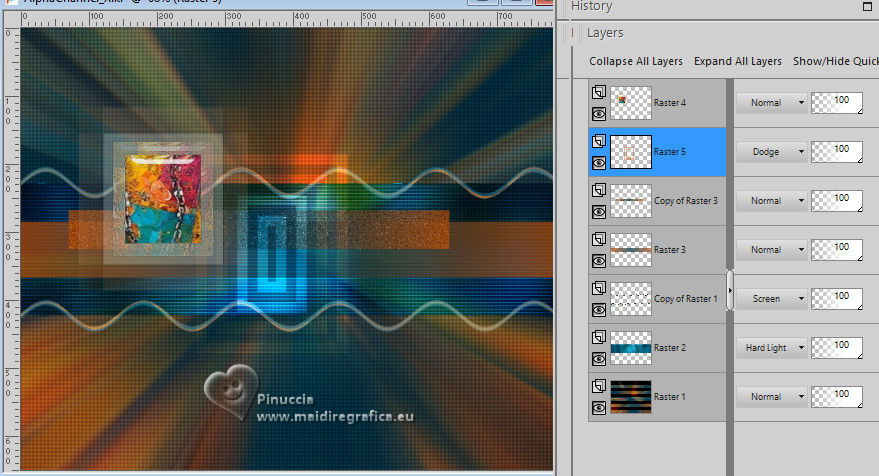 18. Layers>New Raster Layer. Selections>Load/Save Selections>Load Selection From Alpha Channel. Open the selection menu and load the selection Selection #4 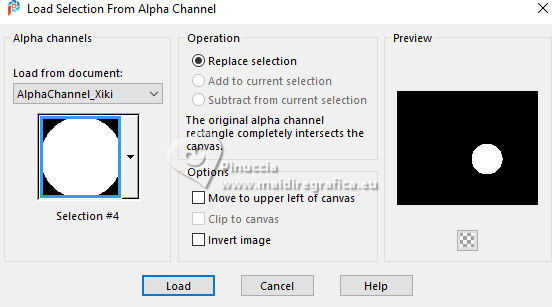 Opacity of your Flood Fill Tool again to 100. Flood Fill  the selection with the color 3 (now background color). the selection with the color 3 (now background color).Effects>Plugins>Alien Skin Eye Candy 5 Textures - Marble. Bedrock color: color 3 Vein color: black #000000 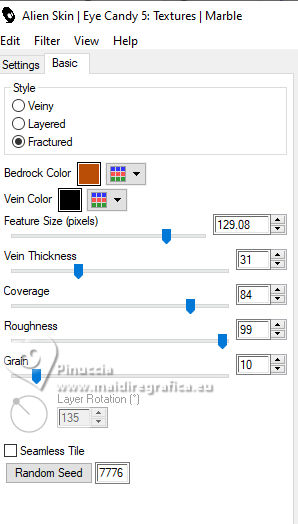 19. Effects>3D Effects>Inner Bevel. 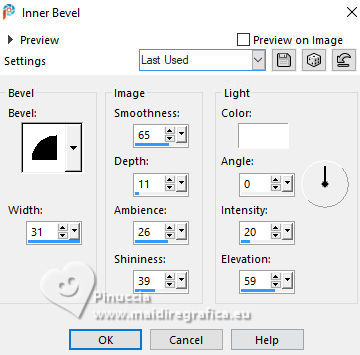 Selections>Select None. Effects>3D Effects>Drop Shadow, color black #000000.  20. Layers>Duplicate. Image>Resize, to 30%, resize all layers not checked. Adjust>Sharpness>Sharpen. Pick Tool  Position X: 219,00 - Position Y: 369,00.  21. Edit>Copy. Edit>Paste as New Image, and minimize this image. 22. Go back to your work. Activate the layer Raster 1. Layers>Duplicate. Effects>PluginsMura's Meister>Perspective Tiling.  23. Activate your Magic Wand Tool  , tolerance 0 and feather 100, , tolerance 0 and feather 100,and click in the transparent part to select it. Press 3 times CANC on the keyboard. Selections>Select None. Don't forget to set again the feather of your Magic Wand Tool to 0 Effects>Reflection Effects>Rotating Mirror.  24. For the border, set again your foreground color to the first color, and your background color to the color 4.  Image>Add Borders, 1 pixel, symmetric, foreground color. Image>Add Borders, 8 pixels, symmetric, color 4. Image>Add Borders, 1 pixel, symmetric, foreground color. Image>Add Borders, 3 pixels, symmetric, color 4. Image>Add Borders, 1 pixel, symmetric, foreground color. Image>Add Borders, 8 pixels, symmetric, color 4. Image>Add Borders, 1 pixel, symmetric, foreground color. Selections>Select All. Image>Add Borders, 40 pixels, symmetric, color 4. 25. Effects>3D Effects>Drop Shadow, color black.  Selections>Select None. 26. Activate the image minimized at step 21. Edit Copy. Go back to your work and go to Edit>Paste as New Layer. Effects>Plugins>Mura's Meister - Copies.  Pick Tool  Position X: 159,00 - Position Y: 16,00.  27. Activate again the woman's tube and go to Edit>Copy. Go back to your work and go to Edit>Paste as New Layer. Image>Mirror>Mirror Horizontal. Image>Resize, if necessary, for the provided tube to 55%, resize all layers not checked. Move  the tube to the right. the tube to the right.Effects>3D Effects>Drop shadow, to your liking. 28. Open TituloUS_Xiki  Erase the watermark and go to Edit>Copy. Go back to your work and go to Edit>Paste as New Layer. Pick Tool  Position X: 92,00 - Position Y: 527,00.  29. Image>Add Borders, 1 pixels, symmetric, foreground color. 30. Sign your work and save as jpg. For the tube of this version thanks Luz Cristina   Your versions. Thanks  Kika  If you have problems or doubts, or you find a not worked link, or only for tell me that you enjoyed this tutorial, write to me. |


