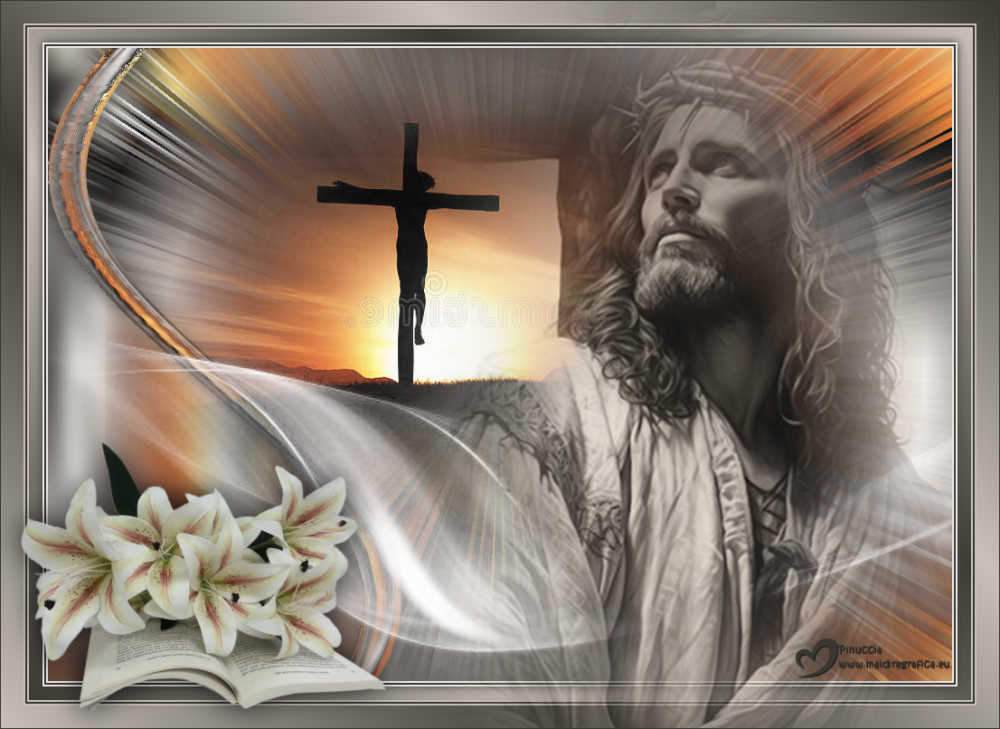
|
RESURECCIÓN


Thanks Yedralina for your invitation to translate your tutorials into english

This tutorial was written with PSP2020 and translated with PSPX9, PSPX8 and PSP2020, but it can also be made using other versions of PSP.
Since version PSP X4, Image>Mirror was replaced with Image>Flip Horizontal,
and Image>Flip with Image>Flip Vertical, there are some variables.
In versions X5 and X6, the functions have been improved by making available the Objects menu.
In the latest version X7 command Image>Mirror and Image>Flip returned, but with new differences.
See my schedule here
 italian translation here italian translation here
 french translation here french translation here
 your versions here your versions here
For this tutorial, you will need:

For the mask thanks Silvie.
The rest of the material is by Yedralina
(The links of the tubemakers here).

consult, if necessary, my filter section here
Filters Unlimited 2.0 here
Mehdi - Wavy Lab 1.1. here
Toadies - Blur 'em here
Sybia - SIERPENS here
VM Stylize - Zoom Blur here
Facoltativo: AAA Filters - Custom here
Filters Toadies, Sybia and VM Stylize can be used alone or imported into Filters Unlimited.
(How do, you see here)
If a plugin supplied appears with this icon  it must necessarily be imported into Unlimited it must necessarily be imported into Unlimited

You can change Blend Modes according to your colors.
In the newest versions of PSP, you don't find the foreground/background gradient (Corel_06_029).
You can use the gradients of the older versions.
The Gradient of CorelX here

Open the mask in PSP and minimize it with the rest of the material.
Colors

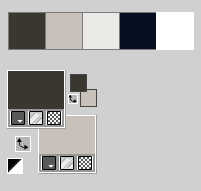
Set your foreground color with the color 1 #3b3832
and your background color with the color 3 #ebeae7
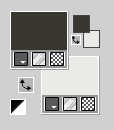
color 2 #c7c1b9
color 4 #09111f o nero #000000
color 5 #ffffff
1. Open a new transparent image 1000 x 700 pixels.
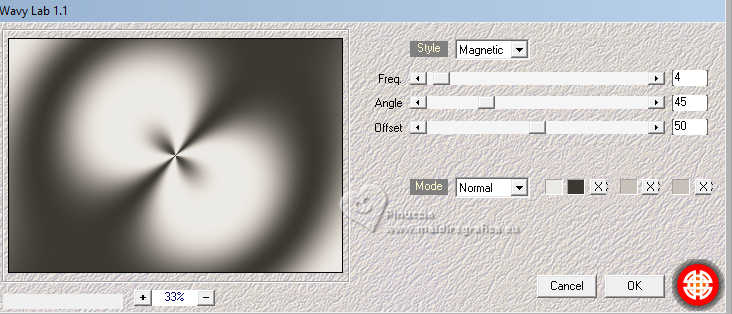
2. Effects>Plugins>Mehdi - Wavy Lab 1.1.
This filter creates gradients with the colors of your Materials palette.
The first is your background color, the second is your foreground color.
Change the last two colors created by the filtre, both with color 2 #c7c1b9
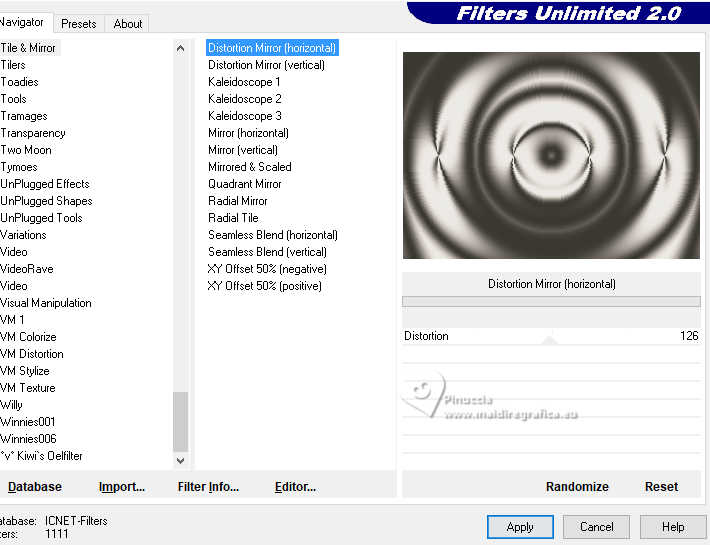
3. Effects>Plugins>Filters Unlimited 2.0 - Tile & Mirror - Distortion Mirror (Horizontal), default settings.
Effects>Edge Effects>Enhance.
4. Layers>New Raster Layer.
Selections>Select All.
Open the misted 3213©Yedralina 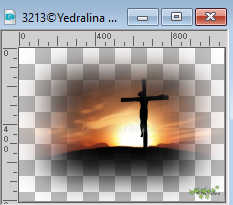
Erase the watermark and go to Edit>Copy.
Minimize the tube.
Go back to your work and go to Edit>Paste into Selection.
Selections>Select None.
5. Effects>Image Effects>Seamless Tiling, default settings.

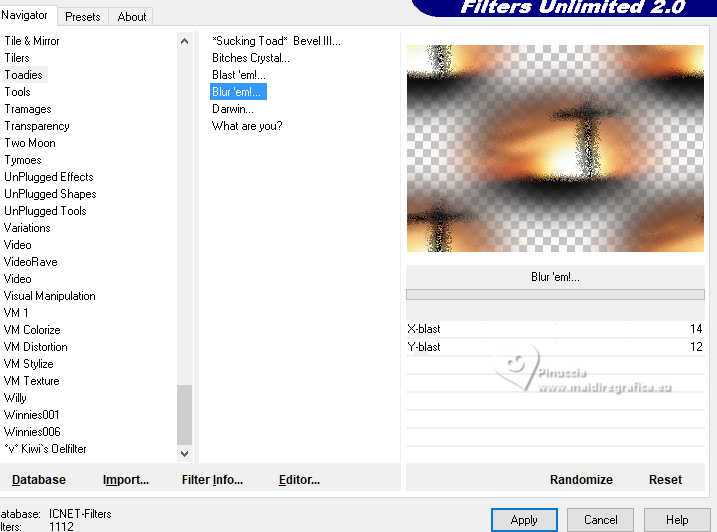
6. Effects>Plugins>Filters Unlimited 2.0 - Toadies - Blur'em!, default settings.
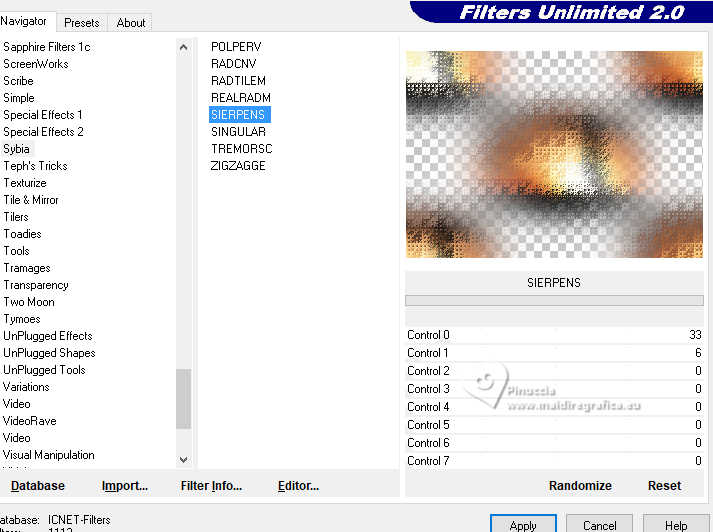
7. Effects>Plugins>Filters Unlimited 2.0 - Sybia - SIERPENS, default settings.
8. Layers>Merge>Merge visible.
Edit>Copy.
Edit>Paste as new image, and minimize this image.
9. Set your foreground color to color white #ffffff.
Layers>New Raster Layer.
Flood Fill  the layer with color white. the layer with color white.
10. Layers>New Mask layer>From image
Open the menu under the source window and you'll see all the files open.
Select the mask Silvie_Mask_Deco288L

Layers>Merge>Merge Group.
Layers>Duplicate.
Layers>Merge>Merge Down.
11. K key to activate your Pick Tool 
Position X: 0,00 - Position Y: 121,00

Change the Blend Mode of this layer to Screen.
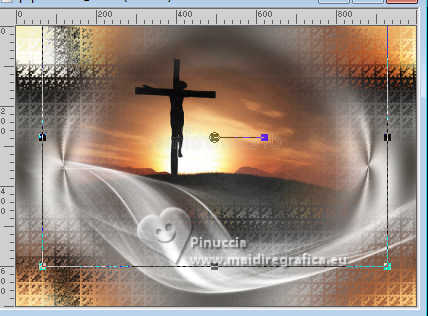
12. Activate again the misted 3213©Yedralina and go to Edit>Copy.
Go back to your work and go to Edit>Paste as new layer.
Resize, if necessary. For me to 80%, resize all layers not checked.
Image>Mirror>Mirror Horizontal.
Adjust>Sharpness>Sharpen.
Layers>Arrange>Move Down.
Position X: 64,00 - Position Y: -47,00

13. Activate your background layer, Merged.
Layers>Duplicate.
Effects>Geometric Effects>Perspective Horizontal.
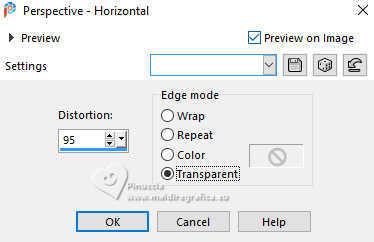
14. Image>Mirror>Mirror Horizontal.
Repeat Effects>Geometric Effects>Perspective Horizontal, same settings.
15. Effects>Distortion Effects>Wave.
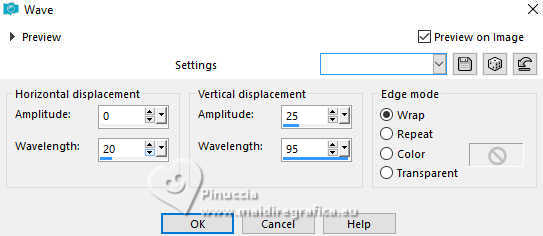
16. Image>Free Rotate - 90 degrees to right.
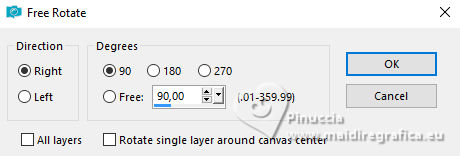
Position X: 0,00 - Position Y: -150,00

M key to deselect the Tool.
17. Image>Flip>Flip Vertical.
18. Activate your Magic Wand Tool  , tolerance and feather 0, , tolerance and feather 0,
and click in the left transparent part (up and down)
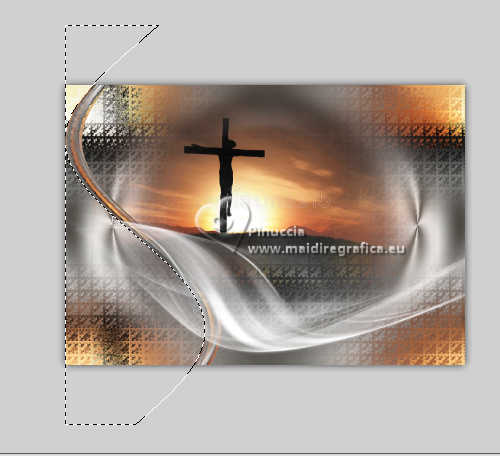
19. Layers>New Raster Layer.
Activate the image minimized at step 8 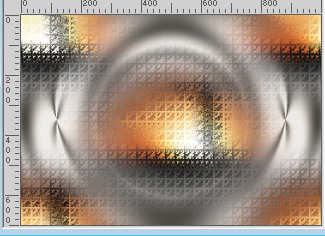
Edit>Copy.
Go back to your work and go to Edit>Paste into Selection.
20. Adjust>Blur>Gaussian Blur - radius 10.

Layers>Arrange>Move Down.
Activate again the layer above, Copy of Merged.
21. Layers>Merge>Merge Down.
Selections>Select None.
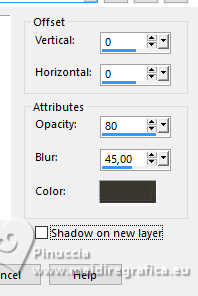
22. Effects>3D Effects>Drop Shadow, color 1 #3b3832
23. Activate your background layer, Merged.
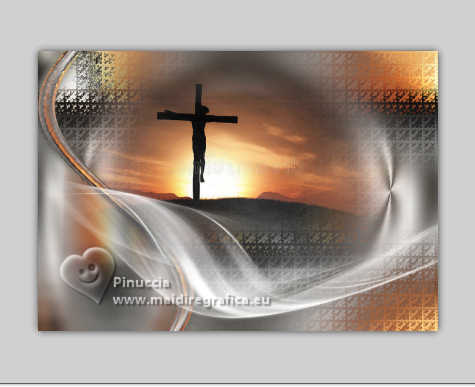
Selections>Select All.
Activate the layer above.
Image>Crop to Selection.
And the image will remain within the limits of the canvas
24. Activate again your background layer.
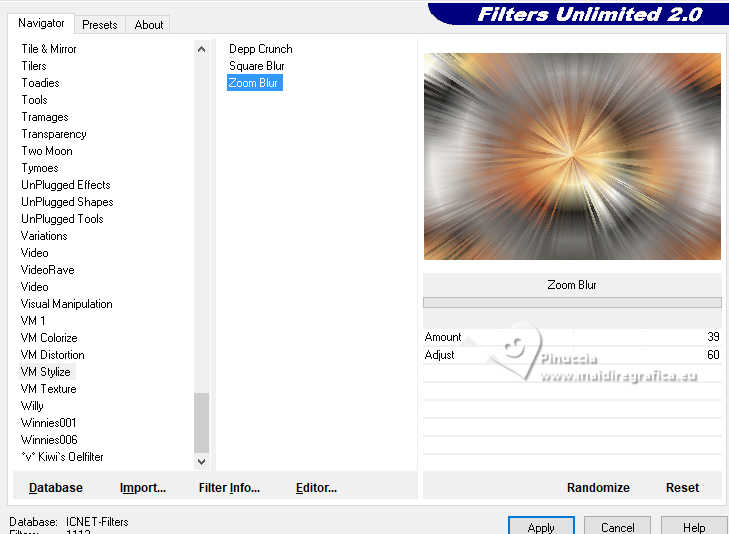
25. Effects>Plugins>Filters Unlimited 2.0 - VM Stylize - Zoom Blur, default settings.
26. Image>Add Borders, 2 pixels, symmetric, color 3 #ebeae7.
Image>Add Borders, 2 pixels, symmetric, color 1 #3b3832.
Image>Add Borders, 2 pixels, symmetric, color 3 #ebeae7.
Selections>Select All.
27. Image>Add Borders, 15 pixels, symmetric, whatever color.
Selections>Invert.
28. Set your foreground color to the color 1 #3b3832,
and your background color to the color 2 #c7c1b9.
Set your foreground color to a Foreground/Background Gradient, style Linear.
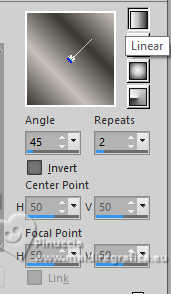
Flood Fill  the selection with your gradient. the selection with your gradient.
Selections>Invert.
29. Effects>3D Effects>Drop Shadow, color 1 #3b3832 (foreground color).
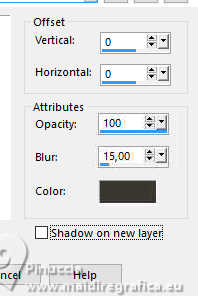
30. Image>Add Borders, 2 pixels, symmetric, color 3 #ebeae7.
Image>Add Borders, 2 pixels, symmetric, colore #3b3832.
Image>Add Borders, 2 pixels, symmetric, colore #ebeae7.
Selections>Select All.
31. Image>Add Borders, 25 pixels, symmetric, color 3 #ebeae7.
Selections>Invert.
Invert the colors of your Gradient.
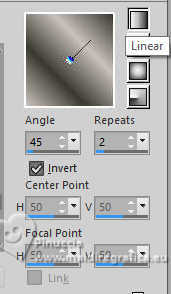
Flood Fill  the selection with your Gradient. the selection with your Gradient.
Selections>Select None.
32. Open your main tube 3207©Yedralina 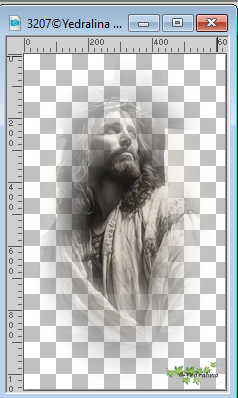
Erase the watermark and go to Edit>Copy.
Go back to your work and go to Edit>Paste as new layer.
Image>Resize, if necessary; for me to 110%, resize all layers not checked.
Adjust>Sharpness>Sharpen.
Move  the tube to the right, see my example. the tube to the right, see my example.
Effects>3D Effects>Drop Shadow, at your choice; for me

33. Open your deco tube 3217©Yedralina 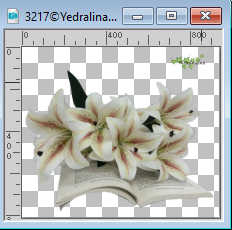
Erase the watermark and go to Edit>Copy.
Go back to your work and go to Edit>Paste as new layer.
Image>Resize, if necessary; for me to 45%, resize all layers not checked.
Adjust>Sharpness>Sharpen.
Move  the tube to the left side, see my example. the tube to the left side, see my example.
Effects>3D EFfects>Drop Shadow, as for the main tube

34. Image>Add Borders, 1 pixel, symmetric, color 1 #3b3832.
35. Image>Resize, 1000 pixels width, resize all layers checked.
36. Optional: Effects>Plugins>AAA Filters - Custom (Landscape).
37. Sign your work on a new layer.
Layers>Merge>Merge All and save as jpg.
For the tubes of this version thanks Yedralina


If you have problems or doubts, or you find a not worked link, or only for tell me that you enjoyed this tutorial, write to me.
13 April 2025

|

