|
ADVENTSZEIT
 ADVENT SEASON ADVENT SEASON
Thanks Ingelore for your invitation to translate your tutorials.

This tutorial was translated with PSPX, PSPX2, PSPX3, but it can also be made using other versions of PSP.
Since version PSP X4, Image>Mirror was replaced with Image>Flip Horizontal,
and Image>Flip with Image>Flip Vertical, there are some variables.
In versions X5 and X6, the functions have been improved by making available the Objects menu.
In the latest version X7 command Image>Mirror and Image>Flip returned, but with new differences.
See my schedule here
 Italian translation qui Italian translation qui
 French translation here French translation here
 Your versions ici Your versions ici
For this tutorial, you will need:
A tube at your choice.

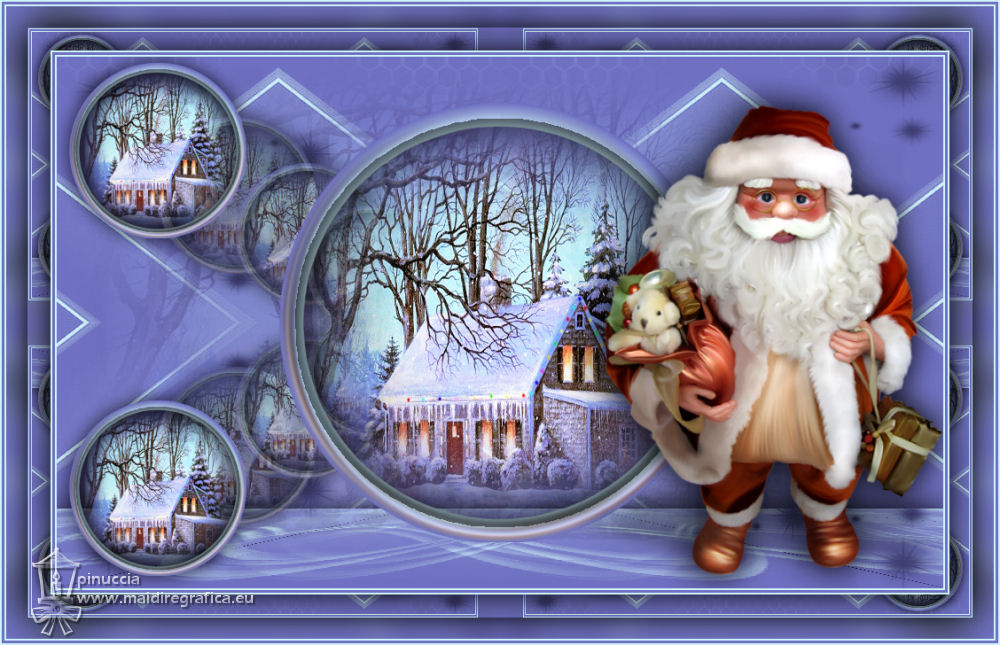
For the tube used and not supplied thanks Thafs; the second tube is not signed.
Thanks for the landscape Mentali and for the masks Narah and DWorisch.
here the links to the material authors' sites)

consult, if necessary, my filter section here
Filters Unlimited 2.0 here
Mura's Meister - Pole Transform here
Mura's Meister - Perspective Tiling here
VM Toolbox - Instant Tile here
Filters VM Toolbox can be used alone or imported into Filters Unlimited.
(How do, you see here)
If a plugin supplied appears with this icon  it must necessarily be imported into Unlimited it must necessarily be imported into Unlimited

You can change Blend Modes according to your colors.
In the newest versions of PSP, you don't find the foreground/background gradient (Corel_06_029).
You can use the gradients of the older versions.
The Gradient of CorelX here

Open the masks in PSP and minimize them with the rest of the material.
1. Choose from your tube a dark color, a light color and a third darker color.
These are my colors.
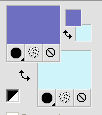
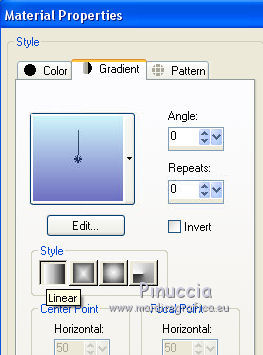
Set your foreground color to a Foreground/Background Gradient, style Linear.
2. Open Alpha-Datei.
Window>Duplicate or, on the keyboard, shift+D to make a copy.

Close the original.
The copy, that will be the basis of your work, is not empty,
but contains a selection saved to alpha channel.
Flood Fill  the transparent image with your Gradient. the transparent image with your Gradient.
Layers>Duplicate.
Layers>New Raster Layer.
Selections>Select All.
Open the landscape tube mentali-misted797 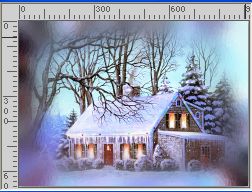 and go to Edit>Copy. and go to Edit>Copy.
Go back to your work and go to Edit>Paste into Selection.
Selections>Select None.
Adjust>Blur>Gaussian Blur - radius 30.

Layers>Merge>Merge Down.
2. Effects>Geometric Effects>Perspective Horizontal
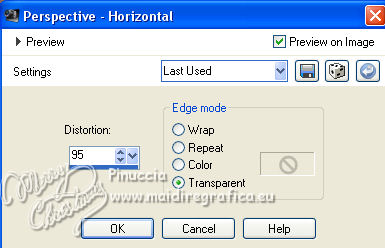
Image>Miroir.
Repeat Effects>Geometric Effects>Perspective horizontale, same settings.
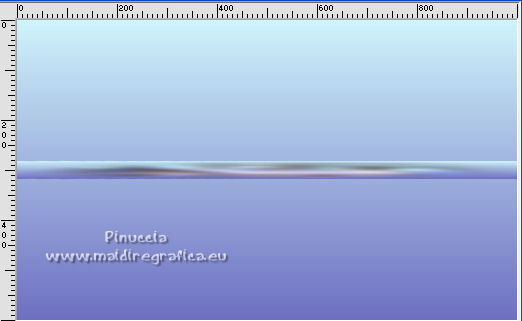
Effects>Plugins>Mura's Meister - Pole Transform, default settings.
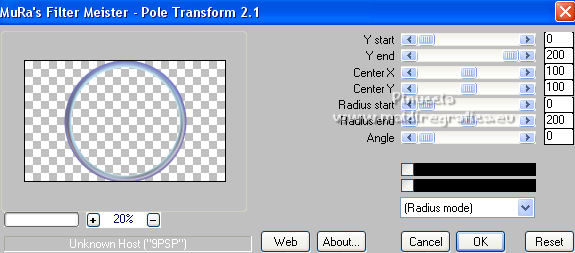
Image>Resize, to 80%, resize all layers not checked.

the result of my example gave me this:
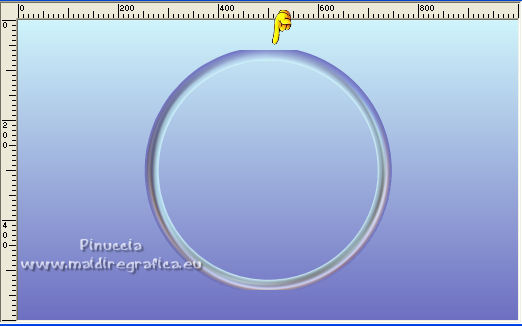
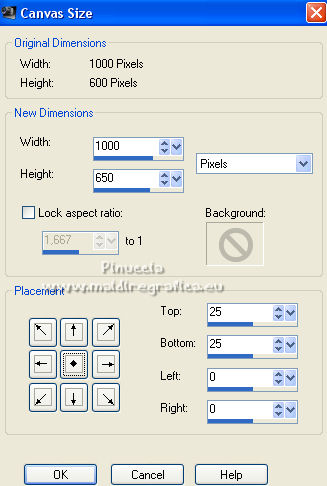
To remedy this, before applying the filter I did:
Image>Canvas Size
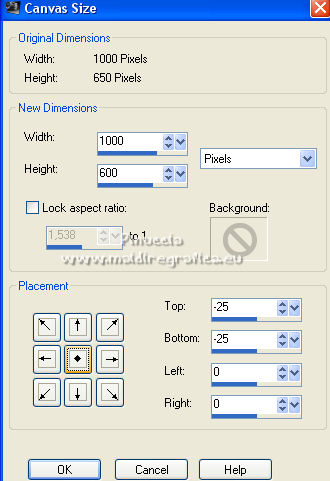
After resizing, I brought the height back to 600 pixels
Image>Canvas Size

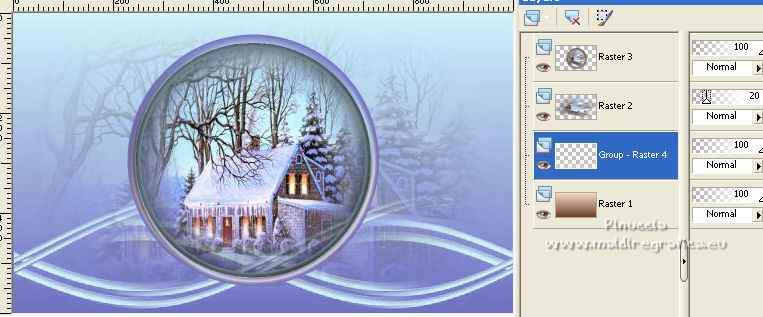
Activate the layer Raster 1.
Layers>New Raster Layer.
Selections>Select All.
Edit>Paste into Selection (the landscape is still in memory).
Selections>Select None.
Reduce the opacity of this layer to 20%.
Activate the layer of the circle, Copy of Raster 1.
Activate your Magic Wand Tool 
and click in the circle to select it.
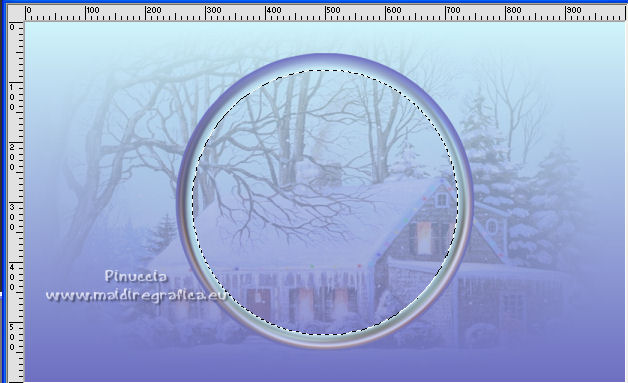
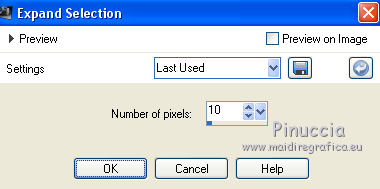
3. Selections>Modify>Expand - 10 pixels.
Layers>New Raster Layer.
Layers>Arrange>Move Down.
Edit>Paste into Selection (the landscape is still in memory).
Layers>New Raster Layer.
Layers>Arrange>Move Up.
Effects>3D Effects>Cutout.
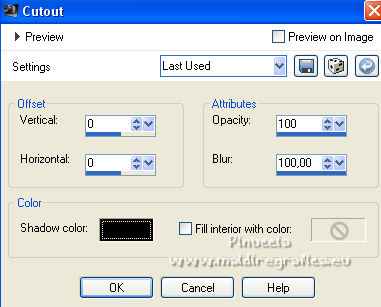
Selections>Select None.
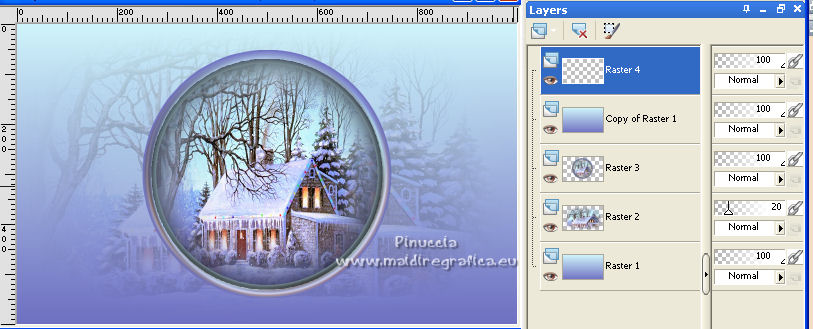
Layers>Merge>Merge Down - 2 times.
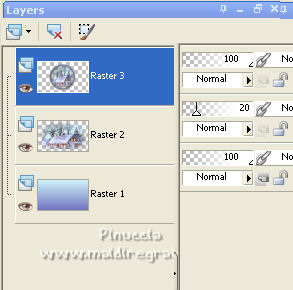
4. Layers>New Raster Layer.
Flood Fill  the layer with your light background color. the layer with your light background color.
Layers>New Mask layer>From image
Open the menu under the source window and you'll see all the files open.
Select the mask hairfair2dworisch
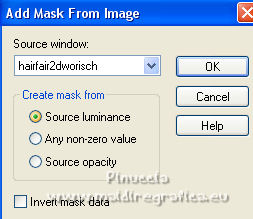
Effects>Edge Effects>Enhance.
Layers>Merge>Merge Group.
K key on the keyboard to activate your Pick Tool 
and set Position X: 2,00 and Position Y: 104,00.

Selections>Load/Save Selection>Load Selection from Alpha Channel.
The selection Auswahl #1 is immediately available. You just have to click Load.
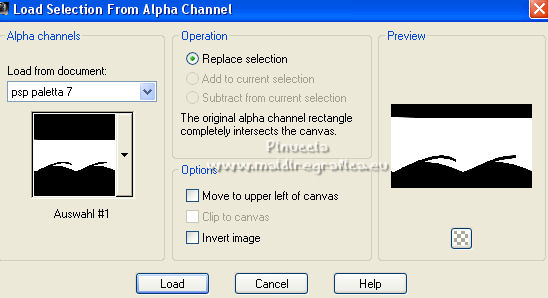
Press CANC on the keyboard 
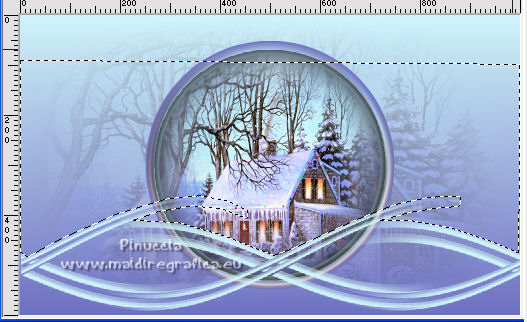
Selections>Select None.
5. Layers>Arrange>Move Down - 2 times.
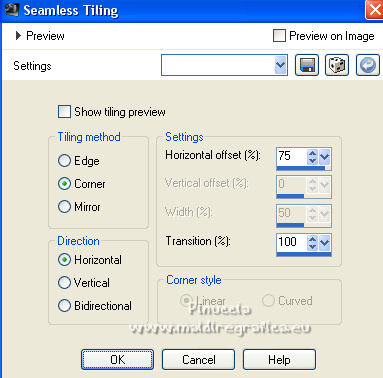
Effects>Image Effects>Seamless Tiling.
Activate your top layer.
Layers>Duplicate.
Image>Resize, to 40%, resize all layers not checked.
Pick Tool 
and set Position X: 14,00 and Position Y: 7,00.

Layers>Duplicate.
Layers>Arrange>Move Down.
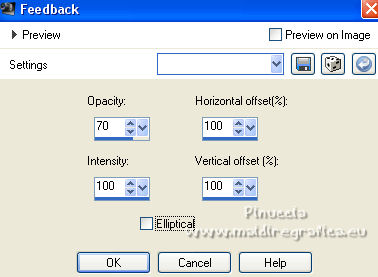
Effects>Reflection Effects>Feedback.
6. Activate again the layer above, Copy of Raster 3.
Layers>Duplicate.
Layers>Arrange>Move Down.
Set Position X: 14,00 and Position Y: 388,00.

Layers>Duplicate.
Layers>Arrange>Move Down.
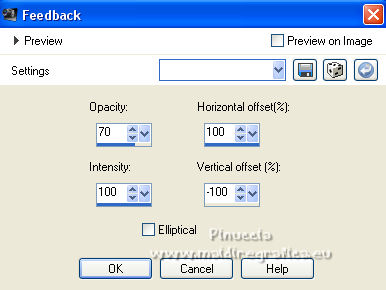
Effects>Reflection Effects>Feedback.
Layers>Merge>Merge Down.
Activate the top layer.
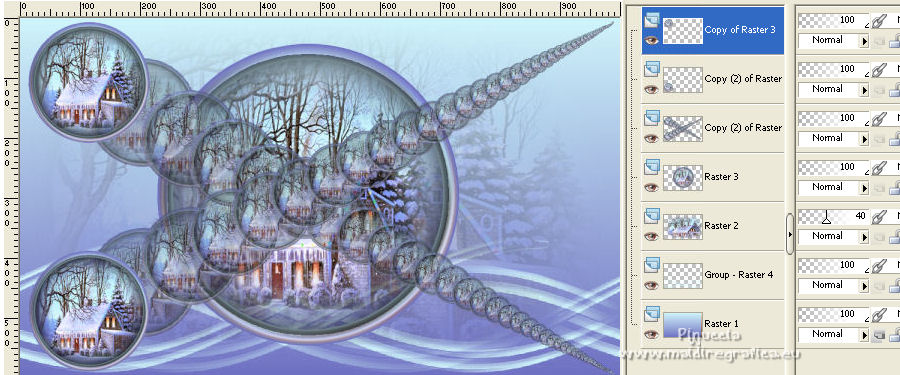
Layers>Merge>Merge Down - 2 times.
Layers>Arrange>Move Down.
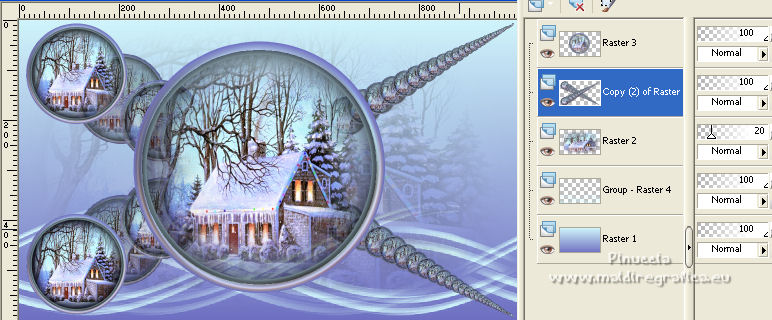
Selection Tool 
(no matter the type of selection, because with the custom selection your always get a rectangle)
clic on the Custom Selection 
and set the following settings.
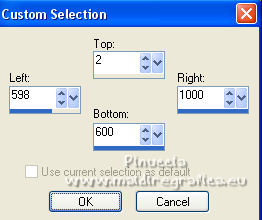
Press CANC on the keyboard.
Selections>Select None.
Effects>3D Effects>Drop Shadow.
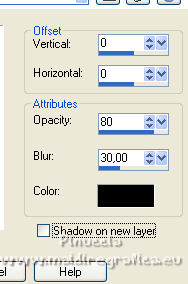
7. Activate the top layer.
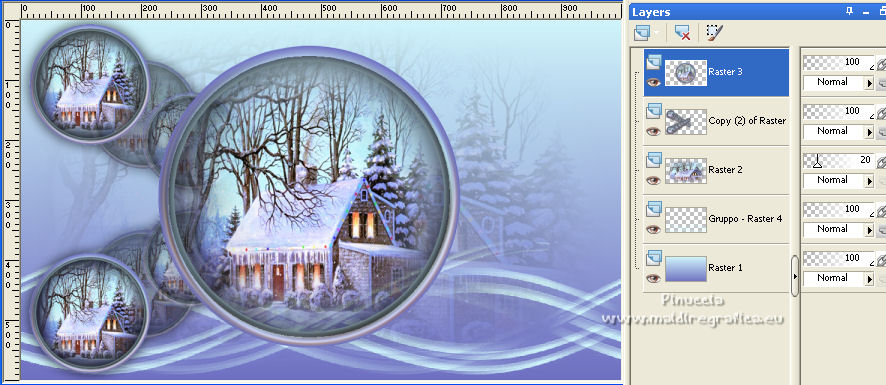
I added: Effects>3D Effects>Drop Shadow, same settings.
Set your foreground color with you second dark color.
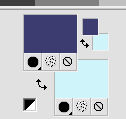
Layers>New Raster Layer.
Flood Fill  the layer with your second dark color. the layer with your second dark color.
Layers>New Mask layer>From image
Open the menu under the source window
and select the mask Narah_mask_0579
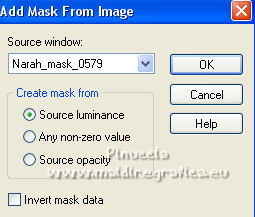
Effects>Edge Effects>Enhance.
Layers>Merge>Merge Group.
Layers>Arrange>Move Down - 2 times.
Layers>Duplicate.
Image>Flip.
Layers>Merge>Merge Down.
8. Activate the layer Raster 1.
Layers>Duplicate.
Layers>New Raster Layer.
Set again your foreground color with the first dark color.
Flood Fill  the layer with your first dark color. the layer with your first dark color.
Layers>New Mask layer>From image
Open the menu under the source window
and select the mask Narah_mask_1014
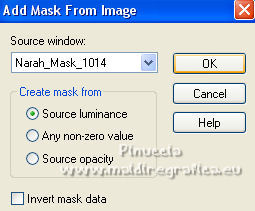
Effects>Edge Effects>Enhance.
Layers>Merge>Merge Group.
Activate the layer above of the previous mask
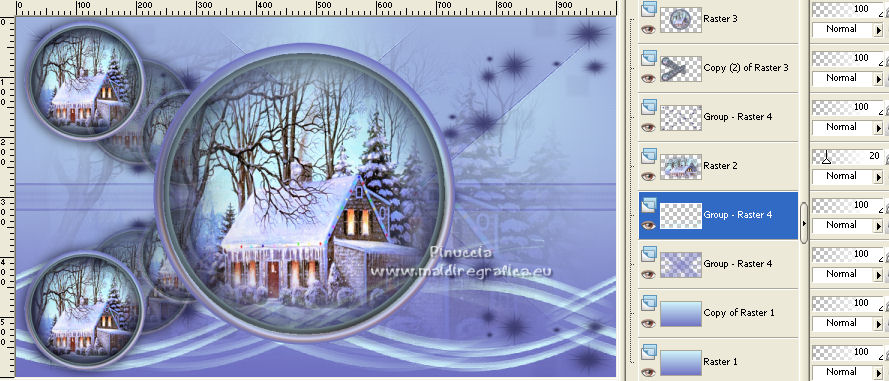
Layers>Merge>Merge Down - 2 times.
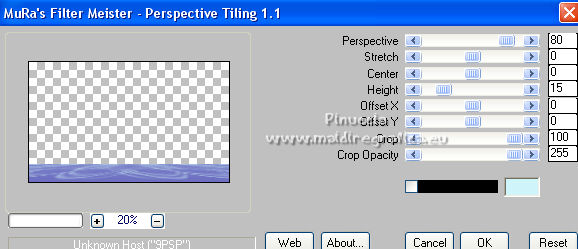
9. Effects>Plugins>Mura's Meister - Perspective Tiling.
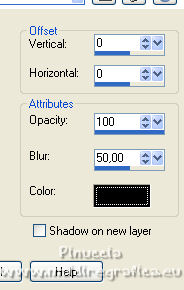
Effects>3D Effects>Drop Shadow.
Activate again the layer Raster 1.
Layers>New Raster Layer.
Flood Fill  the layer with your light color. the layer with your light color.
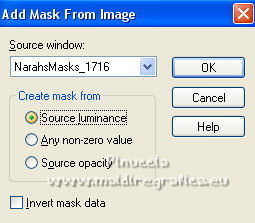
Layers>New Mask layer>From image
Open the menu under the source window
and select the mask NarahsMask_1716
Effects>Edge Effects>Enhance.
Layers>Merge>Merge Group.
I tried a variant, it's up to you to decide:
on the bottom layer
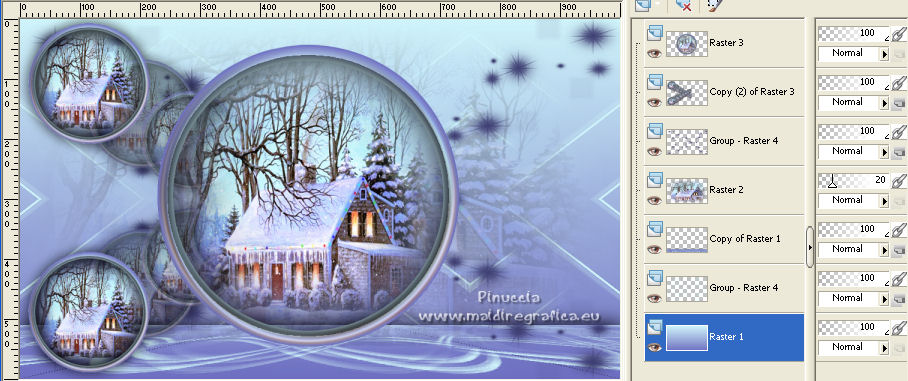
I addes a new layer,
and filled it with the dark foreground color.
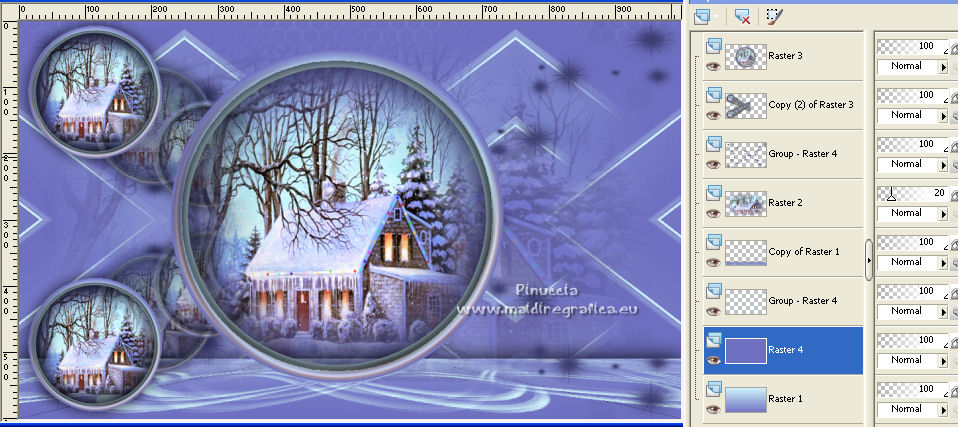
10. Activate the top layer.
Open your tube and go to Edit>Copy.
Go back to your work and go to Edit>Paste as new layer.
Image>Resize, if necessary, resize all layers not checked.
Adjust>Sharpness>Sharpen.
Effects>3D Effects>Drop Shadow, same settings.
Edit>Copy Special>Copy Merged.
Image>Add borders, 2 pixels, symmetric, light color.
Image>Add borders, 3 pixels, symmetric, dark color.
Image>Add borders, 2 pixels, symmetric, light color.
11. Selections>Select All.
Image>Add borders, 50 pixels, symmetric, light color.
Selections>Invert.
Edit>Paste into Selection.
Adjust>Blur>Gaussian Blur - radius 30.

Effects>Plugins>VM Toolbox - Instant Tile.
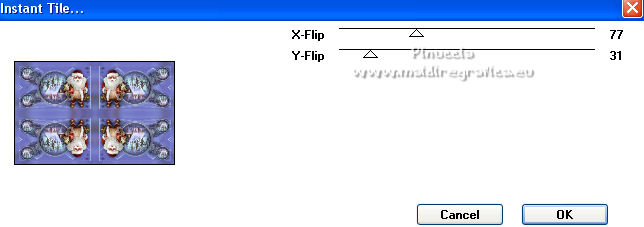
Selections>Invert.
Effects>3D Effects>Drop Shadow, same settings.
12. Selections>Select All.
Selections>Modify>Contract - 24 pixels.
Effects>3D Effects>Drop Shadow, same settings.
Selections>Select None.
Image>Add borders, 2 pixels, symmetric, light color.
Image>Add borders, 3 pixels, symmetric, dark color.
Image>Add borders, 2 pixels, symmetric, light color.
Image>Resize, 1000 pixels width, resize all layers checked.
Adjust>Sharpness>Sharpen.
Sign your work on a new layer.
Layers>Merge>Merge All and save as jpg.
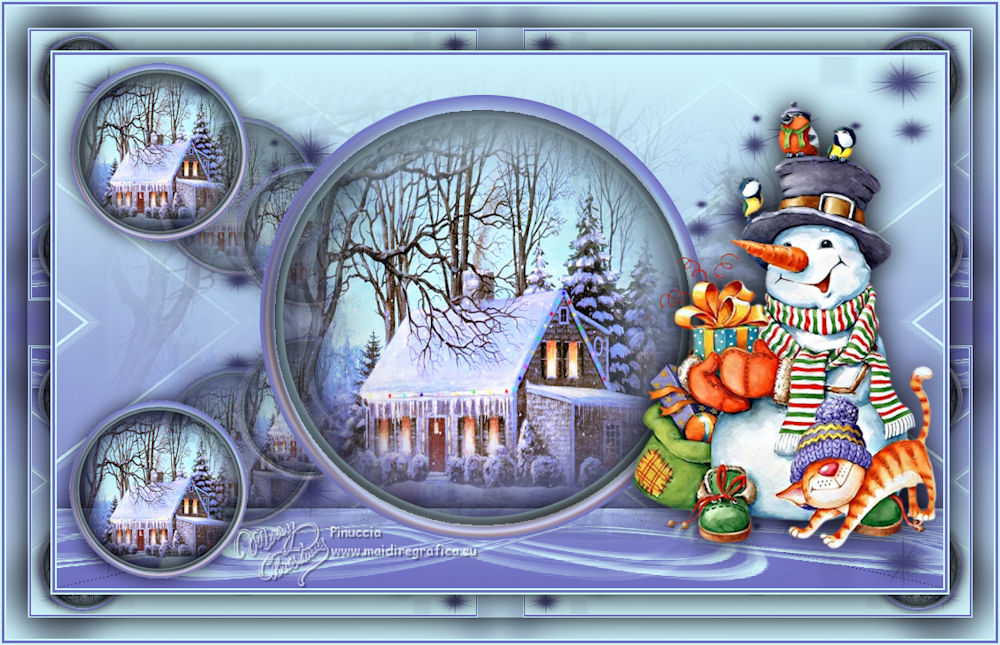
For the tubes of this version thanks MJR e Thafs.
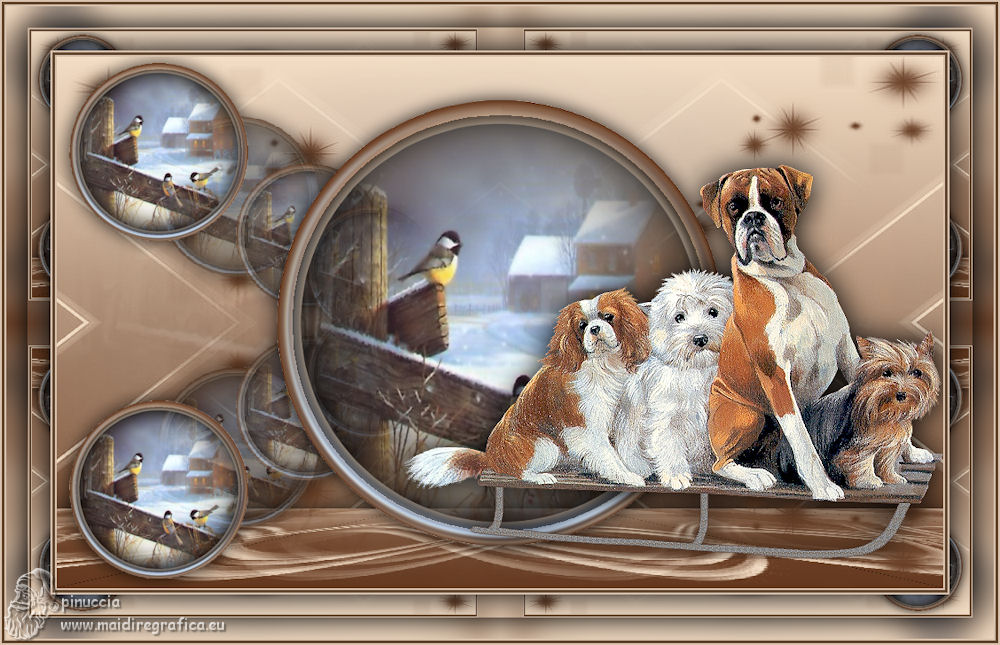
Version with the layer of step 9.
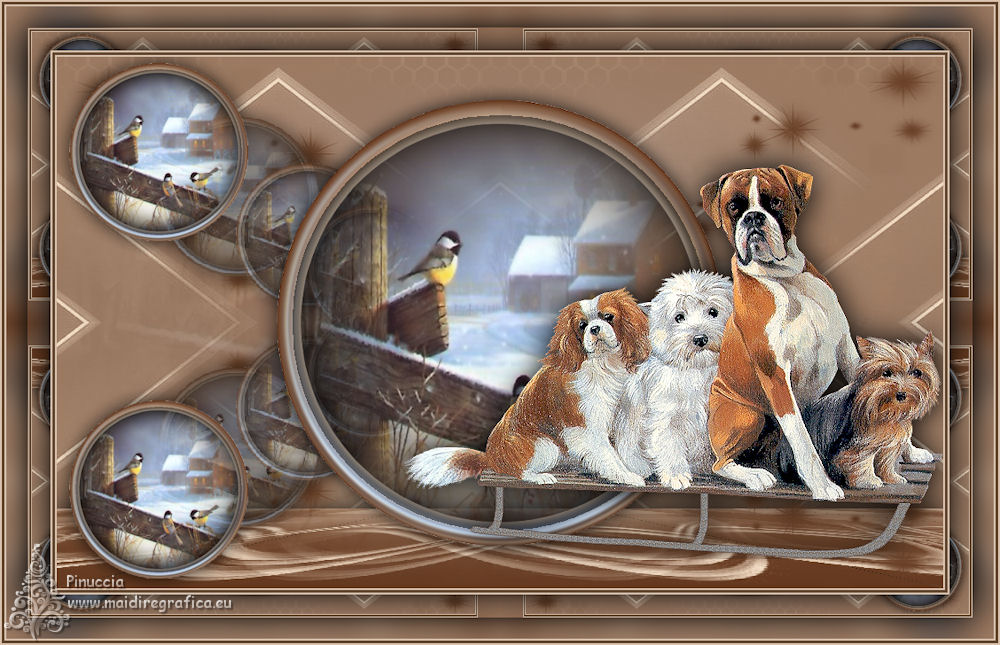

 Your versions here Your versions here
If you have problems or doubts, or you find a not worked link, or only for tell me that you enjoyed this tutorial, write to me.
4 October 2022

|
 ADVENT SEASON

 ADVENT SEASON
