HALLOWEEN 2025

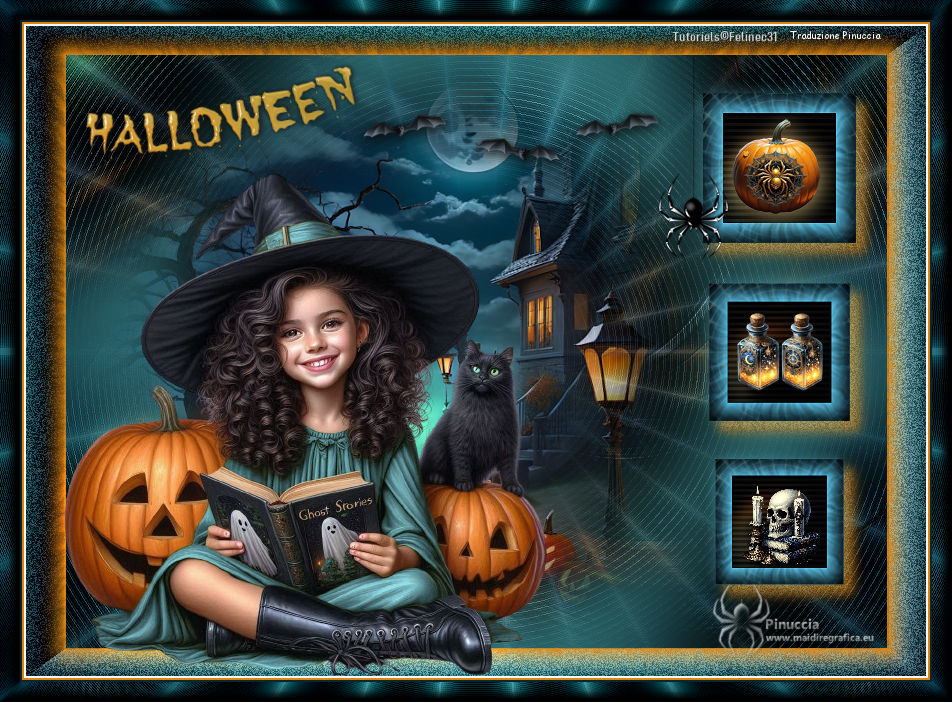
Thanks Carine for your invitation to translate

Clic and move the brush to follow the tutorial.

To print


|
This tutorial was translated with PSPX9 and PSP2020, but it can also be made using other versions of PSP.
Since version PSP X4, Image>Mirror was rephalloweend with Image>Flip Horizontal,
and Image>Flip with Image>Flip Vertical, there are some variables.
In versions X5 and X6, the functions have been improved by making available the Objects menu.
In the latest version X7 command Image>Mirror and Image>Flip returned, but with new differences.
See my schedule here
 italian translation here italian translation here
 your versions here your versions here
Necessary

Thanks for the tubes LoriM, Mentali, Tineke.
(The links of the tubemakers here).

consult, if necessary, my filter section here
Filters Unlimited 2.0 here
Instant art - Spider web here
Xero - Porcelain here
Carolaine and Sensibility - CS-HLines here
Eye Candy 4000 - Corona here
Mura's Meister - Copies here
Filters Instant Art can be used alone or imported into Filters Unlimited.
(How do, you see here)
If a plugin supplied appears with this icon  it must necessarily be imported into Unlimited it must necessarily be imported into Unlimited

You can change Blend Modes according to your colors.
In the newest versions of PSP, you don't find the foreground/background gradient (Corel_06_029).
You can use the gradients of the older versions.
The Gradient of CorelX here

Colors

Set your foreground color to color 1 #092632
and your background color to color 2 #62d6d4
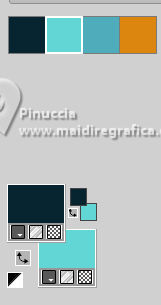
color 3 #4facbb
color 4 #dc8511
Set your foreground color to a Foreground/Background Gradient, style Sunburst.

1. Open a new transparent image 900 x 650 pixels.
Flood Fill  the trasparente image with your gradient. the trasparente image with your gradient.
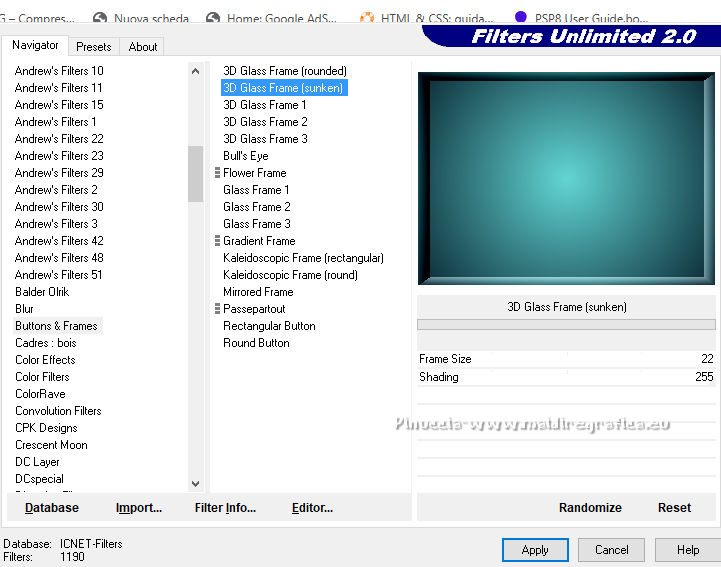
2. Effects>Plugins>Filters Unlimited 2.0 - Buttons & Frames - 3D Glass Frame (Sunken)
you find this effect - to import in Unlimited - in the material
3. Open the misted (your find the tube in the material also in png) mentali-misted3320 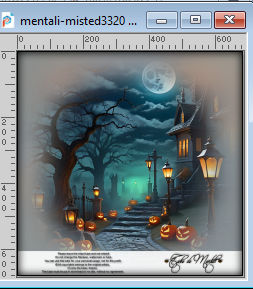
Edit>Copy.
Go back to your work and go to Edit>Paste as new layer.
4. Effects>Image Effects>Seamless Tiling, default settings.

5. Adjust>Blur>Radial Blur.

Effects>Edge Effects>Enhance More.
6. Activate your Selection Tool 
(no matter the type of selection, because with the custom selection your always get a rectangle)
clic on the Custom Selection 
and set the following settings.
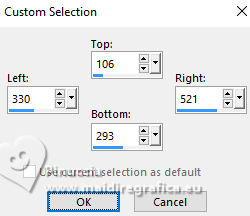
7. Selections>Invert.
Press CANC on the keyboard 
8. Again Selections>Invert.
Effects>Plugins>Instant Art - Spider Web
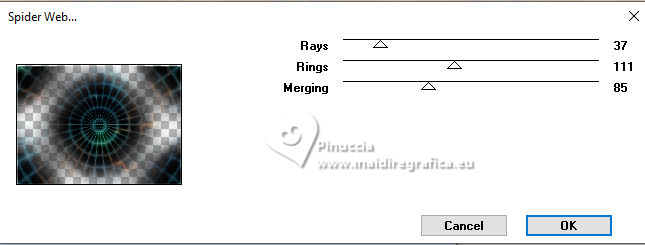
Adjust>Sharpnes>Sharpen.
Selections>Select None.
9. Layers>Merge>Merge Down (Raster 1).
10. Edit>Paste as new layer - the misted mentali-misted3320 is still in memory.
Image>Resize, to 90%, resize all layers not checked.
Move  the tube slightly to the left, see my example. the tube slightly to the left, see my example.
11. Effects>Plugins>Xero - Porcelain.

12. Activate the layer Raster 1.
Custom Selection 
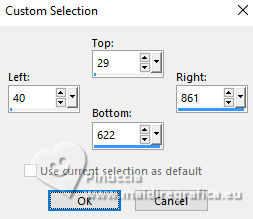
Selections>Promote Selection to Layer.
Layers>Arrange>Bring to Top.
13. Adjust>Blur>Gaussian Blur - radius 10.

14. Open the tube Tineke's tubes-916-halloween 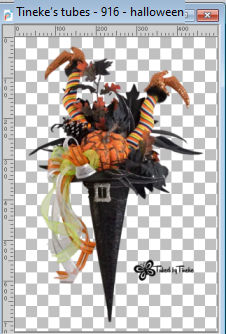
Erase the watermark and go to Edit>Copy.
Go back to your work and go to Edit>Paste into Selection.
15. Adjust>Blur>Radial Blur.
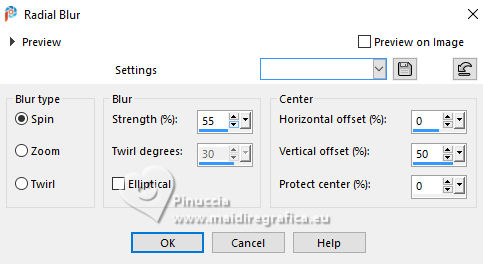
16. Effects>Plugins>VM Instant Art - Spider web.
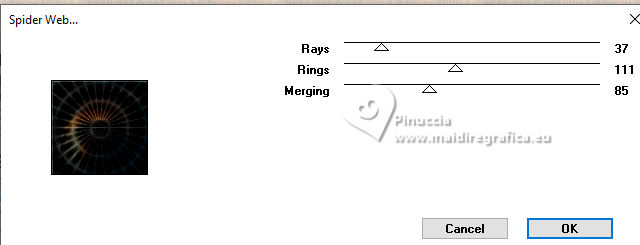
17. Selections>Modify>Contract - 25 pixels.
Adjust>Blur>Gaussian Blur - radius 10.

18. Effects>Plugins>Carolaine and Sensibility - CS-HLines
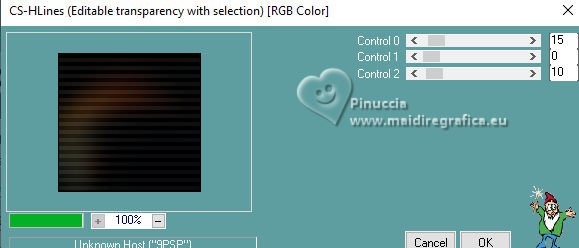
19. Effects>Plugins>Eye Candy 4000 - Corona - color 3 #4facbb.
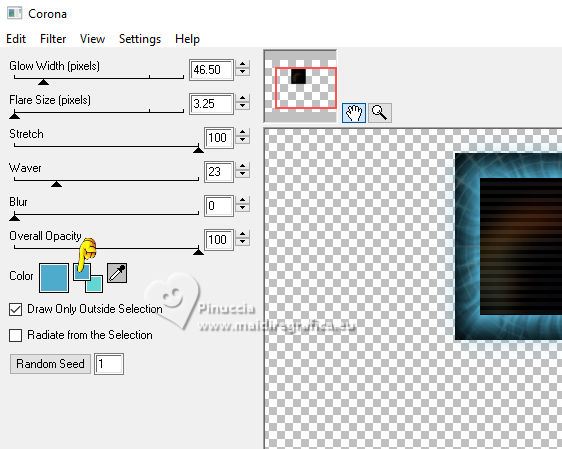
Please note that in older versions of Eye Candy, it may not be possible to write the letter "a".
In this case, I suggest you set your foreground color to color 3 #4facbb before applying the filter. 
Selections>Select None.
Image>Resize, to 80%, resize all layers not checked.
20. Pick Tool 
Position X: 661,00 - Position Y: 51,00.


Adjust>Sharpness>Sharpen.
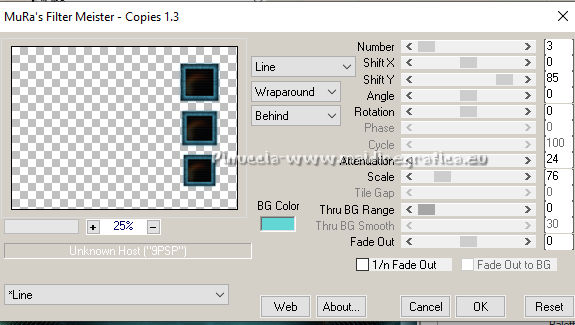
21. Effects>Plugins>Mura's Meister - Copies.
22. Effects>3D Effects>Drop Shadow, color 4 #dc8511
shadow on new layer checked.

23. Stay on the shadow's layer.
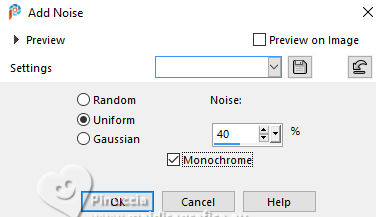
Adjust>Add/Remove Noise>Add Noise.
24. Activate the layer above.
Layers>Merge>Merge Down.
25. Adjust>Brightness and Contrast>Brightness and Contrast
(optional, according to your colors)

26. Open the tube deco 
Edit>Copy.
Go back to your work and go to Edit>Paste as new layer.
27. Pick Tool 
Position X: 688,00 - Position Y: 78,00.


28. Layers>Merge>Merge visible.
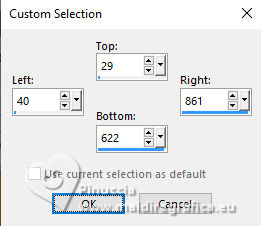
29. Custom Selection 
30. Selections>Invert.
Adjust>Add/Remove Noise>Add Noise, same settings.

31. Again Selections>Invert.
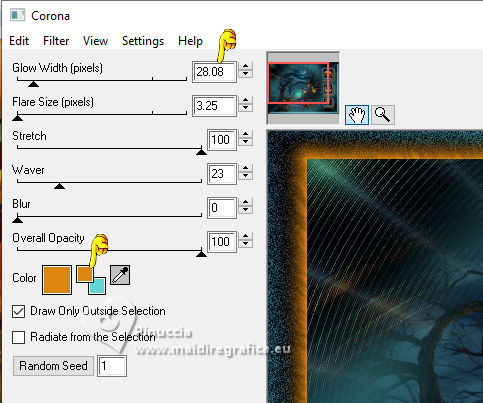
Effects>Plugins>Eye Candy 4000 - Corona - color 4 #dc8511.
Selections>Select None.
32. Open Déco Araignée 
Edit>Copy.
Go back to your work and go to Edit>Paste as new layer.
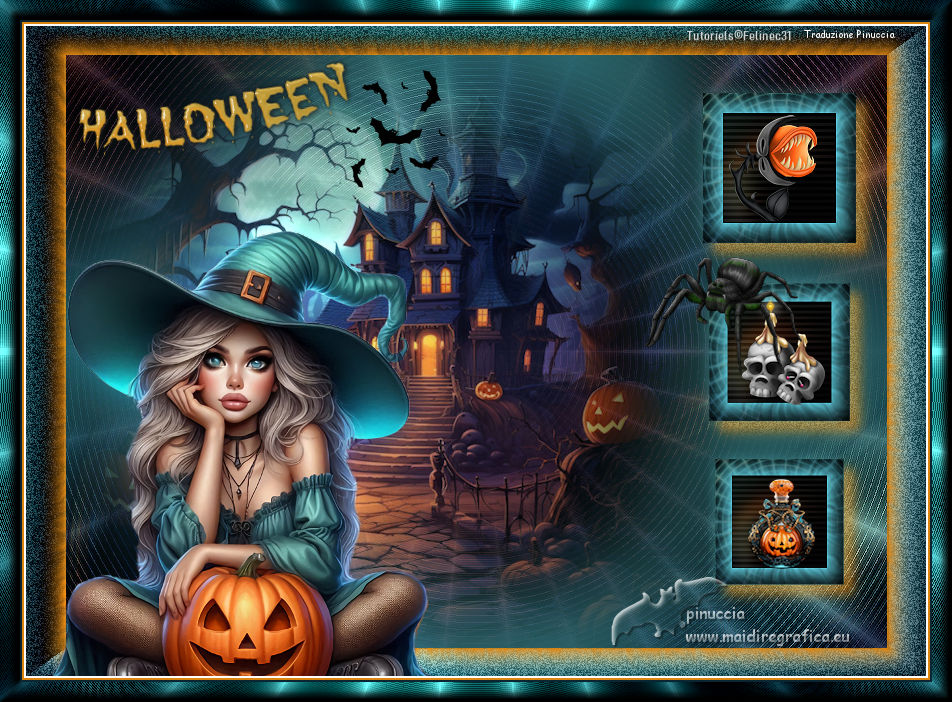
Move  the tube as in my example. the tube as in my example.
33. Open the tube GhostStories4AalmadeByLoriM7-240 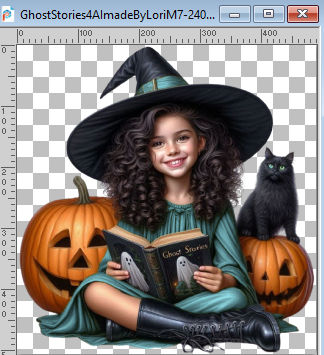
Edit>Copy.
Go back to your work and go to Edit>Paste as new layer.
Move  the tube at the bottom left. the tube at the bottom left.
34. Layers>Duplicate.
Adjust>Blur>Gaussian Blur - radius 20.

Change the Blend Mode of this layer to Dodge.
Layers>Arrange>Move Down.
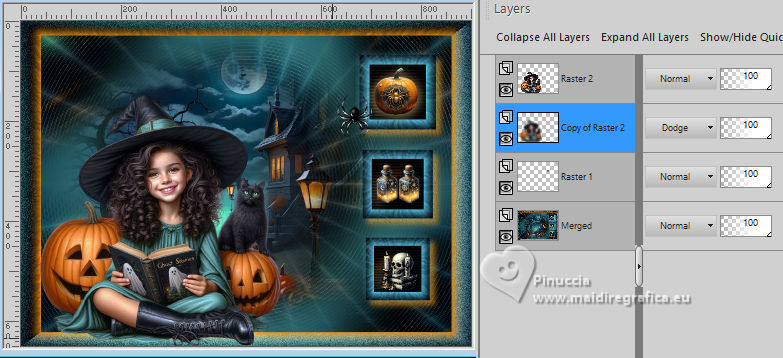
35. Activate again your top layer.
Open the tube chauve souris5 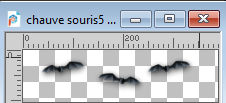
Edit>Copy.
Go back to your work and go to Edit>Paste as new layer.
Place  the tube to your liking. the tube to your liking.
36. Open the testo Texte Halloween 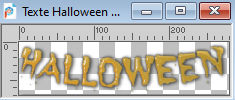
Edit>Copy.
Go back to your work and go to Edit>Paste as new layer.
37. Image>Free Rotate - 10 degrees to left

Move  the text at the upper left. the text at the upper left.
38. For the borders,
set again your foreground color with the initial color and gradient.
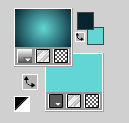
Image>Add Borders, 2 pixels, symmetric, color white.
Image>Add Borders, 2 pixels, symmetric, color 4 
Image>Add Borders, 2 pixels, symmetric, color 1 (foreground color)
39. Selections>Select All.
Image>Add Borders, 20 pixels, symmetric, color 1 (foreground color).
Selections>Invert.
Flood Fill  the selection with your Gradient. the selection with your Gradient.
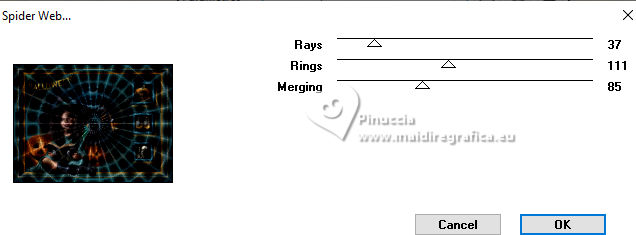
40. Effects>Plugins>Instant Art - Spider Web, same settingscon i settaggi precedenti.
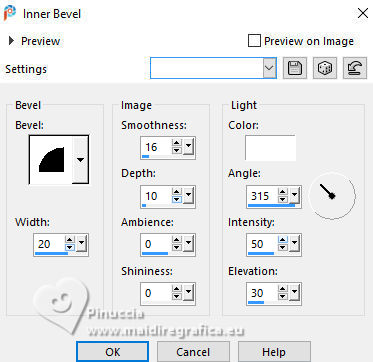
41. Effects>3D Effects>Inner Bevel.
Selections>Select None.
42. Sign your work.
Add the author's signature, without forgetting the translator's..
Save as jpg.
For the tube of this version thanks Blaque Heart Designz

If you have problems or doubts, or you find a not worked link, or only for tell me that you enjoyed this tutorial, write to me.
21 October 2025

|

