|
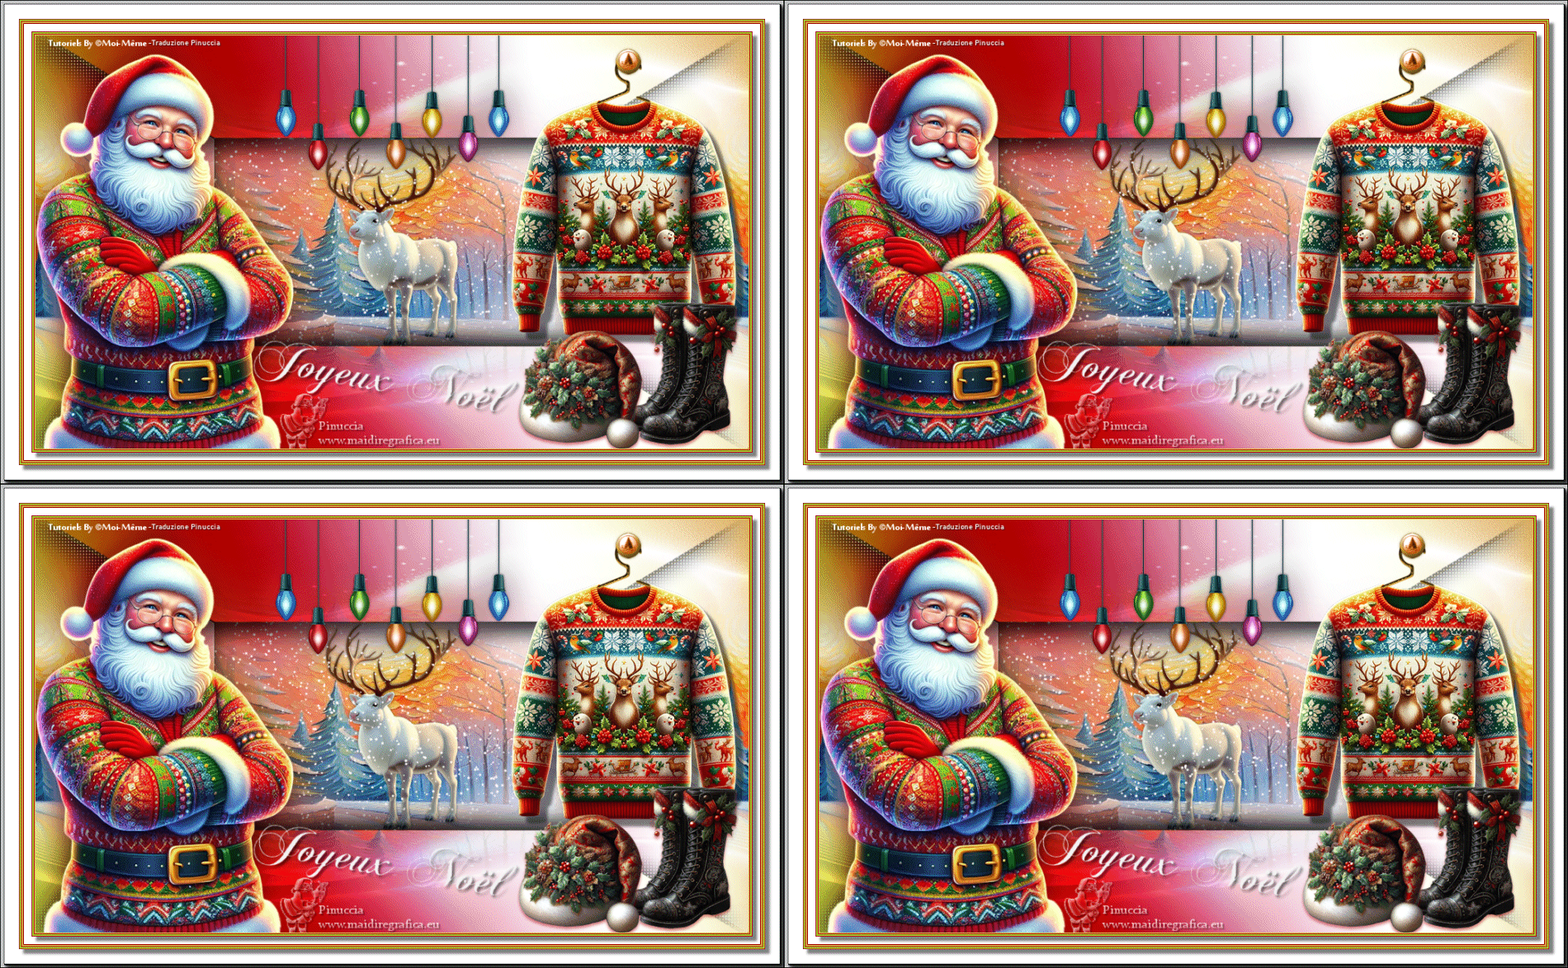
MON PULL DE NOËL


Thanks Irene for the invitation to translate your tutorials

This tutorial was written with PSPX8 and translated with PSPX9 and PSP2020, but it can also be made using other versions of PSP.
Since version PSP X4, Image>Mirror was replaced with Image>Flip Horizontal,
and Image>Flip with Image>Flip Vertical, there are some variables.
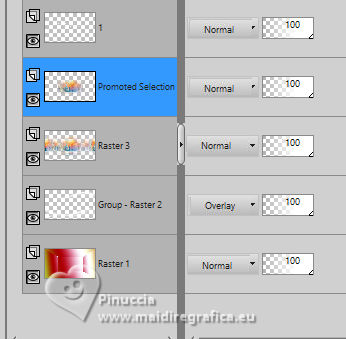
In versions X5 and X6, the functions have been improved by making available the Objects menu.
In the latest version X7 command Image>Mirror and Image>Flip returned, but with new differences.
See my schedule here
 italian translation here italian translation here
 your versions here your versions here
For this tutorial, you will need:
Material by Moi-Même
Other theme's tubes by Moi-Même here
qui and here
(don't use for other tutorials).
(The links of material creators here).

consult, if necessary, my filter section here
Filters Unlimited 2.0 here
Mehdi - Wavy Lab 1.1. here
Alf's Border FX - Mirror Bevel here
FM Tile Tools - Blend Emboss here
VDL Adrenaline - Snowflakes here
Filters Alf's Border FX can be used alone or imported into Filters Unlimited.
(How do, you see here)
If a plugin supplied appears with this icon  it must necessarily be imported into Unlimited it must necessarily be imported into Unlimited
Animation Shop here
You can change Blend Modes according to your colors.
Open the mask in PSP and minimize it with the rest of the material.
Colors
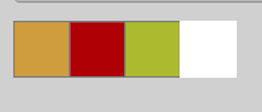
Set your foreground color to #cf9d3e,
and your background color to #af0307.

color 3: #abba30
color 4: #ffffff.
1. Open a new transparent image 950 x 550 pixels.
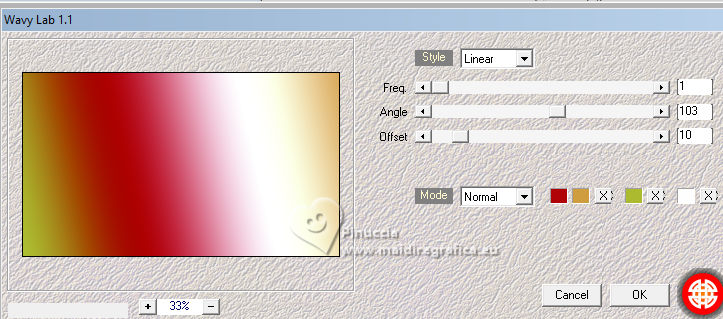
Effects>Plugins>Mehdi - Wavy Lab 1.1.
This filter creates gradients with the colors of your Materials palette.
The first is your background color, the second is your foreground color.
Change the last two colors created by the filtre:
the third color with color 3 #abba30 and the fourth color with 4 #ffffff.
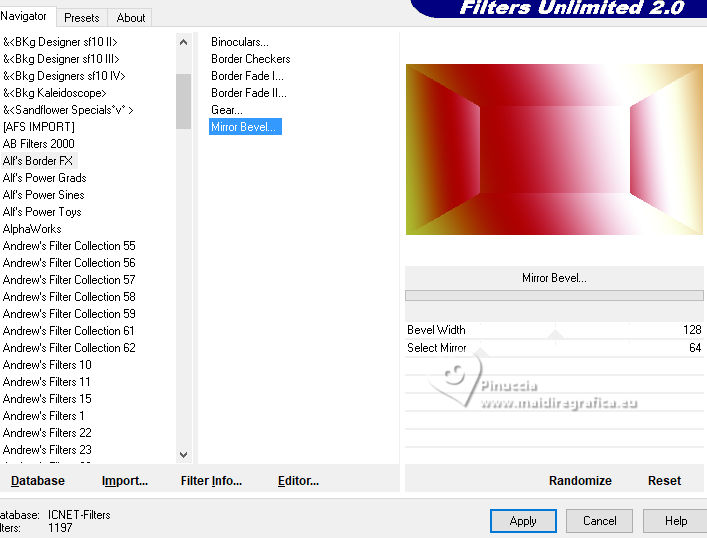
Effects>Plugins>Filters Unlimited 2.0 - Alf's Border FX - Mirror Bevel, default settings.
Effects>Edge Effects>Enhance.
2. Set your foreground color to white.
Layers>New Raster Layer.
Flood Fill  the layer with color white. the layer with color white.
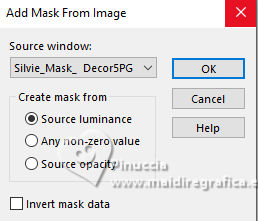
Layers>New Mask layer>From image
Open the menu under the source window and you'll see all the files open.
Select the mask Silvie_Mask_DecorSPG.jpg
Layers>Merge>Merge Group.
Change the Blend Mode of this layer to Overlay.
3. Open déco 1 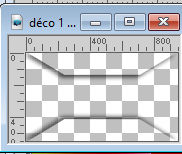
Edit>Copy.
Go back to your work and go to Edit>Paste as new layer.
4. Activate the layer below.
Layers>New Raster Layer.
Selections>Select All.
Open the tube misted paysage AI_generated_Par MM 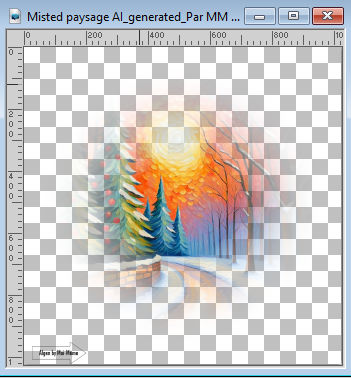
Erase the watermark Edit>Copy.
Go back to your work and go to Edit>Paste into Selection.
Selections>Select None.
Effects>Image Effects>Seamless Tiling - Side by Side.

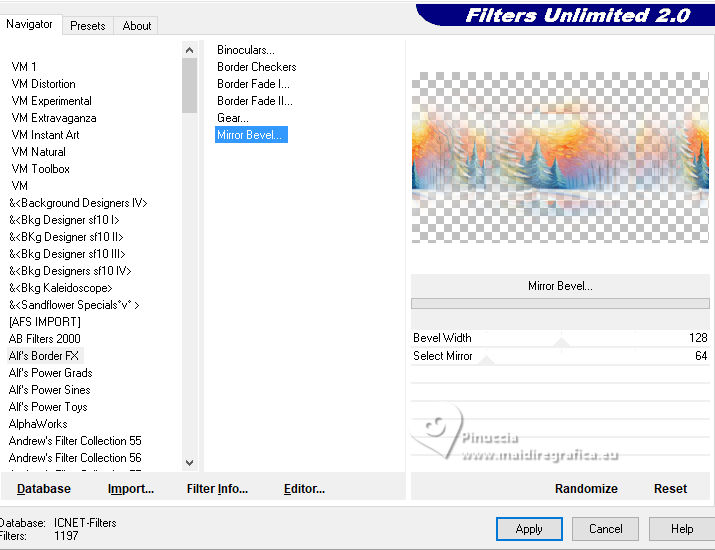
Effects>Plugins>Filters Unlimited 2.0 - Alf's Border FX - Mirror Bevel, default settings.
5. Activate your Selection Tool 
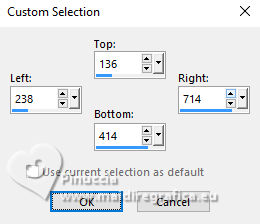
(no matter the type of selection, because with the custom selection your always get a rectangle)
clic on the Custom Selection 
and set the following settings.
Selections>Promote Selection to layer.
(if you prefer, you can add a layer
and paste the landscape into selection)
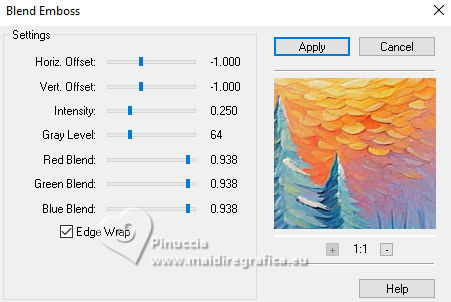
Effects>Plugins>FM Tile Tools - Blend Emboss, default settings.
Keep selected.
6. Layers>New Raster Layer.
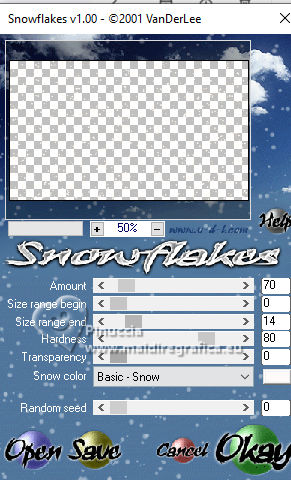
Effects>Plugins>VDL Adrenaline - Snowflakes
if you are using the new version of this filtre (the result doesn't change):
Effects>Plugins>VanDerLee - Snowflakes
 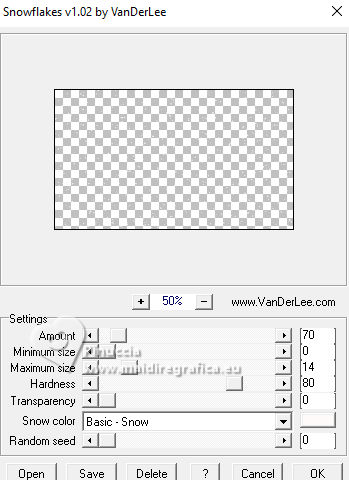
Rename this layer 1
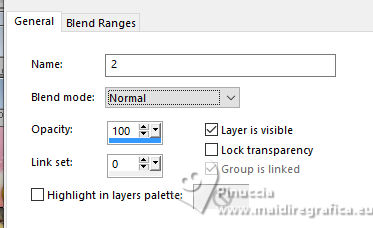
If you want to realize the animation:
Layers>New Raster Layer and use the window that opens to rename the layer 2
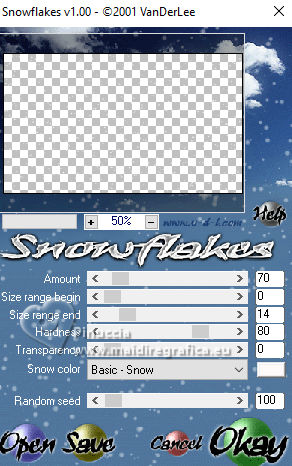
Effects>Plugins>VDL Adrenaline - Snowflakes, same settings, but Random Seed 100
Close this layer.
Layers>New Raster Layer and rename this layer 3
Effects>Plugins>VDL Adrenaline - Snowflakes - Random Seed 200
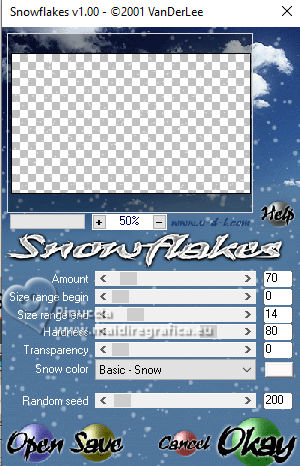
Close this layer
Layers>New Raster Layer and rename this layer 4
Effects>Plugins>VDL Adrenaline - Snowflakes - Random Seed 300
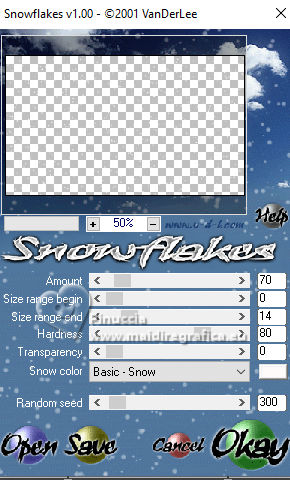
Close this layer and stay on it.
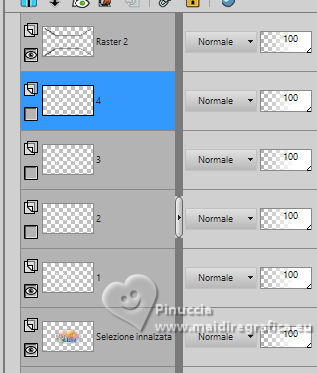

Layers>New Raster Layer.
Effects>3D Effects>Cutout - color black.
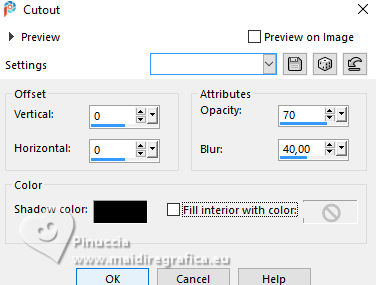
Selections>Select None.
7. Activate the layer Promoted Selection (the fourth from the bottom).
Open the tube Renne 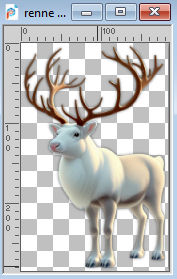
Edit>Copy.
Go back to your work and go to Edit>Paste as new layer.
(it is on its place, in the center of the image).
8. Activate your top layer.
Open pull1AIGen MM 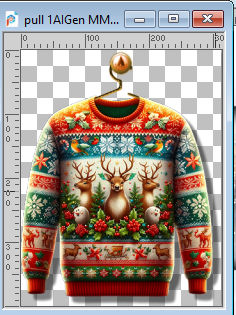
Edit>Copy.
Go back to your work and go to Edit>Paste as new layer.
K key to activate your Pick Tool 
Position X: 634,00 - Position Y: 14,00.

M key to deselect the Tool.
9. Note
In the material, you can choose from the following materials:
"Mes décos(11) pulls de noël exclusive à ce tutoriel"
My decorations (11) exclusive Christmas sweaters for this tutorial
2 "hangers" if you want to use a different sweater of your choice.
Resize the sweater as needed and adjust its position on the hanger.
Adjust the sharpness as needed; the drop shadow is applied to the sweater only by default.
Merge these two layers:
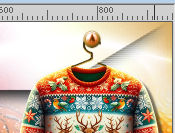
Position the decoration in the upper right corner, as shown in the final example.
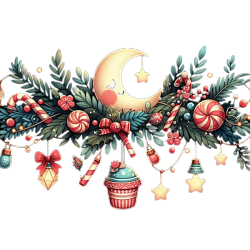
10. Open the tube guirlande_MM 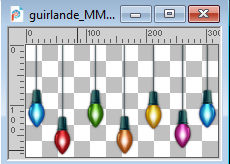
Edit>Copy.
Go back to your work and go to Edit>Paste as new layer.
K key to activate your Pick Tool 
Position X: 316,00 - Position Y: -2,00.

M key to deselect the Tool
11. Layers>Duplicate.
Activate the layer below.
Adjust>Blur>Gaussian Blur - radius 20.

Change the Blend Mode of this layer to Luminance (héritée) or other.
12. Activate your top layer.
Open the tube Bottes noel 4_AIgenMM 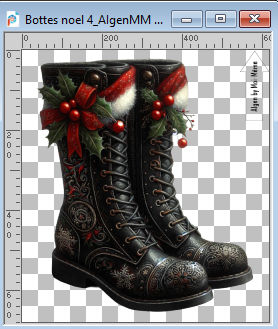
Erase the watermark and go to Edit>Copy.
Go back to your work and go to Edit>Paste as new layer.
Image>Resize, to 30%, resize all layers not checked.
Image>Mirror>Mirror Horizontal.
K key to activate your Pick Tool 
Position X: 775,00 - Position Y: 355,00.

13. Open the tube Bonnet noel 11_AIgenMM 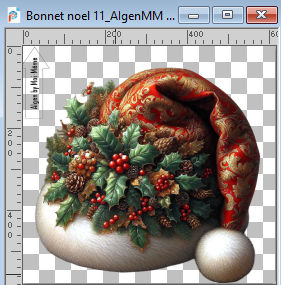
Erase the watermark and go to Edit>Copy.
Go back to your work and go to Edit>Paste as new layer.
Image>Resize, to 30%, resize all layers not checked.
Position X: 635,00 - Position Y: 389,00.

M key to deselect the Tool.
Layers>Merge>Merge Down.
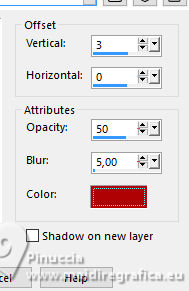
Effects>3D Effects>Drop Shadow, background color.
14. Open the tube Santa_ugly christmas sweater_AIGen MM 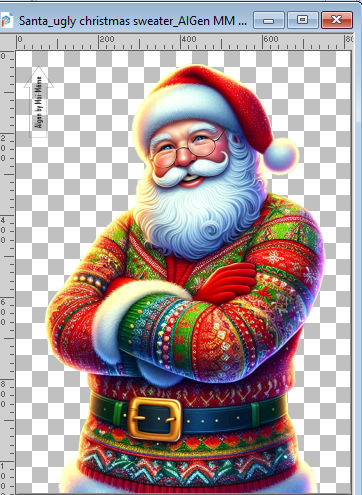
Erase the watermark and go to Edit>Copy.
Go back to your work and go to Edit>Paste as new layer.
Image>Mirror>Mirror Horizontal.
Image>Resize, to 50%, resize all layers not checked.
Move  the tube at the bottom left: the tube at the bottom left:
Objects>Align>Left.
Objects>Align>Bottom.
15. Layers>Duplicate.
Activate the layer below.
Adjust>Blur>Gaussian Blur - radius 20.

Change the Blend Mode of this layer to Multiply.
16. Activate your top layer.
Open Texte 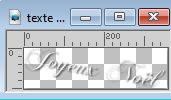
Edit>Copy.
Go back to your work and go to Edit>Paste as new layer.
K key to activate your Pick Tool 
Position X: 290,00 - Position Y: 406,00.

M key to deselect the Tool.
Adapt to your work, if necessary resize.
Change the Blend Mode of this layer to Hard Light.
17. Sign your work.
Add the author and the translator's watermark.
Save your work in pspimage, without merging the layers,
and leave it open on your PSP if you want to create the animation.
18. Window>Duplicate, and stay on this copy of your work.
If you want to make the frame yourself, add the borders directly to the copy of your work
(see the step 19 Frame)
or: Layers>Merge>Merge All.
Edit>Copy.
Open the frame Cadre_Mon pull de Noël 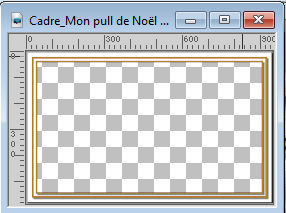
Activate your Magic Wand Tool  , tolerance and feather 0, , tolerance and feather 0,
and click in the frame to select it.
Edit>Paste into Selection.
Selections>Select None.
Save as jpg.
TO CREATE THE ANIMATION
These the step to create your frame
19. Frame
Image>Add Borders, 1 pixel, symmetric, color 2.
Image>Add Borders, 2 pixels, symmetric, color 1.
Image>Add Borders, 1 pixel, symmetric, color 2.
Image>Add Borders, 2 pixels, symmetric, color 3.
Image>Add Borders, 1 pixel, symmetric, color 2.
Selections>Select All.
20. Image>Add Borders, 10 pixels, symmetric, color white.
Effects>3D Effects>Drop Shadow, color black.
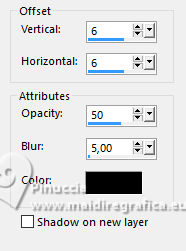
Selections>Select None.
21. Image>Add Borders, 1 pixel, symmetric, color 2.
Image>Add Borders, 2 pixels, symmetric, color 1.
Image>Add Borders, 1 pixel, symmetric, color 2.
Image>Add Borders, 2 pixels, symmetric, color 3.
Image>Add Borders, 1 pixel, symmetric, color 2.
Selections>Select All.
Image>Add Borders, 25 pixels, symmetric, color white.
Effects>3D Effects>Drop Shadow, color black.

Selections>Select None.
22. Effects>Plugins>AAA Frames - Foto Frame.
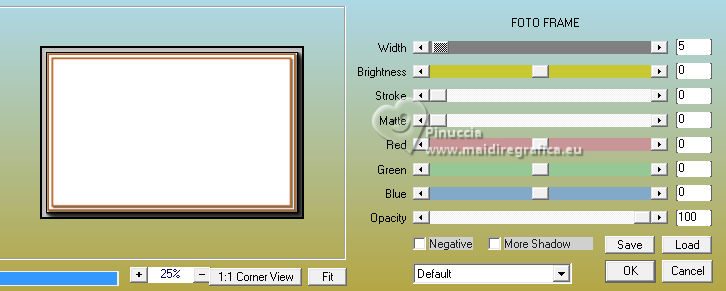
Save as jpg.

TO CREATE THE ANIMATION
Activate the image with the opened layers.
The layer 2,3,4 are closed.

Edit>Copy Special>Copy Merged
Activate the Frame Cadre_Mon pull de Noël 
Activate your Magic Wand Tool  , tolerance and feather 0, , tolerance and feather 0,
and click in the frame to select it.
Edit>Paste into Selection.
Selections>Select None.
Edit>Copy.
Open Animation Shop and go to Edit>Paste>Paste as new animation.
Go back to PSP.
On your work, close the layer 1 and open the layer 2.
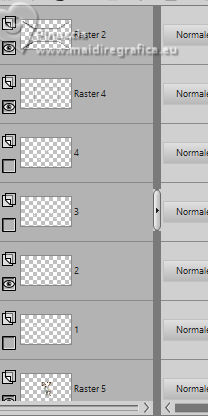
Edit>Copy Special>Copy Merged.
Activate the frame.
Edit>Undo Select None.
Edit>Undo Paste into Selection.
Edit>Paste into Selection.
Edit>Copy.
Go back to Animation Shop ang go to Edit>Paste>Paste after the current frame.
Again in PSP.
On your work, close the layer 2 and open the layer 3.
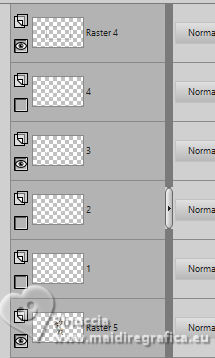
Edit>Copy Special>Copy Merged.
Activate the frame.
Edit>Undo Select None.
Edit>Undo Paste into Selection.
Edit>Paste into Selection.
Edit>Copy.
Go back to Animation Shop ang go to Edit>Paste>Paste after the current frame.
In PSP.
On your work, close the layer 3 and open the layer 4.
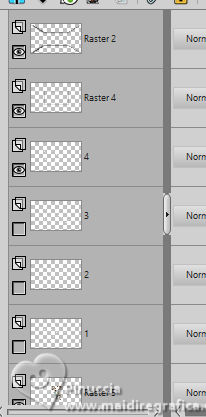
Edit>Copy Special>Copy Merged.
Activate the frame.
Edit>Undo Select None.
Edit>Undo Paste into Selection.
Edit>Paste into Selection.
Edit>Copy.
Go back to Animation Shop ang go to Edit>Paste>Paste after the current frame.
And you'have an animation composed by 4 frames.
Edit>Select All.
Animation>Frame Properties and set to 20.
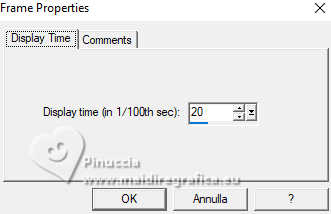
Check the result ckicking on View animation 
and save as gif.

If you have problems or doubts, or you find a not worked link,
or only for tell me that you enjoyed this tutorial, write to me.
19 Novembre 2025

|

