|
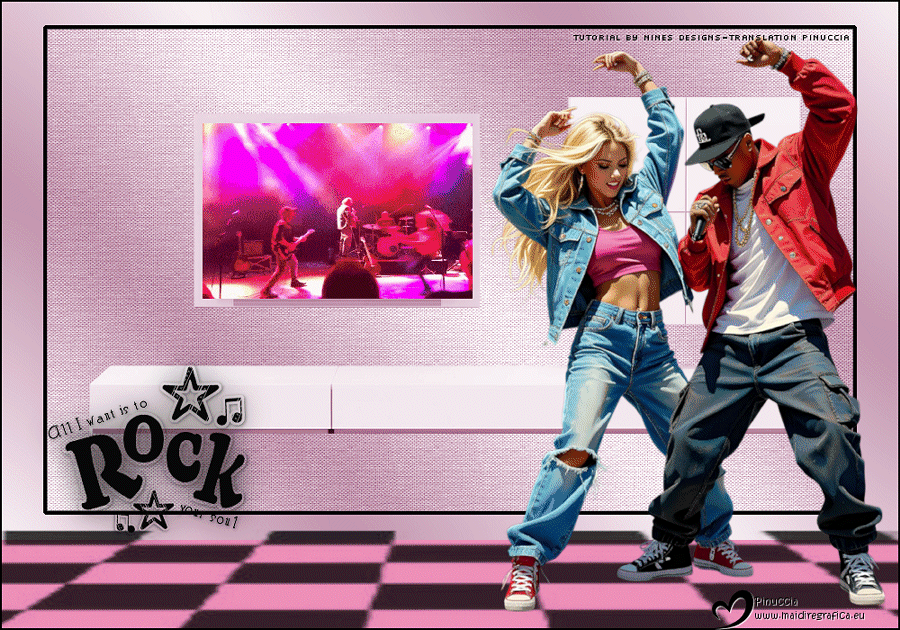
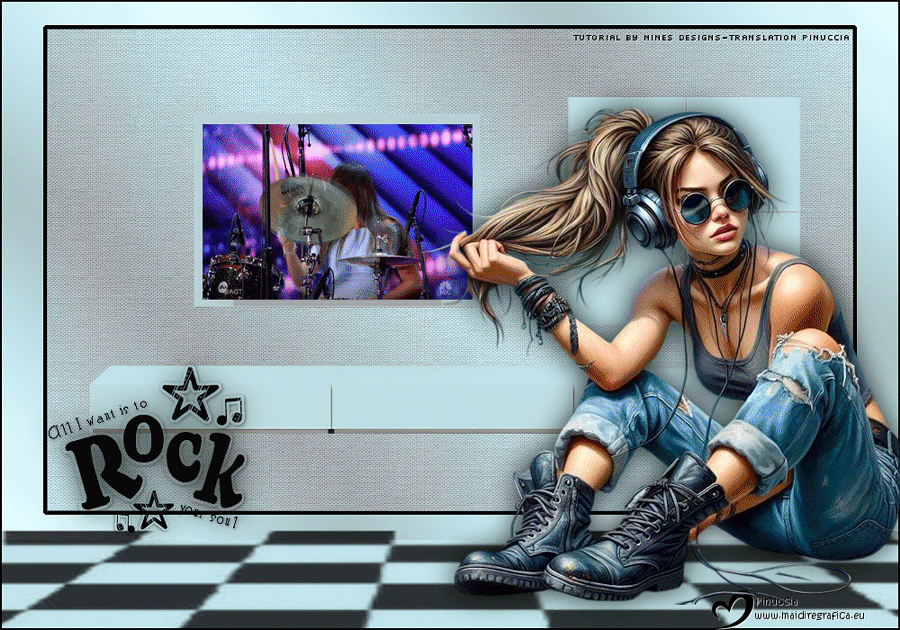
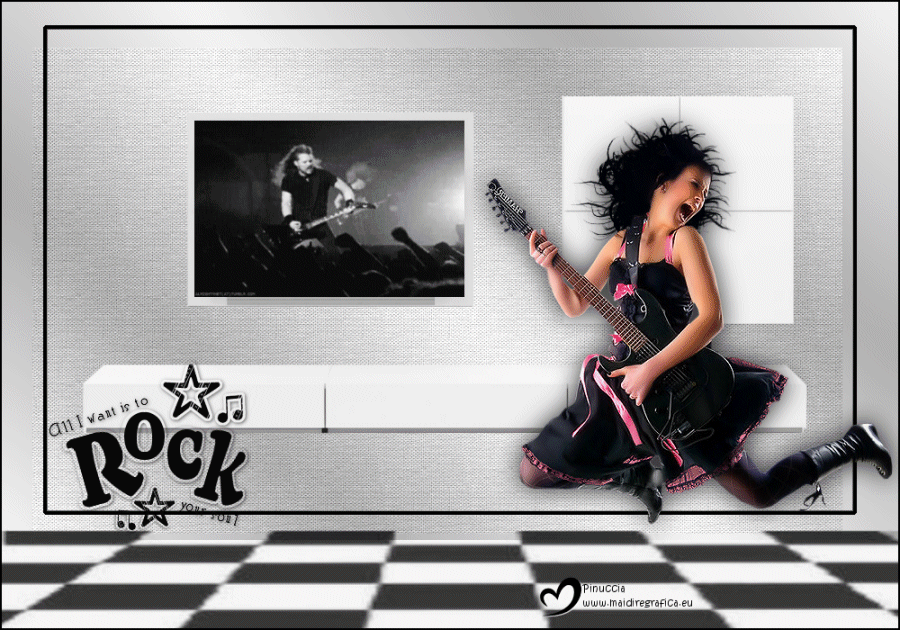
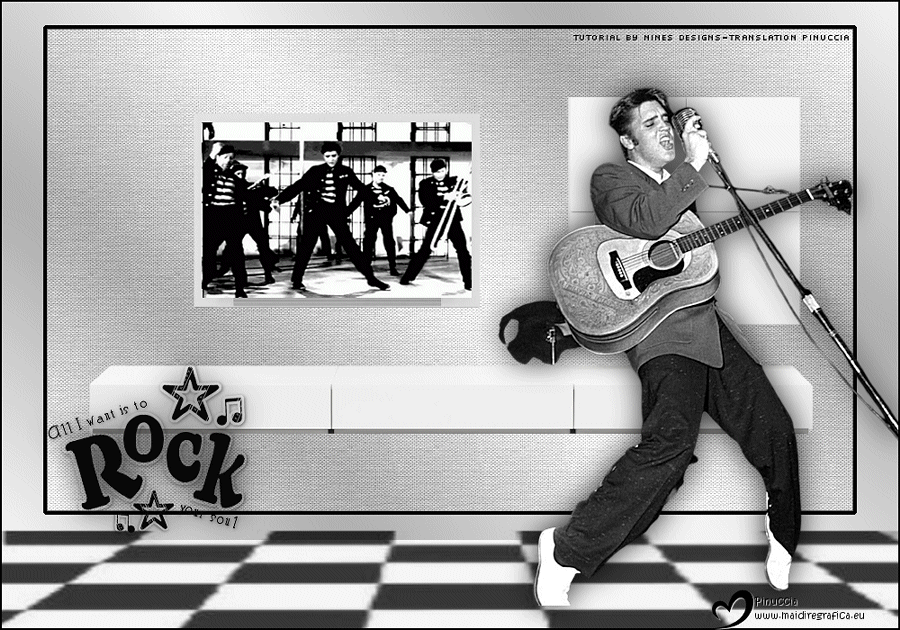
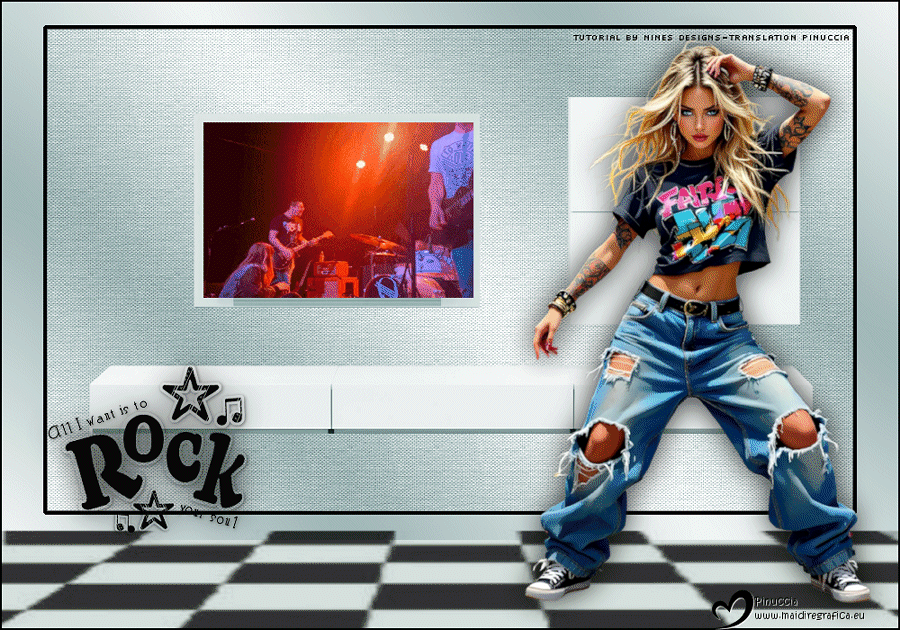
TAG ROCK MUSICAL


This tutorial was translated with PSPX9 and PSP2020, but it can also be made using other versions of PSP.
Since version PSP X4, Image>Mirror was replaced with Image>Flip Horizontal,
and Image>Flip with Image>Flip Vertical, there are some variables.
In versions X5 and X6, the functions have been improved by making available the Objects menu.
In the latest version X7 command Image>Mirror and Image>Flip returned, but with new differences.
See my schedule here
 French translation here French translation here
 Your versions here Your versions here
For this tutorial, you will need:

For the tubes thanks AnaRidzi and Katrina
(you find here the links to the material authors' sites)

consult, if necessary, my filter section here
Filters Unlimited 2.0 here
Animation Shop here

You can change Blend Modes according to your colors.
In the newest versions of PSP, you don't find the foreground/background gradient (Corel_06_029).
You can use the gradients of the older versions.
The Gradient of CorelX here

Open the mask in PSP and minimize it with the rest of the material.
1. Open a new transparent image 1000 x 600 pixels.
2. Set your foreground color to #f6f6f6,
and your background color to #adadad.
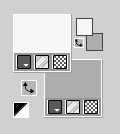
Set your foreground color to a Foreground/Background Gradient, style Linear.
Flood Fill  the transparent image with your Gradient. the transparent image with your Gradient.
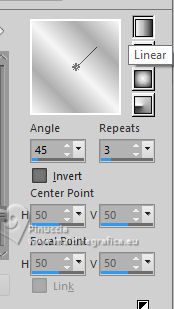
3. Adjust>Blur>Gaussian Blur - radius 25
4. Layers>Duplicate.
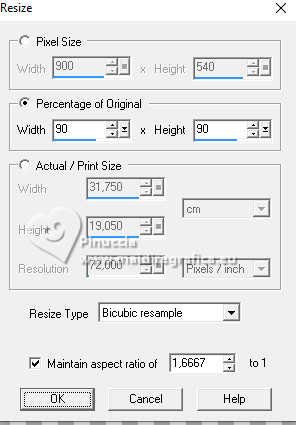
Image>Resize, to 90%, resize all layers not checked.
5. Effects>Plugins>Filters Unlimited 2.0 - Paper Texture - Canvas Fine, default settings

6. Selections>Select All.
Selections>Float.
Selections>Defloat.
Selections>Modify>Select Selection Borders

7. Set your background color to #000000
Layers>New Raster Layer.
Flood Fill the selection with the color #000000.
Selections>Select None
8. Open the tube DBK AA Decor-179 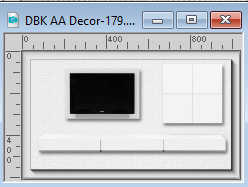
Edit>Copy.
Go back to your work and go to Edit>Paste as new layer.
Image>Resize, to 90%, resize all layers not checked.
Place  correctly the tube in the center. correctly the tube in the center.
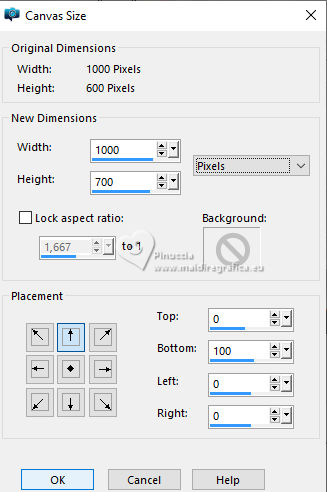
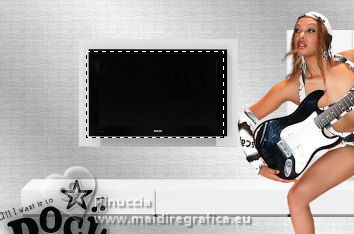
9. Image>Canvas Size - 1000 x 700 pixels
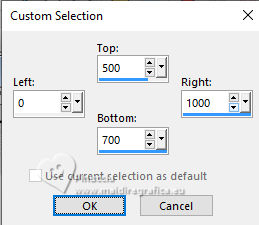
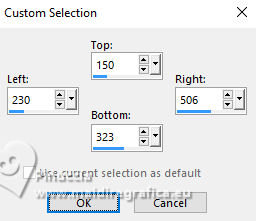
10. Selection Tool 
(no matter the type of selection, because with the custom selection your always get a rectangle)
clic on the Custom Selection 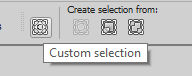
and set the following settings.
11. Layers>New Raster Layer.
Flood Fill the selection with the color #000000.
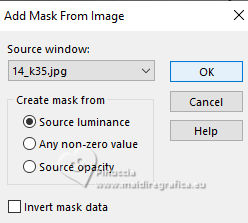
12. Layers>New Mask layer>From image
Open the menu under the source window and you'll see all the files open.
Select the mask 14_K35
Layers>Merge>Merge Group.
13. Layers>New Raster Layer.
Layers>Arrange>Send to Bottom.
Set your foreground color to Color.
Flood Fill the selection with your foreground color #f6f6f6.
Selections>Select None.
14. Activate your top layer.
Open the text testo Rock_ac 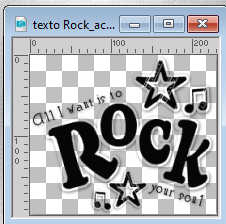
Edit>Copy.
Go back to your work and go to Edit>Paste as new layer.
Move the text at the bottom left.
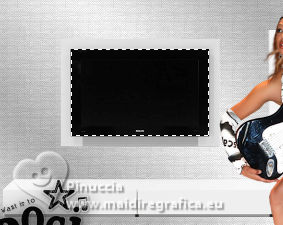
15. Open the tube Ana Ridzi-1767 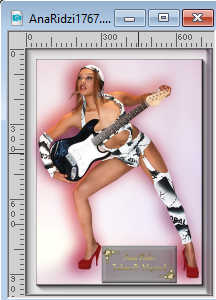
Edit>Copy.
Go back to your work and go to Edit>Paste as new layer.
Image>Resize, 1 time to 80% and 1 time to 90%, resize all layers not checked.
Move the tube to the right side.
16. Effects>3D Effects>Drop Shadow, color #000000.
17. Layers>New Raster Layer.
Layers>Arrange>Bring to top.
Flood Fill the layer with the color #000000.
18. Selections>Select All.
Selections>Modify>Contract - 2 pixels.
Press CANC on the keyboard 
Selections>Select None.
19. Sign your work on a new layer.
20. Layers>Merge>Merge visible.
21. Custom Selection
Note: If the selection is not correctly positioned in the center of the frame,
activate your Move tool ,
hold down the right mouse button, and position the selection correctly.
Keep selected.
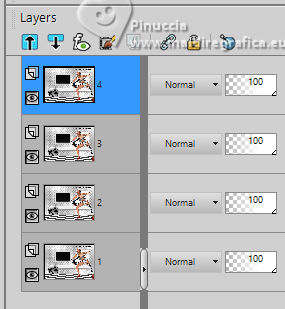
22. Layers>Duplicate - 3 times.
We have 4 identical layers.
Rename these layers 1,2,3 et 4.
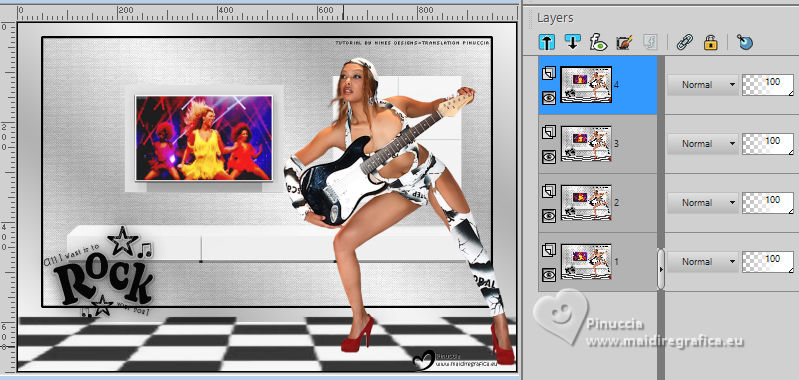
23. Activate the layer 1
In the animacion folder, open the image 1.psp.
Edit>Copy.
Go back to your work and go to Edit>Paste into Selection.
You won't see the image because it's covered by the upper layers.
24. Activate the layer 2
In the animacion folder, open the image 2.psp.
Edit>Copy.
Go back to your work and go to Edit>Paste into Selection.
25. Activate the layer 3
In the animacion folder, open the image 3.psp.
Edit>Copy.
Go back to your work and go to Edit>Paste into Selection.
26. Activate the layer 4.
In the animacion folder, open the image 4.psp.
Edit>Copy.
Go back to your work and go to Edit>Paste into Selection.
Save the image as PSP Animation Shop (*psp)
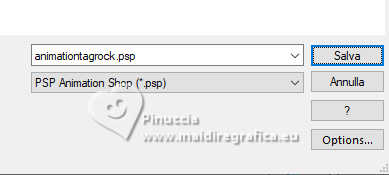
27. Open the image in Animation Shop,
and you have an animation composed by 4 images

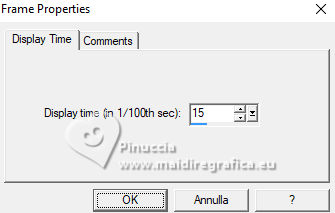
28. Selections>Select All.
Animation>Frame Properties and set to 15
29. Animation>Resize Animation - to 90%
30. Check the animation clicking on View animation 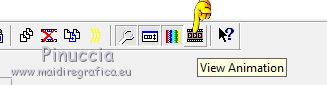
and save as gif
If you want to add your own animation:
here you find some of my animation
Resize your animation to 300 x 195 pixels.
Open the animation in Animation Shop and check how many images it consists of,
for example, 20 frames (like mine).
In PSP, at step 20, after merging the layers:
Edit>Copy.
Open Animation Shop and go to Edit>Paste>Paste as new animation.
Edit>Duplicate and repeat until you have an animation composed of 20 frames,
like your animation.
Click on the first frame to select it and go to Edit>Select All.
Activate your animation:
Edit>Select All.
Edit>Copy.
Go back to your work and go to Edit>Paste>Paste in the selected frame.
Position the animation in the frame and when you're sure you've found the correct position,
left-click
Animation>Frame Properties and set the display time to 15
(or depending on your image: the higher the value, the slower the animation)
Animation>Resize Animation to 90%
Check the animation by clicking on View Animation
and save as a gif.
 Your versions here Your versions here

If you have problems or doubts, or you find a not worked link, or only for tell me that you enjoyed this tutorial, write to me.
9 January 2025

|